MiniWave Front Basket + Rack Assembly TutorialUpdated 19 hours ago
Tools Required:
- 4mm Hex Key
- 5mm Hex Key
- 10mm Wrench
- Stanley Knife/Scissors
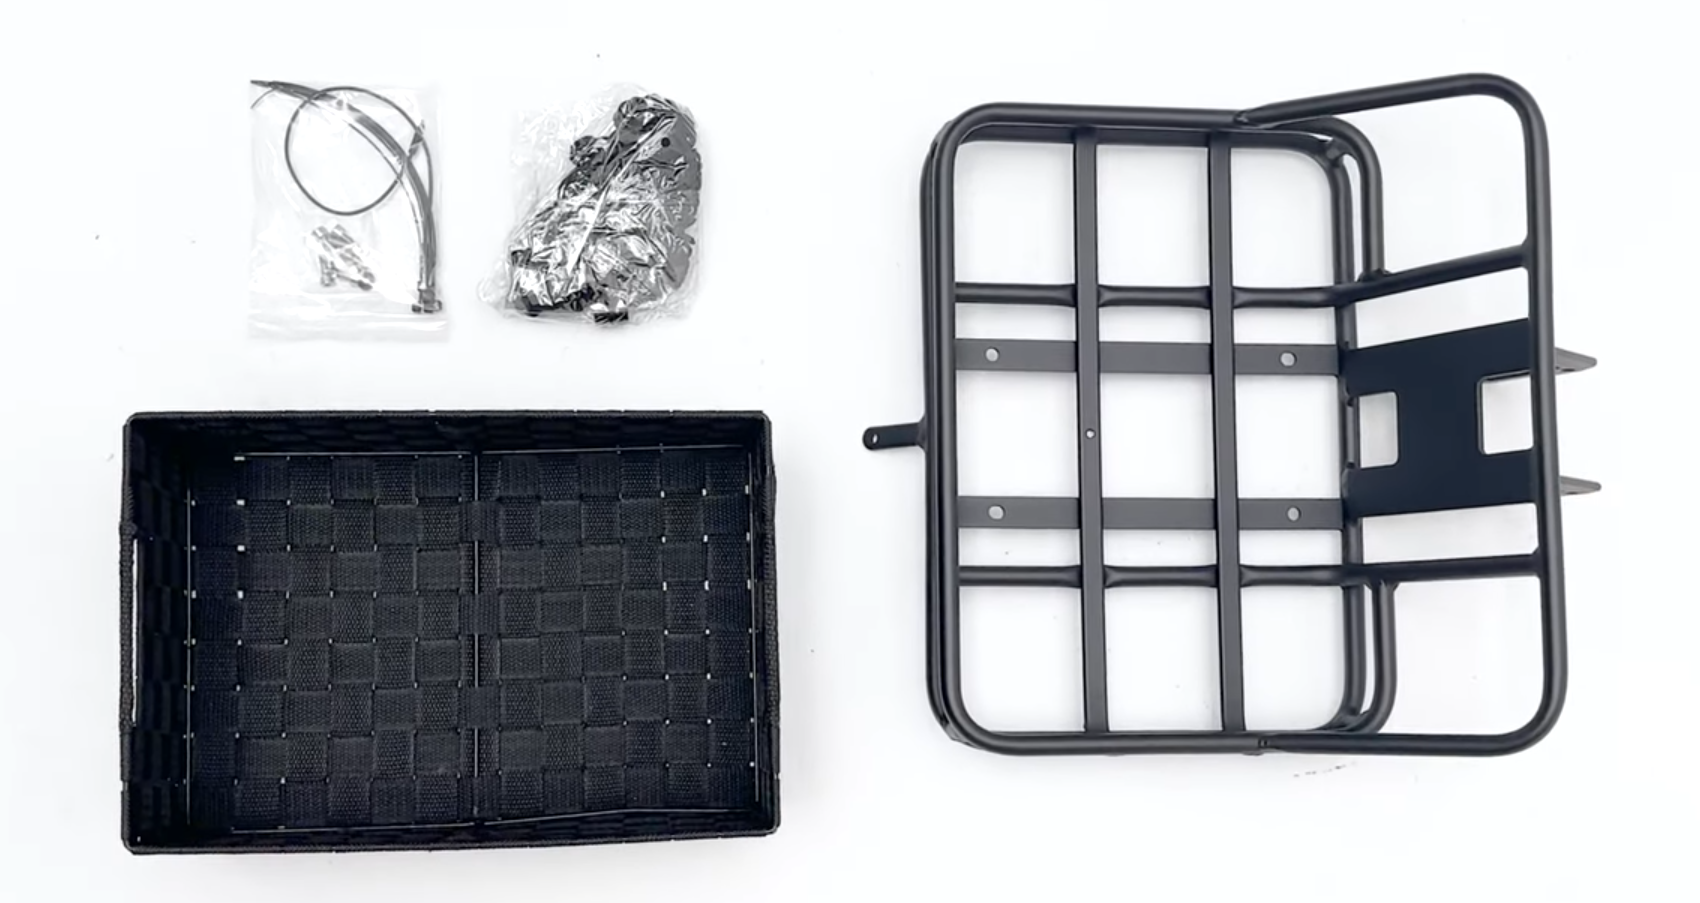
- Carefully open the box using scissors or a utility knife. Lay out all components on a clean, flat surface and ensure all parts are present before starting assembly.
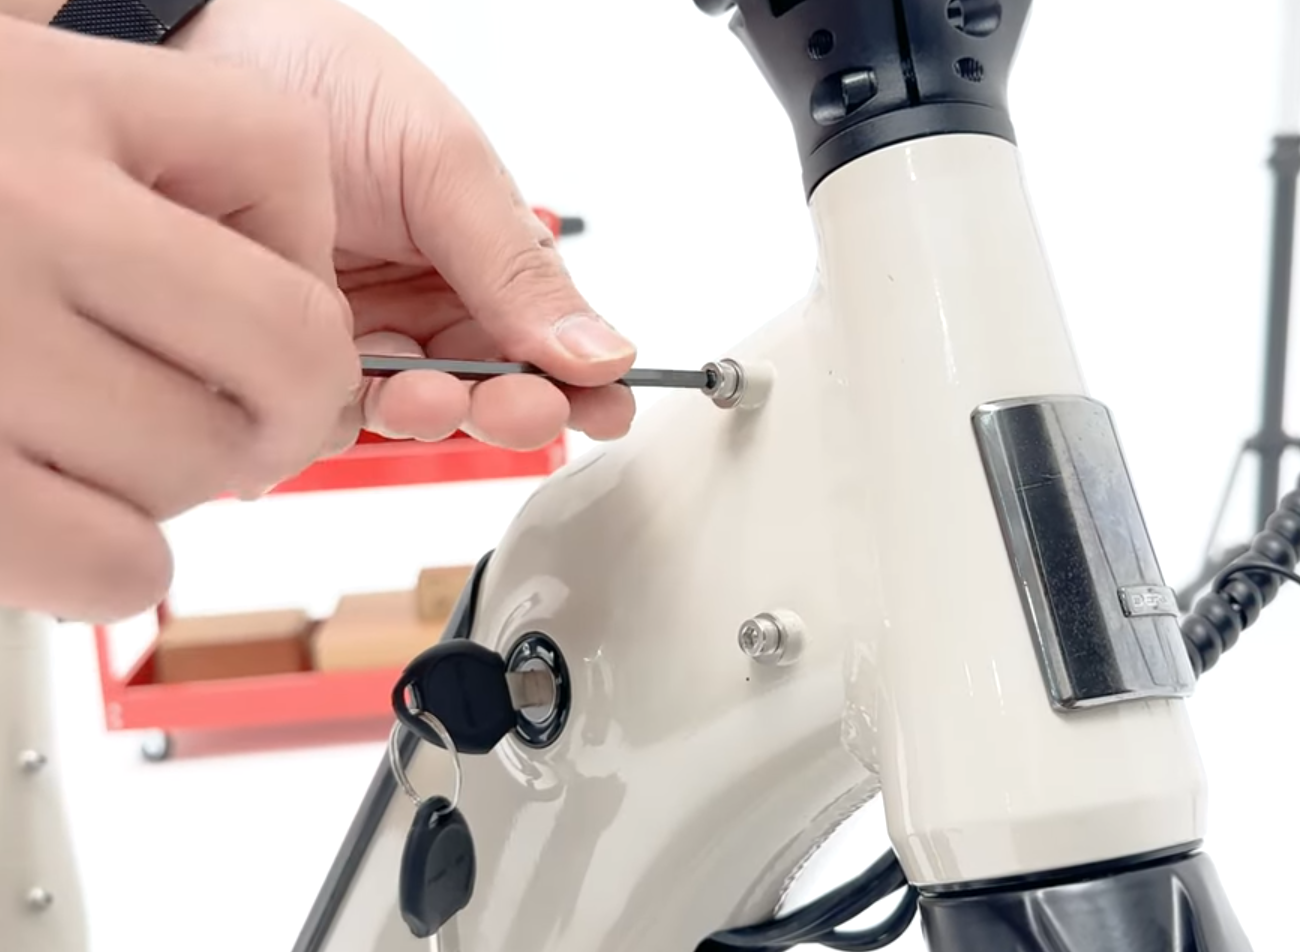
- Using the 4mm Hex Key, unscrew the four bolts located on either side of the headstem at the front of the bike. Keep these bolts aside for the next step.
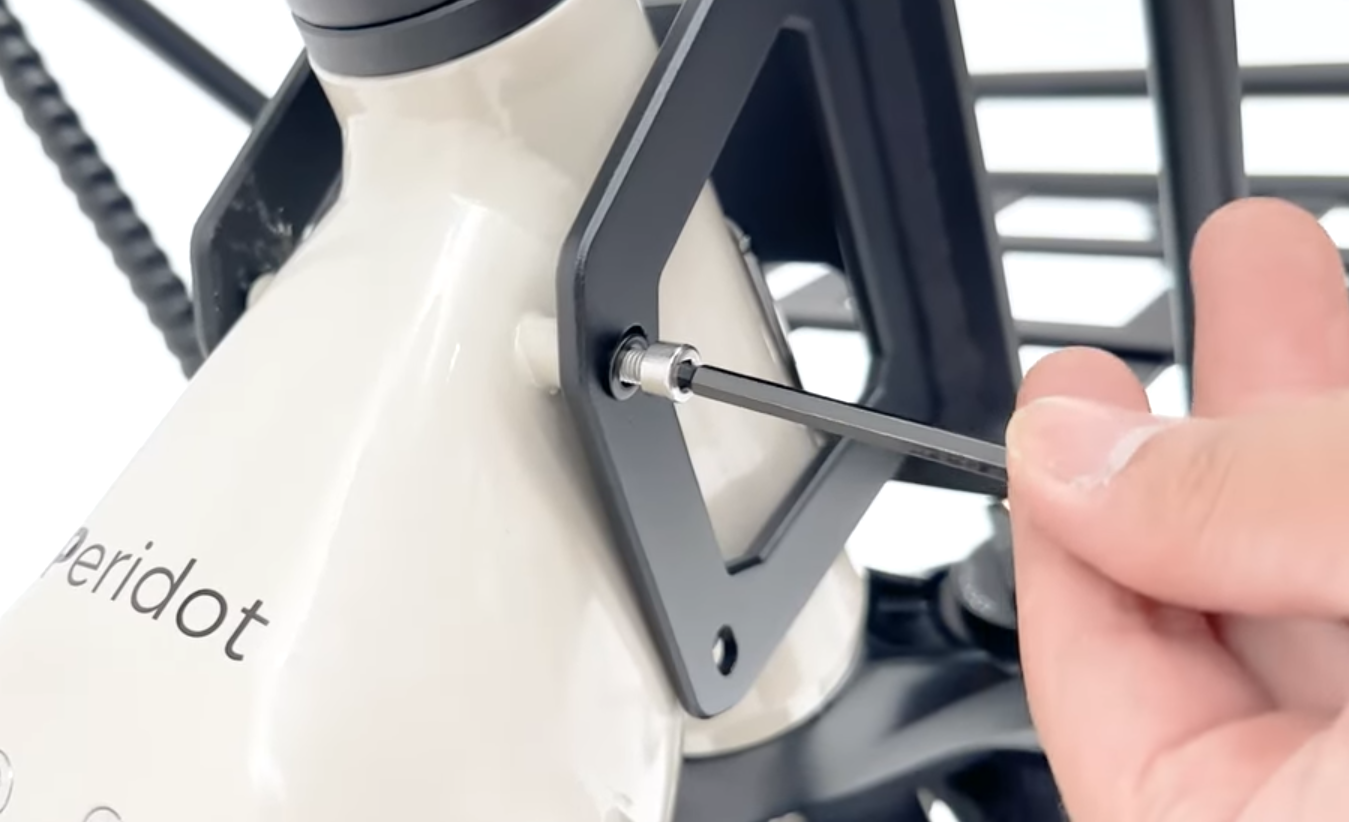
- Align the front rack with the mounting points you just uncovered. Reinsert and tighten the four screws using the 4mm Hex Key to secure the rack in place. IMPORTANT: Ensure that the front (right) brake cable is passed between the opening in the front rack, as it can affect the movement of the handlebars if not.
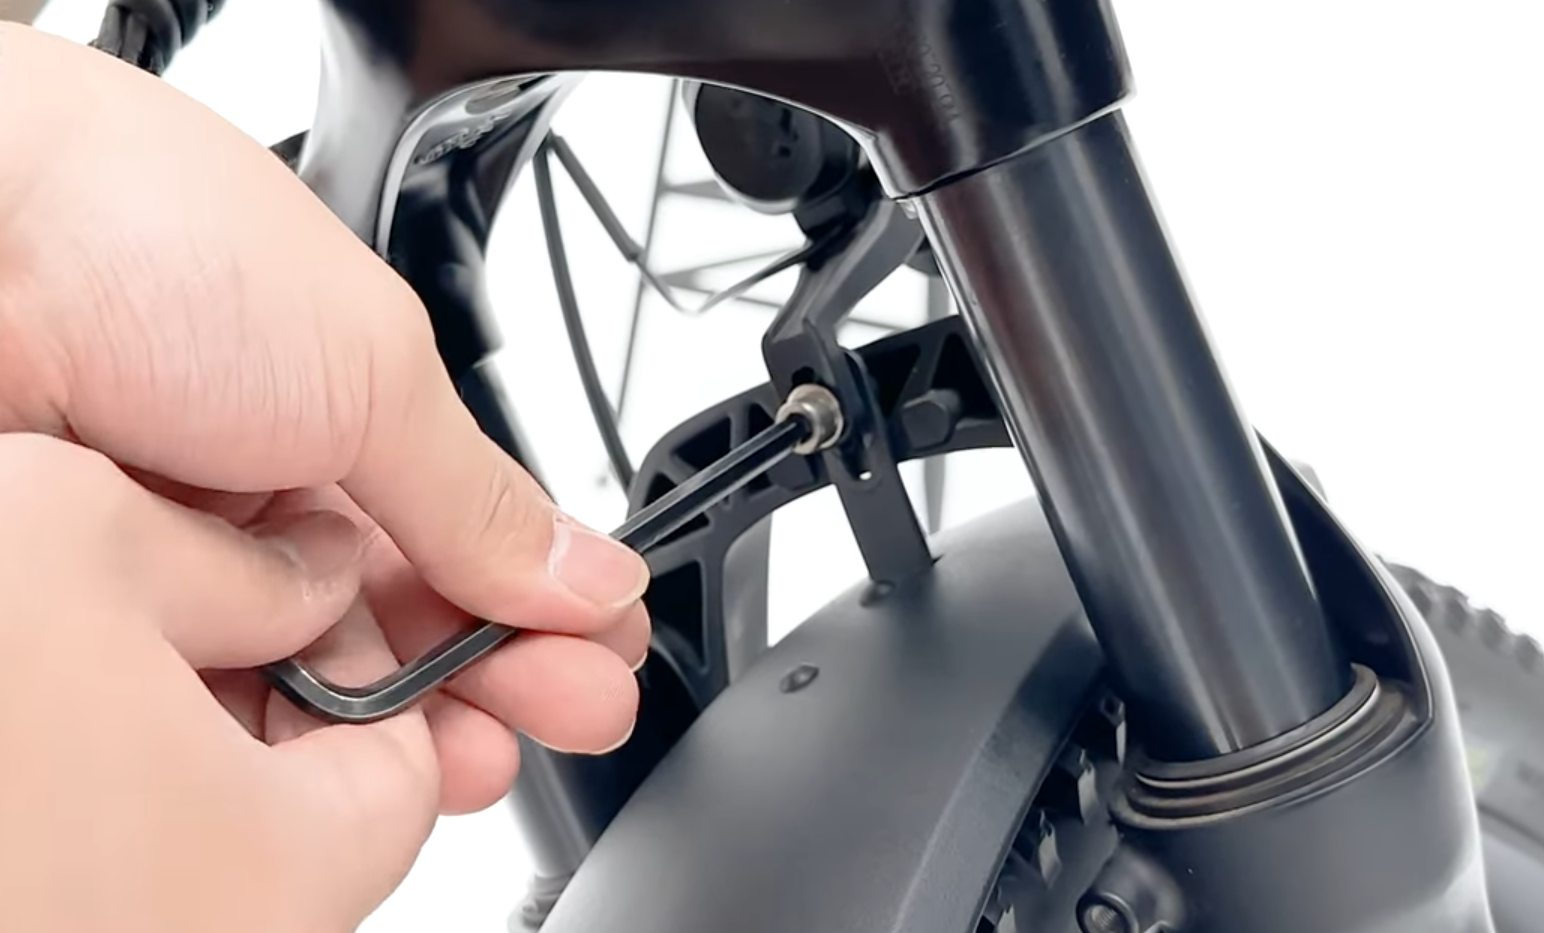
- Once finished, use the 5mm allen key to remove the screw holding the mudguard and front light in place, and remove the front light. Re-screw the mudguard alone back into the mounting point over the front wheel of the bike, using the shorter replacement screw contained in the box.
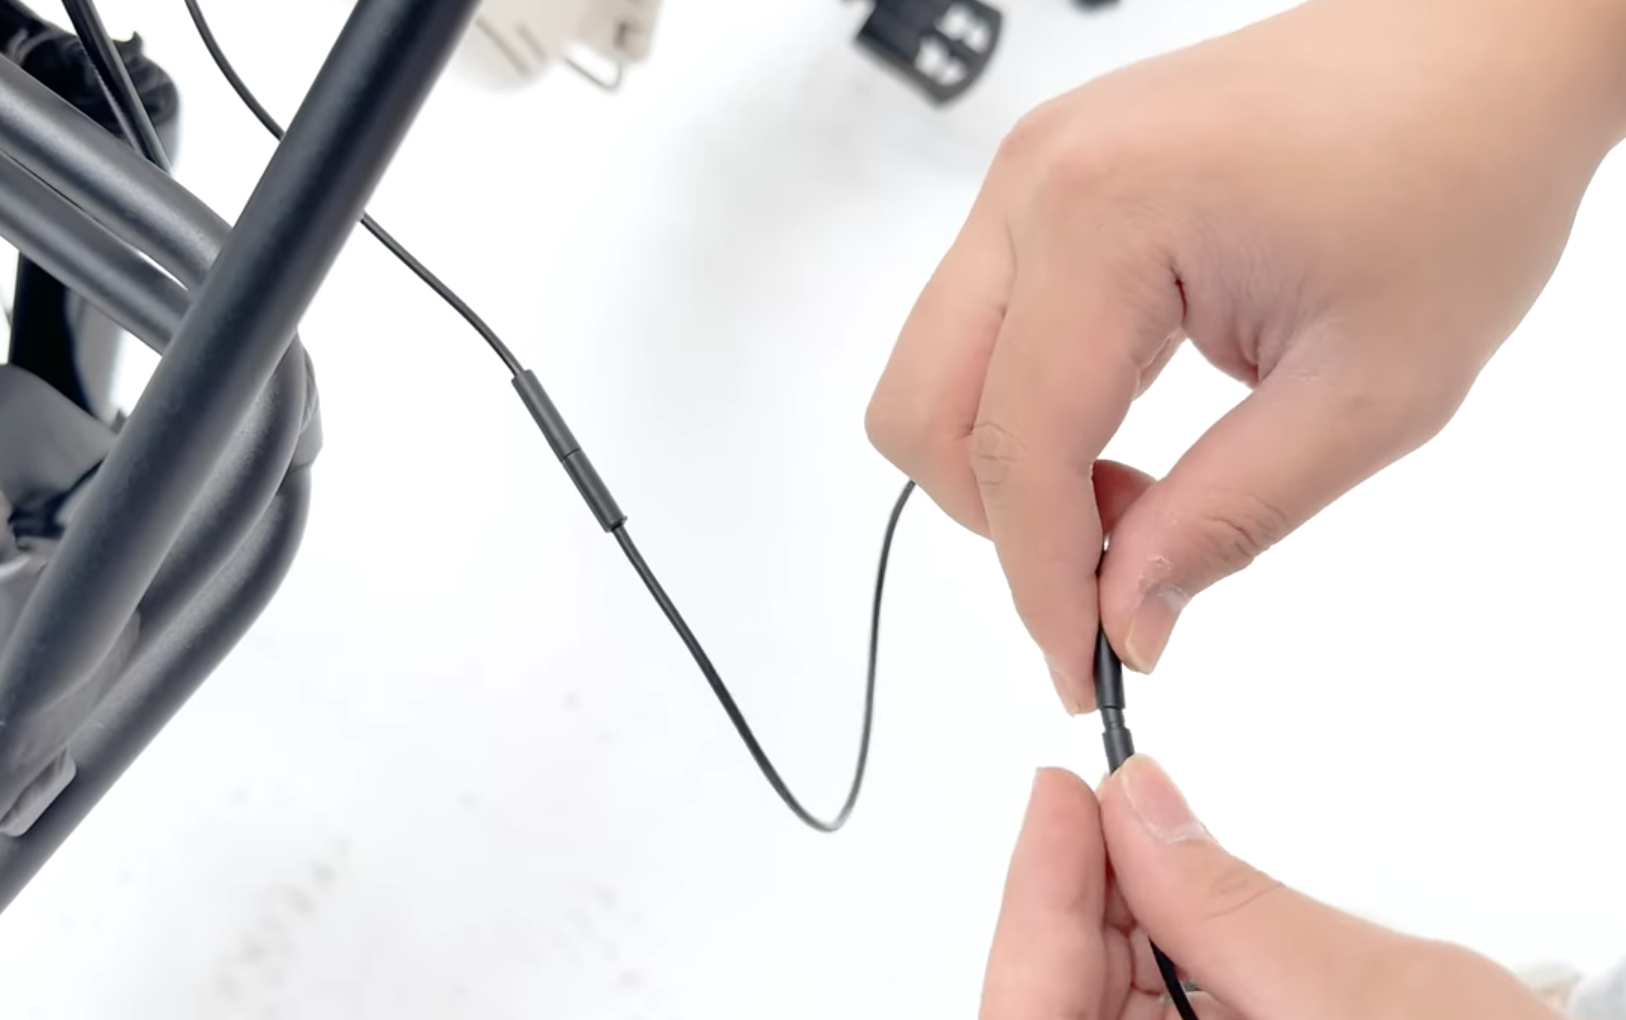
- Unplug the front light from its original cable.
Connect the included light extension cable to the existing cable to increase its length.
Then plug the light into the extension cable.
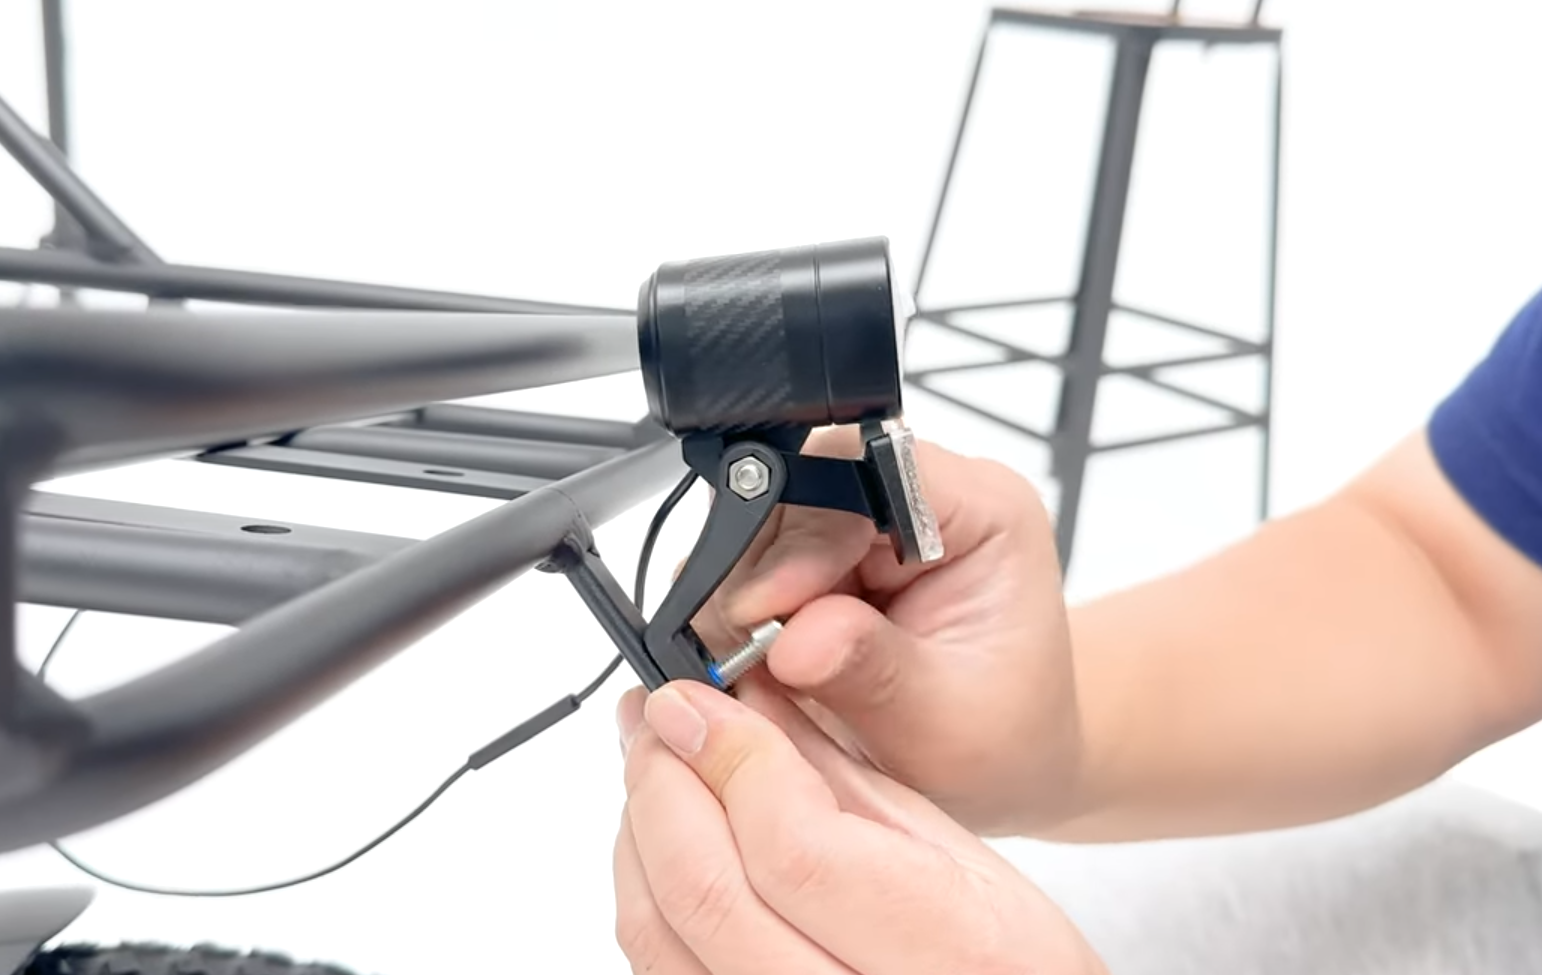
- Position the front light on the designated mounting point at the front of the rack.
Secure it using the provided screw and nut.
Use the 5mm Hex Key and a 10mm wrench to firmly tighten the light in place.
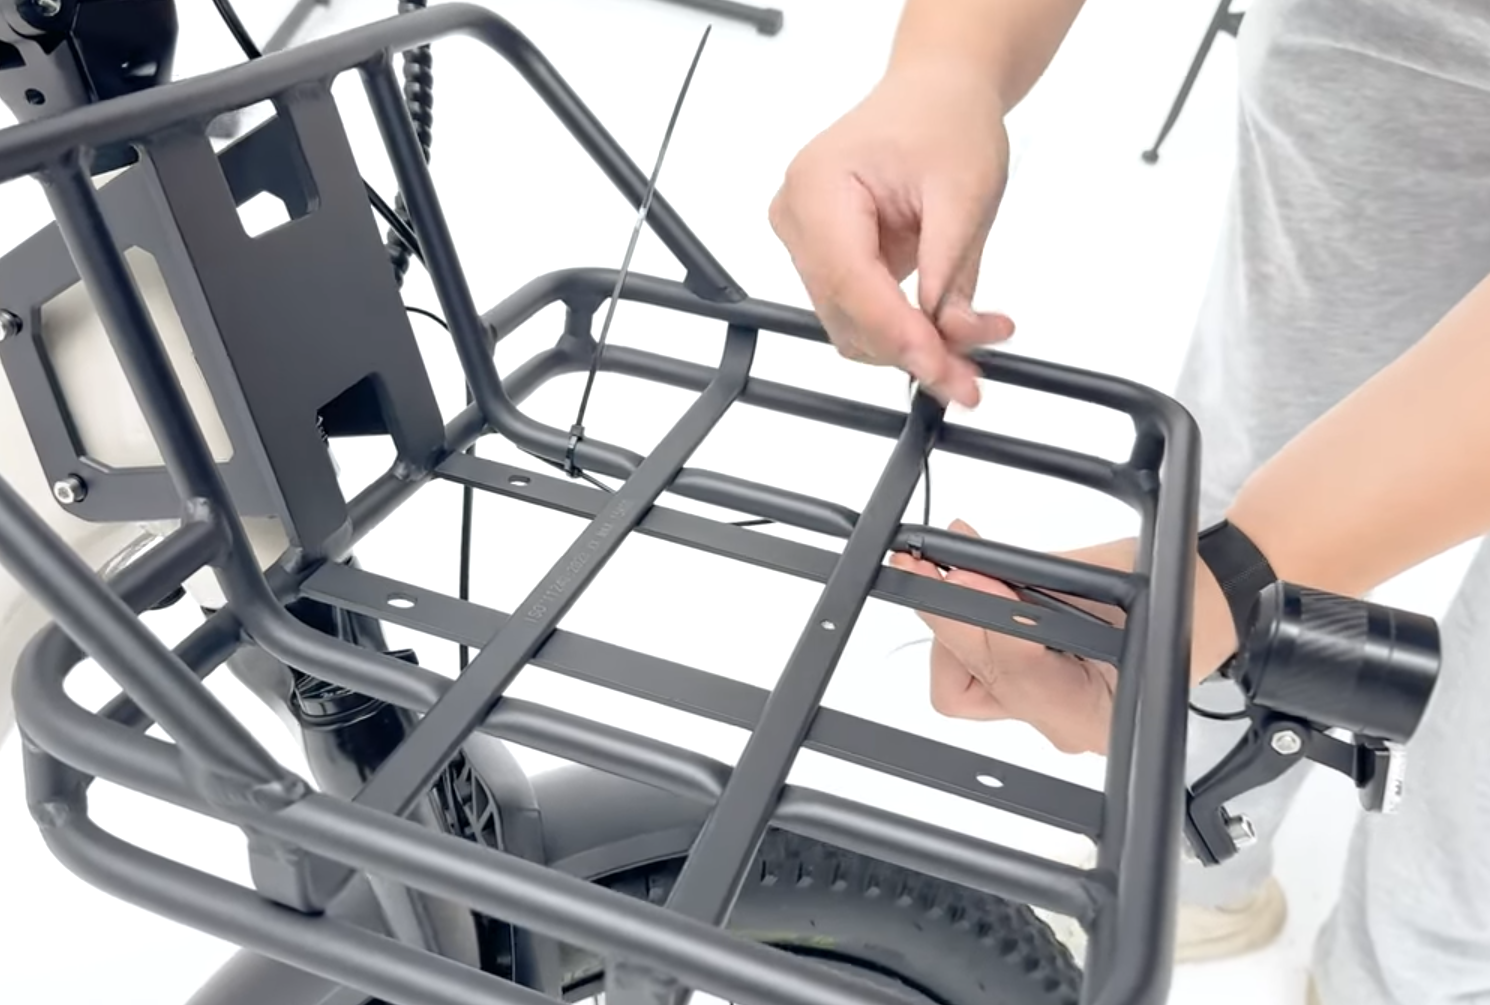
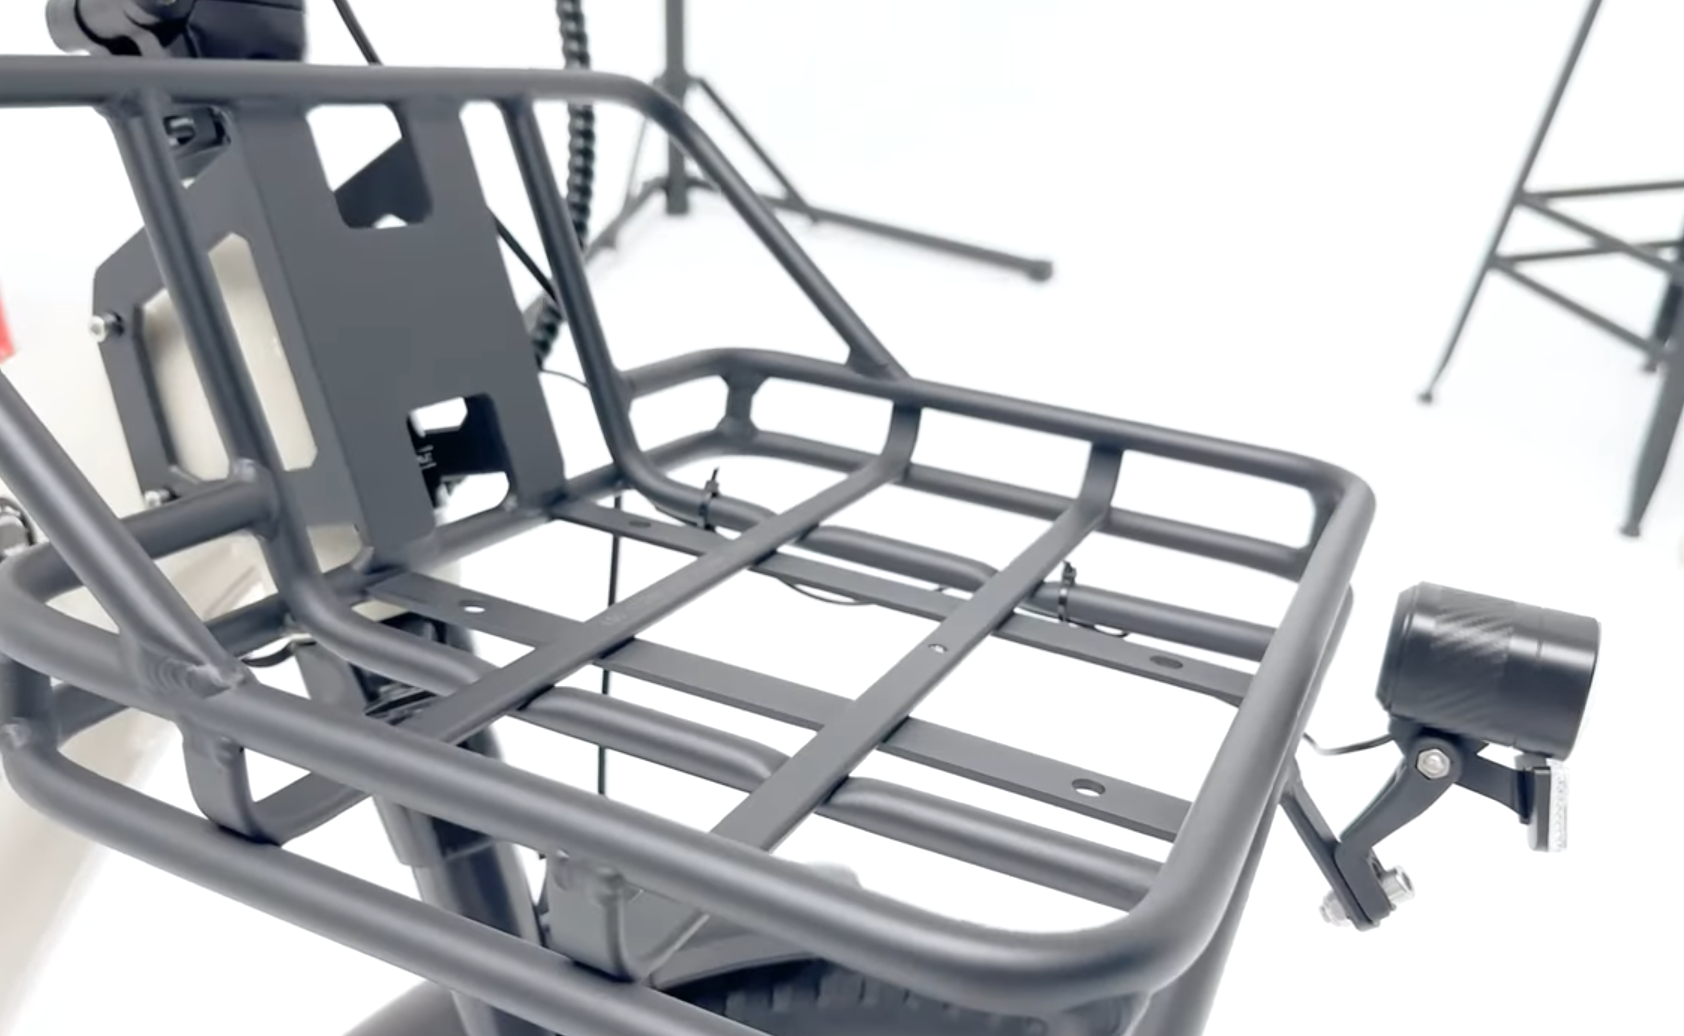
- Use the included zip ties to neatly secure the extension cable along the rack, keeping it out of the way and preventing movement during rides.
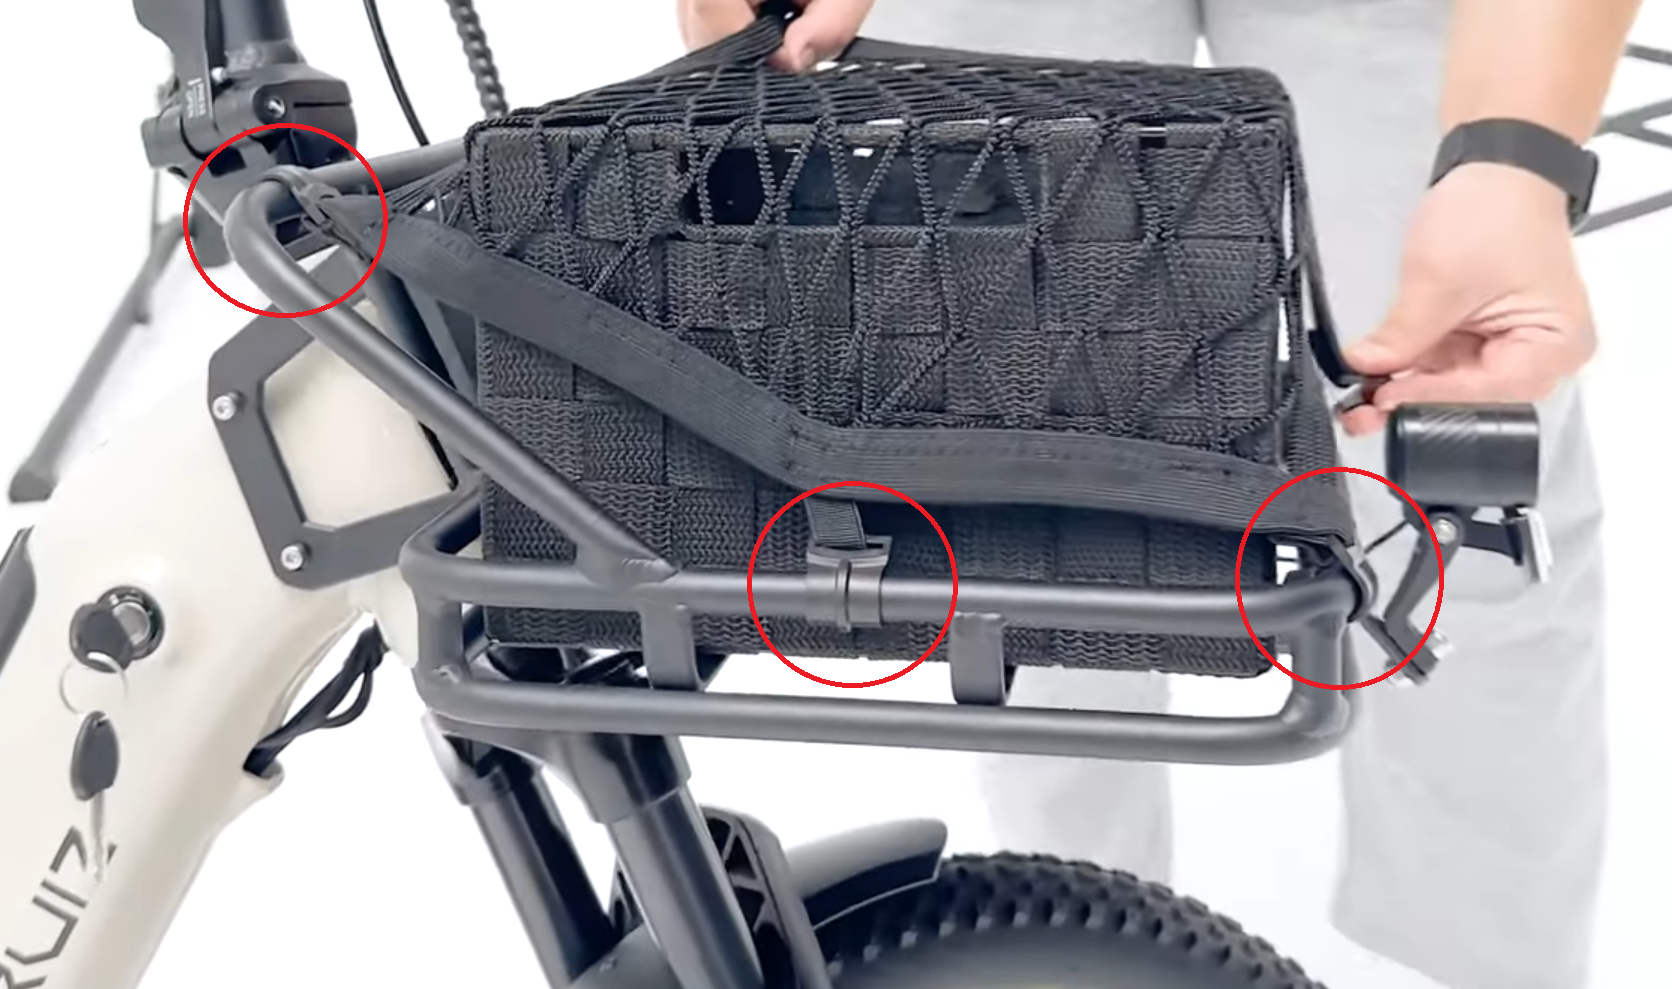
- Place the basket into the front rack, and use the mesh cover provided over the top, clipping it to these 3 points circled in red on either side of the rack.
- Finally, test the movement of your handlebars and ensure that there is not cable tug or anything getting caught. Use zip-ties to hold cables in a fixed position out of the way of the movement of the forks and handlebars if you encounter any.