How to remove rear wheel, change tube and tyre - Xplorer modelsUpdated 5 months ago
Tools Required:
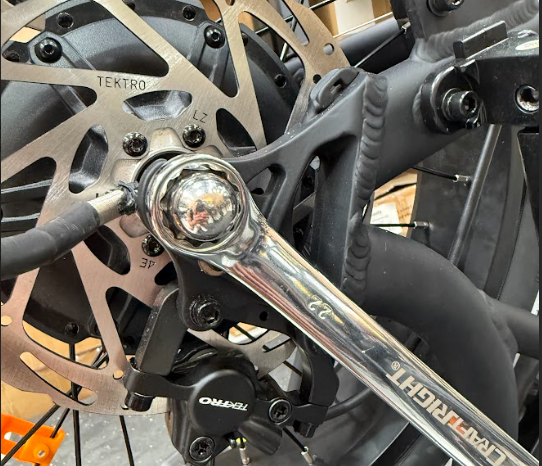
- Size 22 Wrench
- Cable Cutters
- Screwdriver (flathead preferred)
- 4mm Hex Key
- To make the entire process easier, it is best to flip the bike onto it's handlebars before trying to remove the rear wheel. Use a carton or soft barrier to prevent scratching or damaging the bike frame. Use the size 22 wrench to remove the outer wheel nuts from each side of the bicycle. Note: The drive-side (the side with the derailleur) may be harder to access due to the derailleur guard. In this case, work slowly and carefully with small turns, as there’s limited space. Avoid stripping the nut by keeping the wrench aligned.
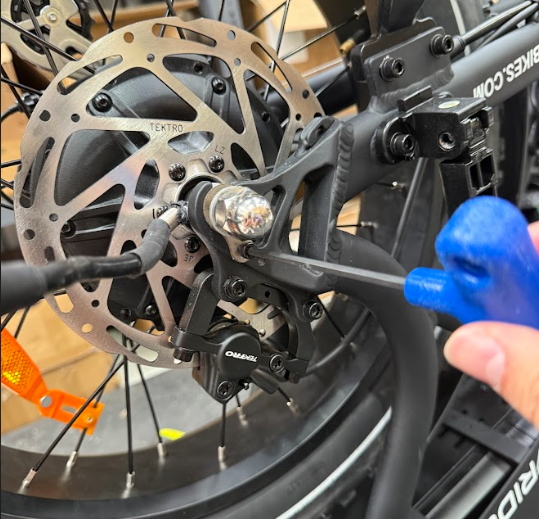
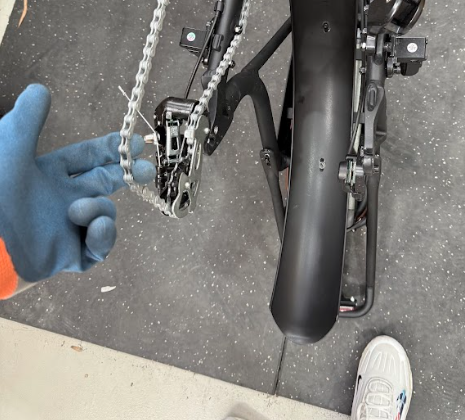
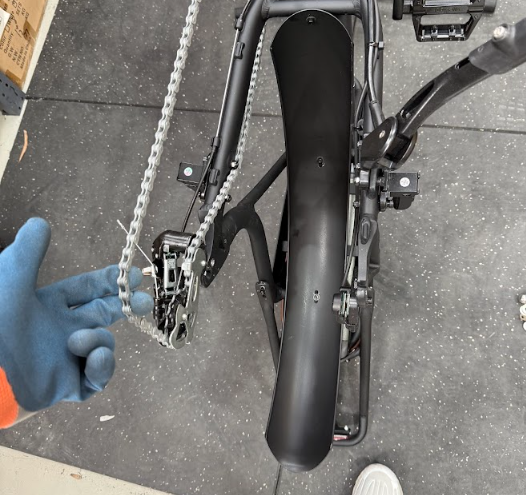
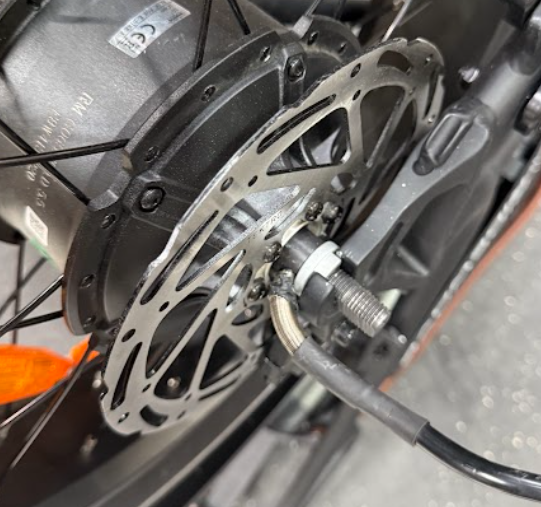
- Once the wheel nuts have been removed, use the 4mm hex key to loosen and remove the bolts securing the torque arms on both sides of the wheel. On the drive-side, the derailleur guard must be pulled downward and off the axle first to access the torque arm bolt. After removing the torque arm bolts, you can now take off: torque arms, outer wheel nuts (if not already removed), derailleur guard, spacers. Leave the locking washers in place on the inside of the dropouts (these are small toothed washers that help keep the axle aligned).
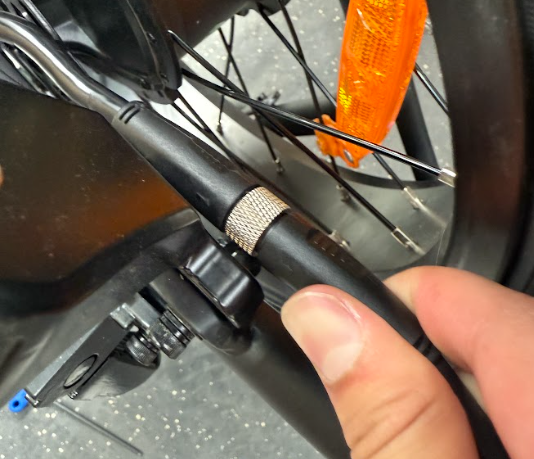
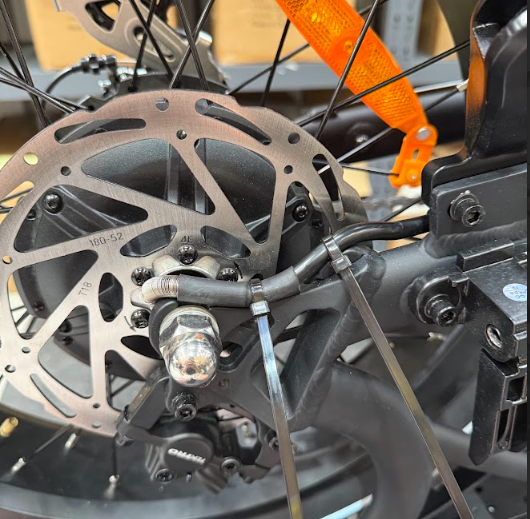
- Locate the motor cable connection on the non-drive side of the rear wheel, near the brake rotor. Use cable cutters to snip the zip ties that are holding the cable in place along the frame. Gently unscrew and pull apart the two ends of the motor cable connector. This will fully disconnect the motor from the controller.
- Now that the motor cable is disconnected and all hardware is removed from the axle:
- Hold the derailleur with one hand and gently pull it backward to create space for axle removal.
- With your other hand, grip the wheel by the rim, inserting your fingers between the spokes.
- Pull upward firmly but steadily—the axle should pop out of the dropout slots.
- Once the axle clears the frame, remove the chain by lifting it off the cassette.
- Carefully slide the wheel out and away from the bike frame.
💡 Tip: Lay the wheel flat on a clean surface for the next steps.
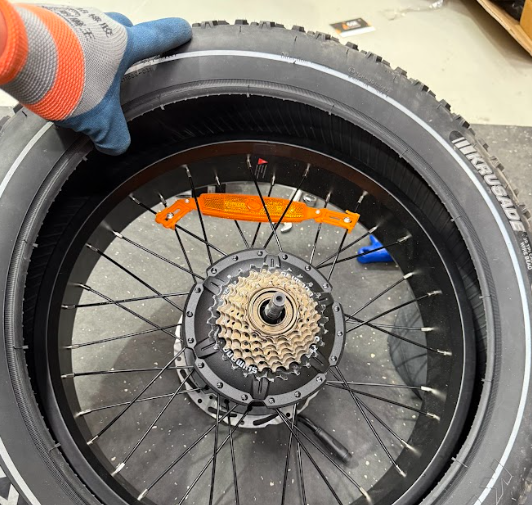
Removing the inner tube and tyre:
- Once the wheel is removed, lay it down on a clean, dry surface and use a flathead screwdriver, tyre lever or other suitable tool to press the valve core and release most of the air from the tube. The valve stem will start to descend into the space created by the air leaving the tube, try not to let it fall all the way through at this stage of the process.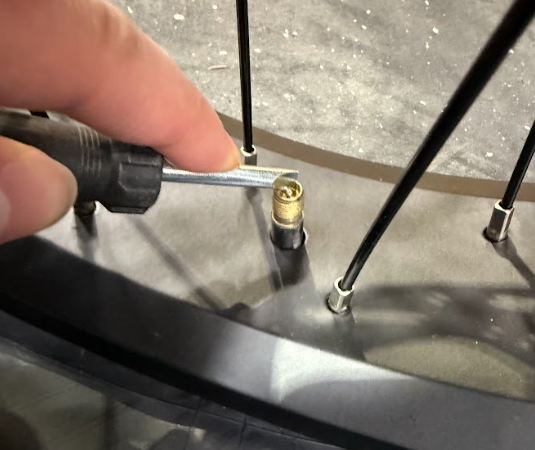
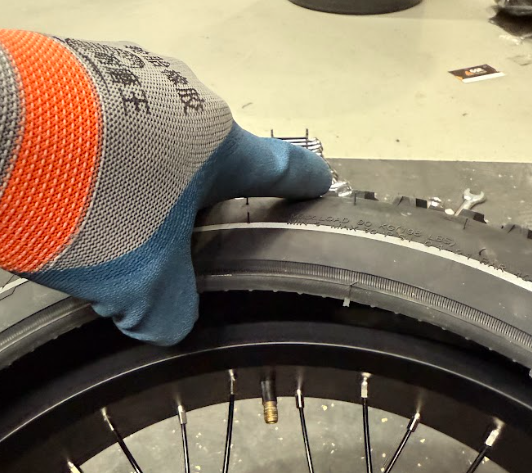
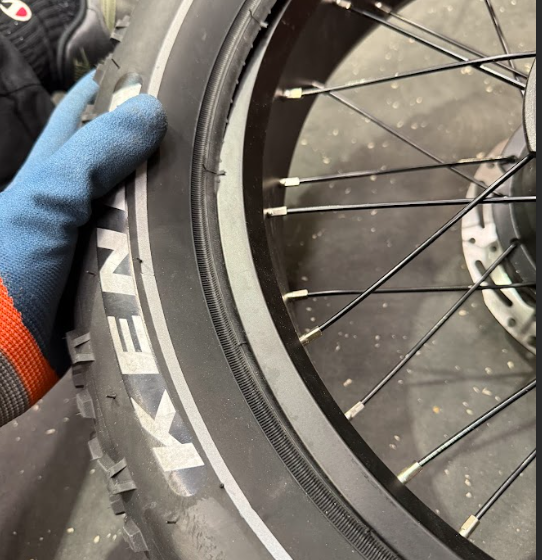
- Once mostly deflated, pinch the tyre sidewalls inward to loosen the bead from the rim. Using your hands or tyre levers, work one side of the tyre bead over the rim edge. Do this incrementally around the wheel. Once one side is free, lift out the inner tube, starting from the valve stem. Use your thumb to push the valve stem fully through the rim. Now you can either remove the tyre entirely (by pulling the other bead off the rim), or leave it partially on if you're just replacing the tube.
Installing the new tube and/or tyre:
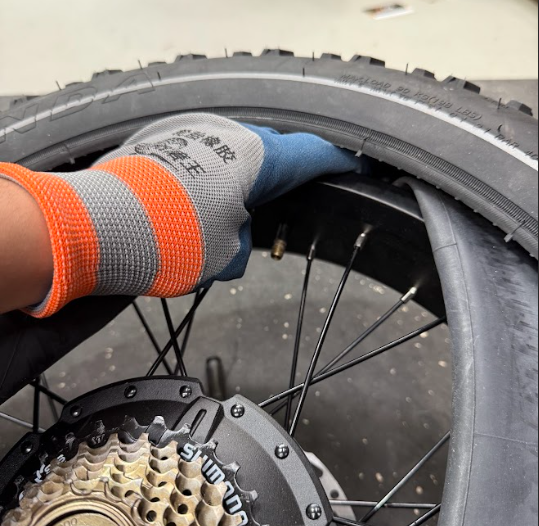
- If installing a new tyre, fit one bead of the tyre fully onto the rim first. Lightly inflate the new inner tube just enough to give it shape. Insert the valve stem through the rim hole, then carefully tuck the rest of the tube inside the tyre, making sure it’s not twisted or pinched.
- Starting near the valve, work the second tyre bead onto the rim, moving around the wheel with your thumbs or tyre levers.
⚠️ Be cautious not to pinch the tube between the rim and tyre bead during this step.
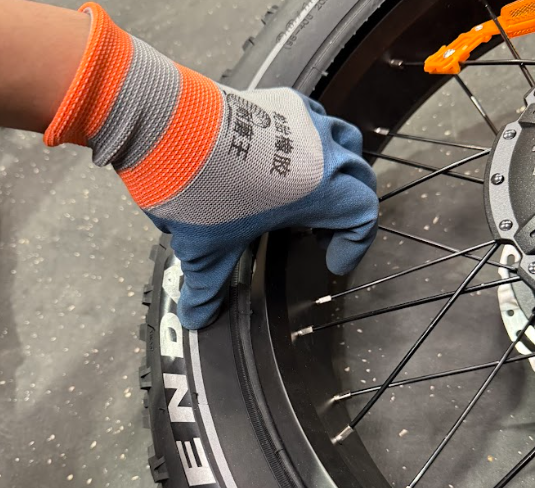
- Once the tyre is fully seated, check around both sides to ensure the tube isn’t sticking out and the bead is evenly positioned all the way around.
Reinstalling the rear wheel:
- Slide the chain back onto the smallest cog on the cassette. Guide the axle back into the dropout slots, gently pulling the derailleur back to create space. Ensure that the locking washers are on the inner part of the frame and positioned correctly.
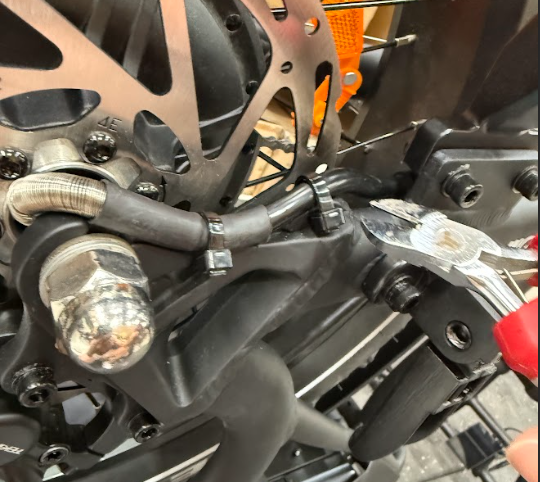
- Reconnect the motor cable and use new zip ties to secure it along the frame. Reinstall in reverse order:
- Torque arms (secure with 4mm hex bolts)
- Spacers/washers and derailleur guard
- Wheel nuts (tighten securely with the 22mm wrench)
⚠️ Double-check everything is tightened and aligned correctly before riding.
Attached are some links to useful videos that may help with this tricky process: