Miniwave Front Light Cable Replacement TutorialUpdated 5 months ago
Required Tools & Materials
To complete this installation, you will need the following:
Phillips Head Screwdriver: For removing and reinstalling the black securing plate.
T25 Torx Key: For removing the battery lock mechanism and the battery terminal.
Flat-head Screwdriver (Optional): Helpful for prying the cable connector out of the spring guard if it becomes lodged.
Support/Padding: A soft, sturdy object to prop up the frame and protective material (cloth or foam) for the handlebars.
Step 1: Test the new cable externally
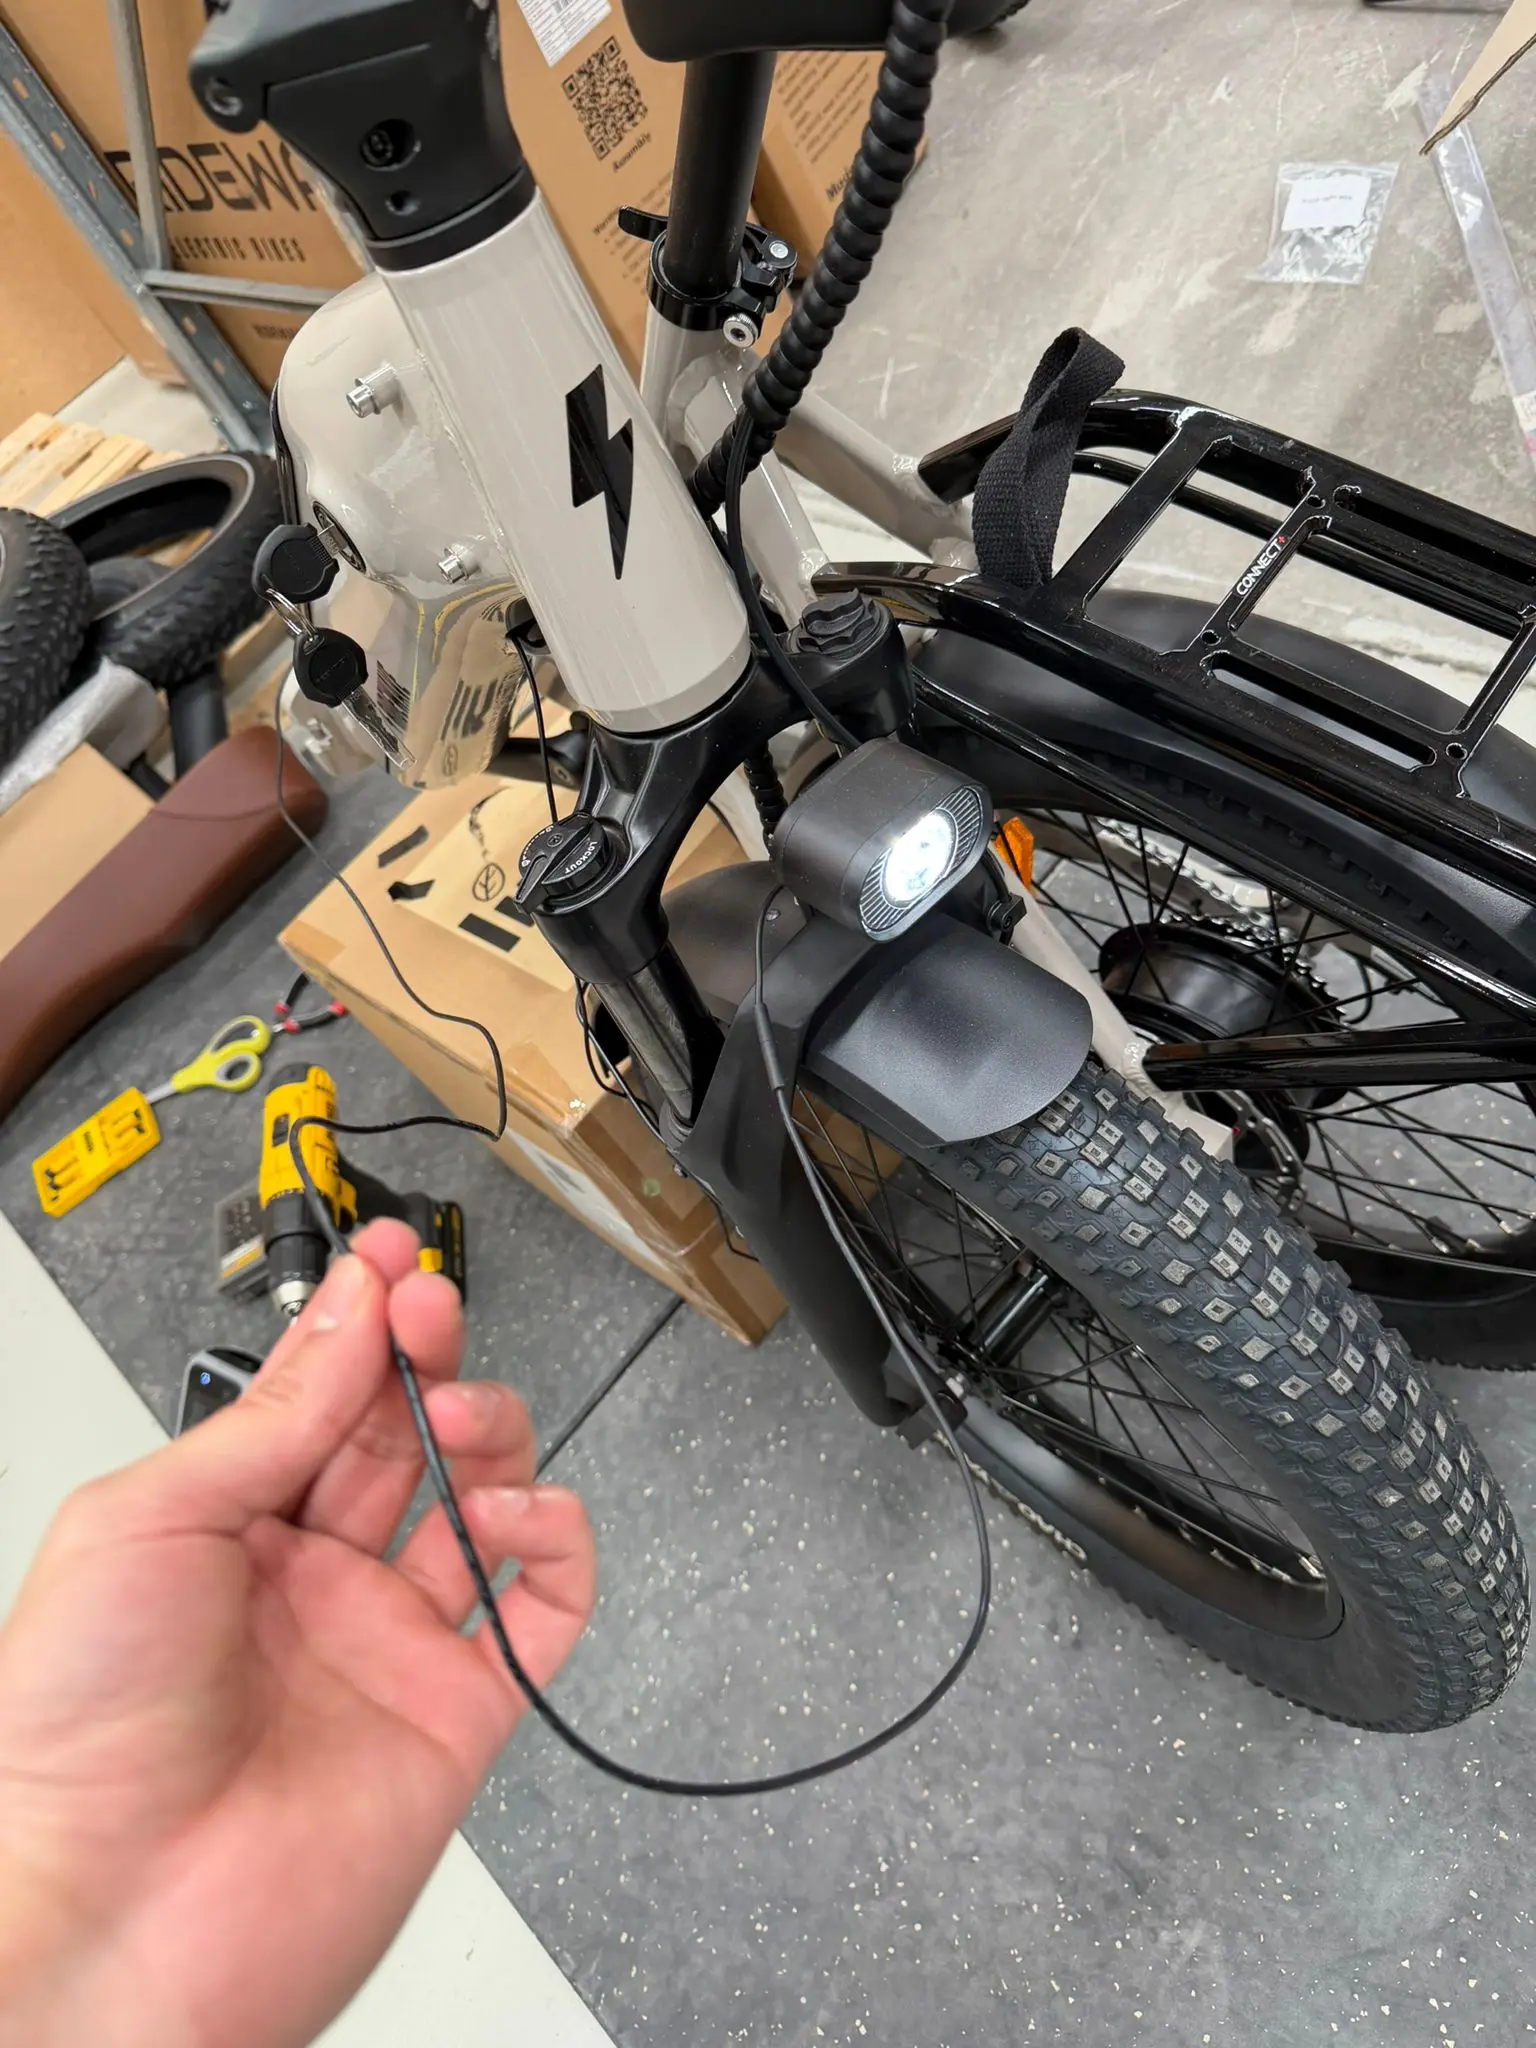
Note: As shown in the photos, the process may be easier if the Miniwave is propped up underneath the D-handle where the main fold occurs. We recommend finding something soft yet sturdy enough to support the bike's weight during this tutorial.
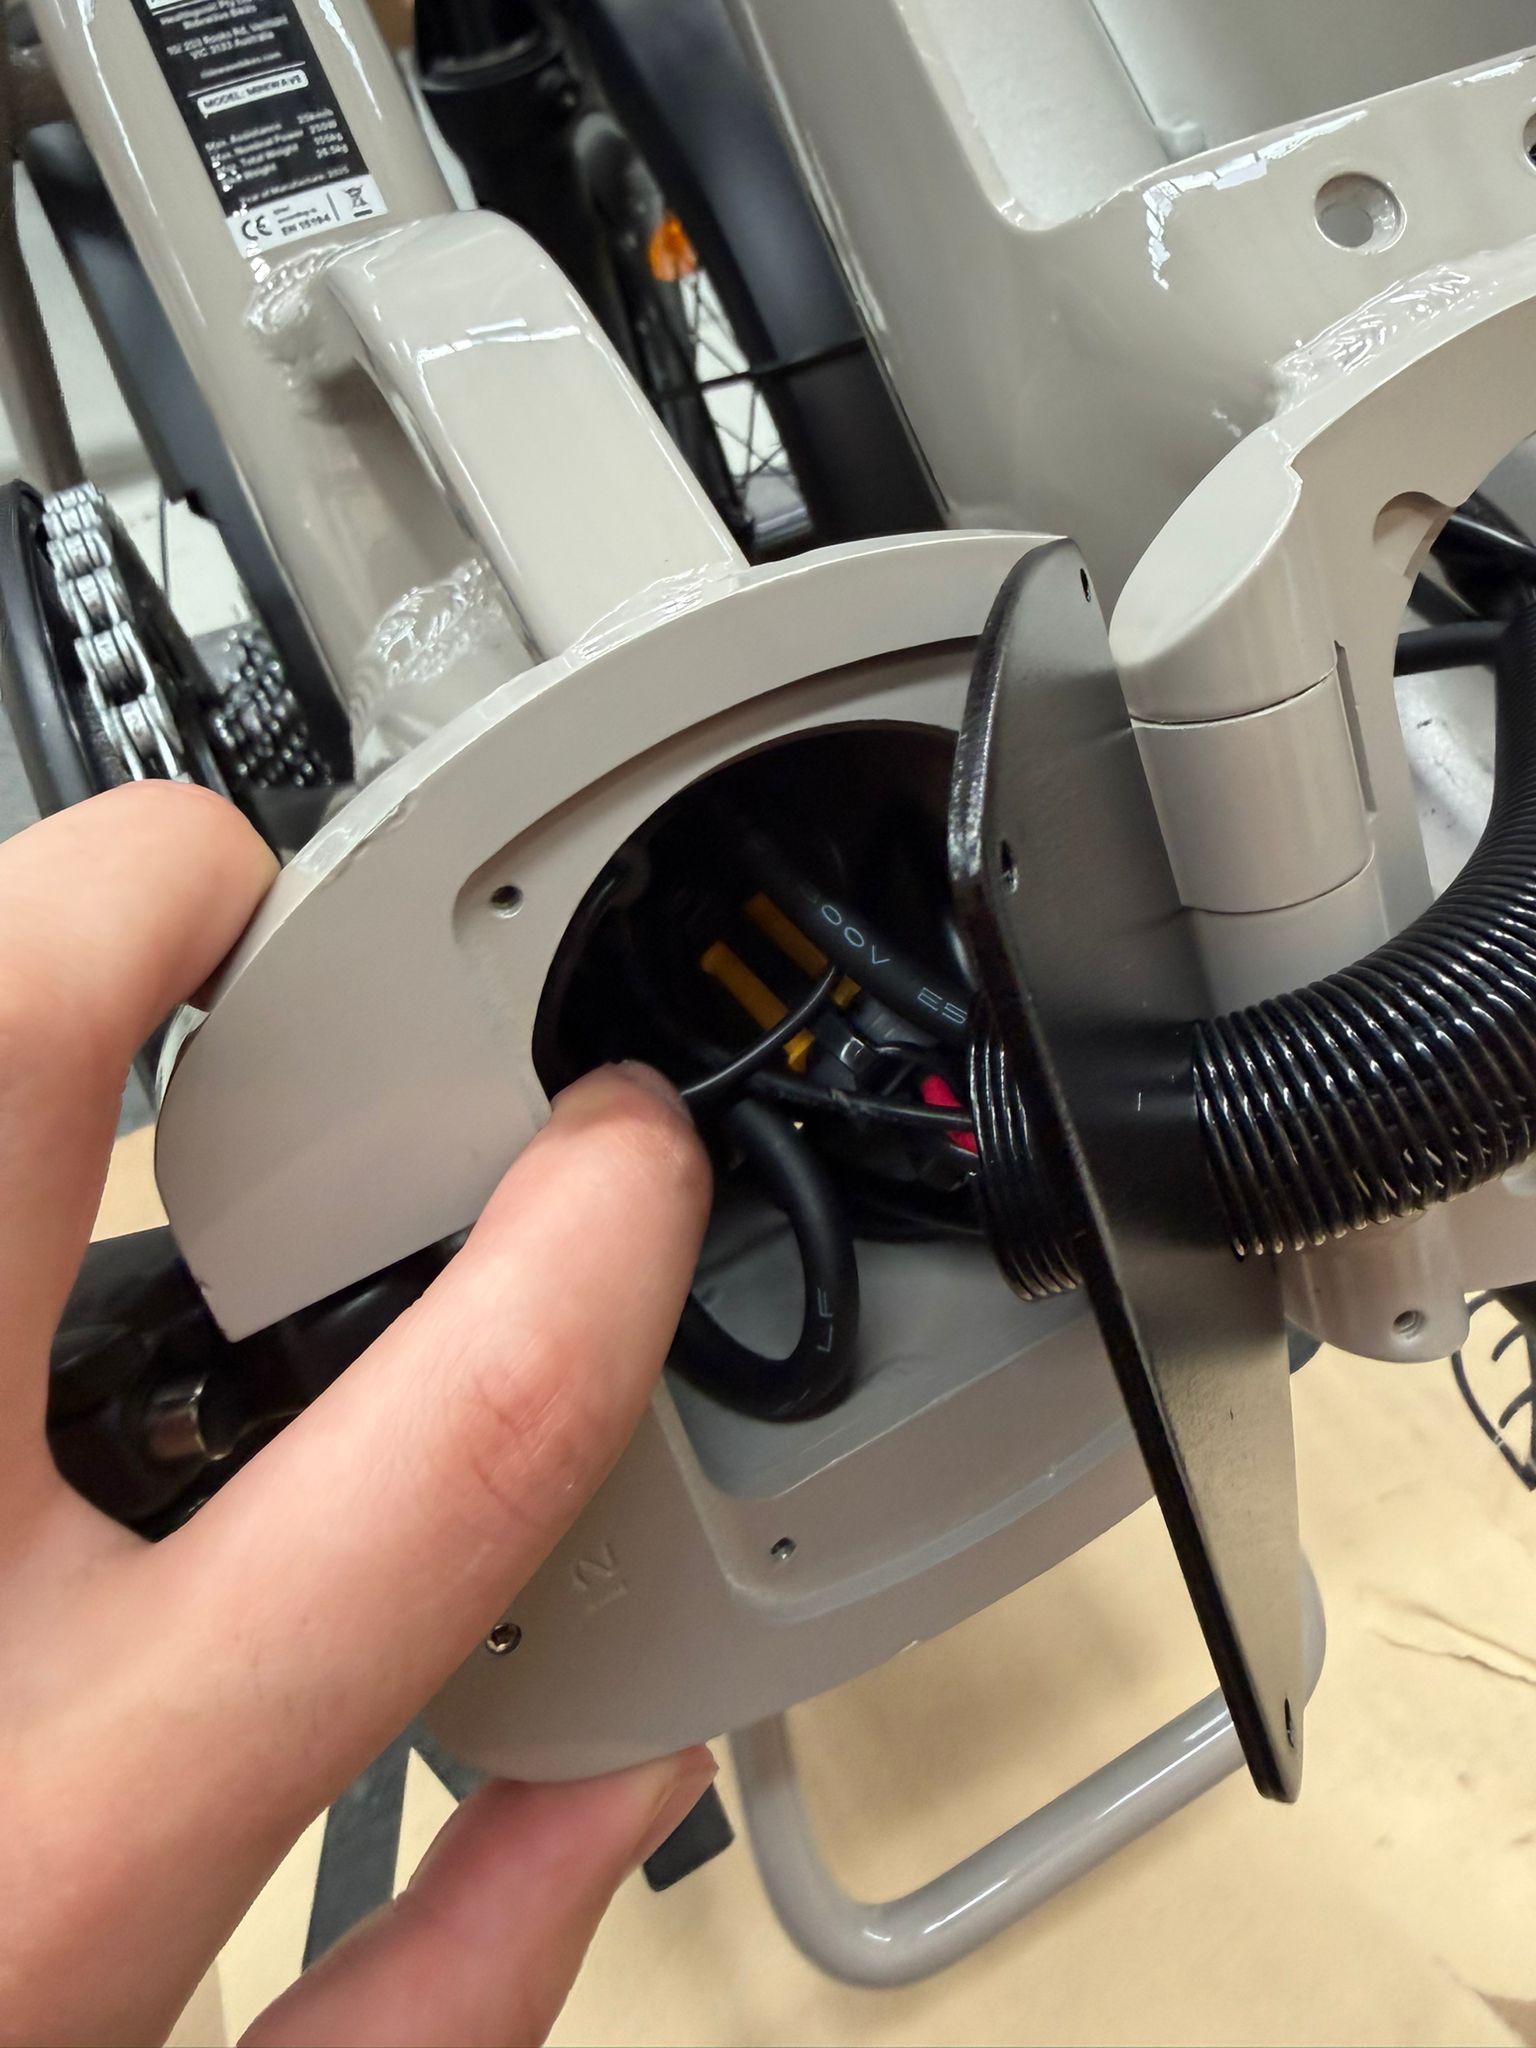
- Fold the bike to expose the main wiring area inside the frame, behind the black plate.
- Use a Phillips head screwdriver to remove the four screws from the black securing plate.
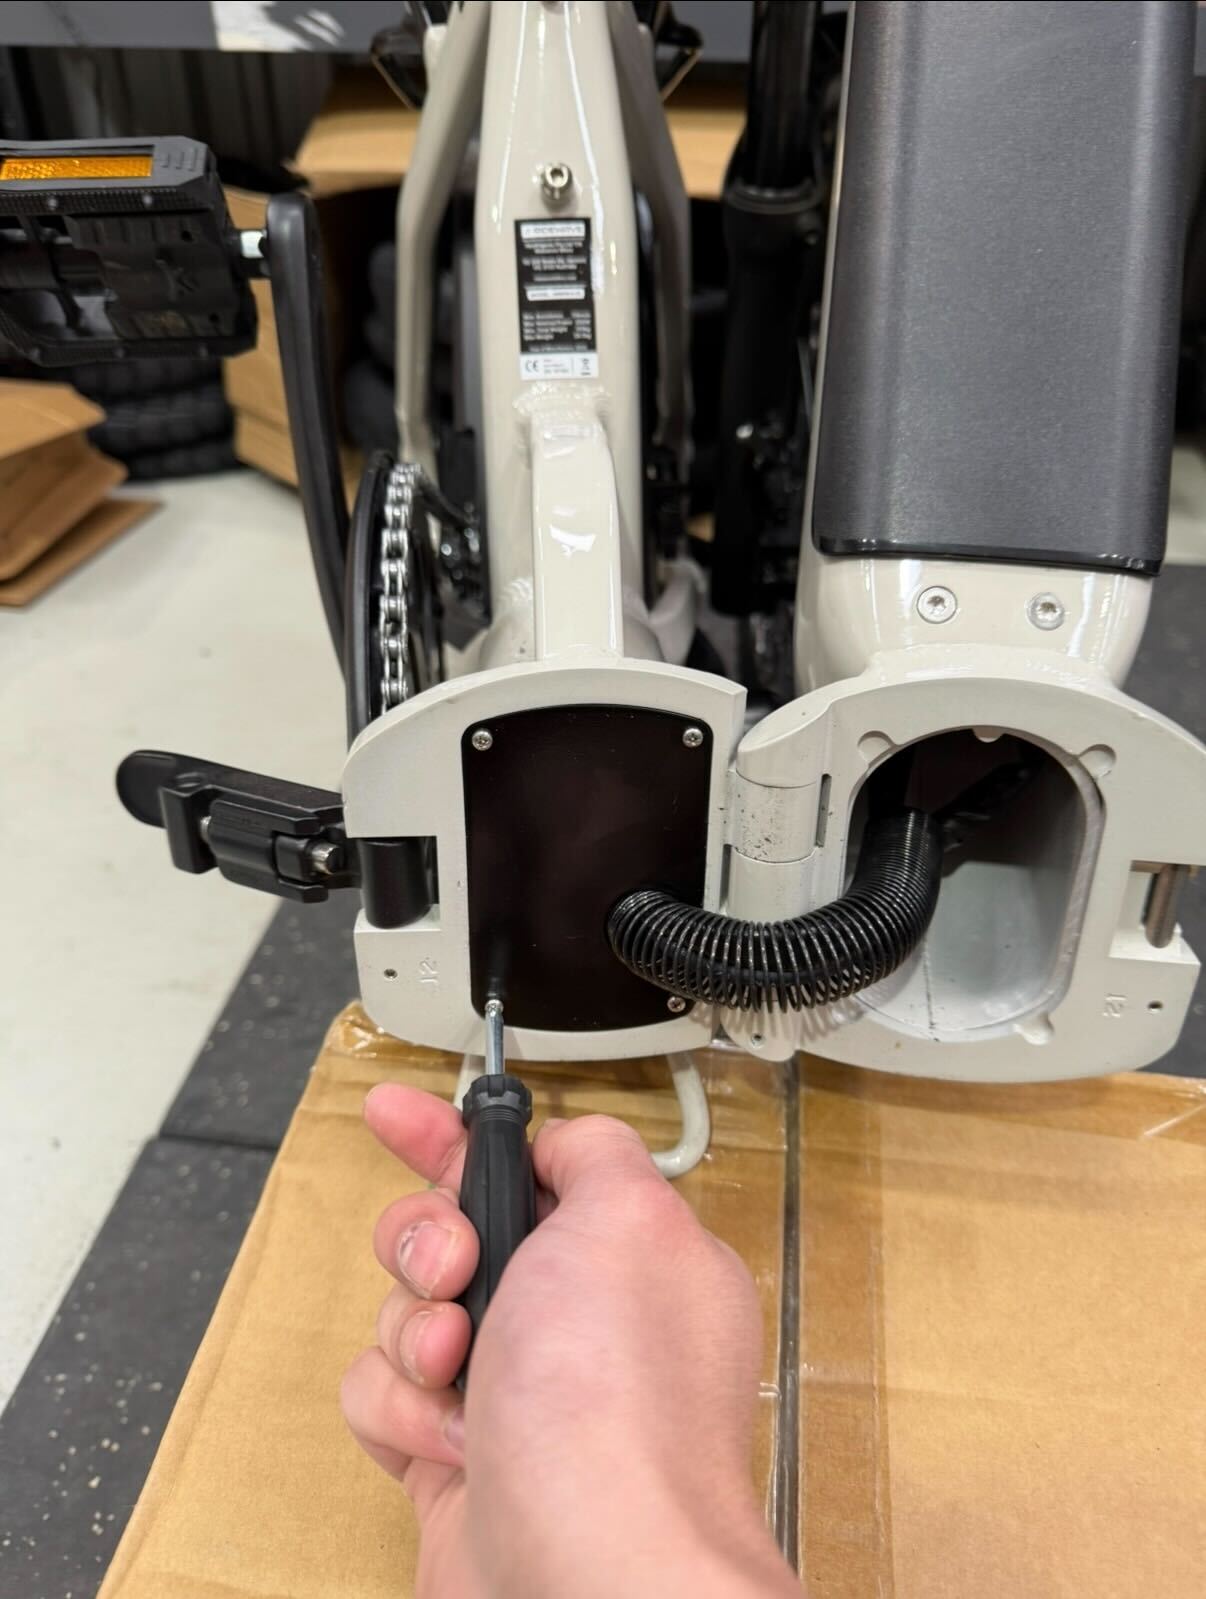
- Once the screws are out, gently slide the plate to the right side to create enough clearance for working inside the frame.
- Locate the light connector (red) inside the wiring compartment (as shown in the image).
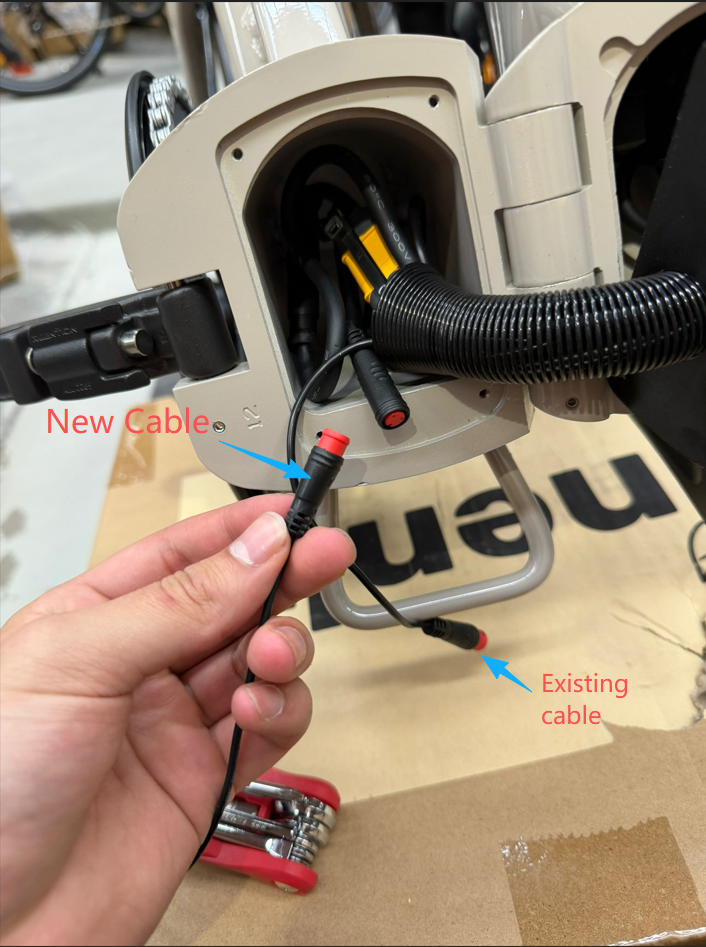
- Unplug the two cable connectors from each other. Connect the new cable to the existing terminal located behind the black securing plate. Ensure that the arrows are aligned when plugging the cables together at this end.
- Plug the opposite end of the new cable into the front light. Power on the Miniwave and long-press the (+) button to verify that the light functions correctly. Continue with the remainder of the tutorial if the front light is now functional. If not, contact ridewave support for further troubleshooting.
Step 2: Install new cable
- Once you have verified that the new cable is working externally, you may proceed with removing the existing cable from the Miniwave downtube. Remove the battery from the downtube by turning the key to the unlocked position and rotating the secondary latch in either direction; you can then lift the battery up and away from the frame.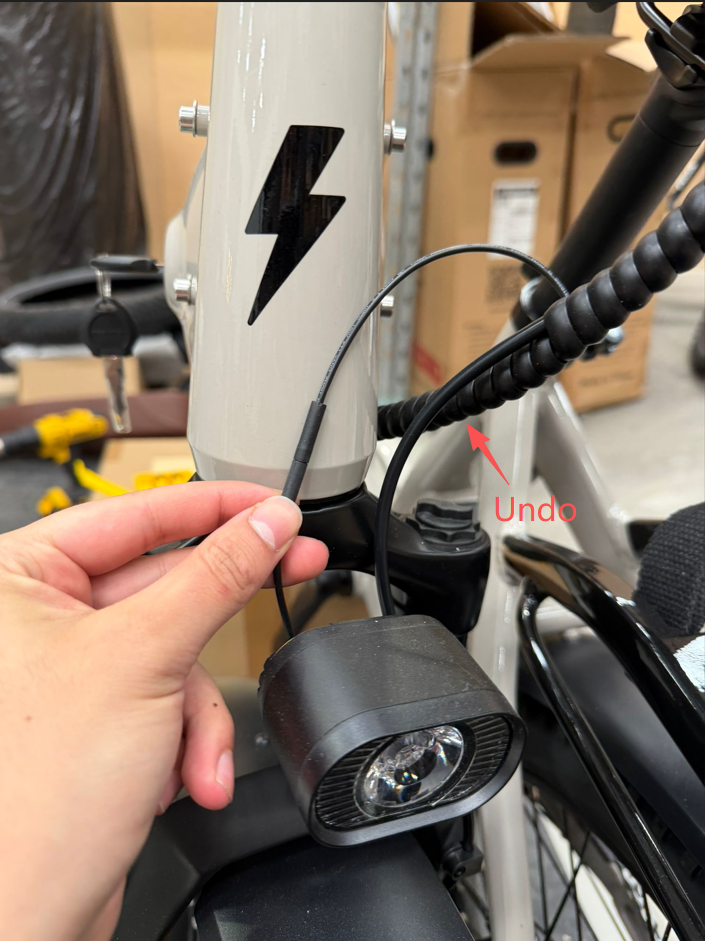
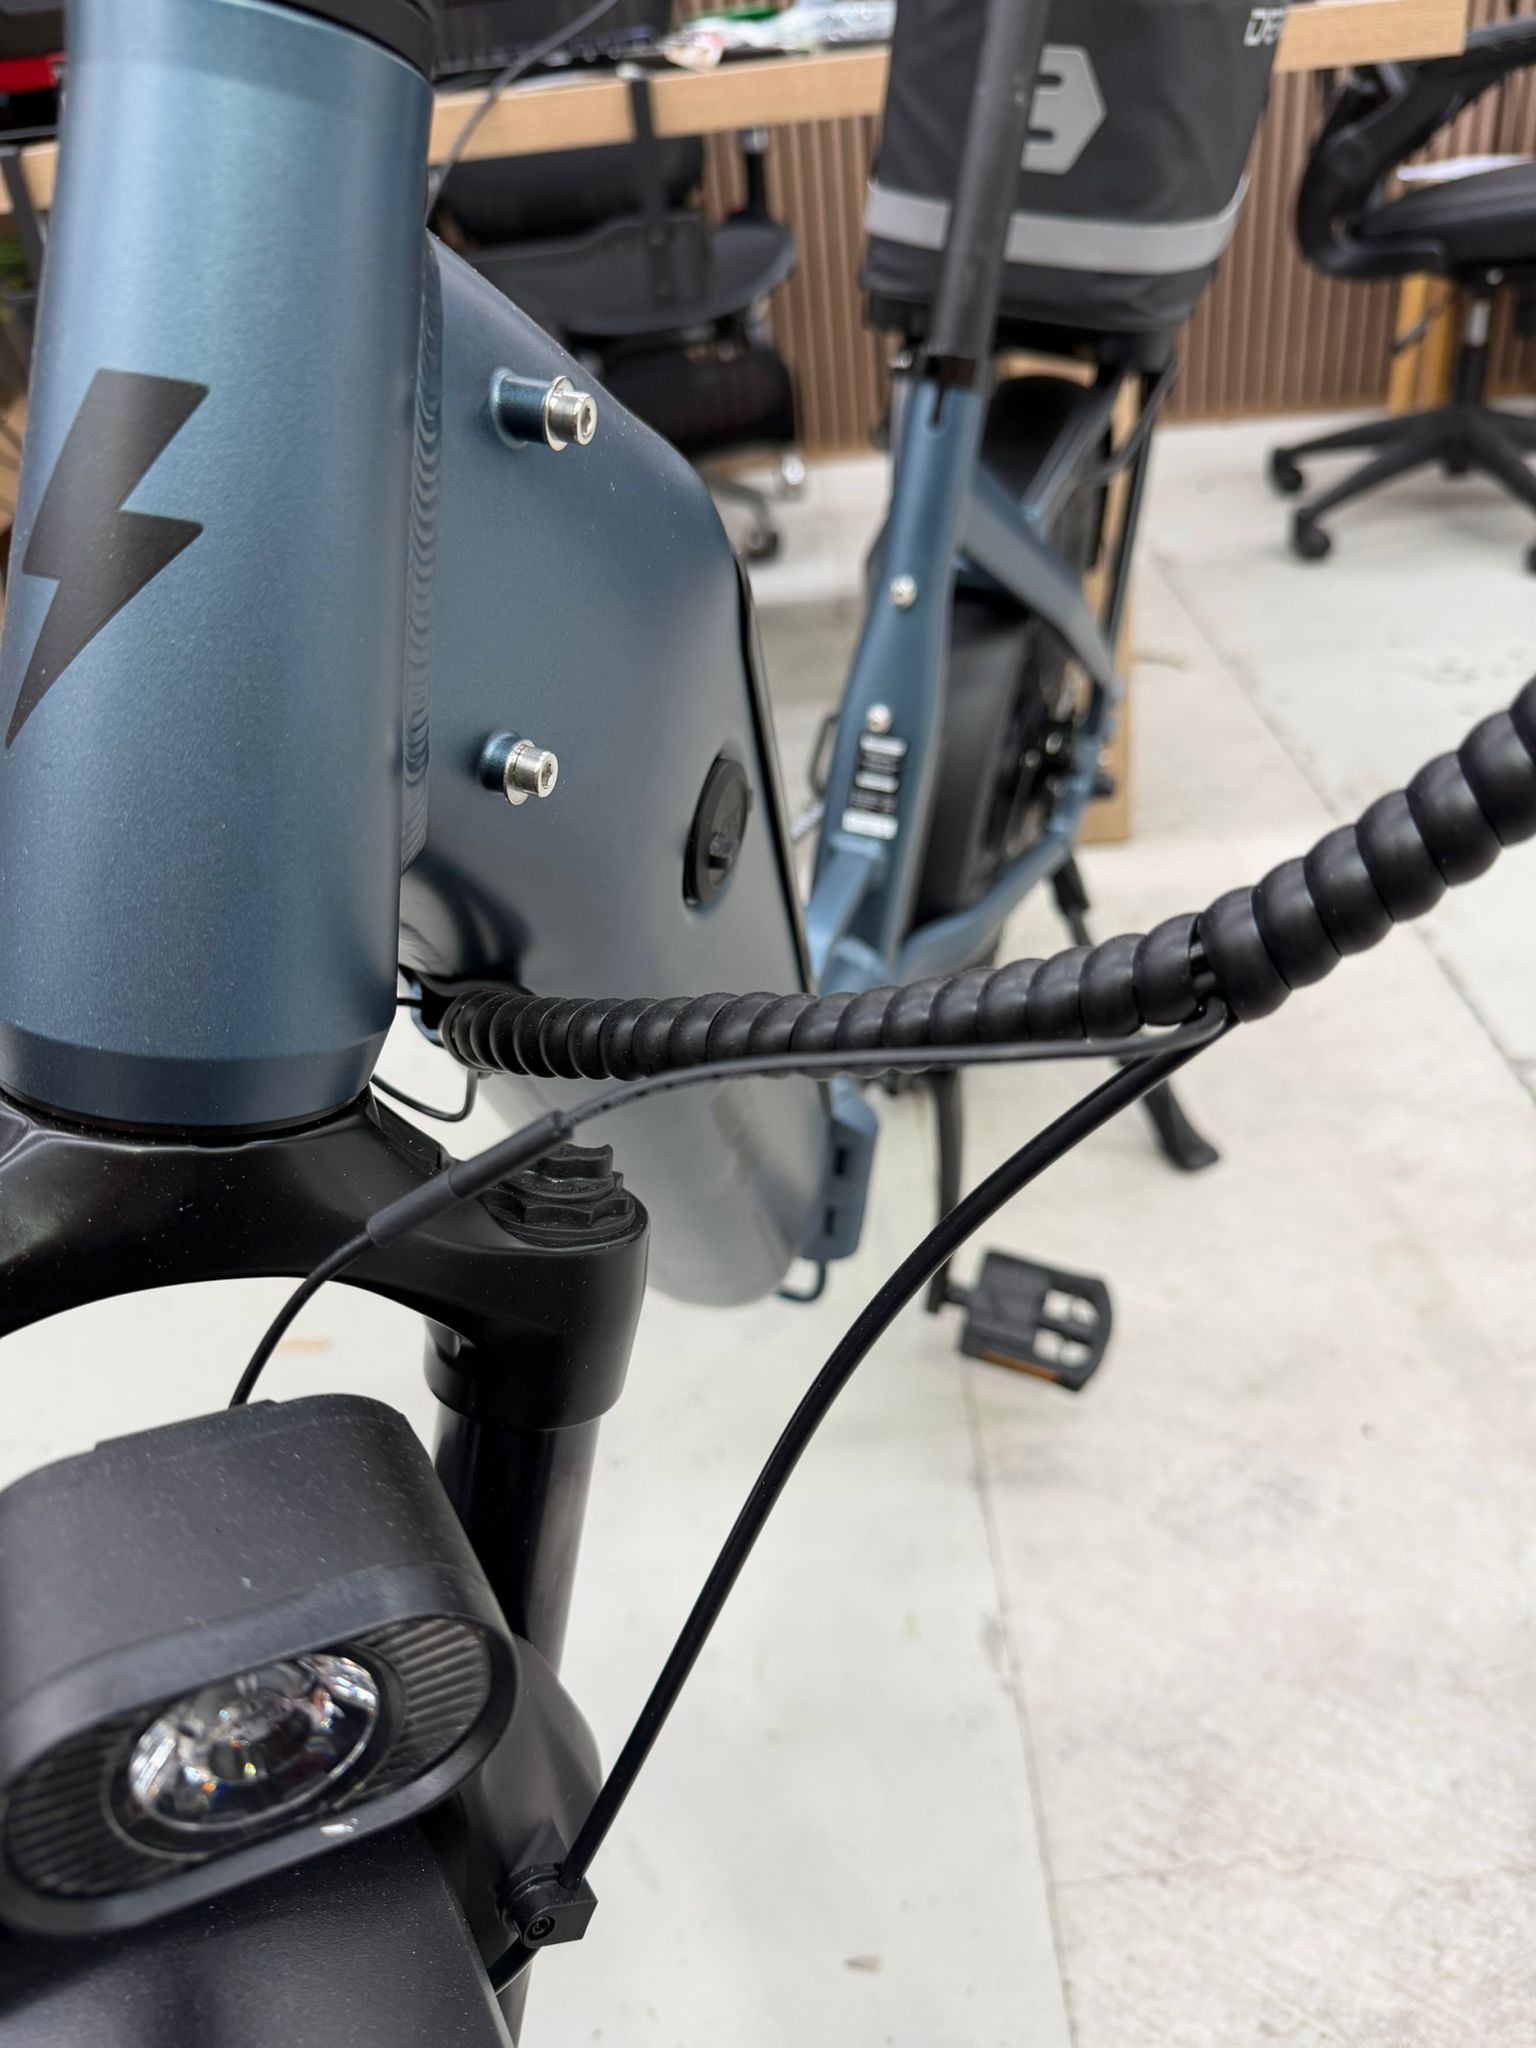
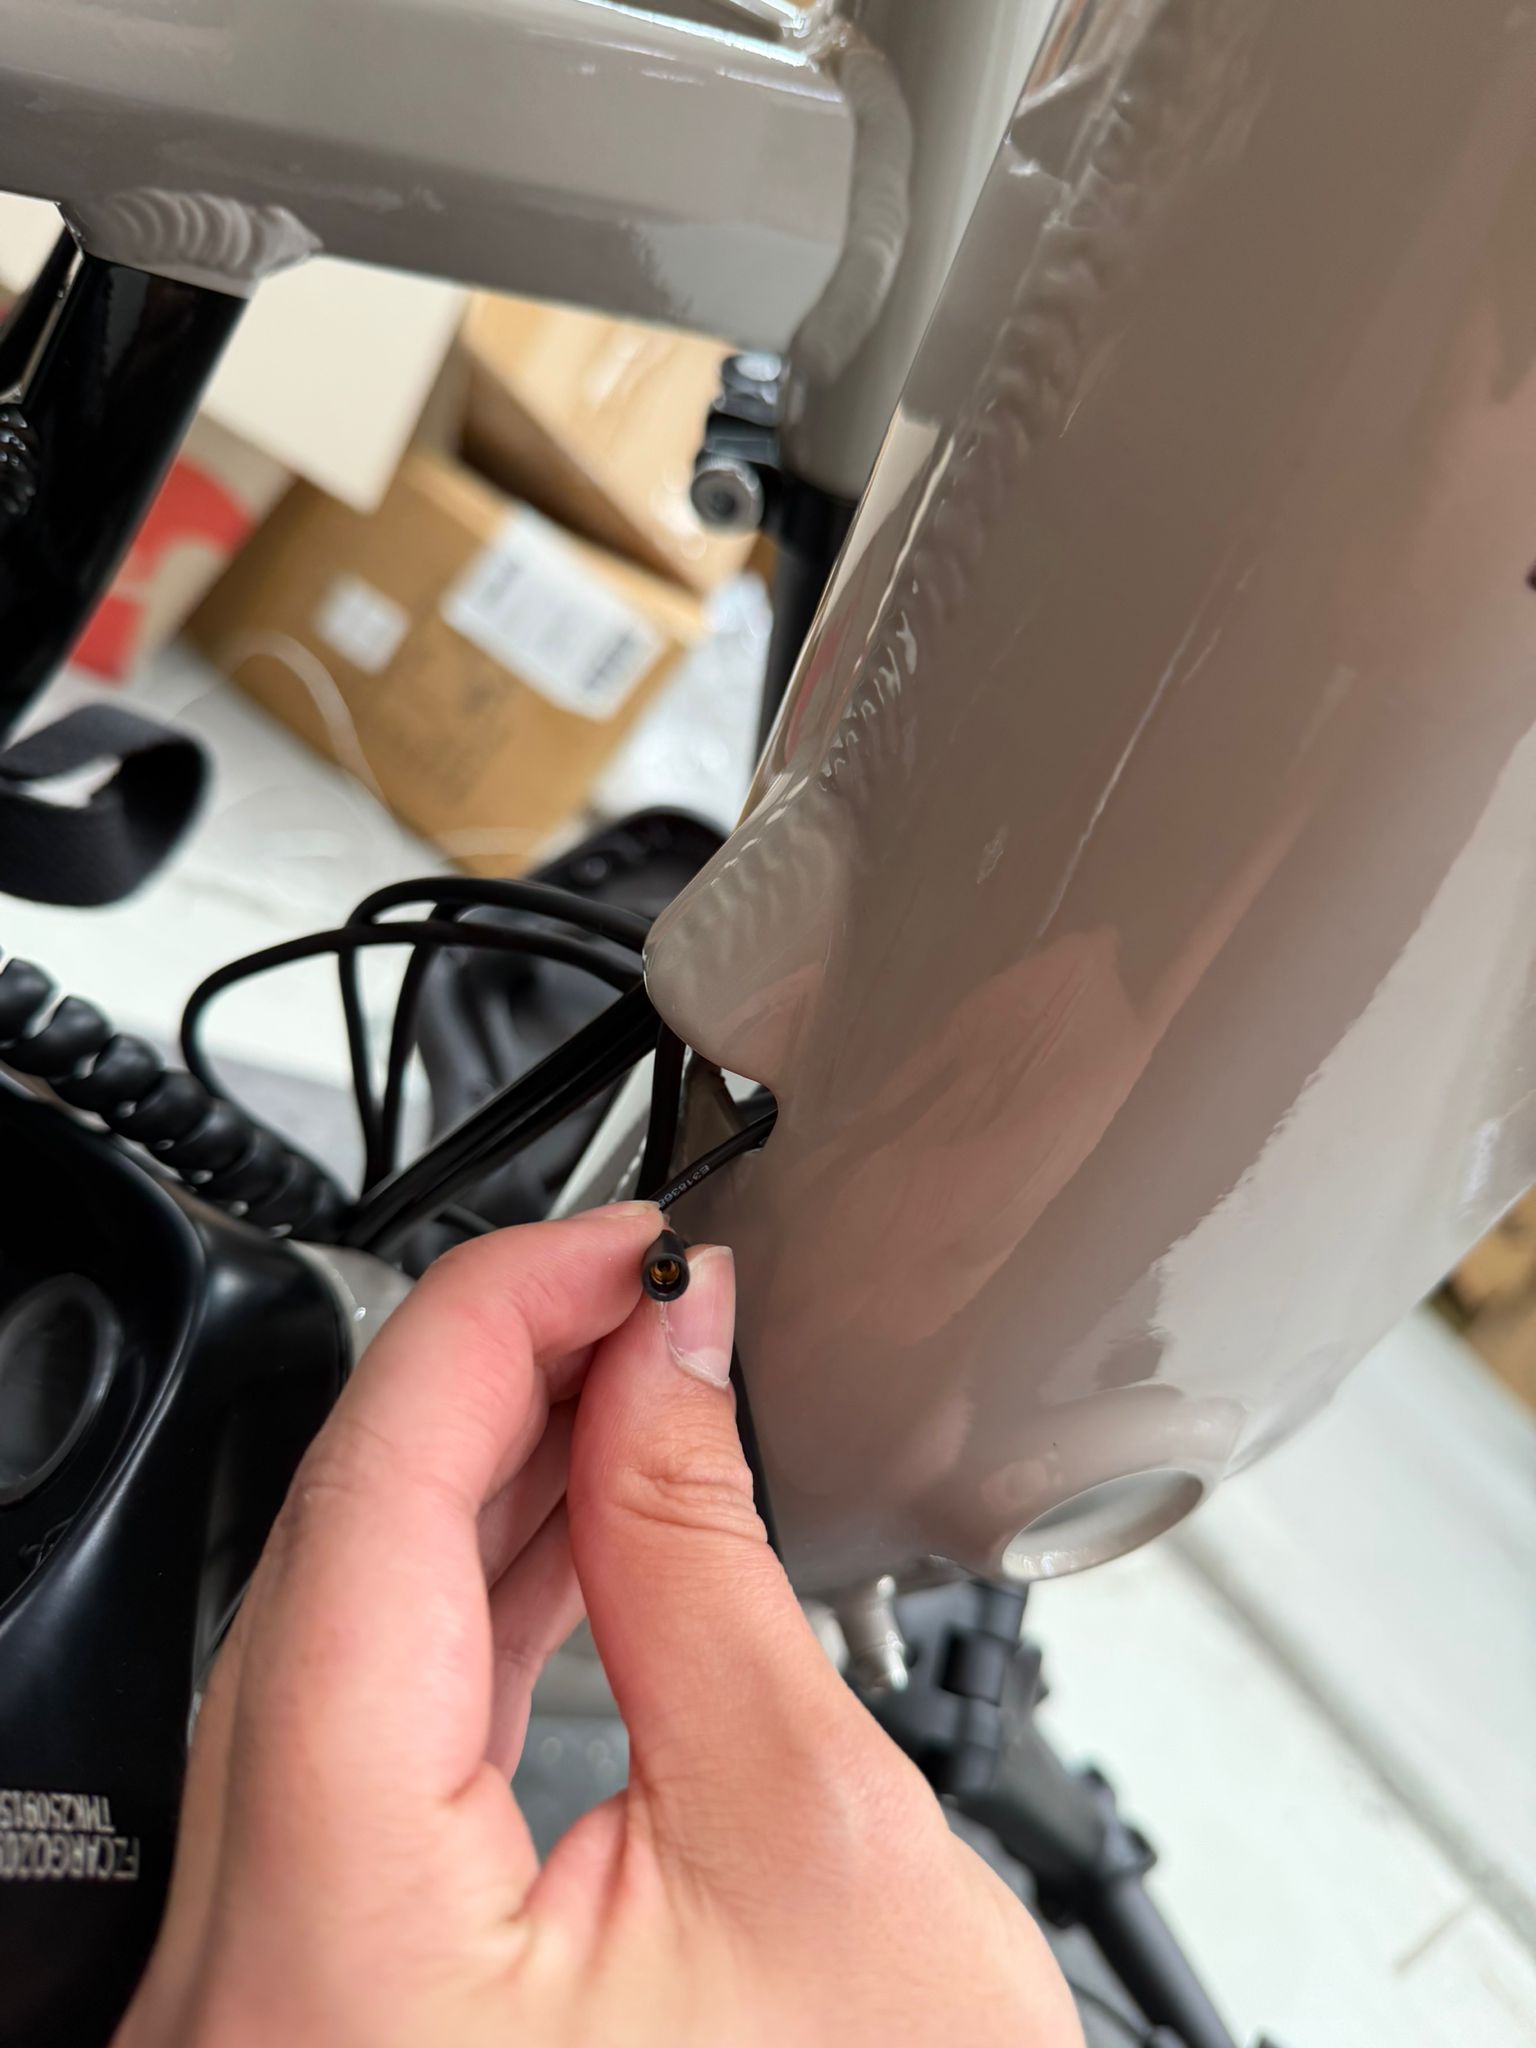
- Unravel the pigtail cable wrap located just behind the forks to access the front light cable. If you have not already done so, unplug the front light cable and allow it to hang freely in front of the forks.
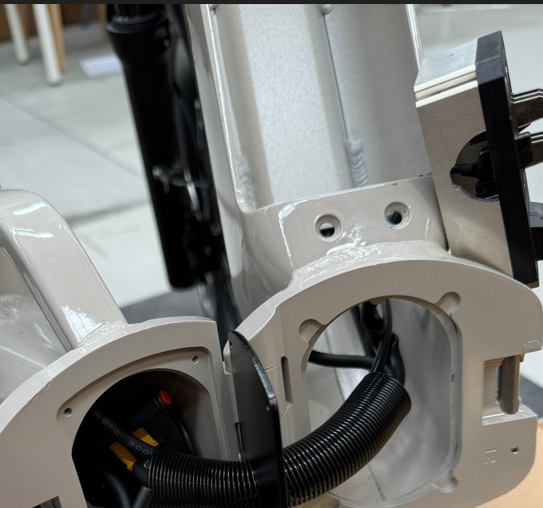
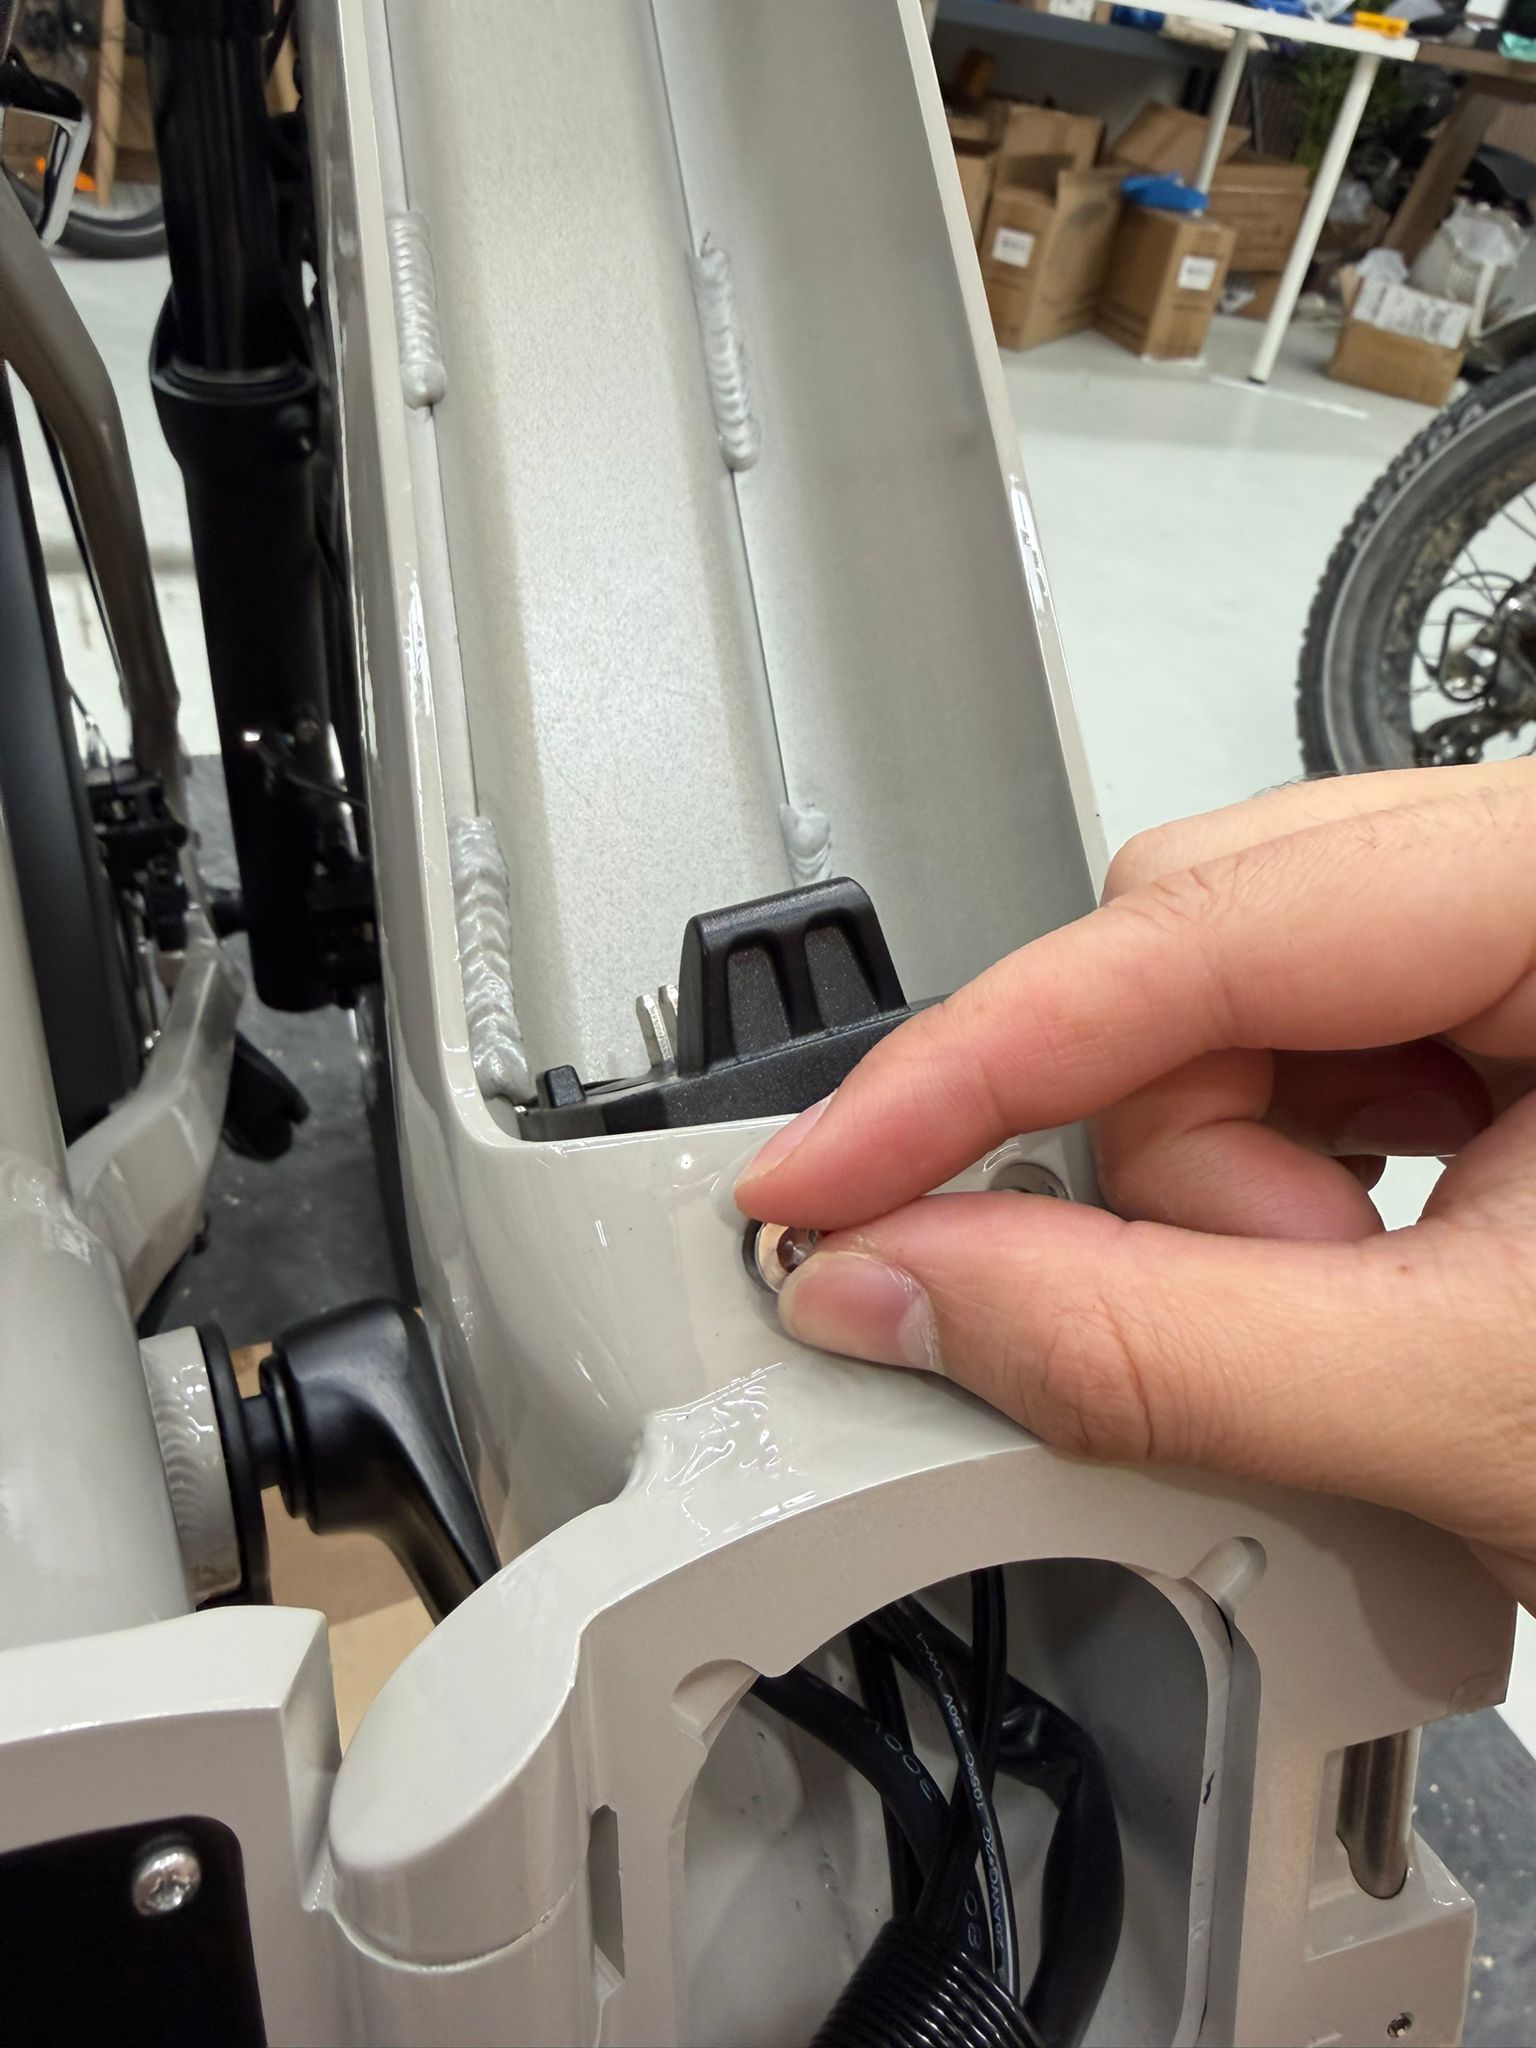
- Use a T25 Torx key to remove the two screws securing the battery lock mechanism located at the top of the downtube.
.jpeg)
- Once the screws are removed, slide the lock directly downward and set it aside. The lock will be reinstalled after the cable replacement is complete. It is good practice to hand-tighten the screws back into the lock housing externally to ensure they are not lost. Removing the lock barrel provides the necessary clearance to access the cable.
.jpeg)
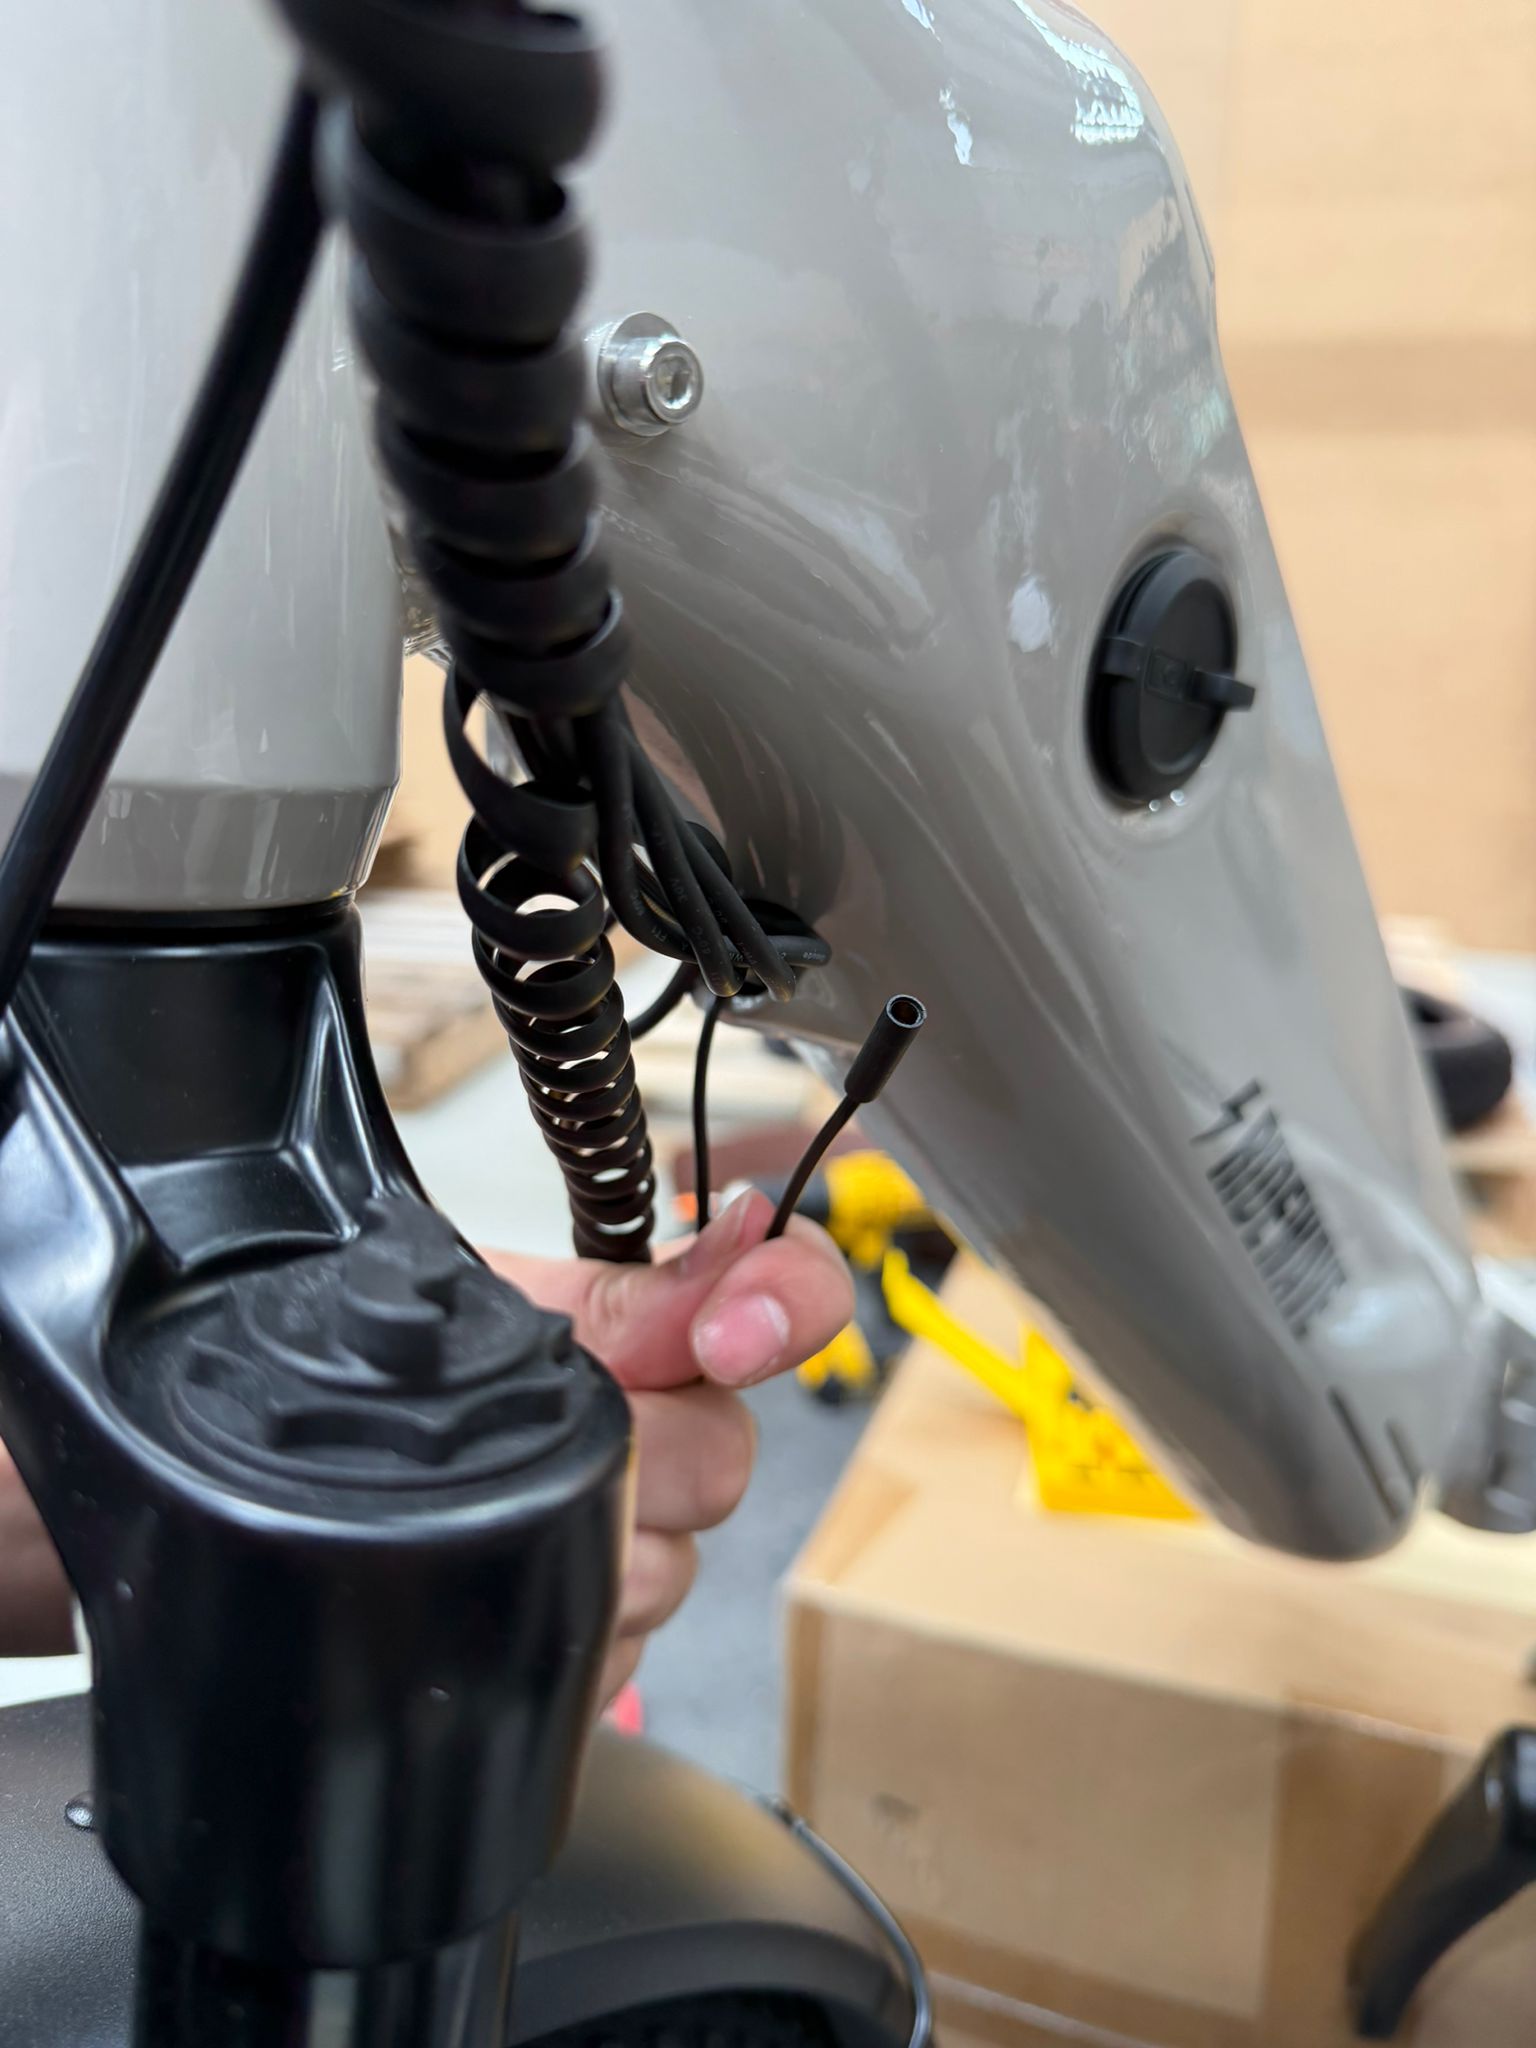
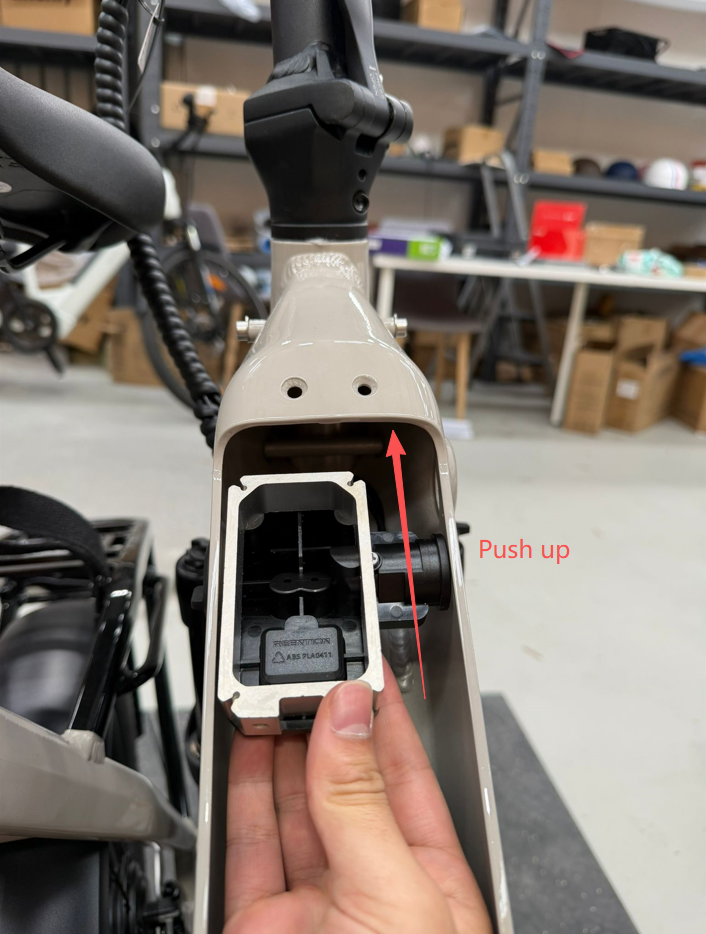
- Remove the two screws securing the battery terminal at the bottom of the downtube using the same T25 Torx key.
.jpeg)
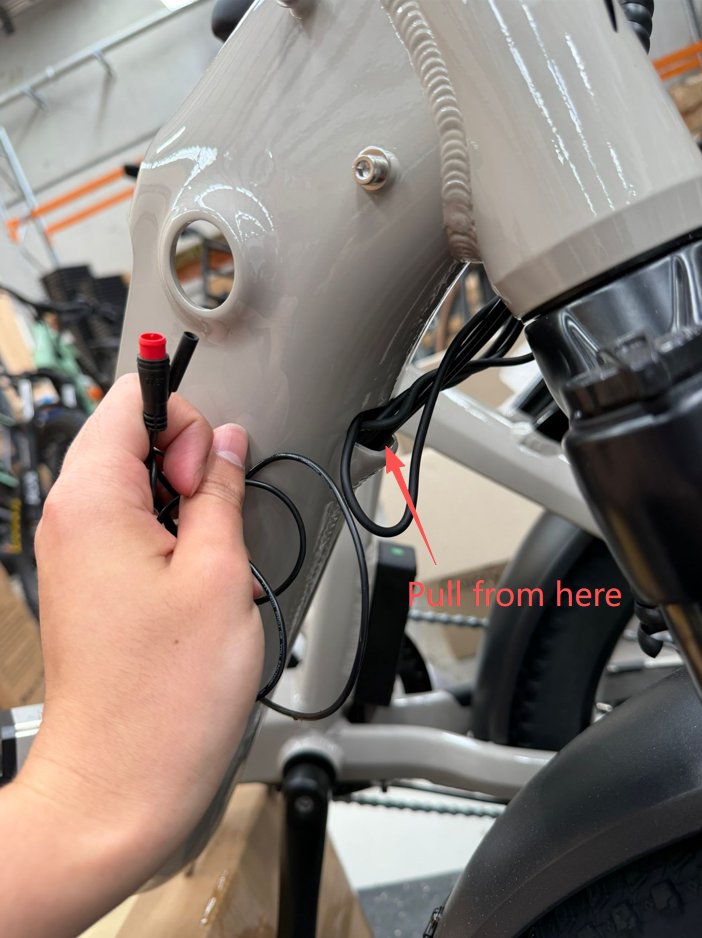
- Allow the terminal to hang safely outside of the bike frame, resting against the side of the downtube. Ensure you do not tug on the terminal, as this will place unnecessary stress on the connected wiring.
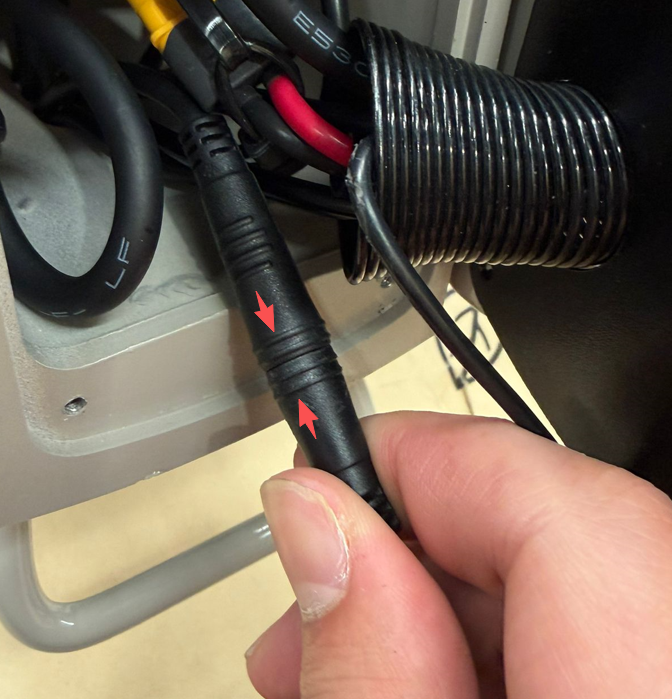
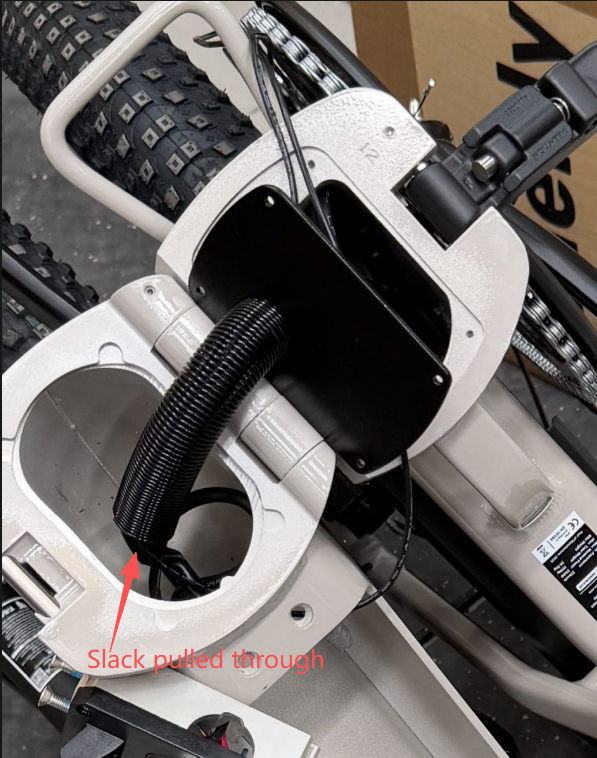
- Back at the main hinge of the bike, extract the male connector from the coiled spring cable guide that passes through the black mounting plate. If the connector becomes lodged within the spring guard, gently spread the coils apart to expose it. While pushing the connector from the left with your thumb, apply light tension to the bundle of cables from the right side of the guard to create clearance. If necessary, a flat-head screwdriver or a similar blunt tool can be used to carefully pry the cable head out of the spring protector.
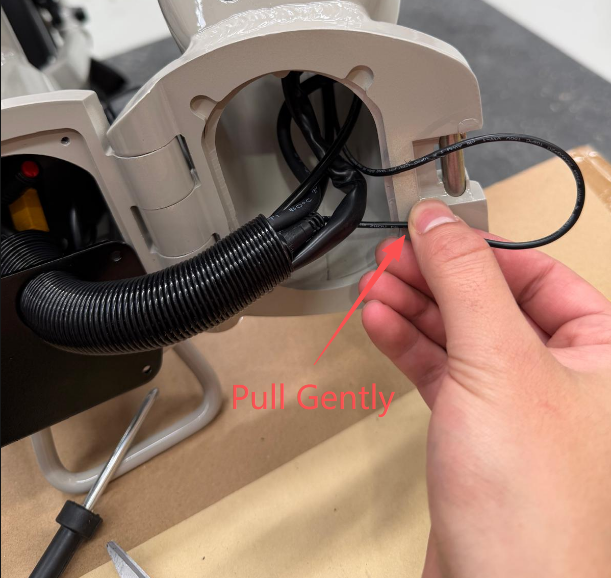
- Once the male connector is free, withdraw the cable from the downtube through the exit point located just behind the front forks. If you encounter resistance, do not apply excessive force that could tear the cable away from the connector head. Instead, use your fingers to reach into the top of the downtube (where the lock barrel was previously positioned) to loosen and maneuver the other cables, ensuring the connector has a clear path to slide through.
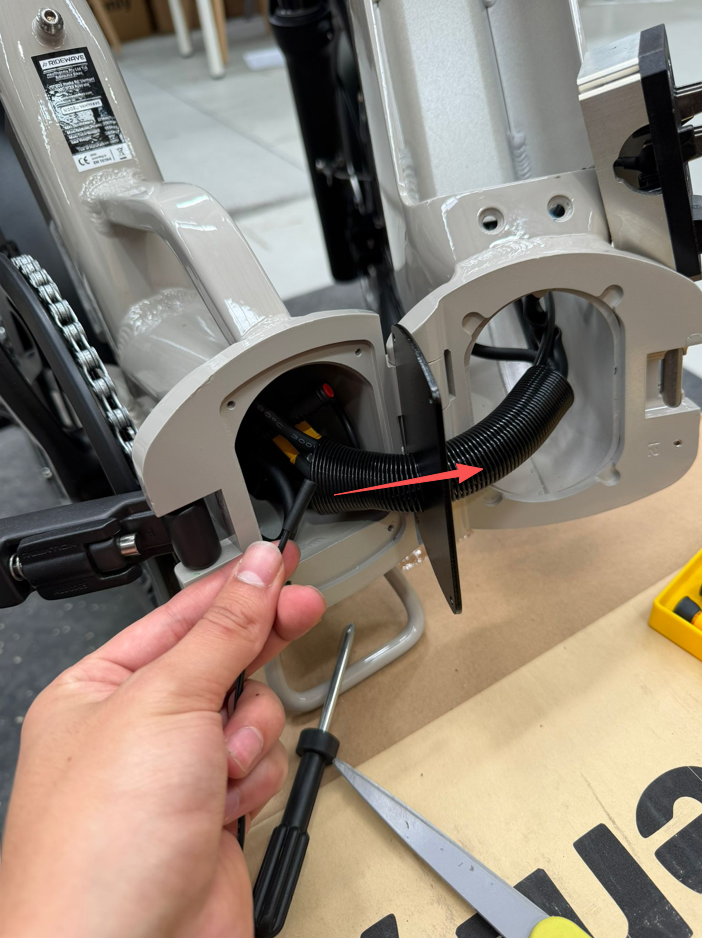
- Pass the thinner black connector of the new front light cable through the spring cable guard from left to right. Pull the slack through until there is just enough length to reconnect the red terminals on the left side of the main fold.
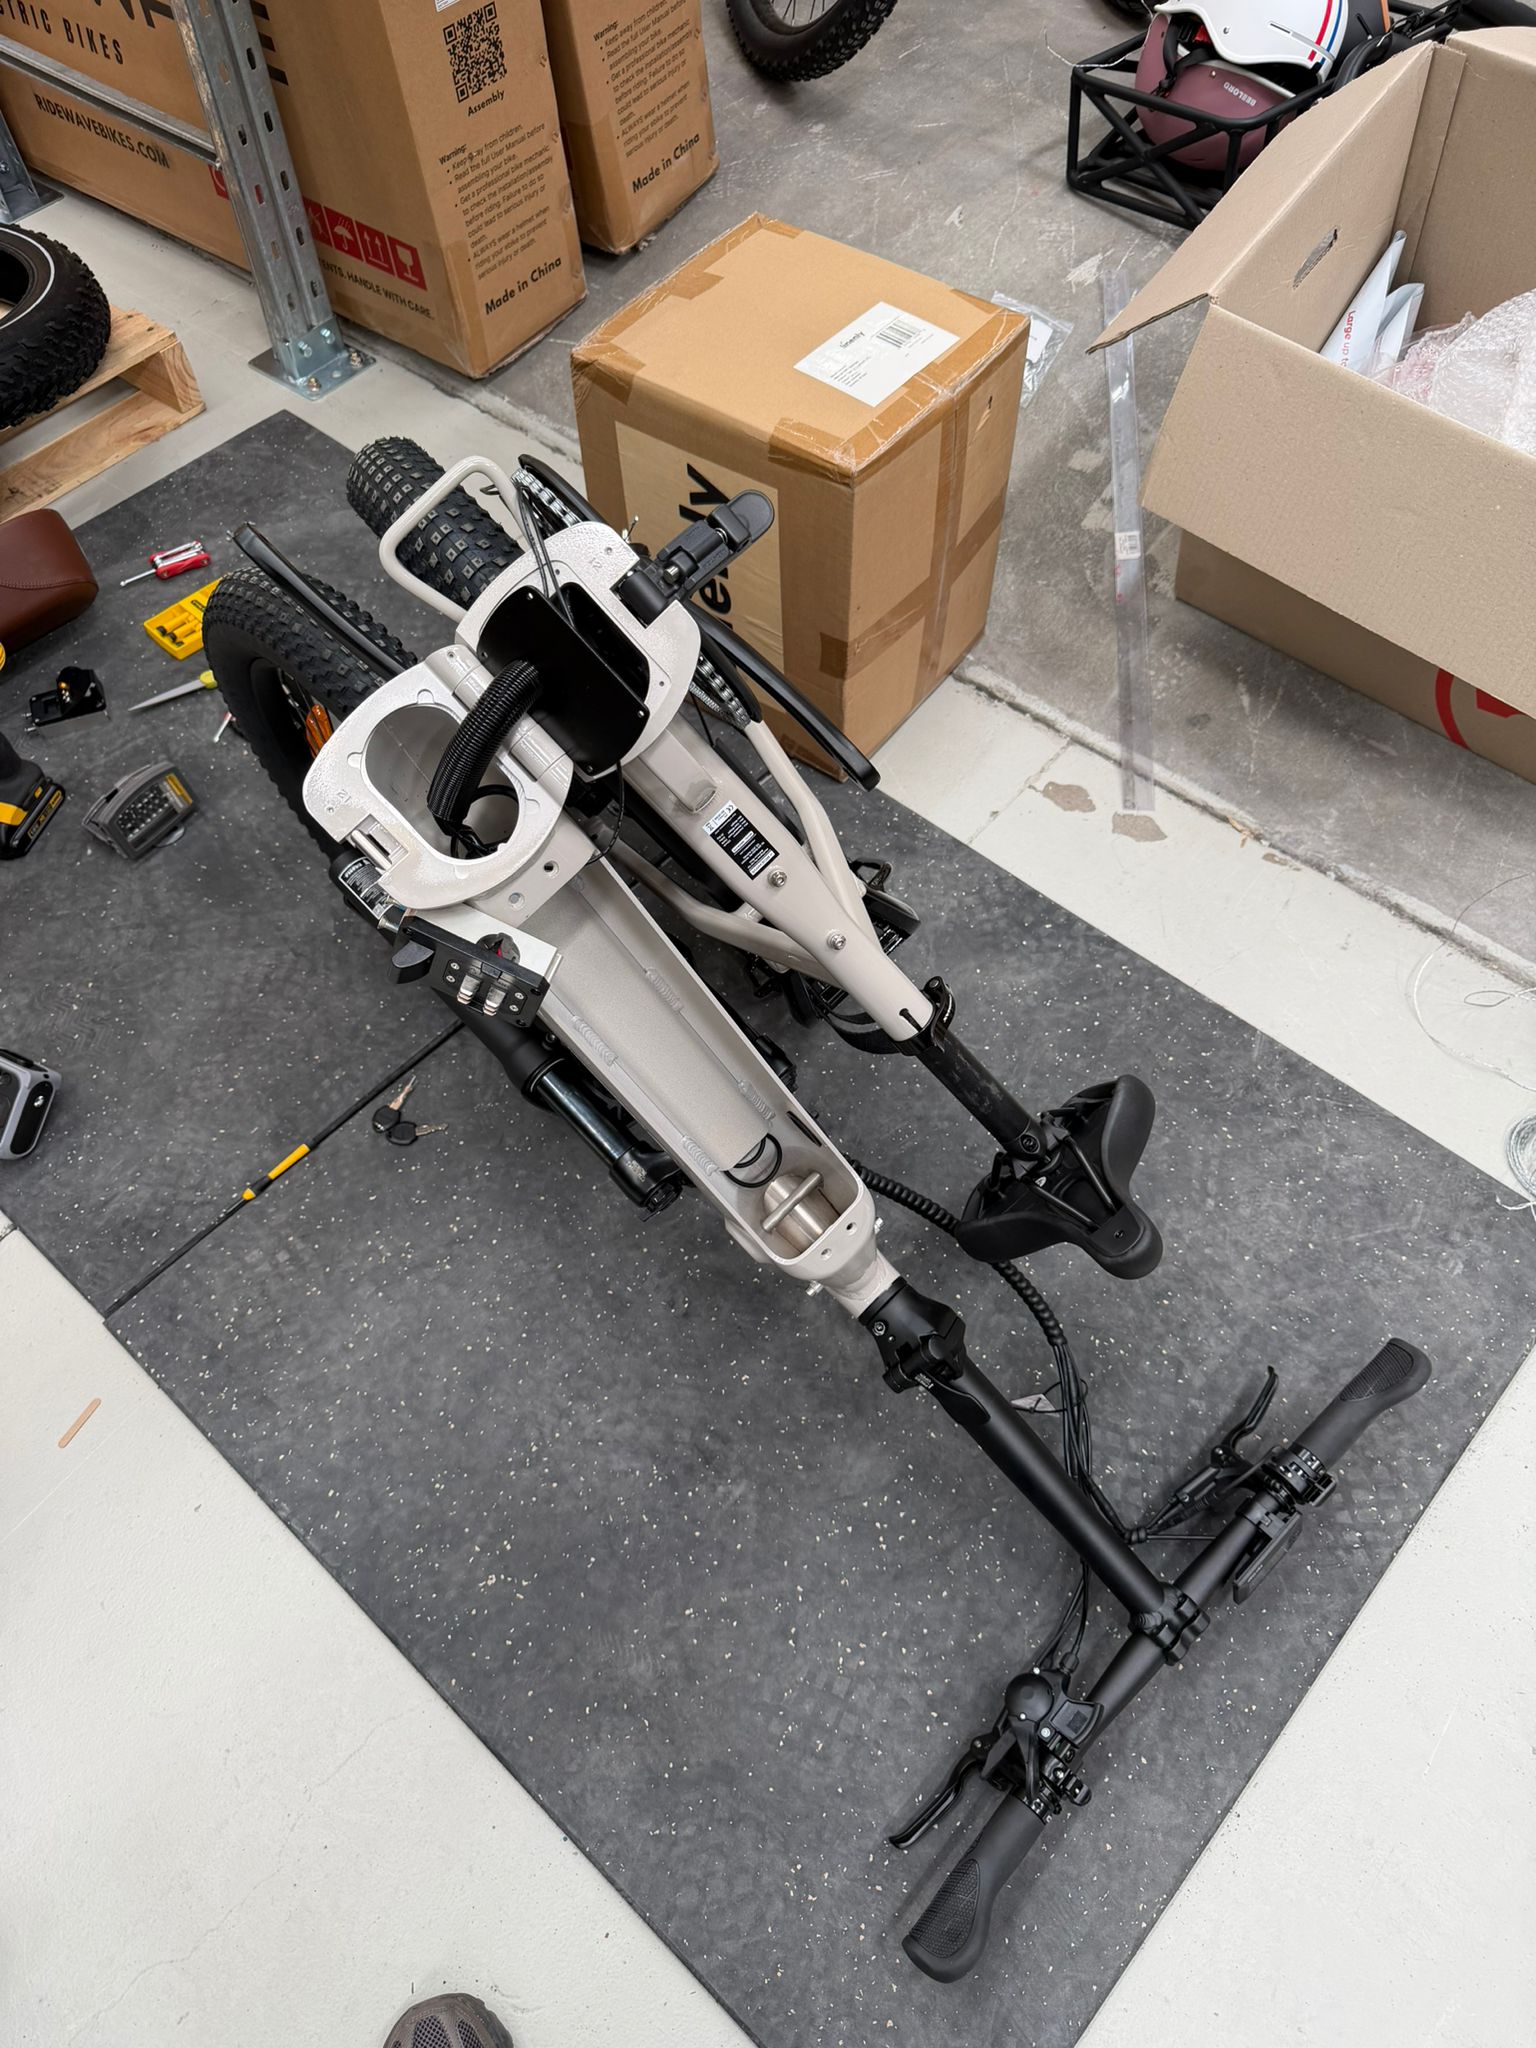
- To route the new cable through the downtube, it is most efficient to feed the thinner connector from the fold toward the front fork exit. Rest the Miniwave upside down on its handlebars; this allows gravity to assist as the connector passes through the downtube housing. Note: Before flipping the Miniwave, place a soft cloth, foam, or cardboard underneath the handlebars. This will protect the display screen, throttle, and control buttons from being scratched or damaged while the bike is resting upside down.
- Feed the black connector into the downtube, starting just above the spring guard and heading toward the opening where the lock barrel was removed. To create clearance, pull the existing cables at the fork exit point to one side and continue feeding the new cable through until the connector becomes visible.
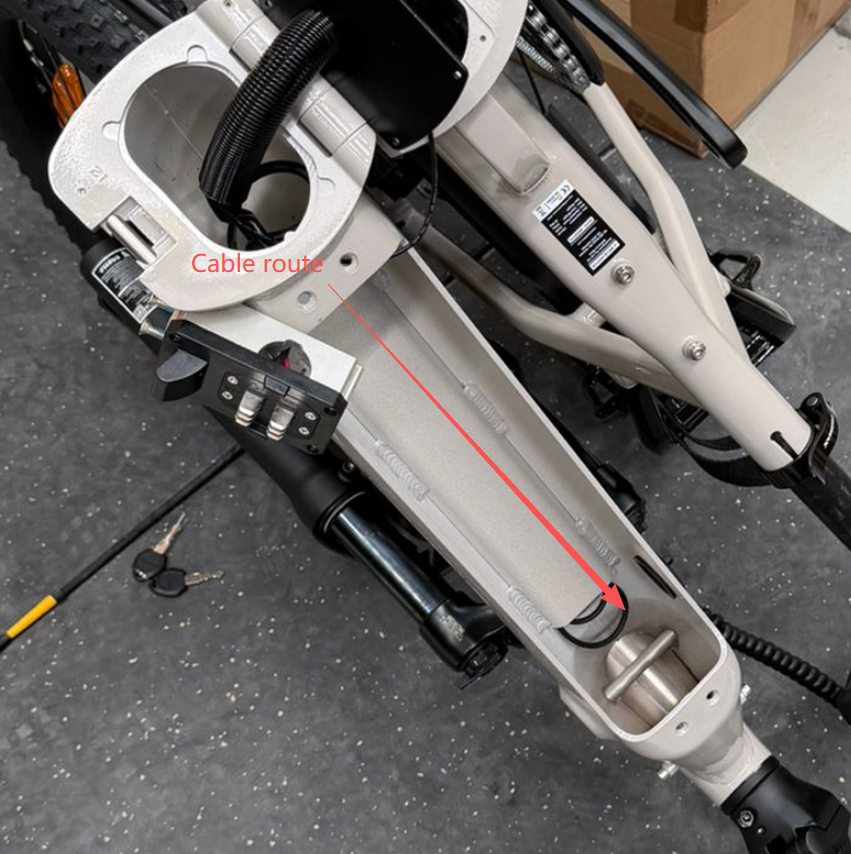
- Use your fingers to guide the connector head through the downtube exit, then pull the remaining slack through from the front of the bike.
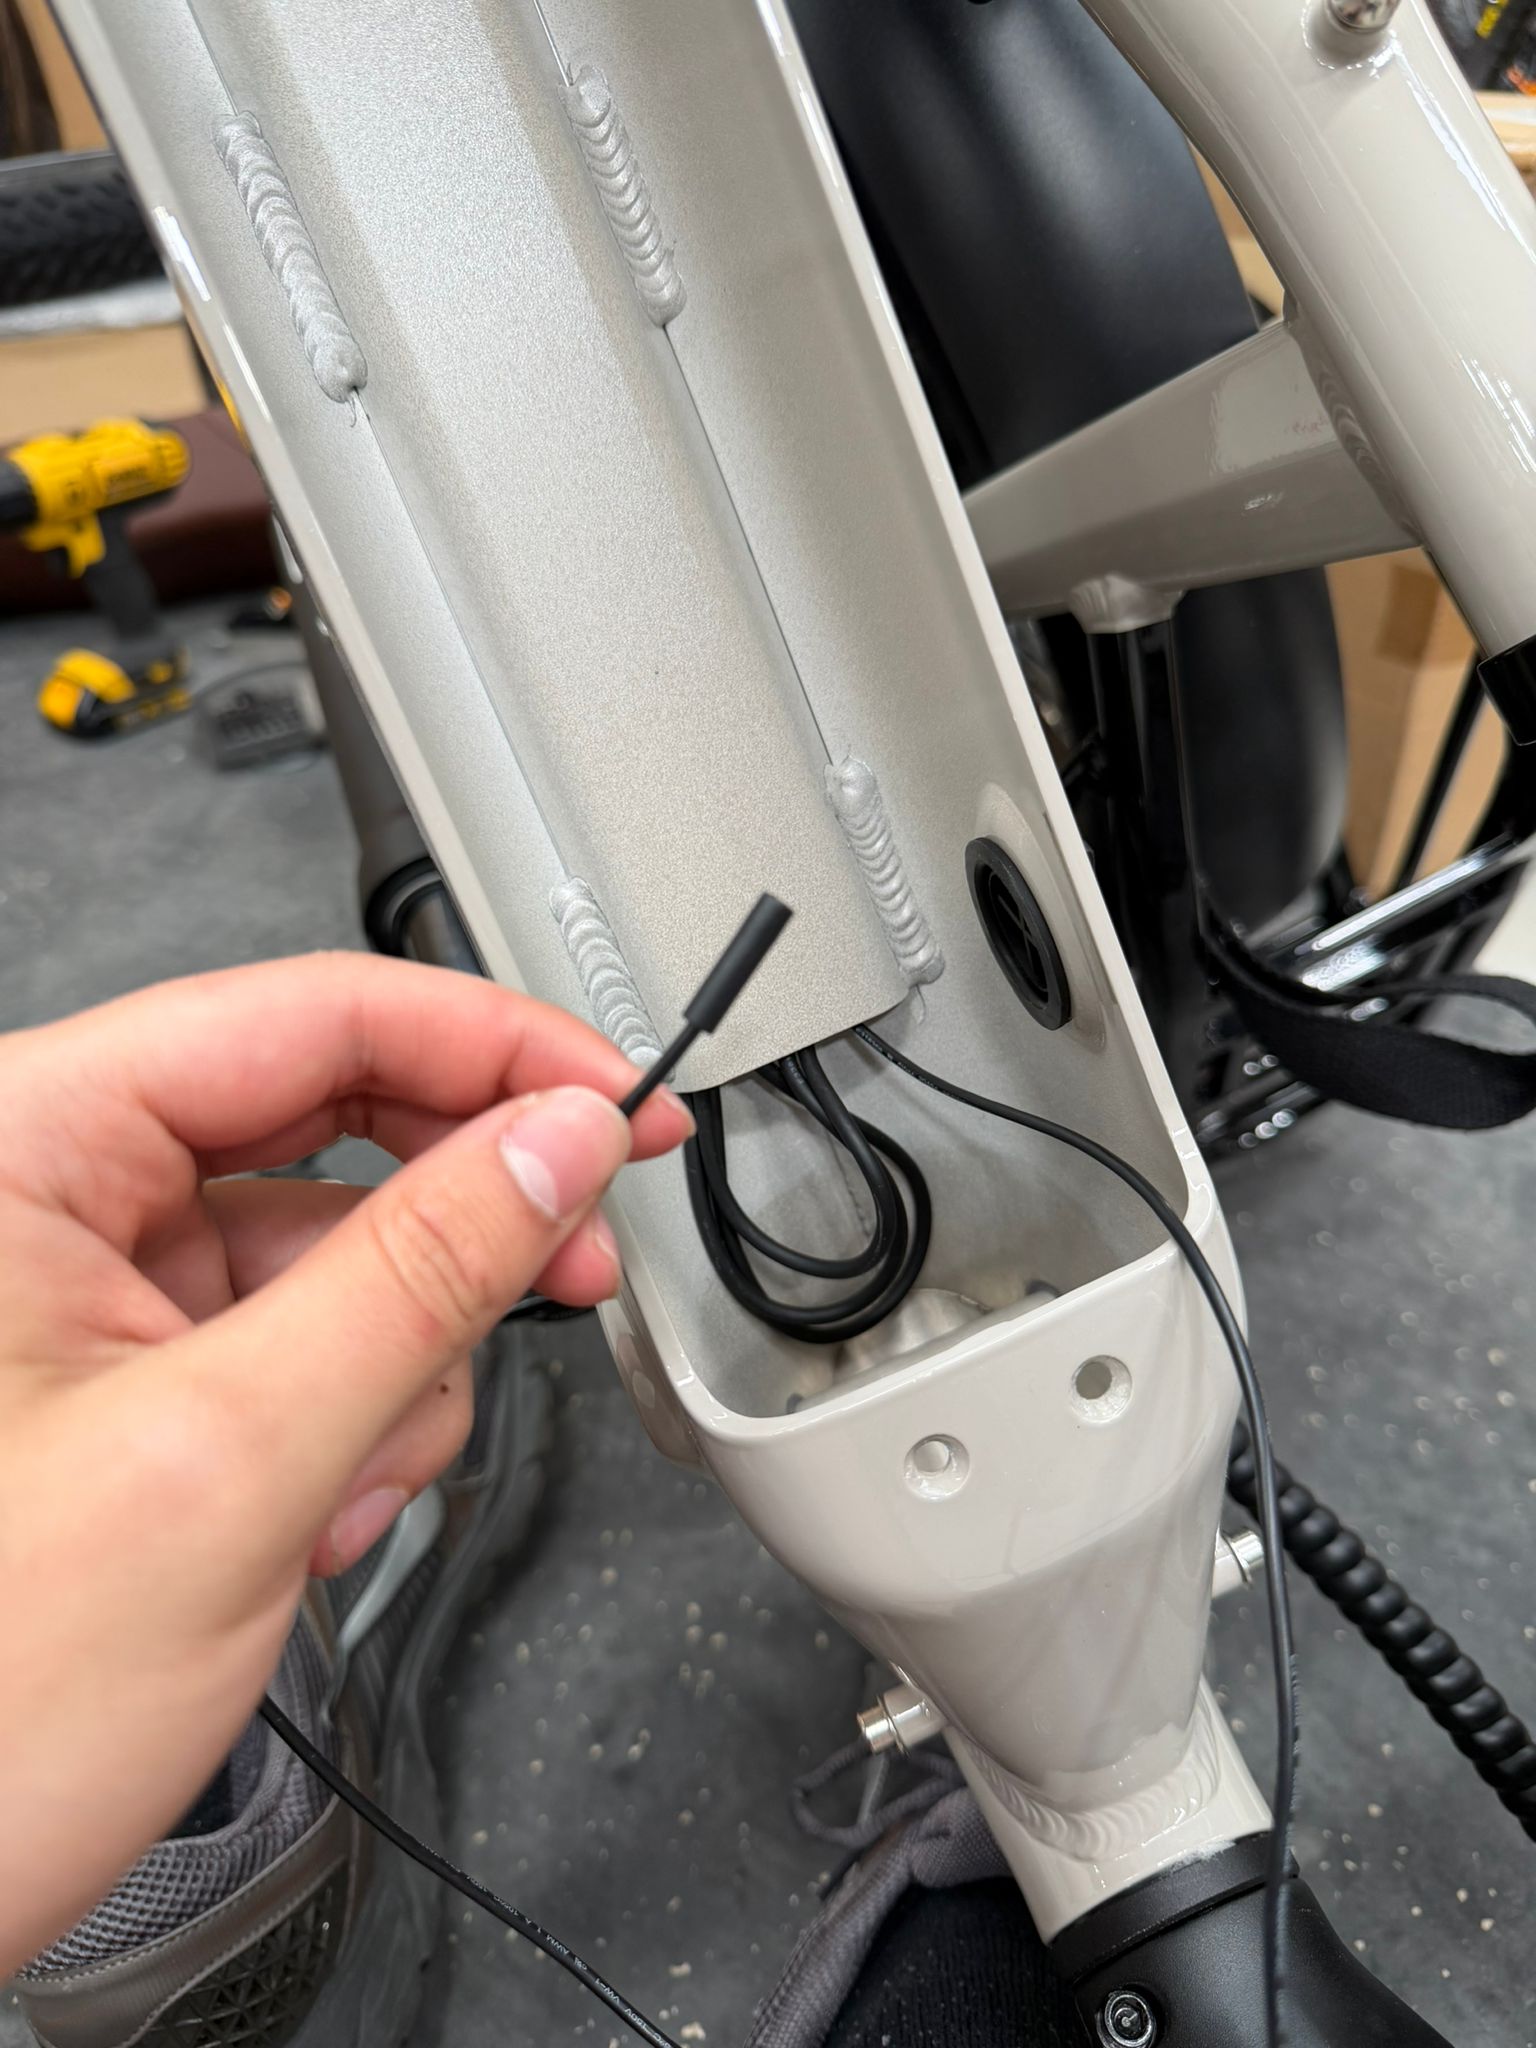
- Plug the red connector back in on the left side of the fold, then tuck the connection into the frame cavity to ensure the black securing plate can be reinstalled without obstruction. Secure the black plate into position using a Phillips head screwdriver.
- Reinstall the lock barrel and battery terminal using the T25 Torx key. For the easiest alignment, hold each component firmly in position while hand-tightening the screws first to ensure the threads are properly seated; once they are started, use the T25 key to tighten them until secure. Ensure that you turn the key to the unlocked position in the lock barrel before re-inserting the Miniwave battery.
- Re-wrap the cables at the front of the Miniwave using the pigtail cable organiser. If there is excess slack at the front end, gently push the additional cable into the downtube exit behind the forks before completing the wrap. Please refer to the provided photo for the correct orientation and appearance of the completed cable management.