Urban Ebike Assembly ManualUpdated 2 months ago
Pre-Assembly Tips
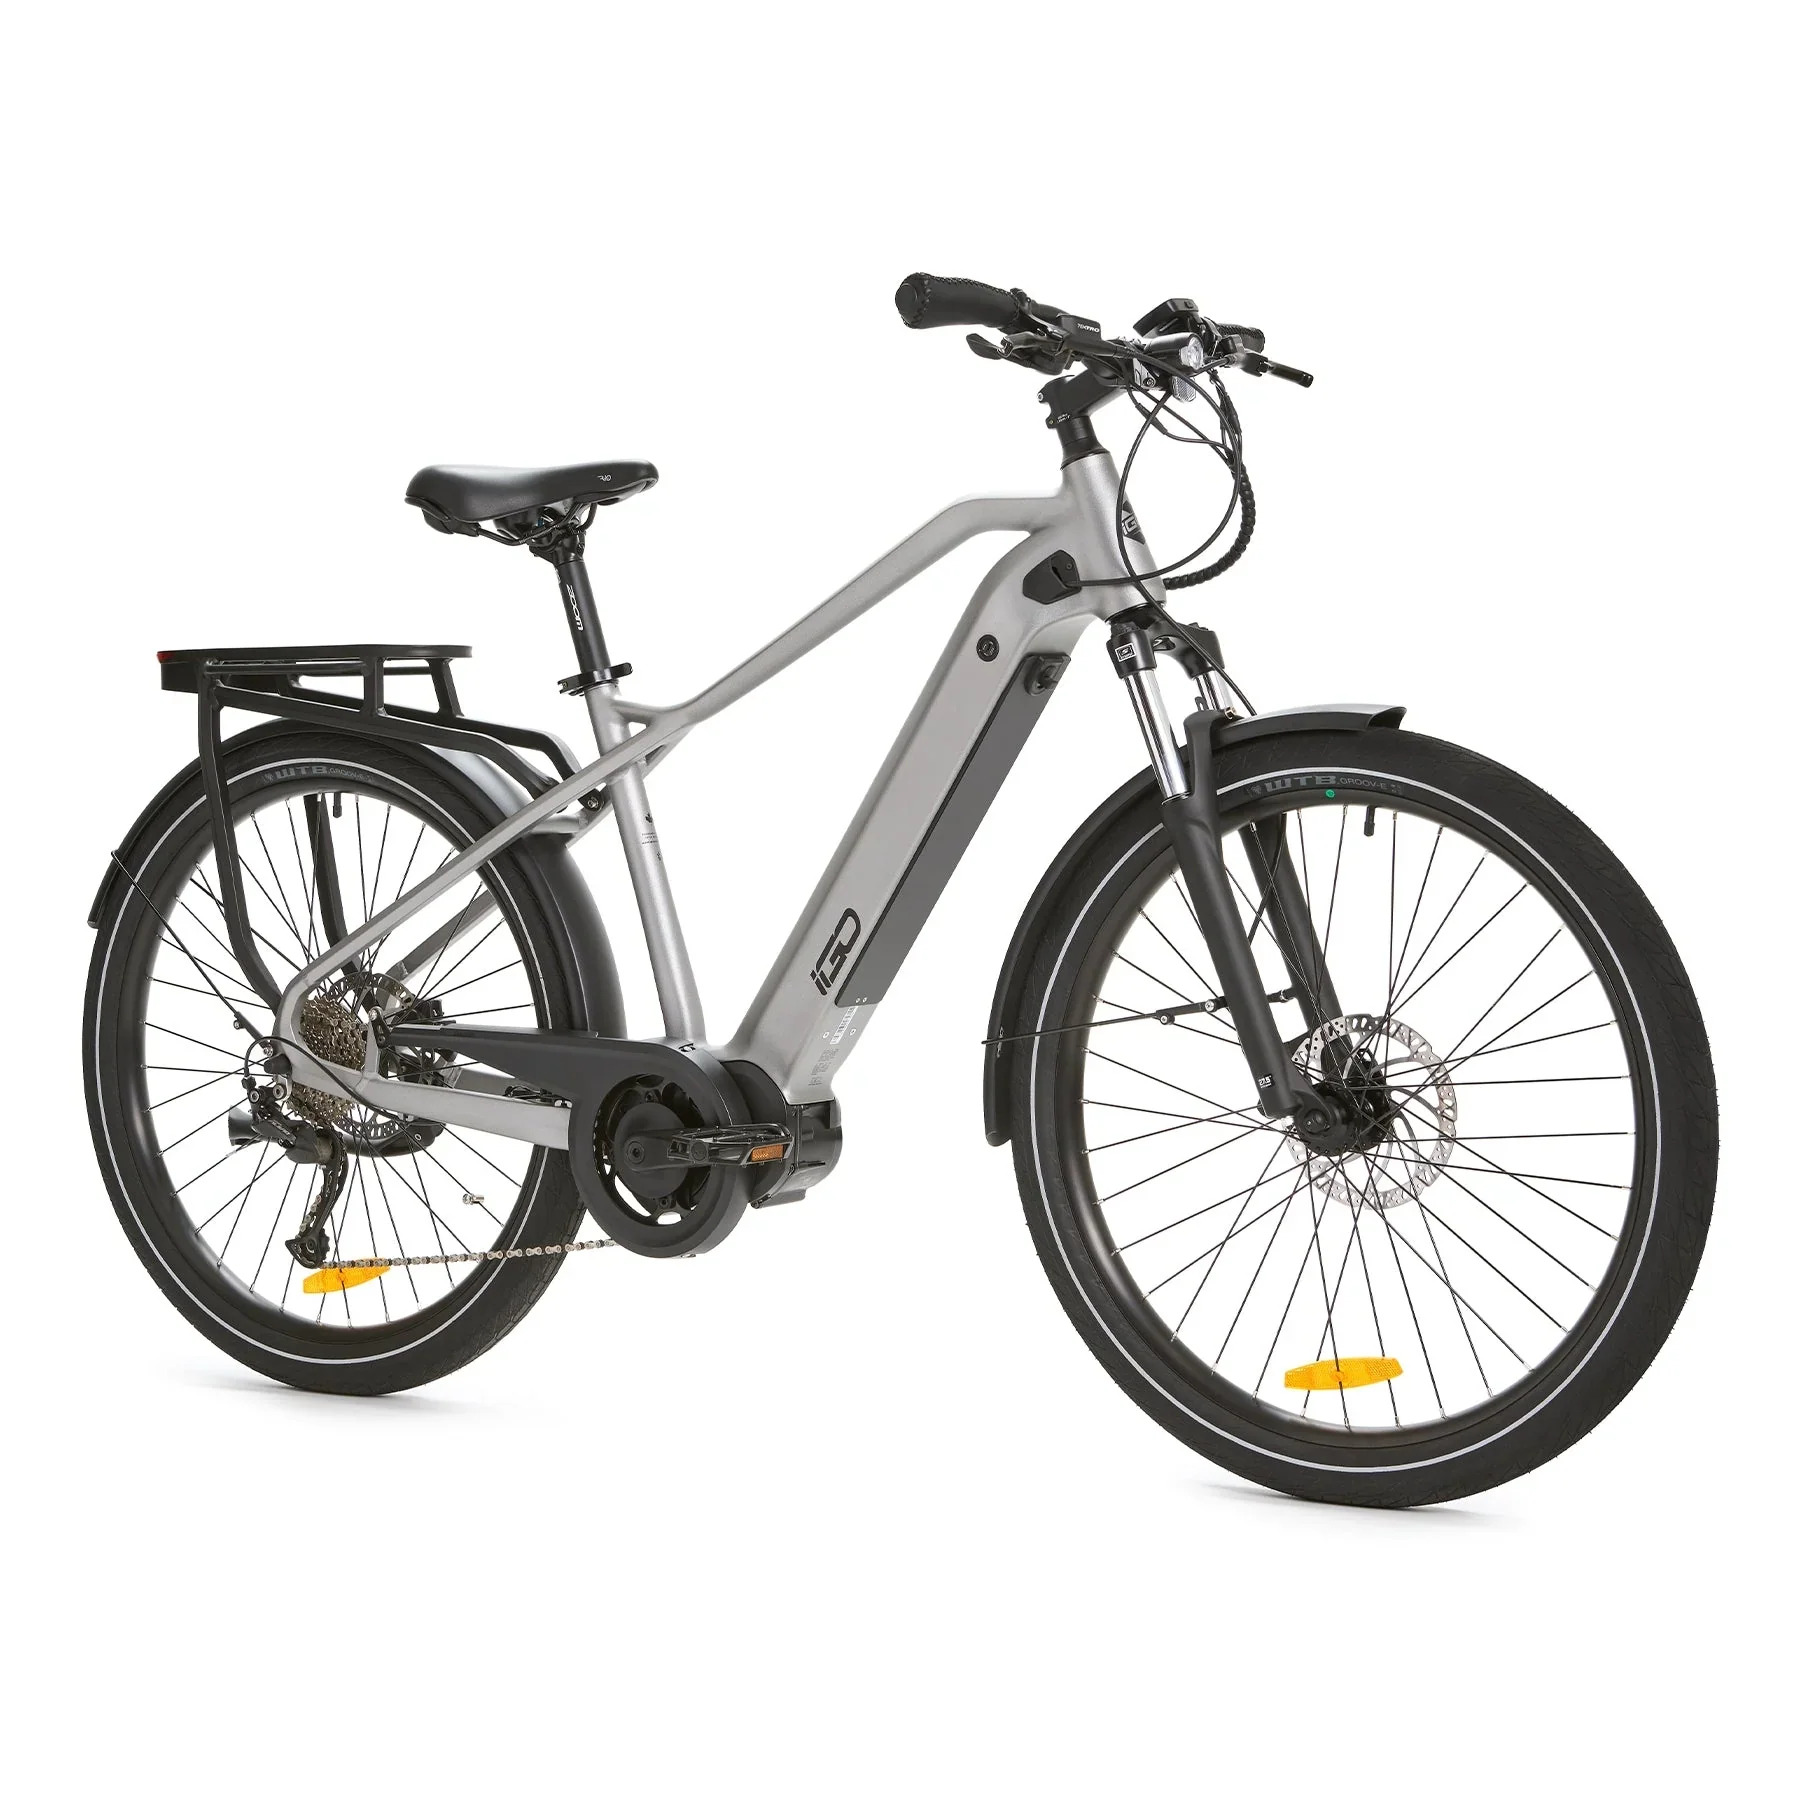
Welcome to the assembly manual for the Ridewave Urban eBike. This guide will take you step-by-step through the process of assembling your new bike. Please read through the instructions carefully before starting to ensure a smooth assembly process. The bike will arrive 80% assembled (electronics are pre-assembled). Preparing your eBike is an exciting process! Here are some tips to ensure everything goes smoothly:
Keep a clean, open workspace for the assembly process.
Avoid using sharp tools near cables or wires to prevent accidental damage.
If you’re not confident assembling the bike, consider visiting a local bike shop for professional assistance.
Contents of the Box
The box includes the following items:
Ridewave Urban eBike
User Manual
Battery charger
Maintenance grease
Battery keys
Pedals
Toolkit bag containing:
8/10mm Wrench
13/15mm Wrench
13/16mm Wrench
2.5mm Hex Key
3mm Hex Key
4mm Hex Key
5mm Hex Key
6mm Hex Key
7mm Hex Key
Step 1: Unpack the Bike
Opening the box: Carefully open the box using scissors or a Stanley knife. Avoid cutting too deeply to prevent damaging the bike or accessories. Remove the accessories box, which contains essential tools and components.
Getting the bike ready for assembly: After removing the accessories box, lift the bike out with assistance or cut the sides of the box to make it easier to access. Remove all protective materials (foam, cardboard, zip ties, and tape). Pay extra attention to avoid cutting wires while removing zip ties. Carefully remove the front wheel, ensuring no contact with the left crank. Stand the Urban upright on the rear wheel and use a mounting stand or appropriate support to keep it stable.
Step 2: Assemble the Handlebars
Rotate the stem forward: Loosen the stem bolts using a 5mm hex key and rotate the stem so it is aligned with the front of the bike. With the forks forward, the front brake caliper should be behind the left fork.
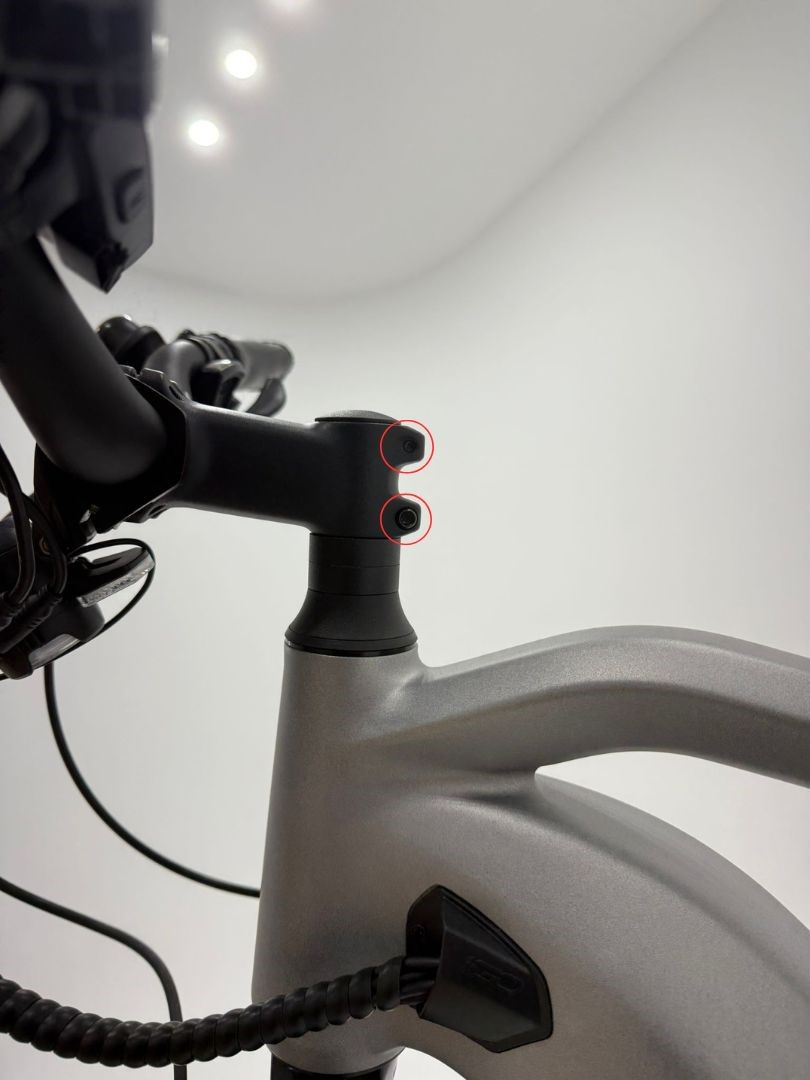
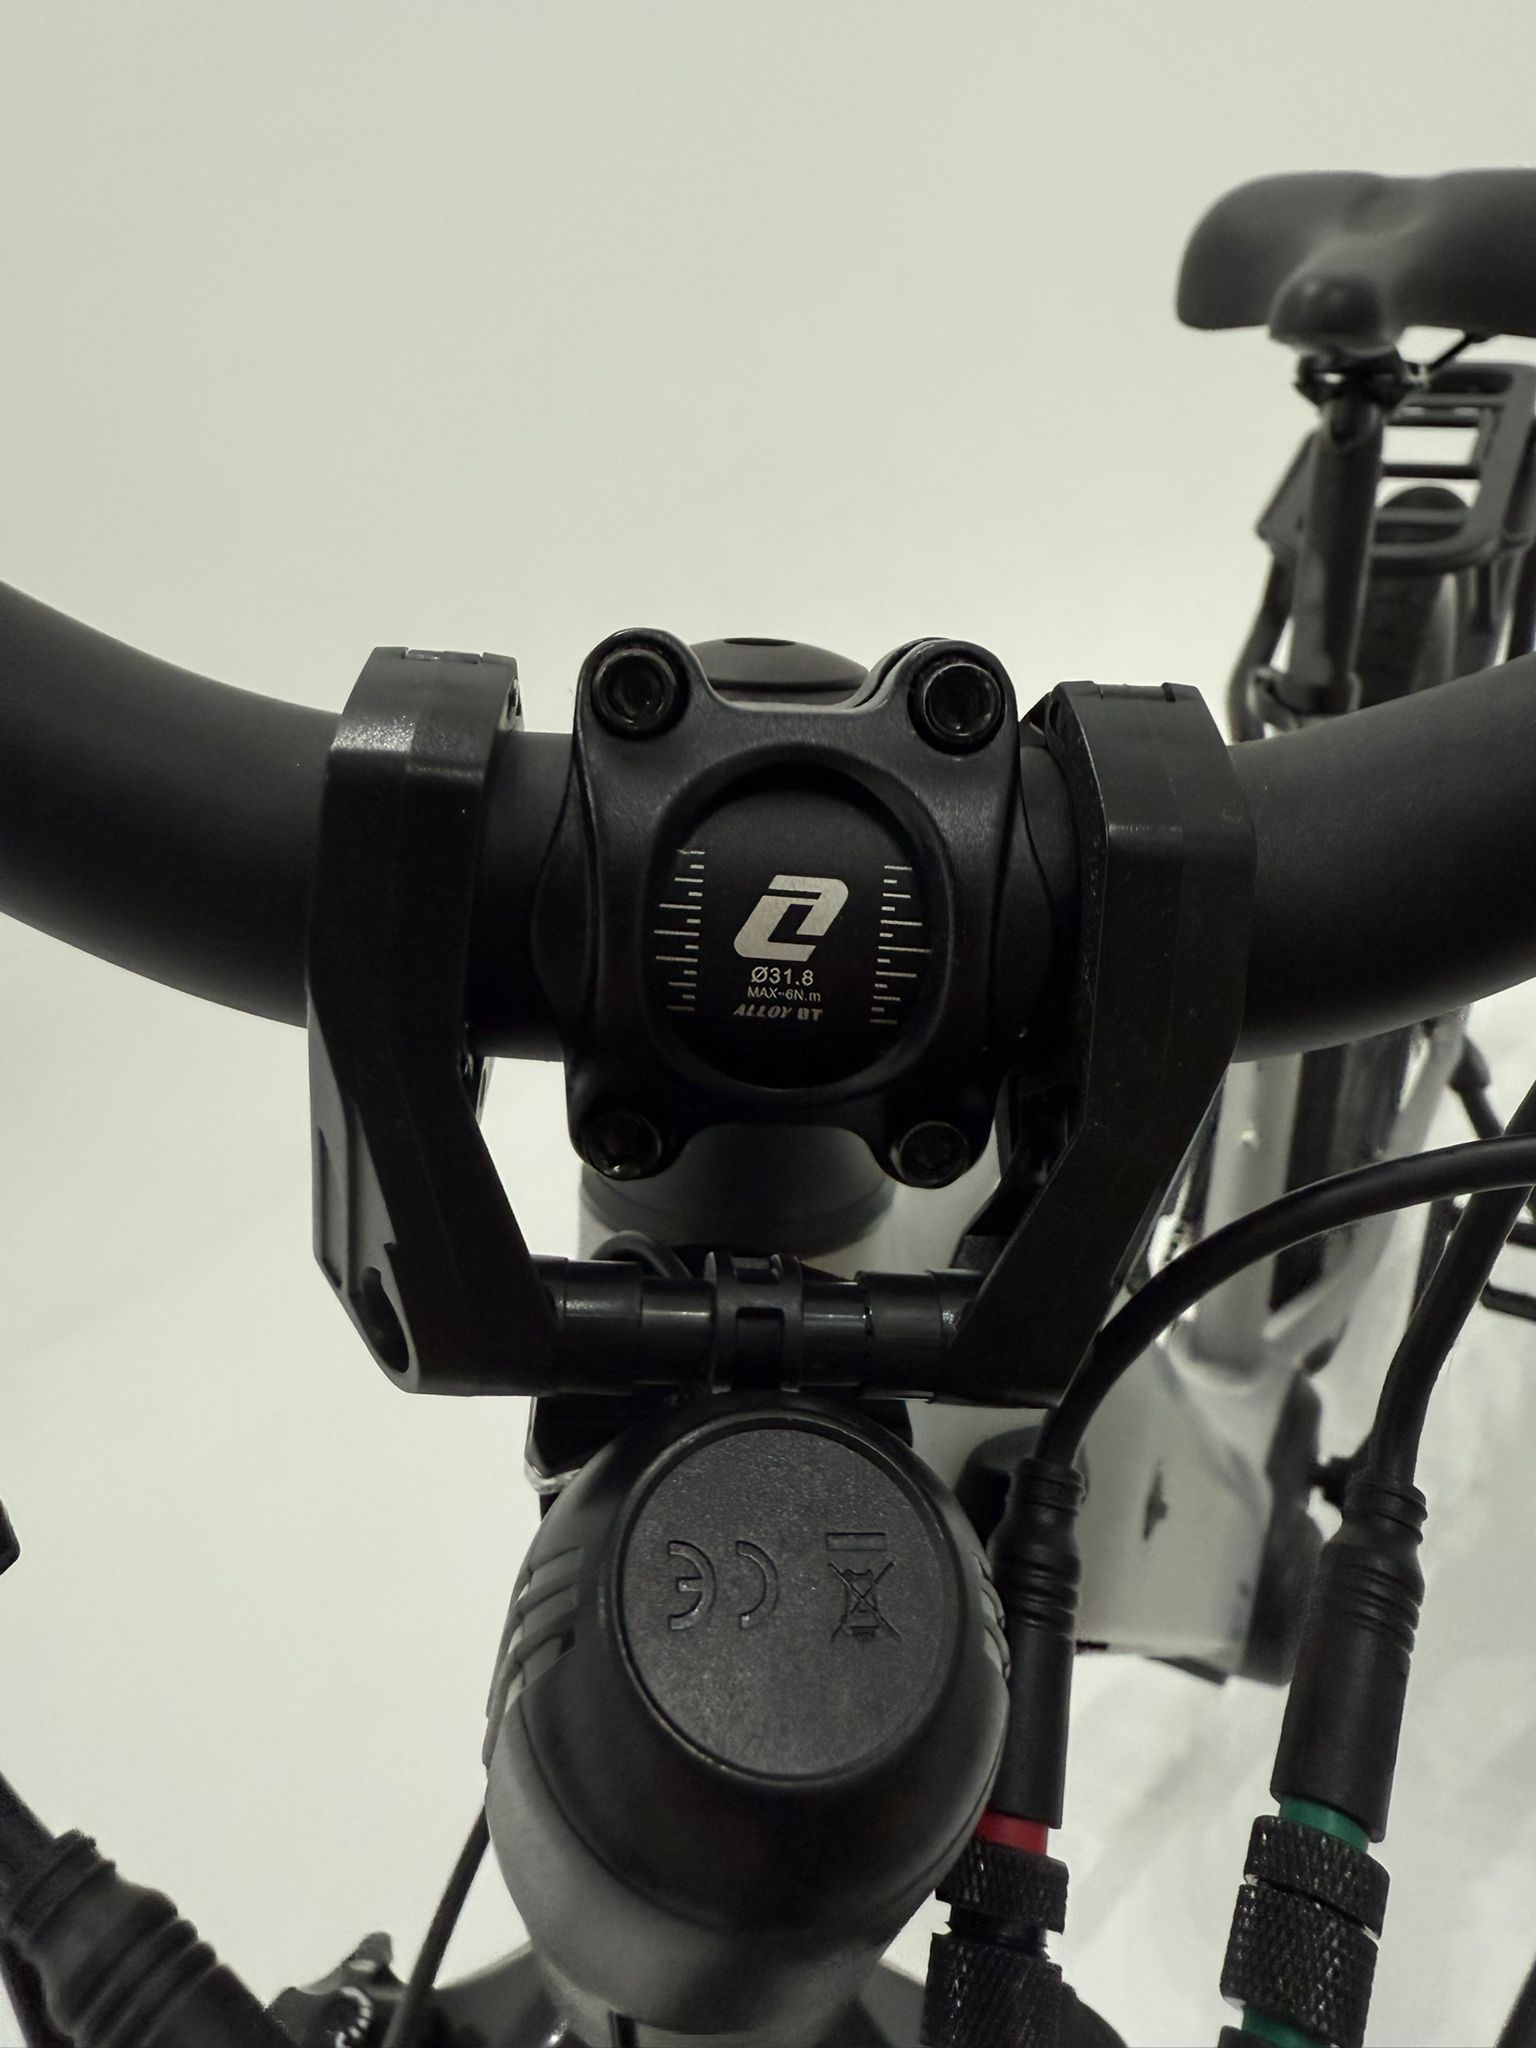
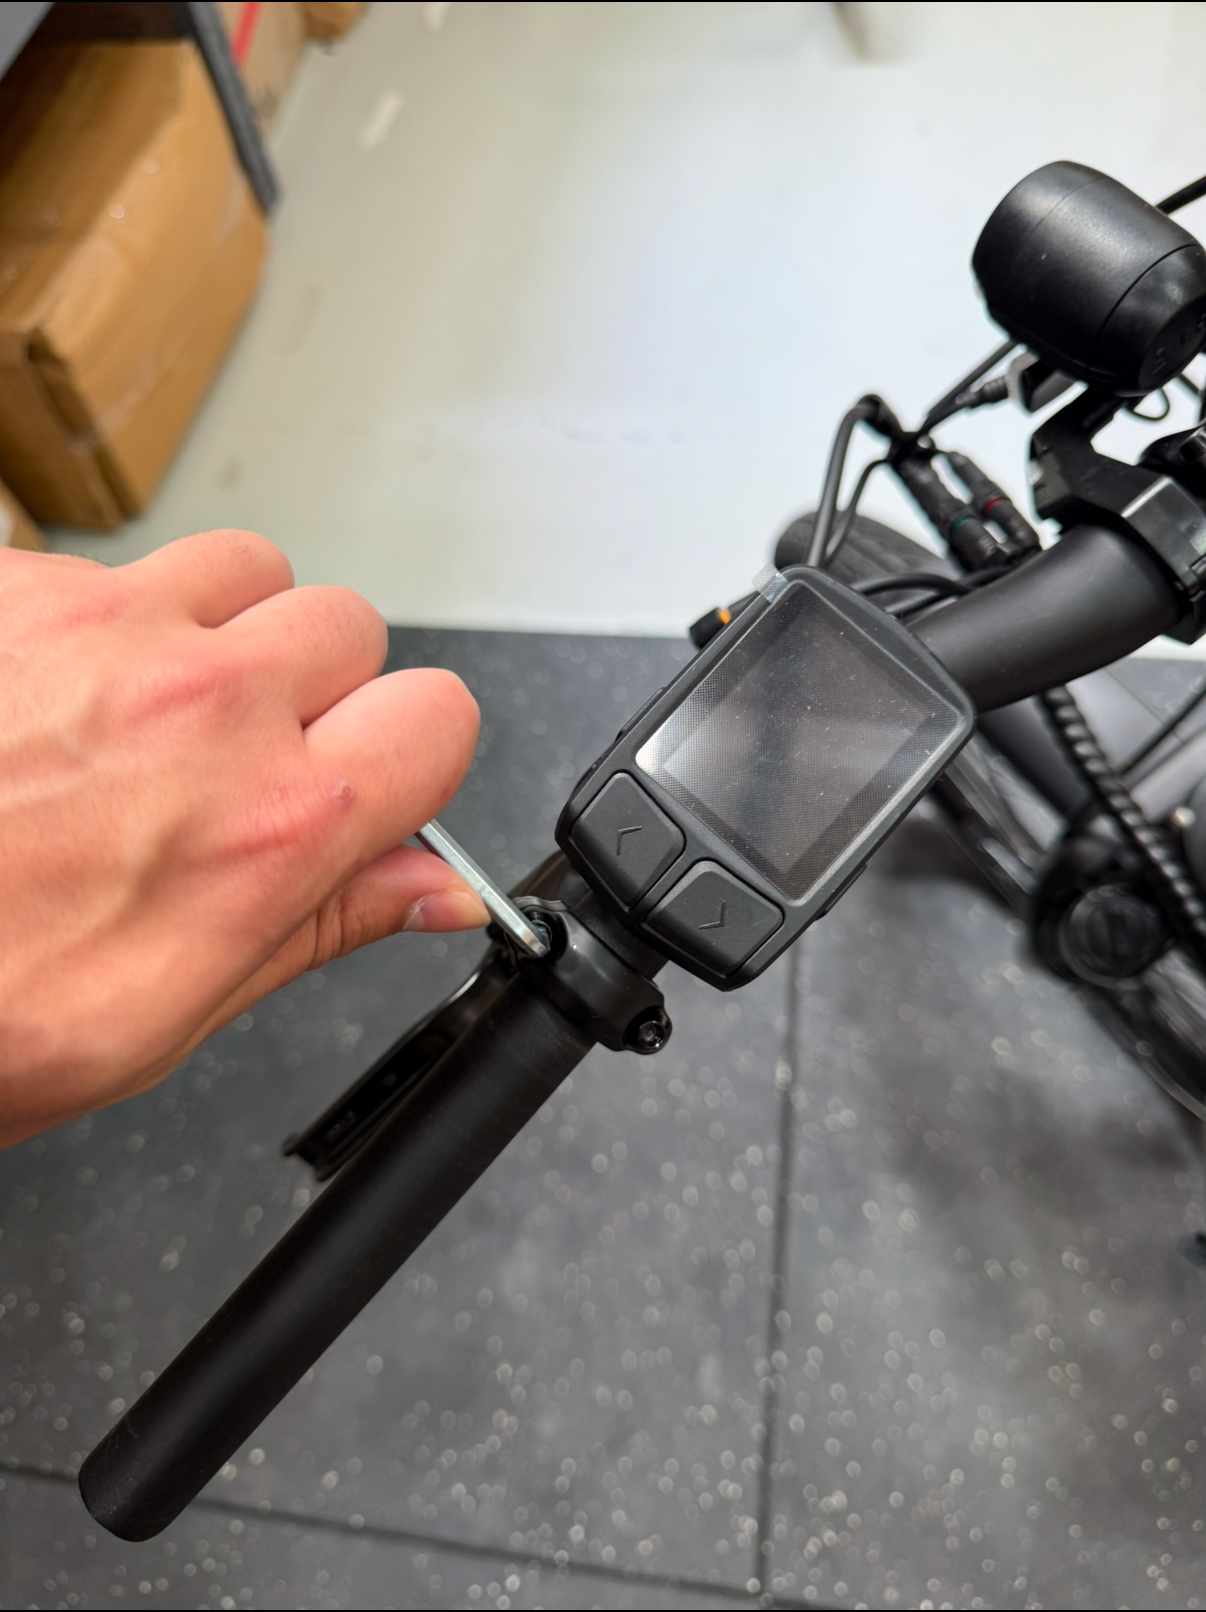
Remove the faceplate: Use a 4mm hex key to loosen and remove the four bolts on the stem faceplate.
Position the handlebars: Align the handlebars with the stem, ensuring the horizontal guidelines on the handlebars are evenly positioned within the faceplate.
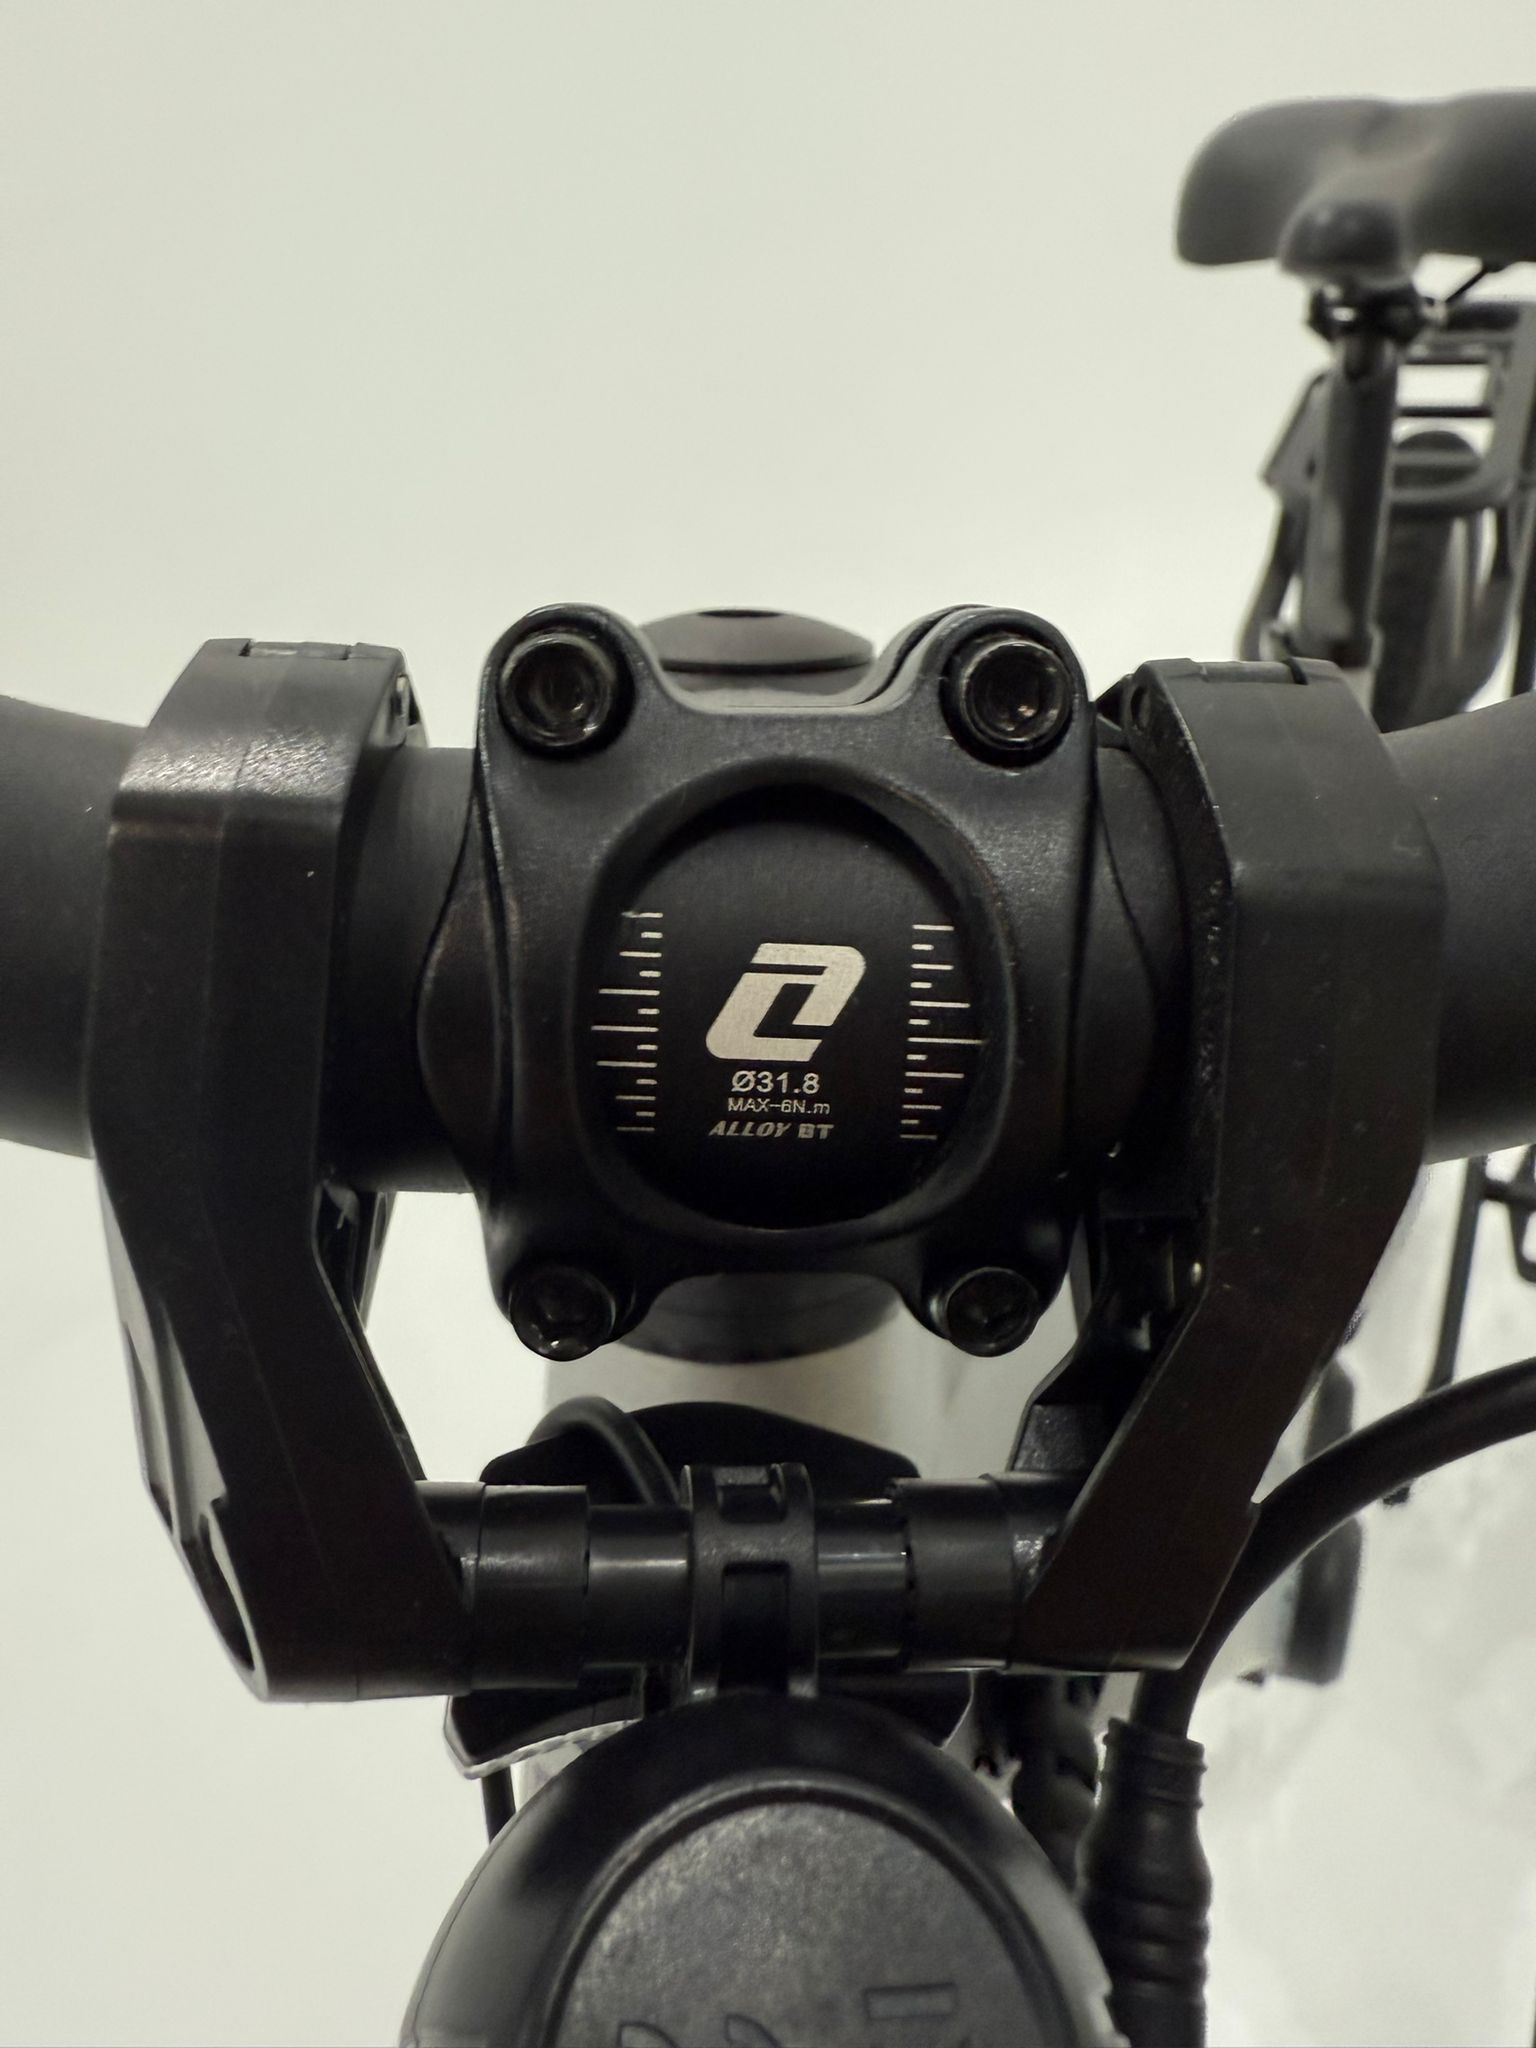
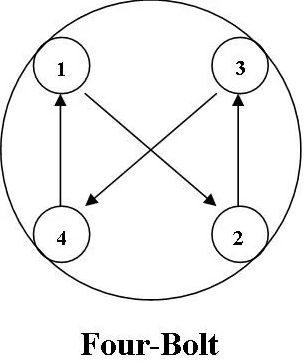
Tighten the bolts: Reattach the faceplate and tighten the bolts in an X-pattern to ensure even pressure. Tighten the bolts to 6Nm.
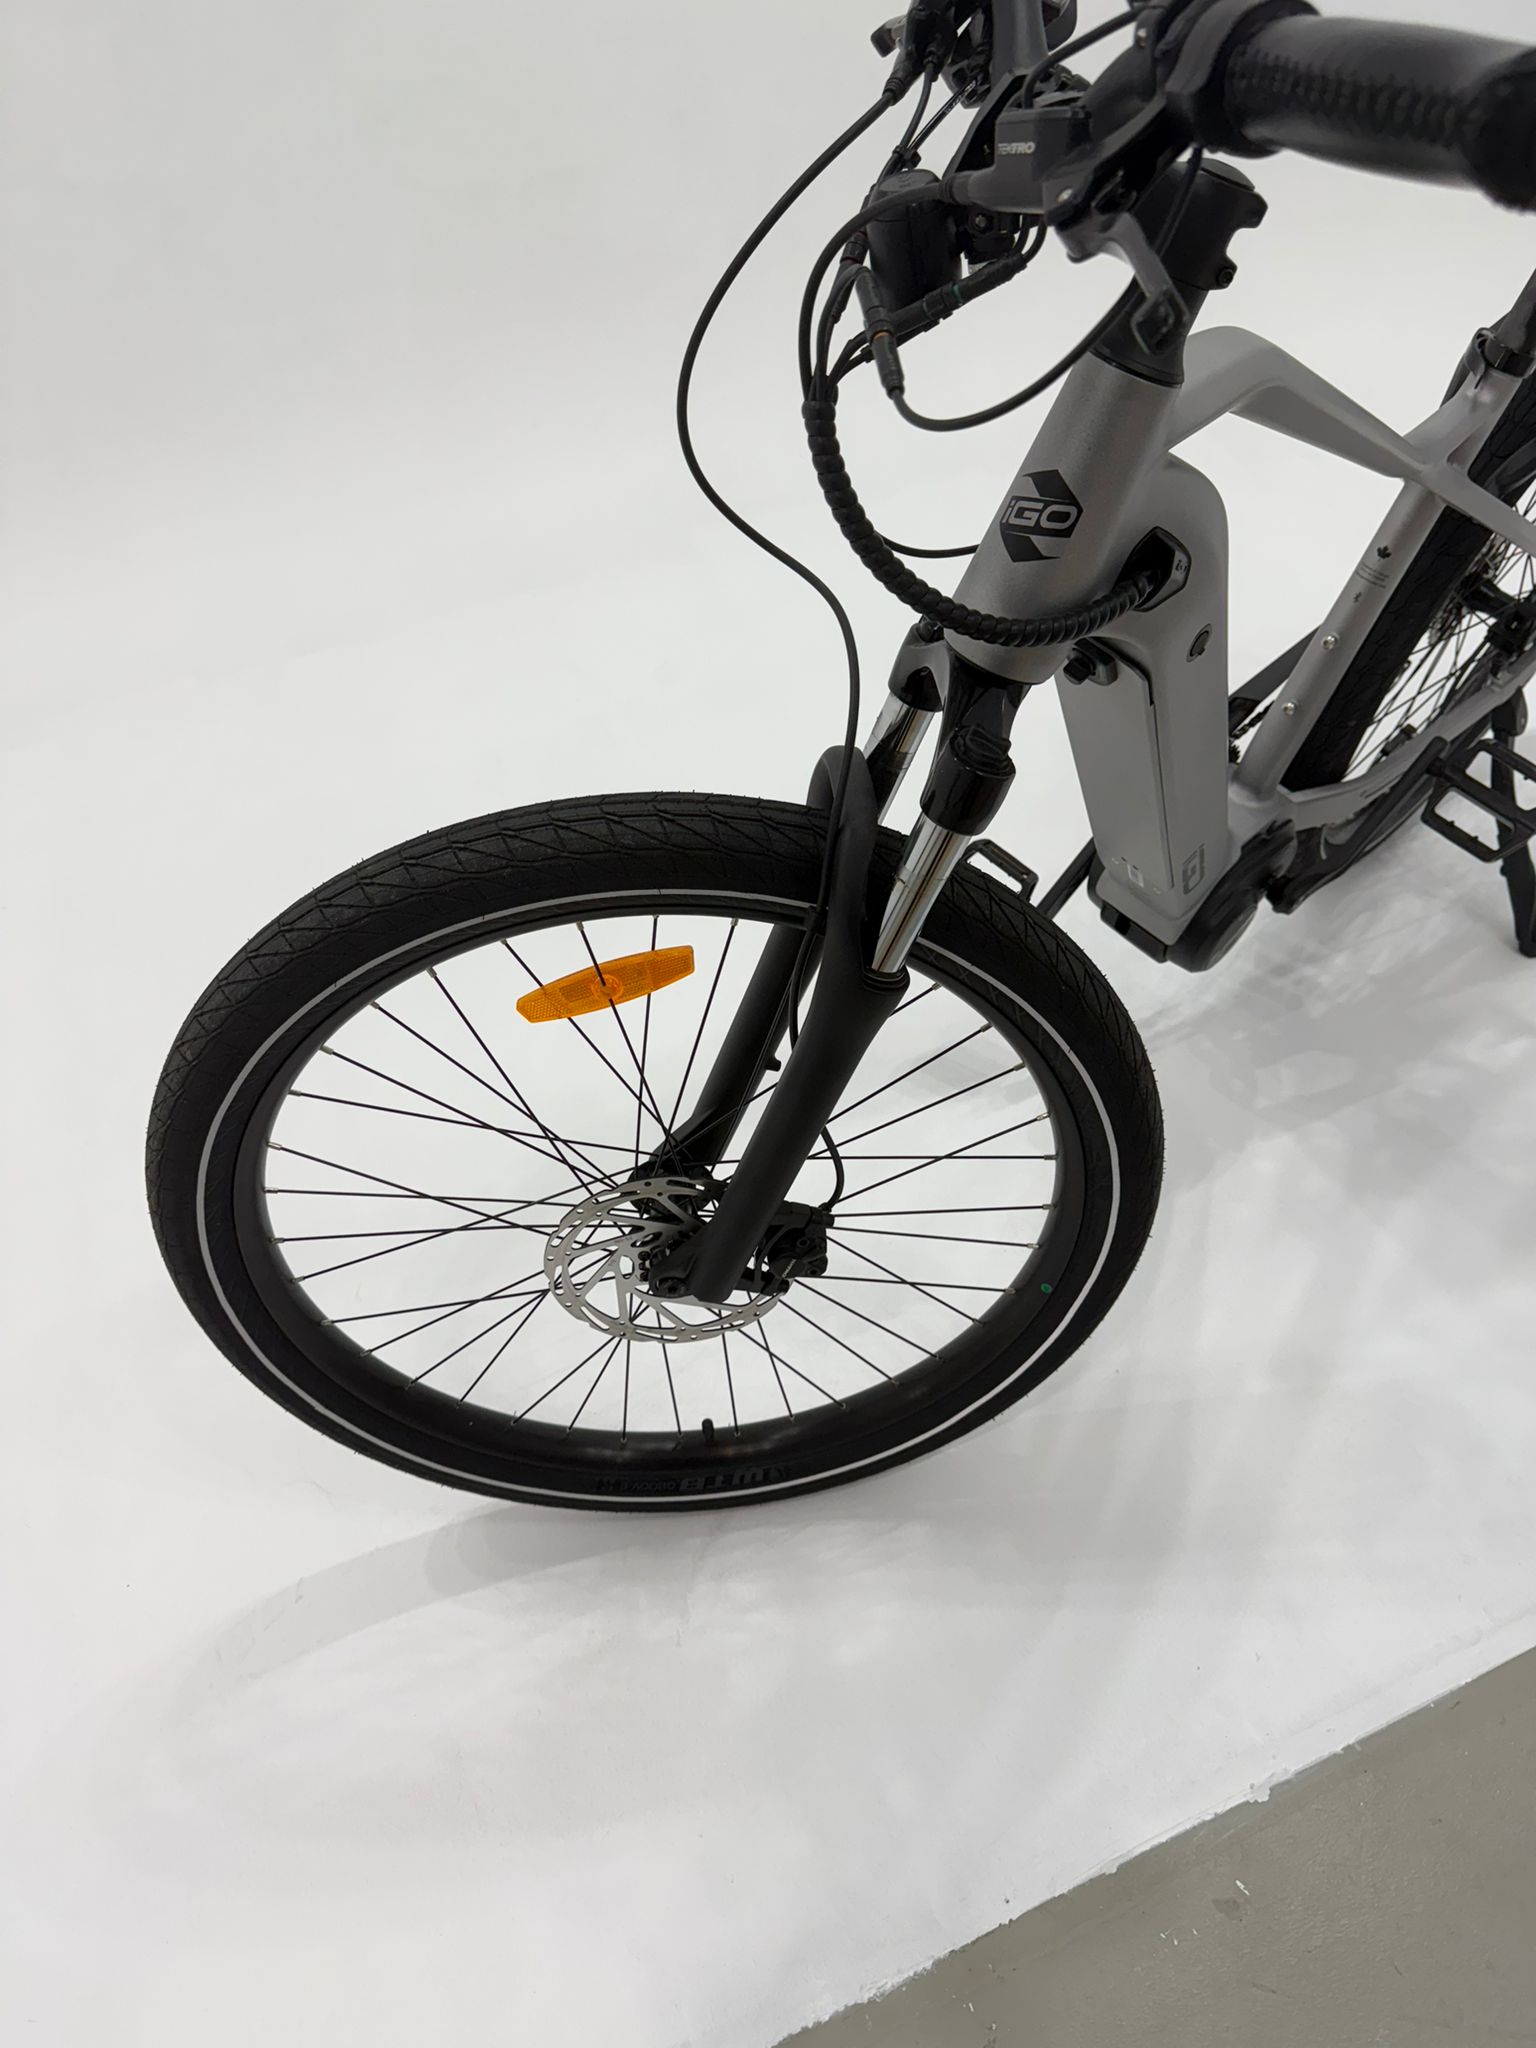
Step 3: Assemble the Front Wheel
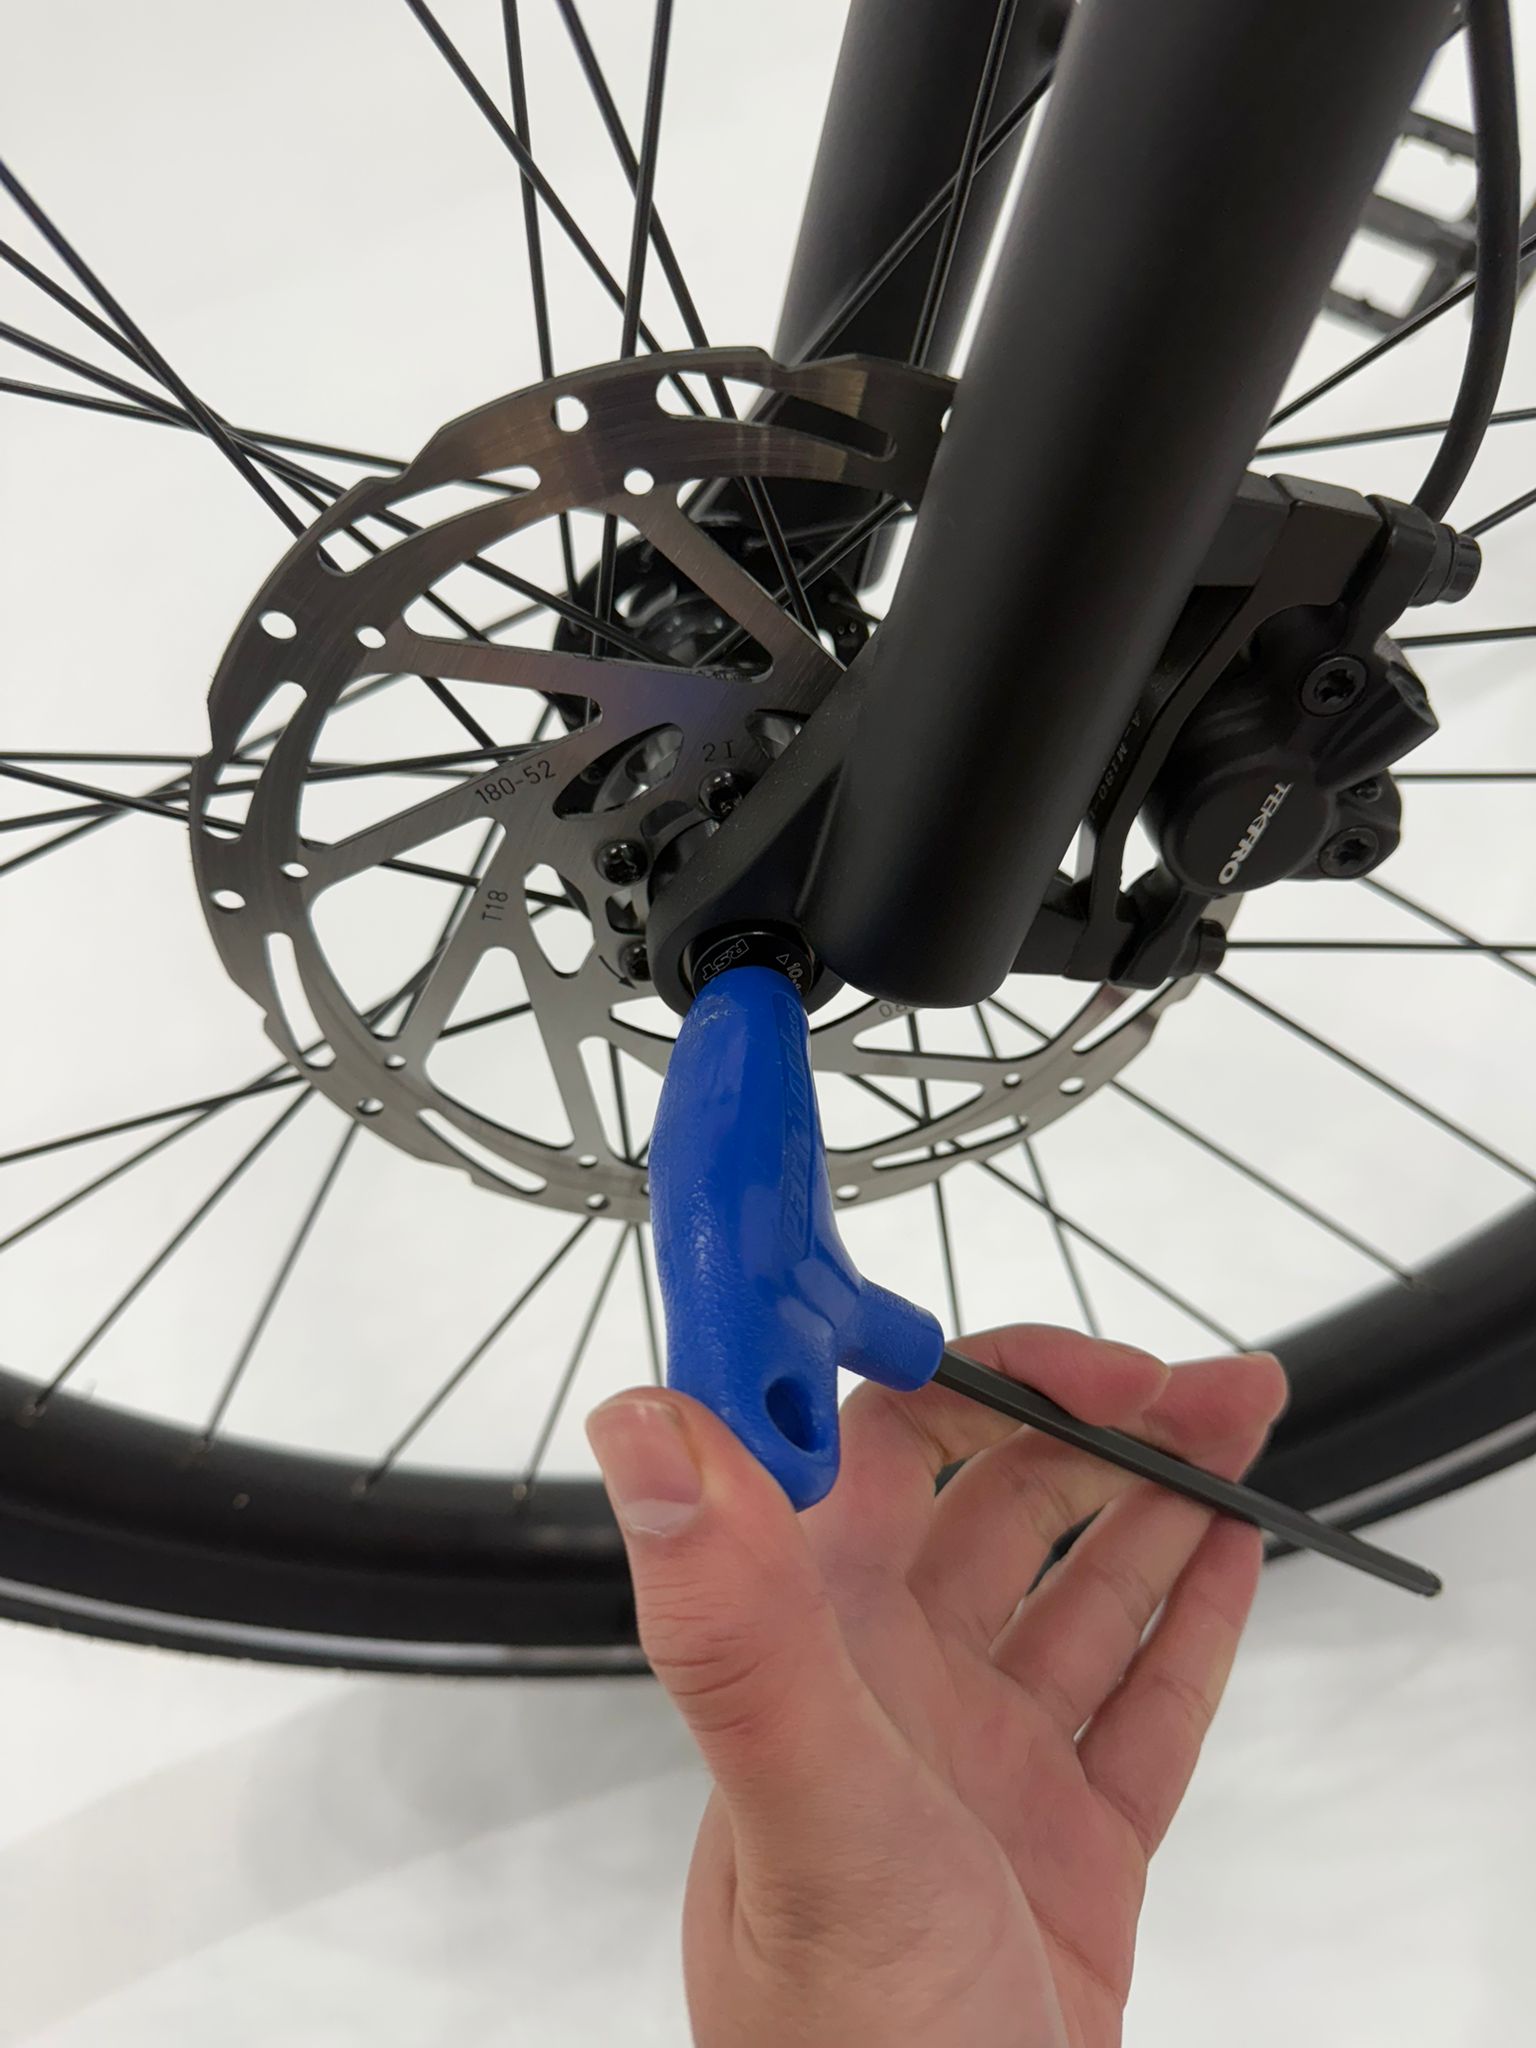
Prepare the wheel: Loosen the thru-axle bolt on one side of the wheel using a 6mm allen key and remove the thru-axle completely.
Insert the wheel: Align the front wheel into the fork dropouts, ensuring the disc rotor fits properly into the brake caliper.
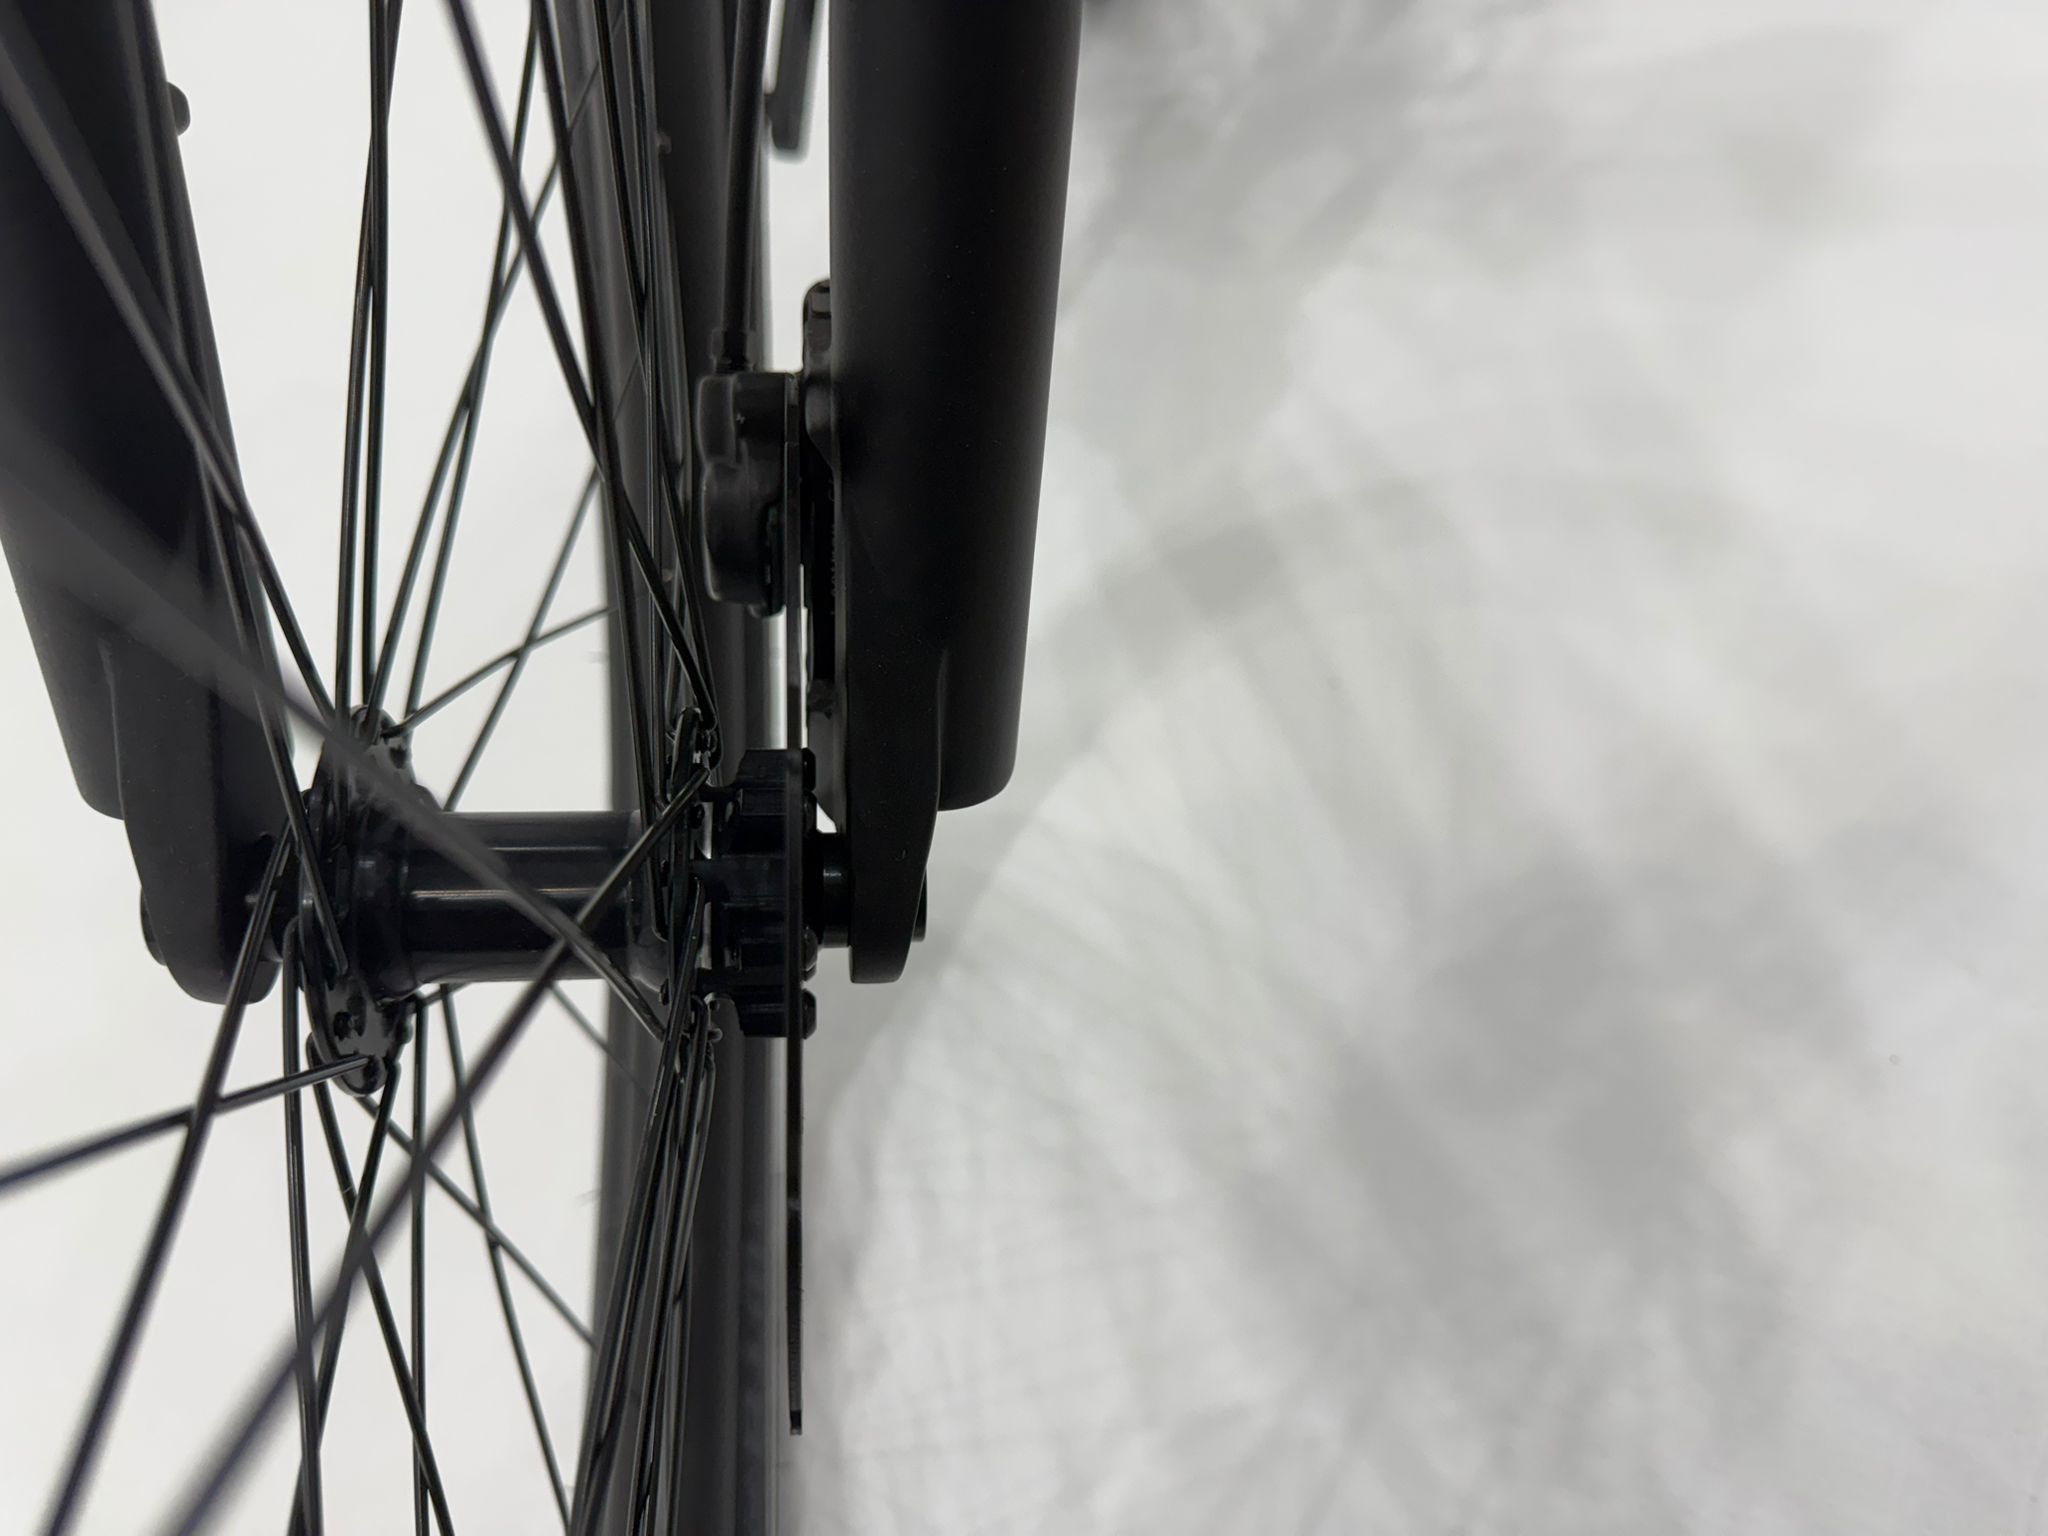
Secure the wheel: Thread the thru-axle through the fork and the wheel hub. Tighten the bolt on the thru-axle until the desired tension is achieved. Ensure the wheel is securely mounted and spins freely without contacting the brake pads or fork.
Step 4: Assemble the Pedals
Identify left and right pedals: The left pedal is marked with an “L” and the right pedal is marked with an “R.”
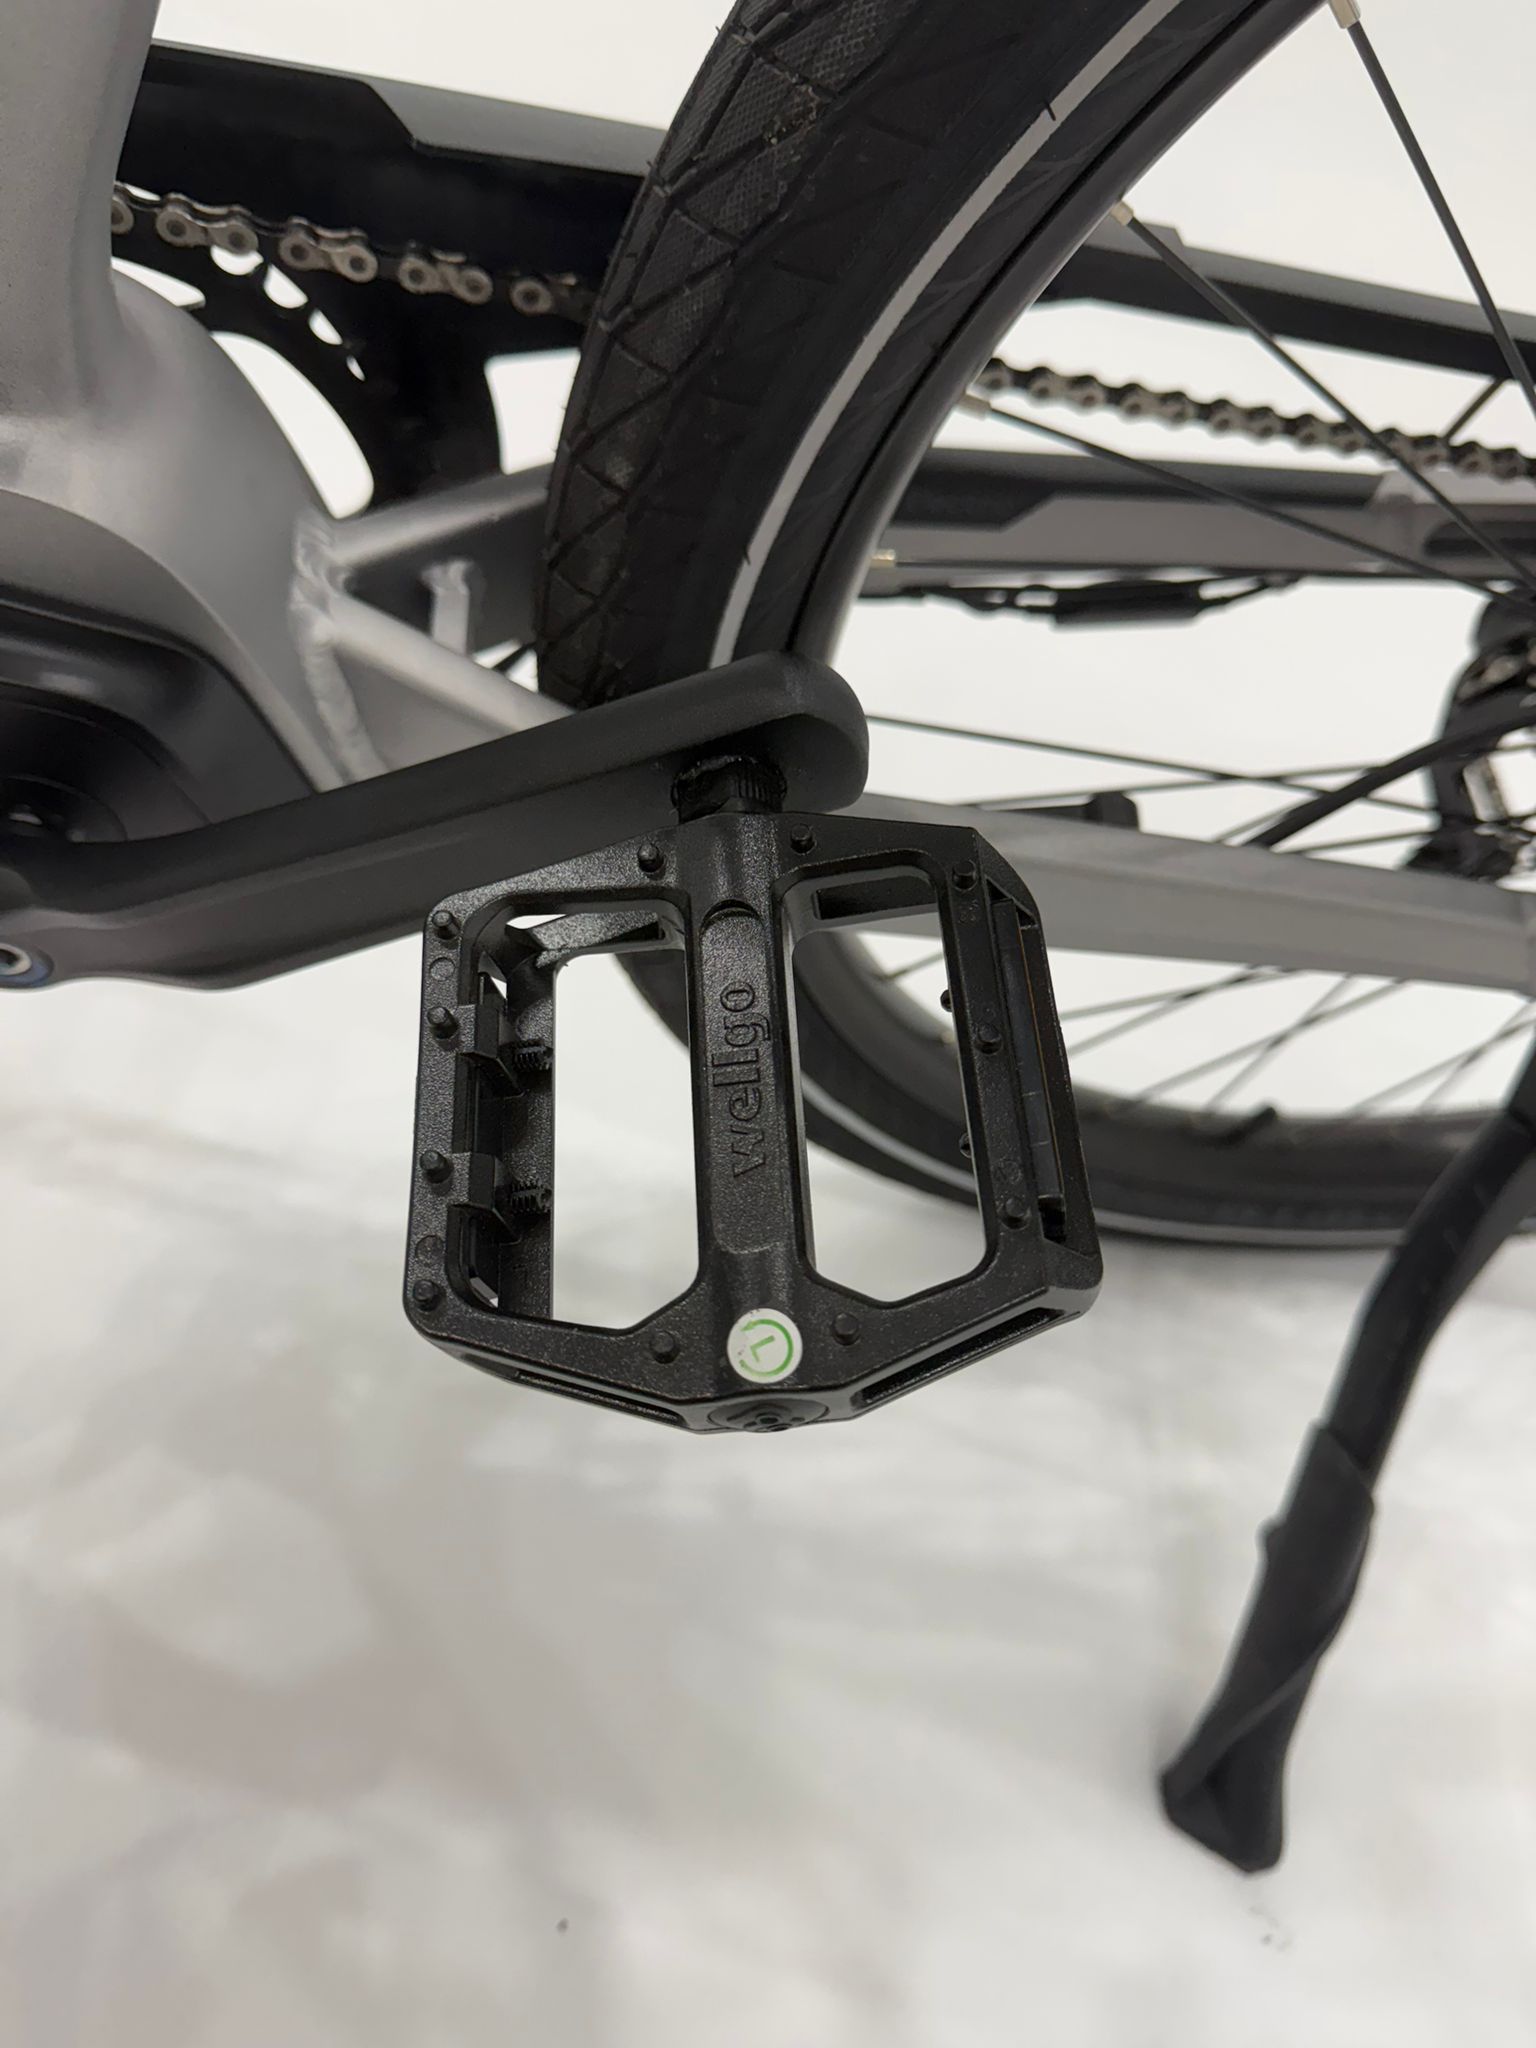 Attach the left pedal: Thread the left pedal counterclockwise onto the left crank arm and tighten it using a 15mm wrench. It should be hand-tightened for the majority of it's fastening until almost all of the thread is inside the crank arm.
Attach the right pedal: Thread the right pedal clockwise onto the right crank arm and tighten it using a 15mm wrench.
Step 5: Pump the Tyres
Locate the valve adapter: Use the valve adapter provided in your toolkit.
Inflate the tyres: Attach the adapter to the valve and inflate both front and rear tyres to the recommended PSI listed on the tyre sidewall. For the Urban, the recommended range is 35-70 PSI.
Softer Ride: Inflate to 35-45 PSI for more comfort on uneven terrain.
Firmer Ride: Inflate to 45-70 PSI for a sturdier feel on flat urban roads.
Check the tyre bead: Ensure the tyre bead is properly seated on the rim. If it rises unevenly, deflate slightly, adjust, and re-inflate.
Step 6: Attaching the Throttle (Optional):
Note: The throttle is only to be used on private-property or for off-road use. It is ILLEGAL to use throttle-power exceeding 6km/h on public roads in most states in Australia, and this throttle has no way of being limited to this speed. Please refer to our manual here for more information.
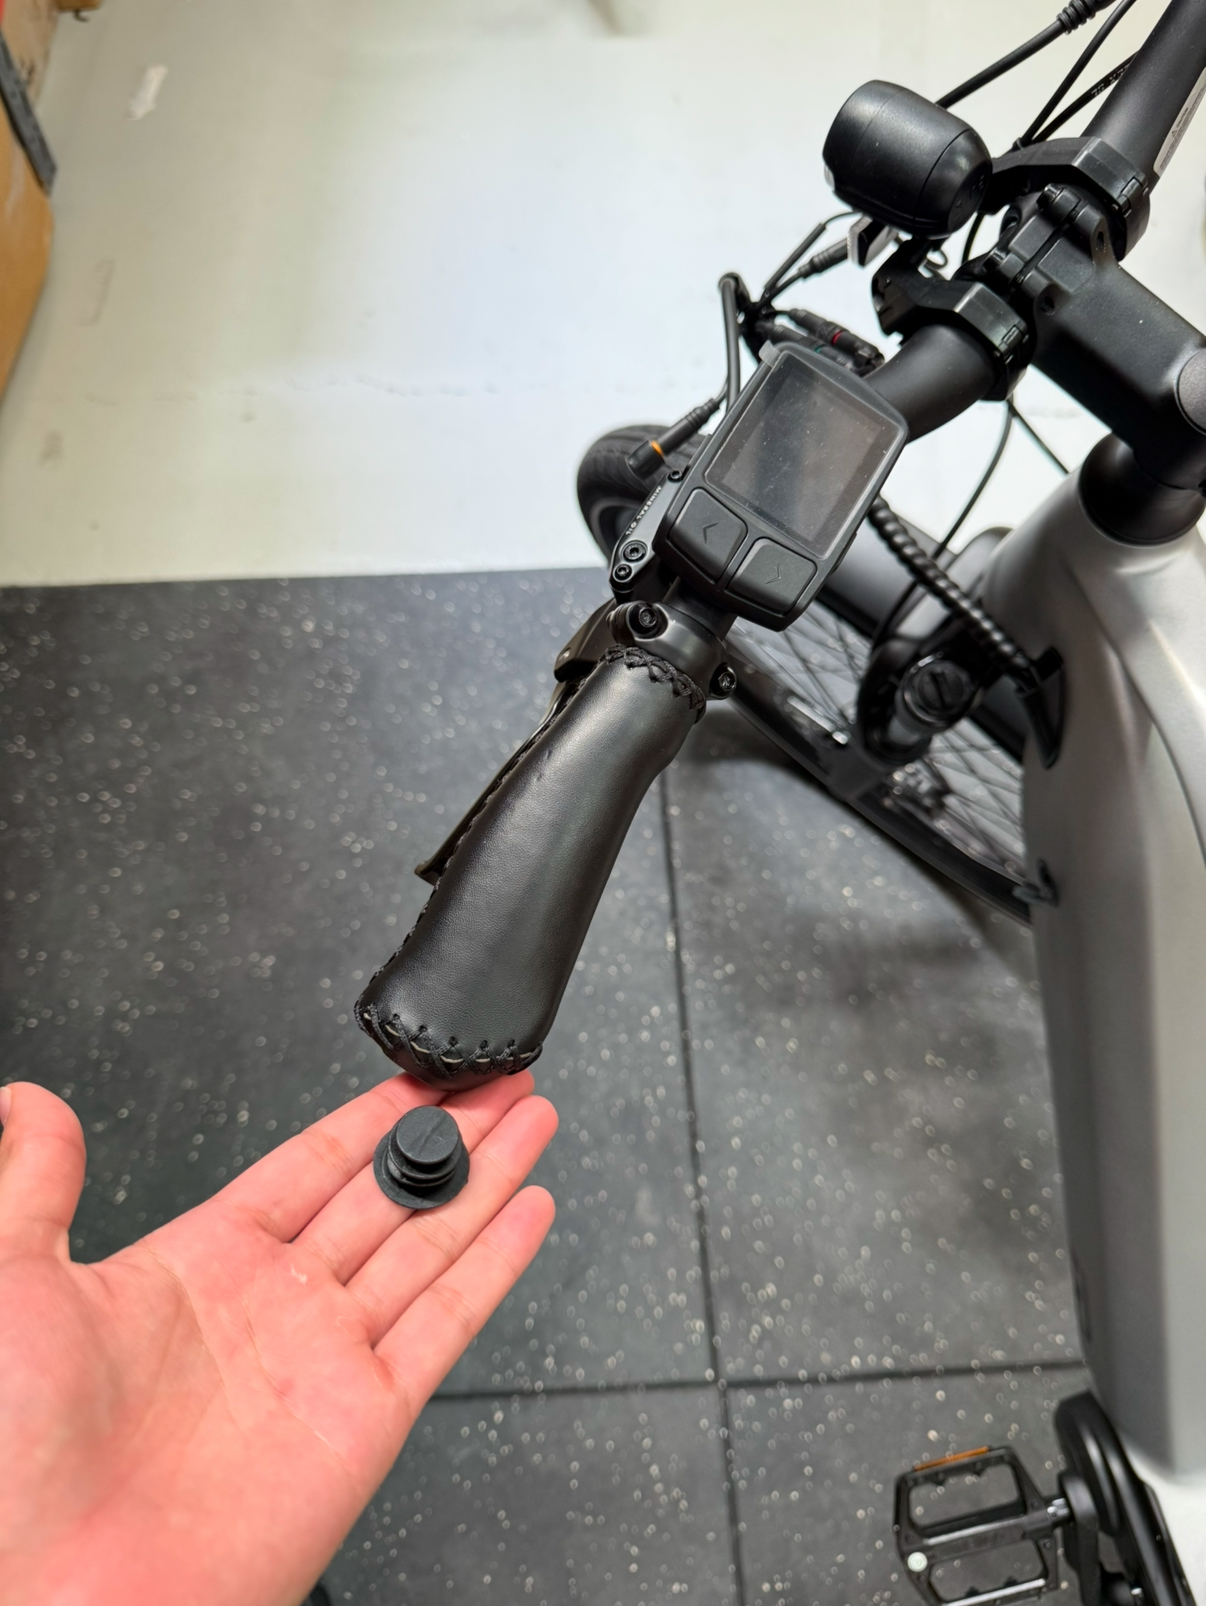
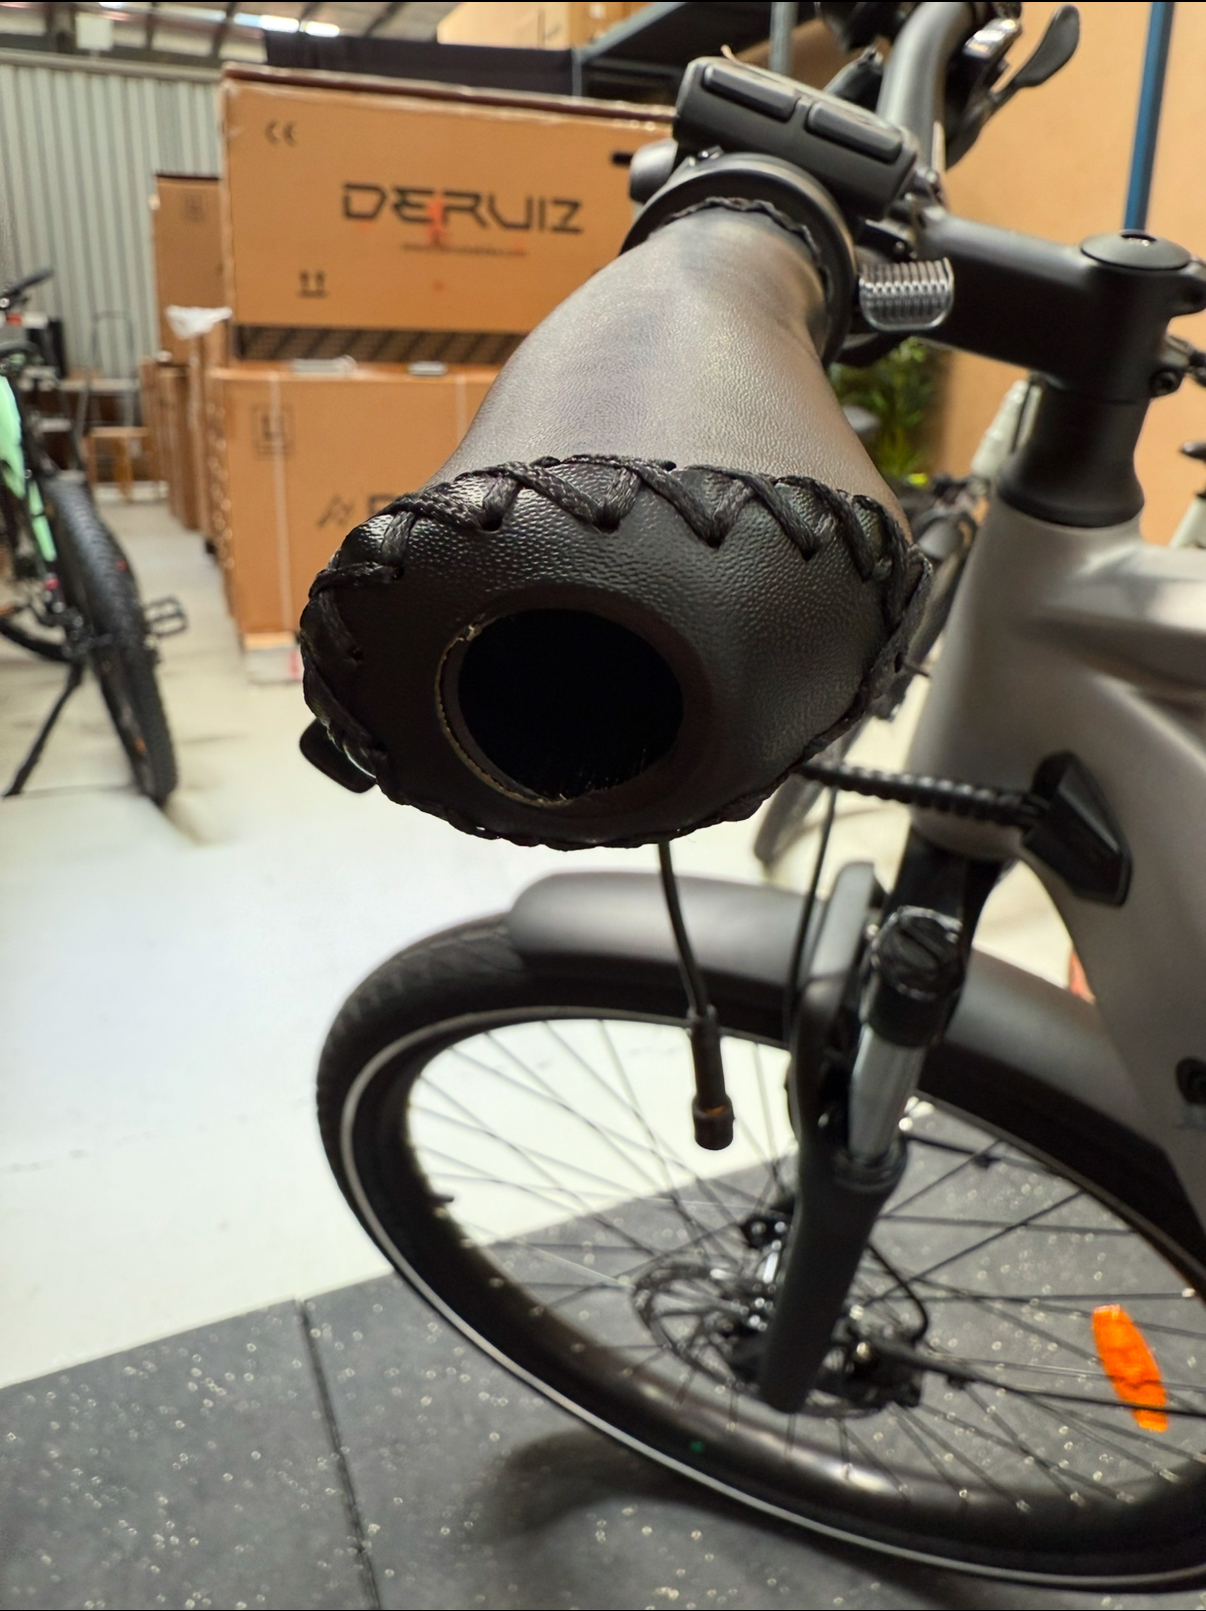
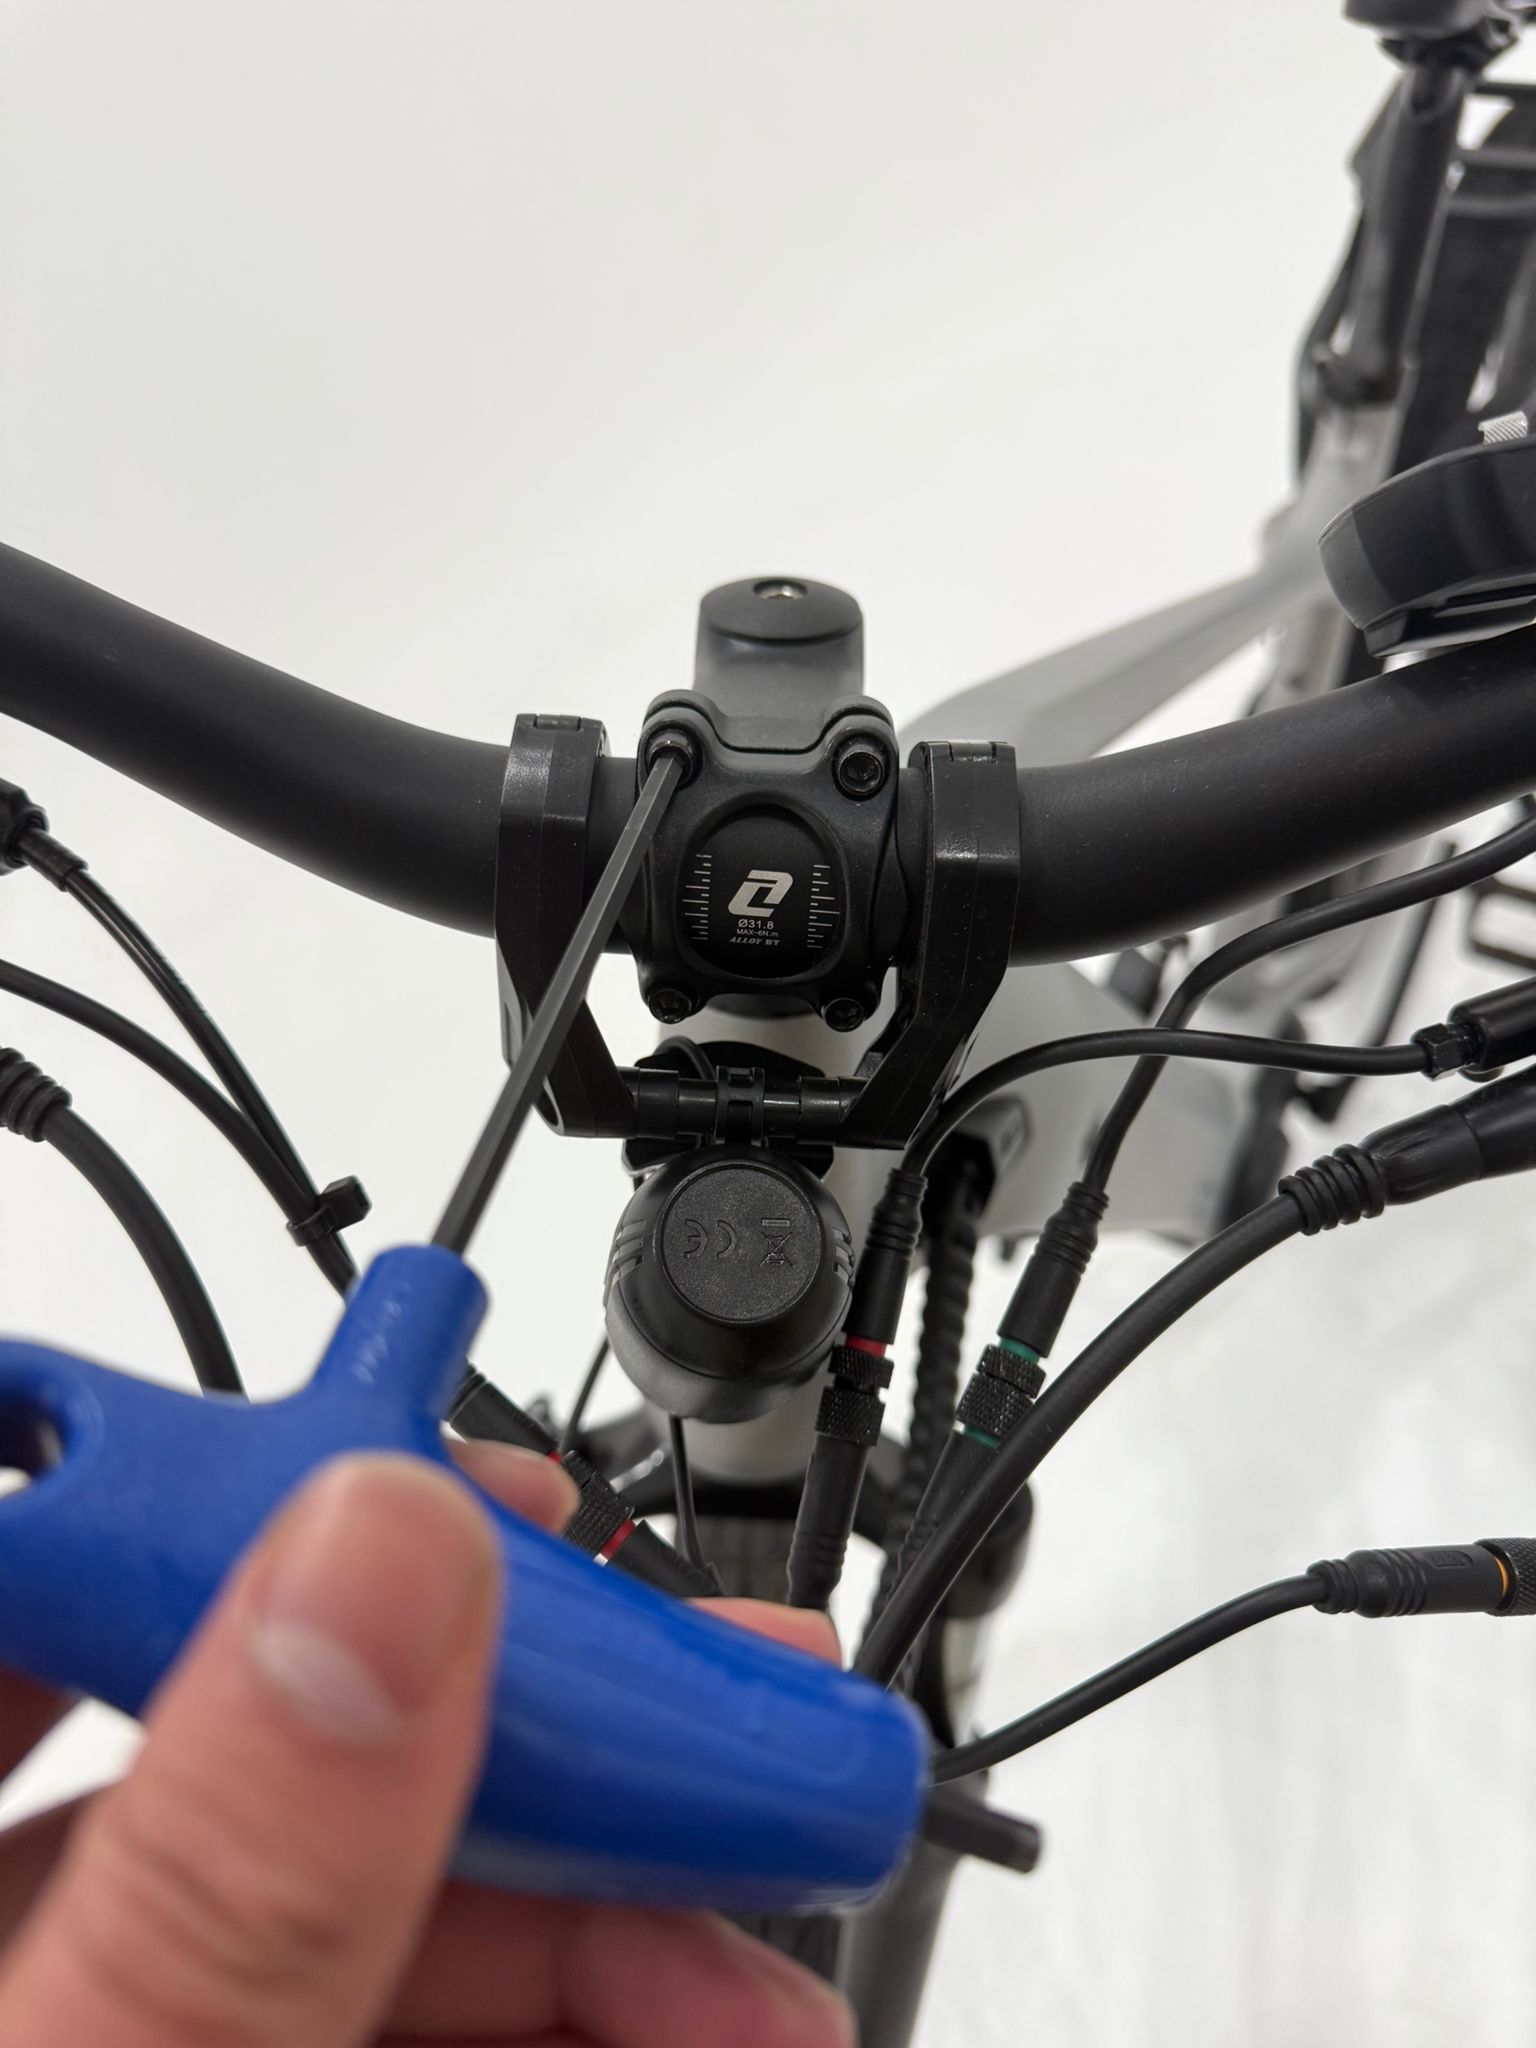
Remove plastic stopper: Pull the plastic stopper out that secures the handlebar grip to the bike.
Remove grip: With the stopper removed, twist and firmly pull the grip away from the display and brake lever to expose the handlebar underneath
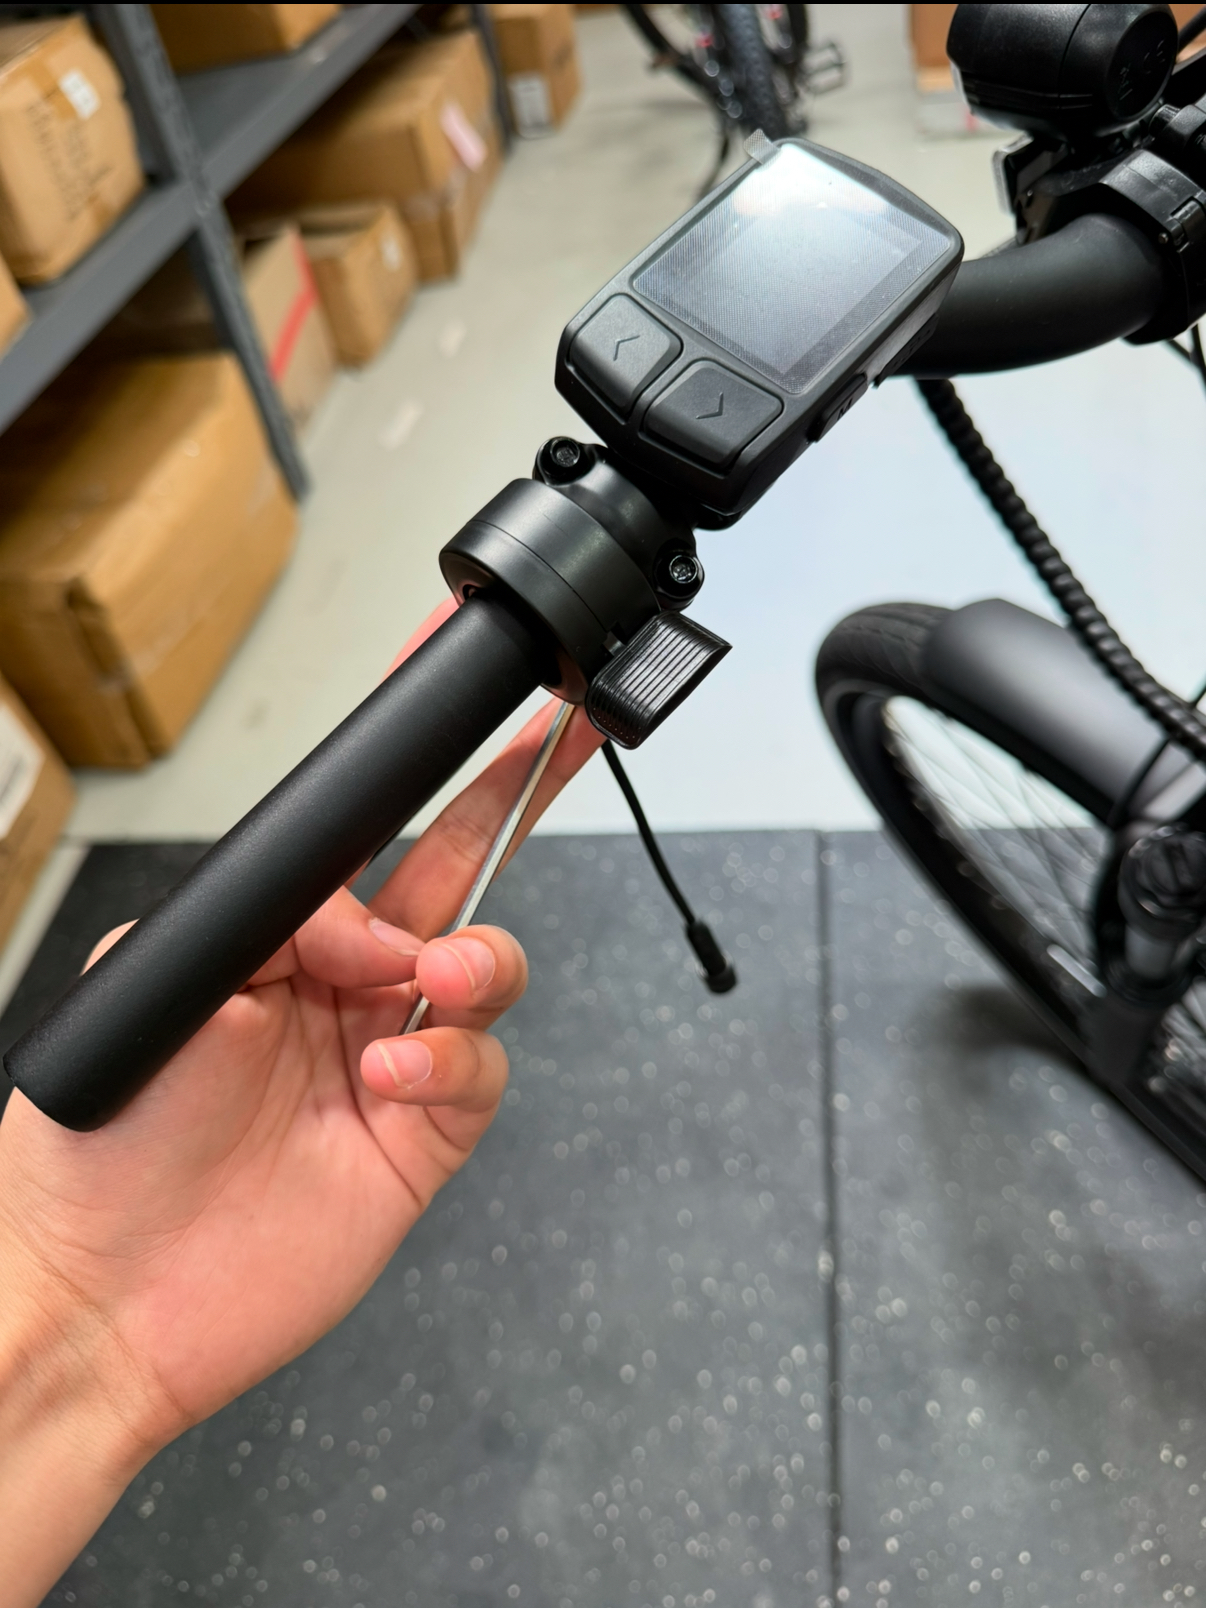
Loosen handlebar attachments: Use a 4mm hex key for the brake lever, and a 2.5mm hex key to loosen the display. Once they are loose enough to be easily shifted, loosen the throttle with a 3mm hex key and slide it towards the brake lever so they make contact.
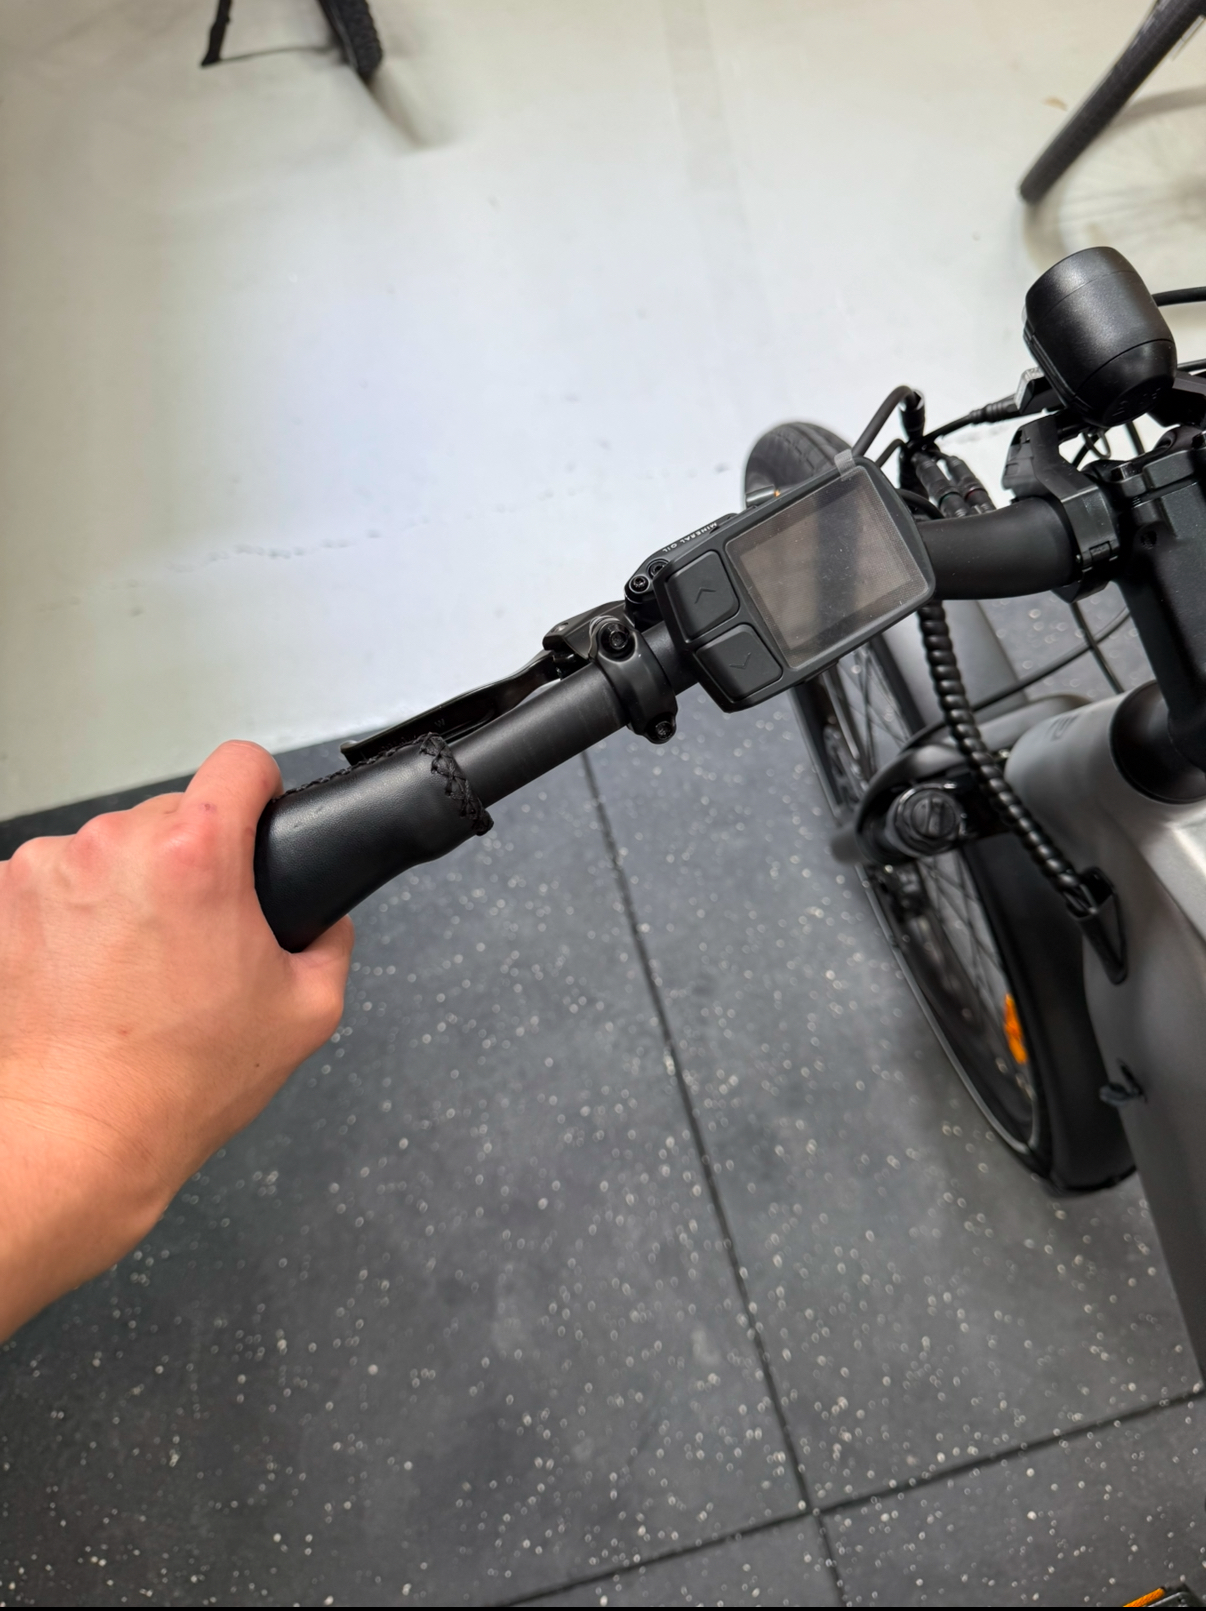
- Reattach the grip: Slide the grip back onto the handlebars by twisting and pushing simultaneously. Once the grip is contacting the throttle itself, take a look through at the side of the grip where the stopper lives. The grip should be far enough onto the handlebar that the metal and opening in the grip should be even (as demonstrated in the image). If the grip can't fit all the way onto the bike because of the position of the attachments, loosen and move the brake lever, throttle, and display until the grip opening is flush with the handlebar. Push the stopper back in with your palm and tighten the handlebar attachments using the hex keys.
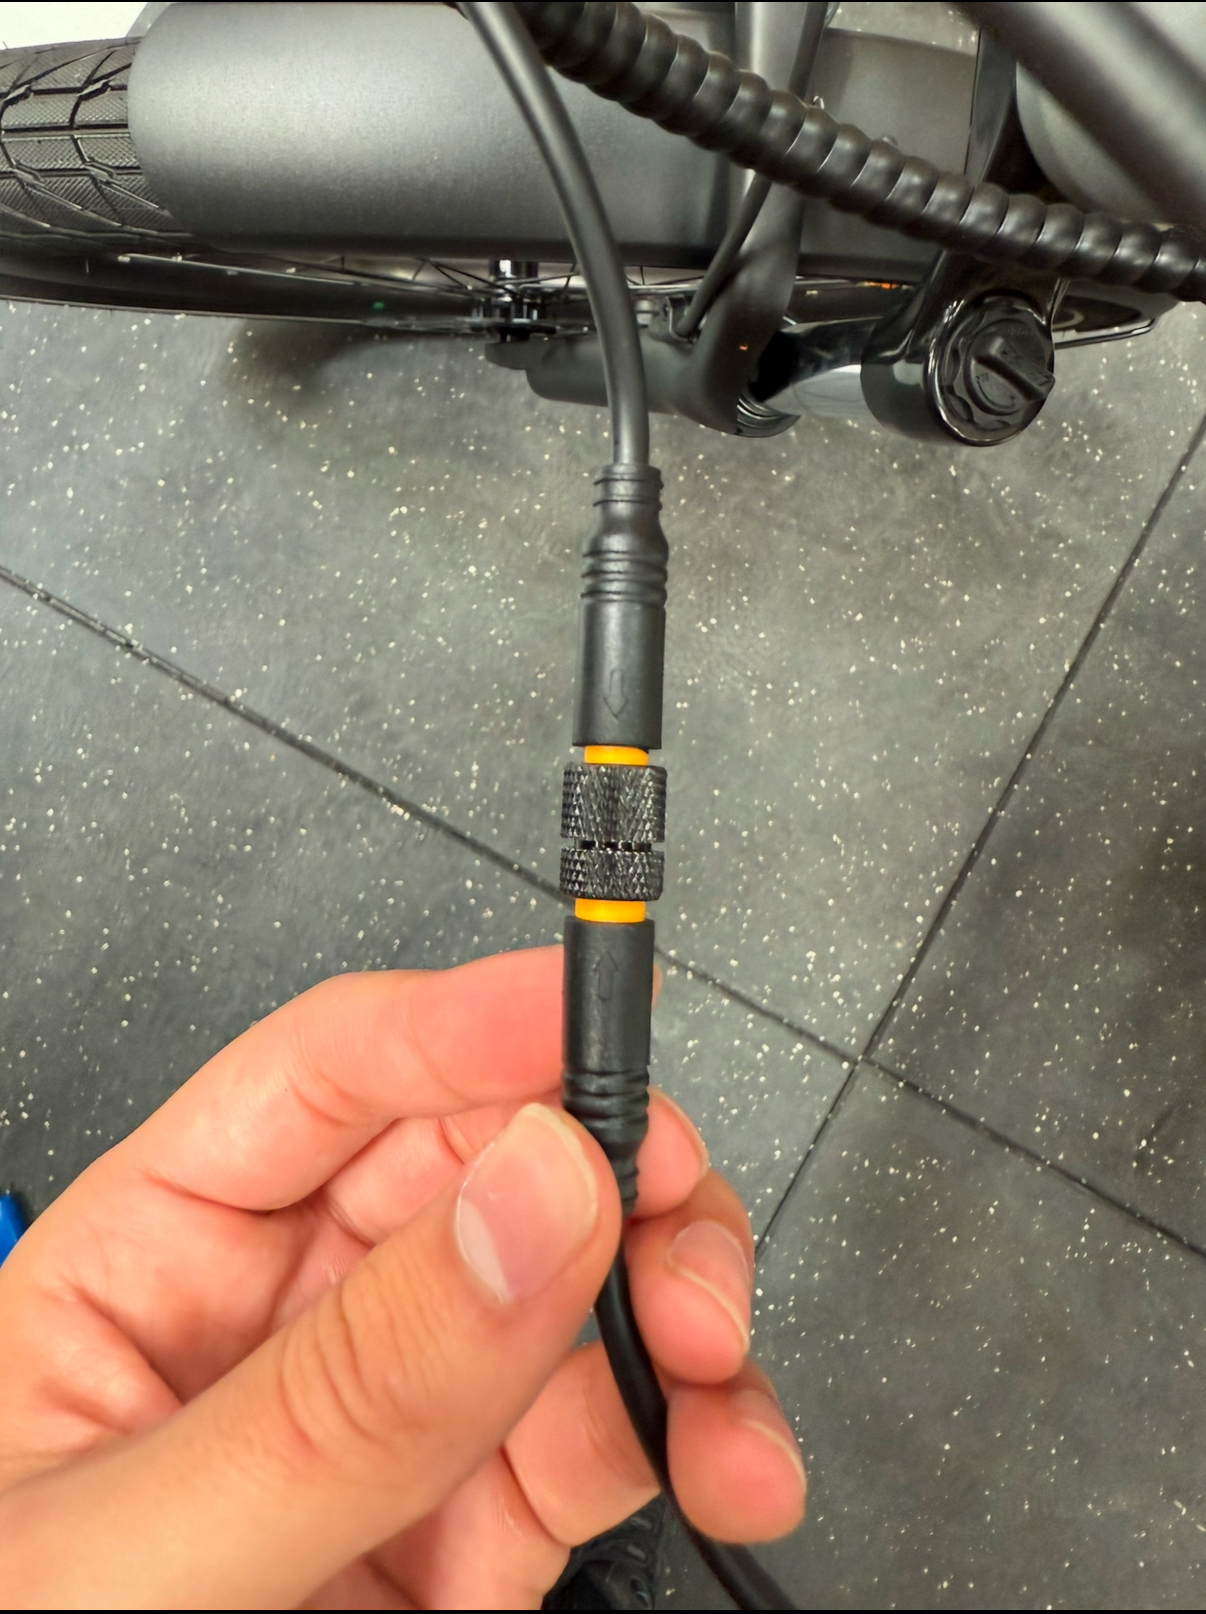
- Connect the cable: Paying attention to the orientation of the arrow indicators on the orange throttle cable, push the ends together and use the screw mechanism to fasten the cables together. Use a zip tie to fix this loose cable to the other cables in-front of the handlebars to keep it's position constant. Test the function of the throttle, ensuring that the bike is in one of the pedal assistance modes (eco being the lowest).
Final Checks
Before riding your Ridewave Urban eBike, perform the following checks:
Ensure all bolts are tightly fastened.
Check the tyre pressure and inflate as needed.
Ensure the brakes function correctly and the wheels spin freely.
Congratulations! Your Ridewave Urban eBike is now fully assembled. Enjoy your ride and don’t hesitate to contact our support team for any additional assistance.