Wallaby Assembly InstructionsUpdated 2 months ago
Note: This assembly tutorial applies to both the 20×4" and 20×3" tyre variants of the Ridewave Wallaby Folding eTrike. The assembly process is largely identical for both models, and any differences will be clearly explained at the relevant steps.
Pre-Assembly Tips
Welcome to the assembly manual for the Ridewave Wallaby Folding eTrike. This guide will take you step-by-step through the process of assembling your new trike. Please read through the instructions carefully before starting to ensure a smooth assembly process. The trike arrives 95% assembled, with all electronics pre-installed. Preparing your Ridewave Wallaby Folding eTrike is an exciting process! Here are some tips to ensure everything goes smoothly:
1. Keep a clean, open workspace for the assembly process.
2. Avoid using sharp tools near cables or wires to prevent accidental damage.
3. If you’re not confident assembling the trike, consider visiting a local bike shop for professional assistance.
4. The pre-assembly process requires only a pair of scissors, a cable cutter, and a utility knife (Stanley knife) to remove protective packaging.
Contents of the box
The box includes the following items:
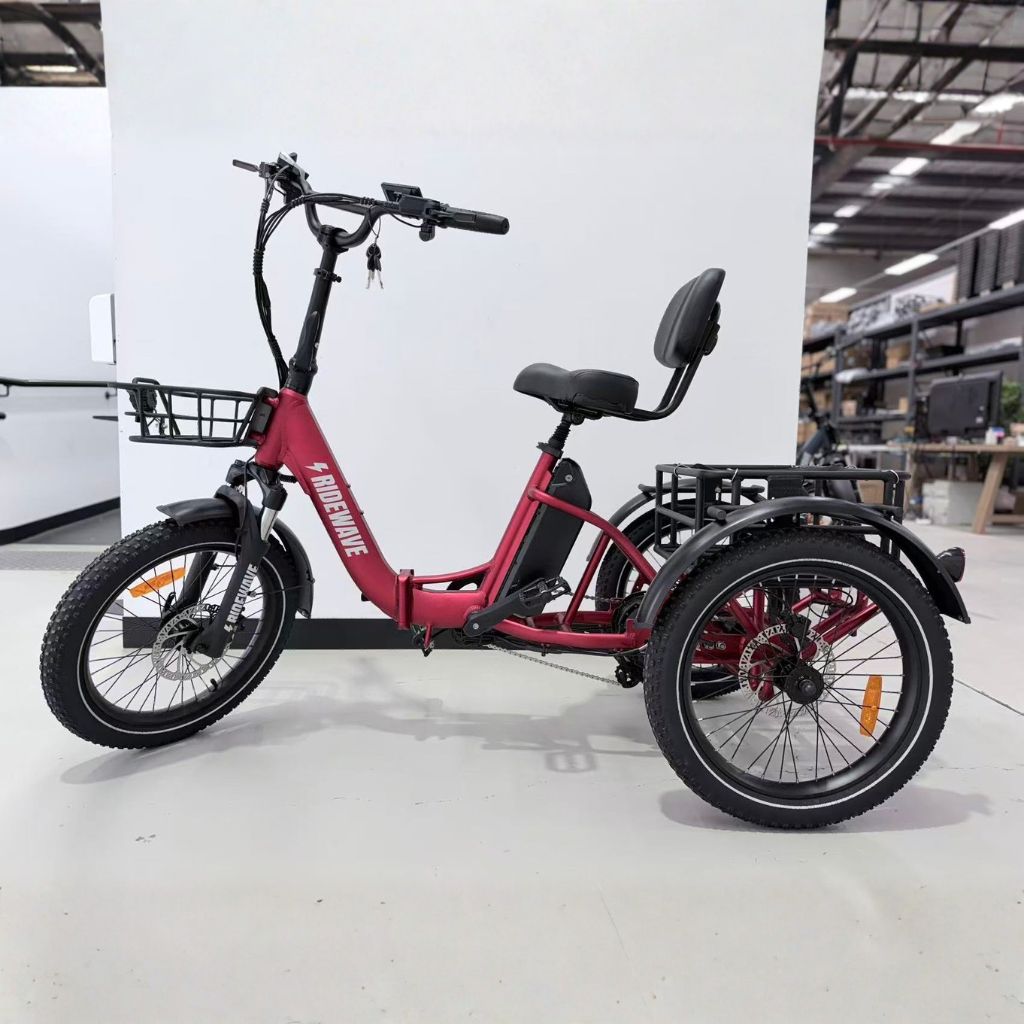
Ridewave Wallaby Folding eTrike
Battery charger
User Manual
Battery keys
Toolkit bag containing:
8/10mm Wrench
13/15mm Wrench
13/16mm Wrench
2.5mm Hex Key
3mm Hex Key
4mm Hex Key
5mm Hex Key
6mm Hex Key
7mm Hex Key
Step 1: Unpack the Trike
- Opening the box: Carefully open the box using scissors or a Stanley knife. Avoid cutting too deeply to prevent damaging the trike or accessories. Remove the loose items (seat, mudguards, etc.), and accessories box which contain essential tools and components.
- Getting the trike ready for unfolding: After removing the accessories box, lift the trike out with assistance or cut the sides of the box to make it easier to access. Remove all protective materials—including foam, cardboard, zip ties, and tape. Take extra care not to damage any cables when cutting zip ties.
Step 2: Fold and insert handlebar
- Folding-out handlebar: Place a piece of foam from inside the box under the central fold point to protect the frame from scratches. With all packaging removed from the front end, unfold the handlebar upwards into the riding position and close the latch firmly until it locks.
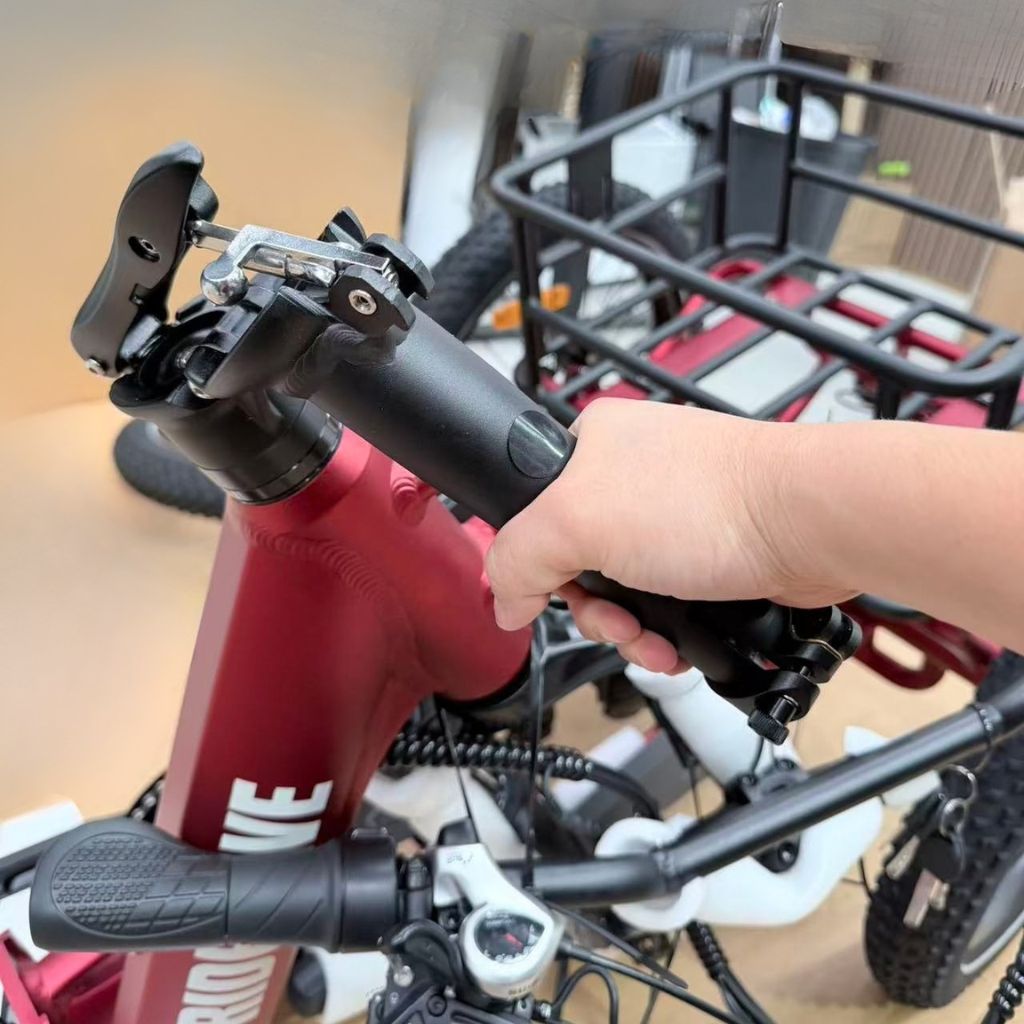
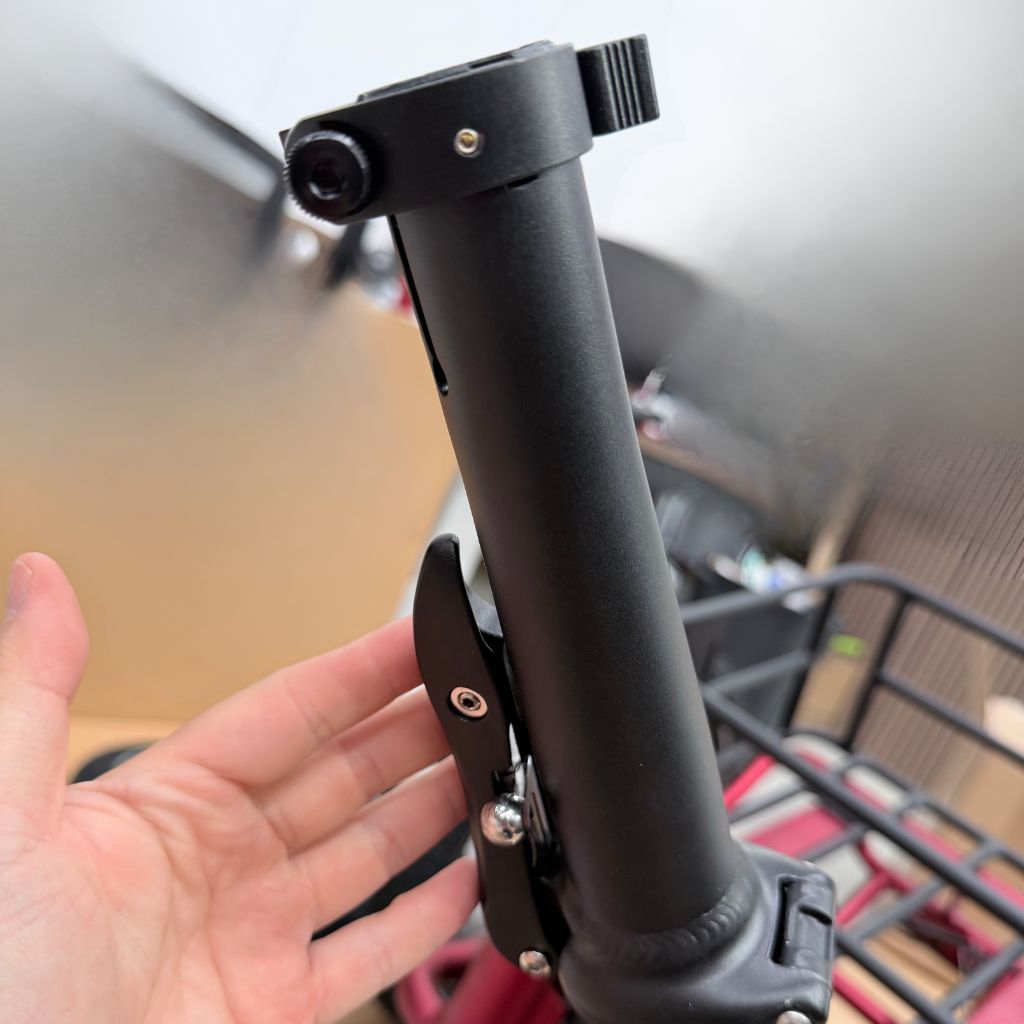
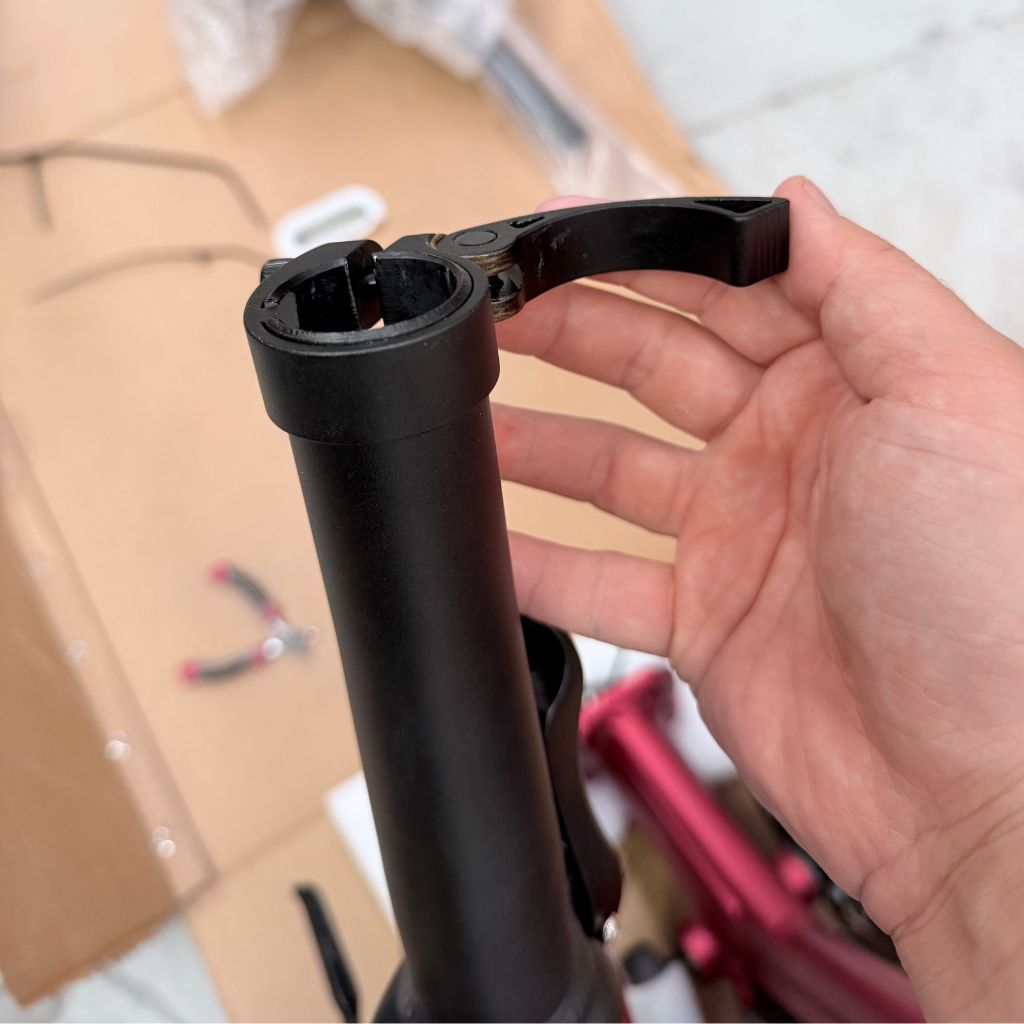
Inserting Handlebar: Open the handlebar clamp lever and slide the handlebar into the folding stem, making sure all cables run neatly towards the front of the trike. Adjust to a comfortable riding height, then close the clamp lever so the handlebar is securely fastened.

Step 3: Front Wheel Assembly
- Unfolding the trike: With all protective materials (zip ties, cardboard, foam) removed, take the front wheel off the frame and set it aside. Hold the front forks and lift them slightly so the frame can be opened fully. Straighten the trike and close the central folding latch until it locks and the frame feels solid.

Attaching front wheel:
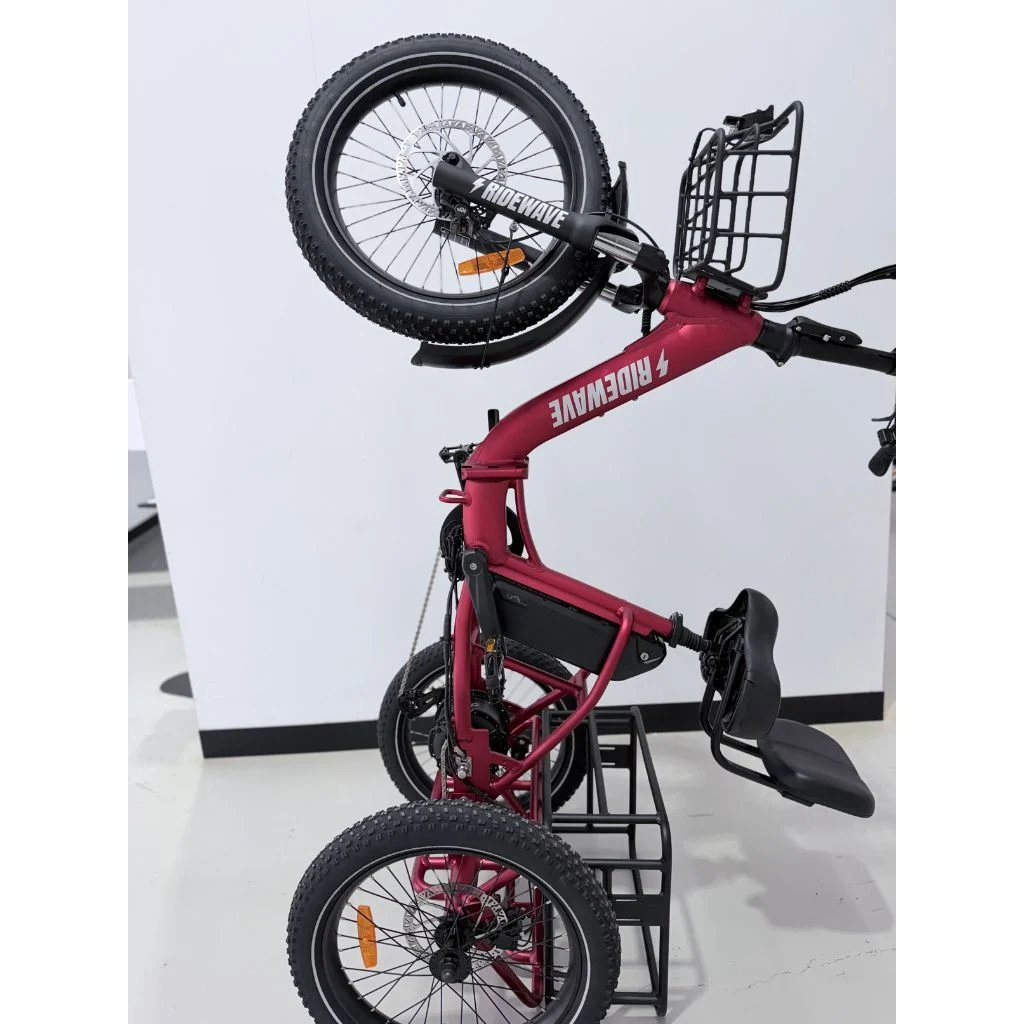
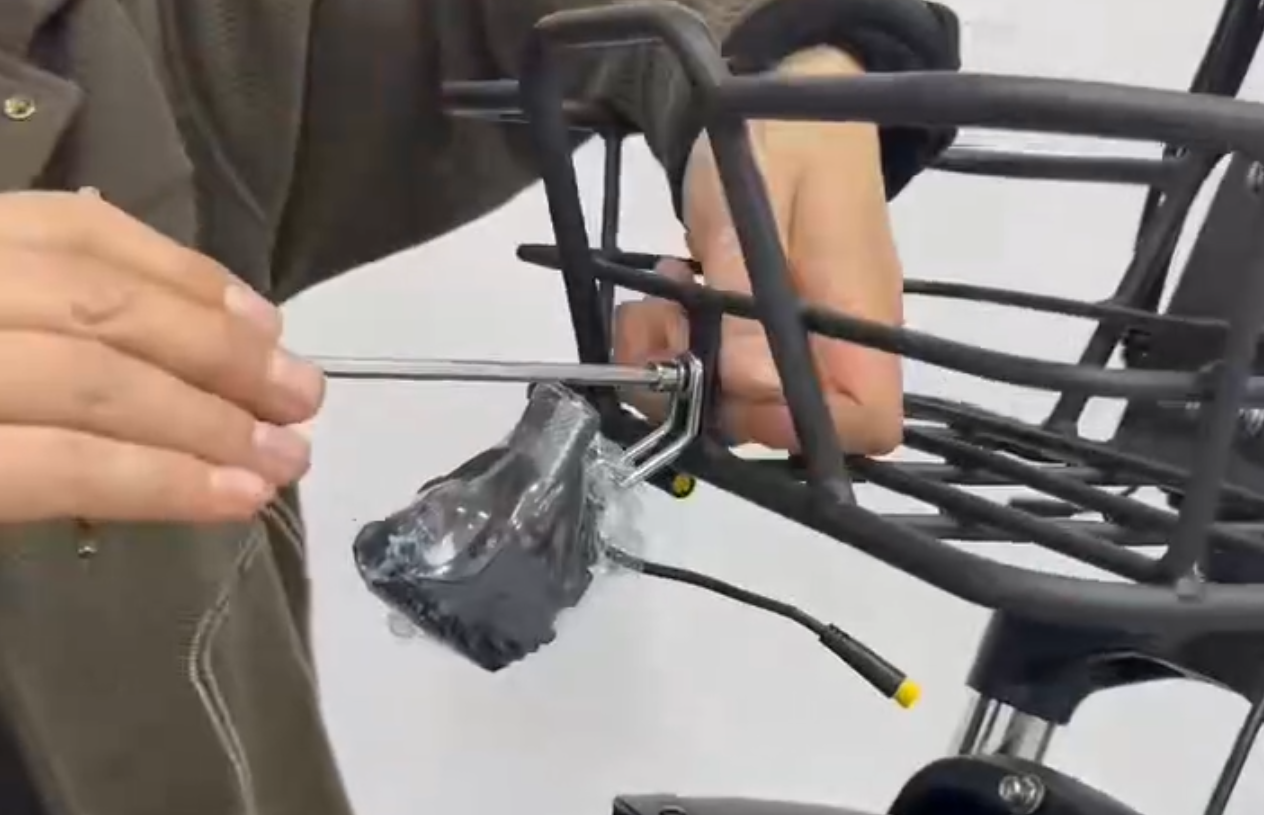
Note: To make this step easier, you may hold both brake levers and carefully lift the handlebars upward so the trike rests vertically on the rear cargo crate. If using this method, place protective material such as cardboard, foam, or carpet underneath the crate to prevent scratches or damage. See image below.
Rest the trike on its front forks.
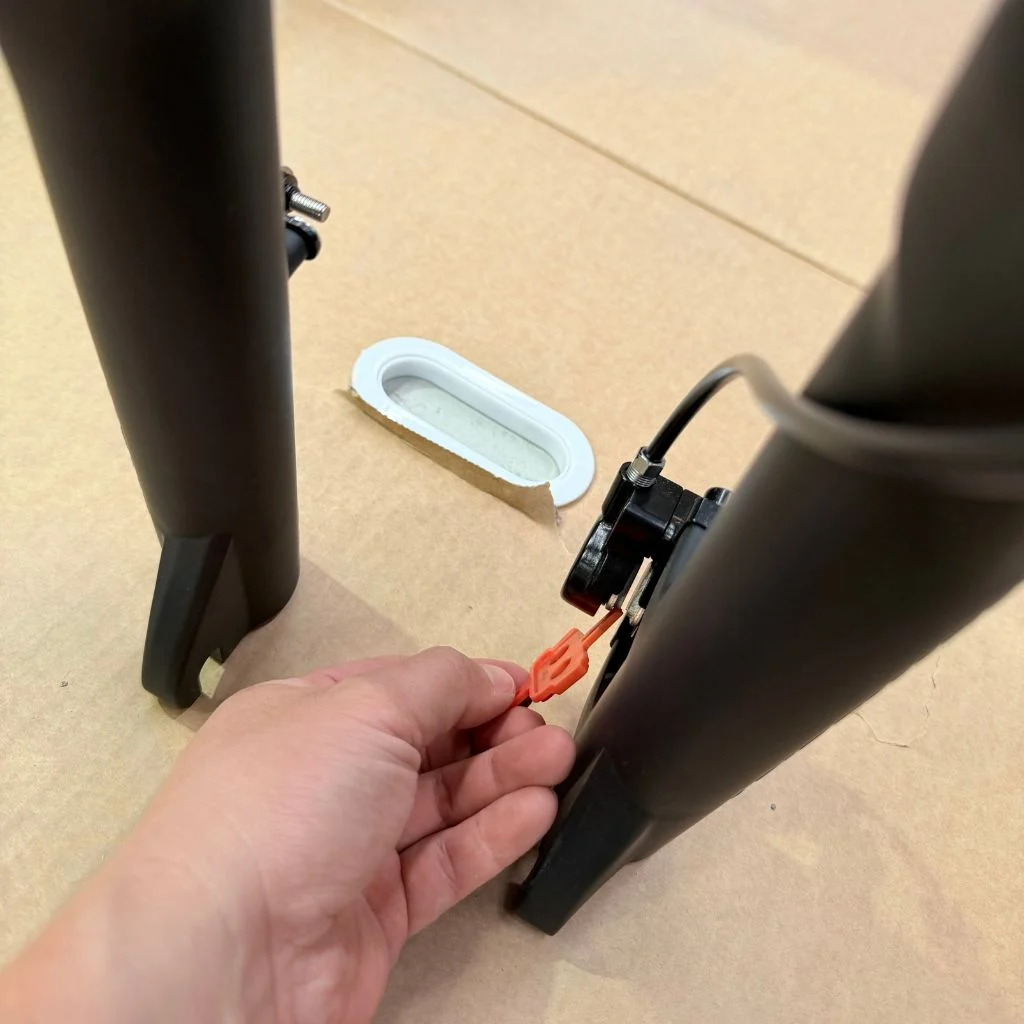
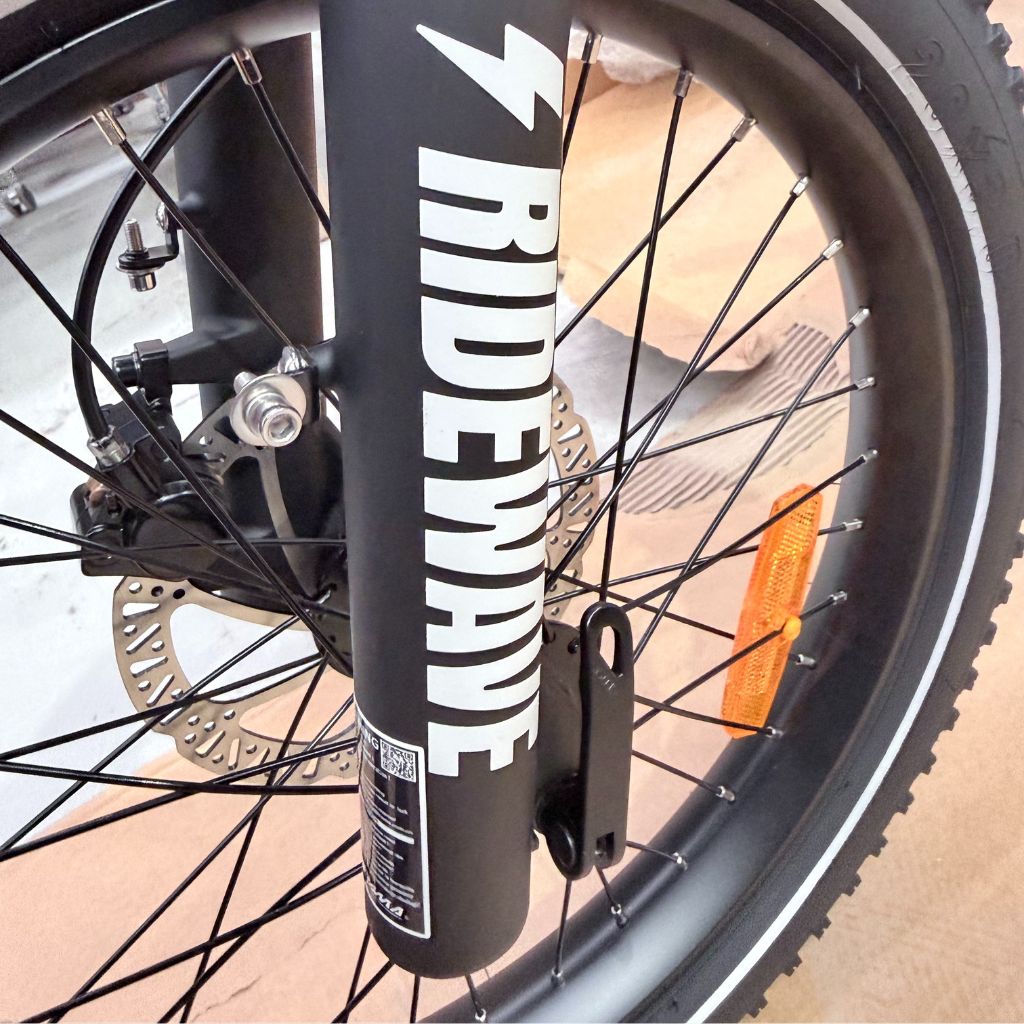
Remove the plastic spacer between the front brake pads and discard it.
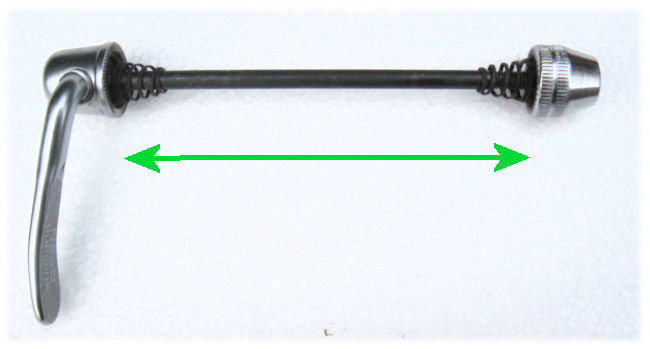
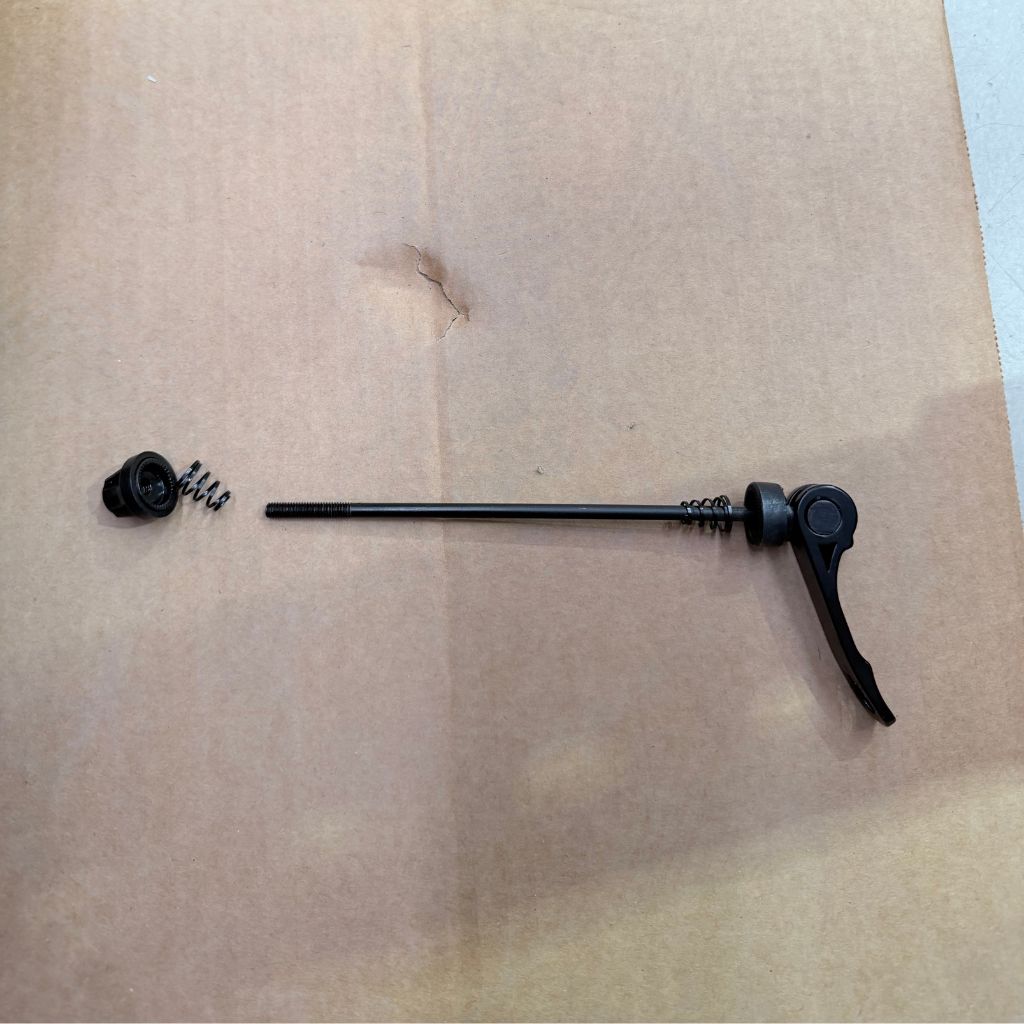
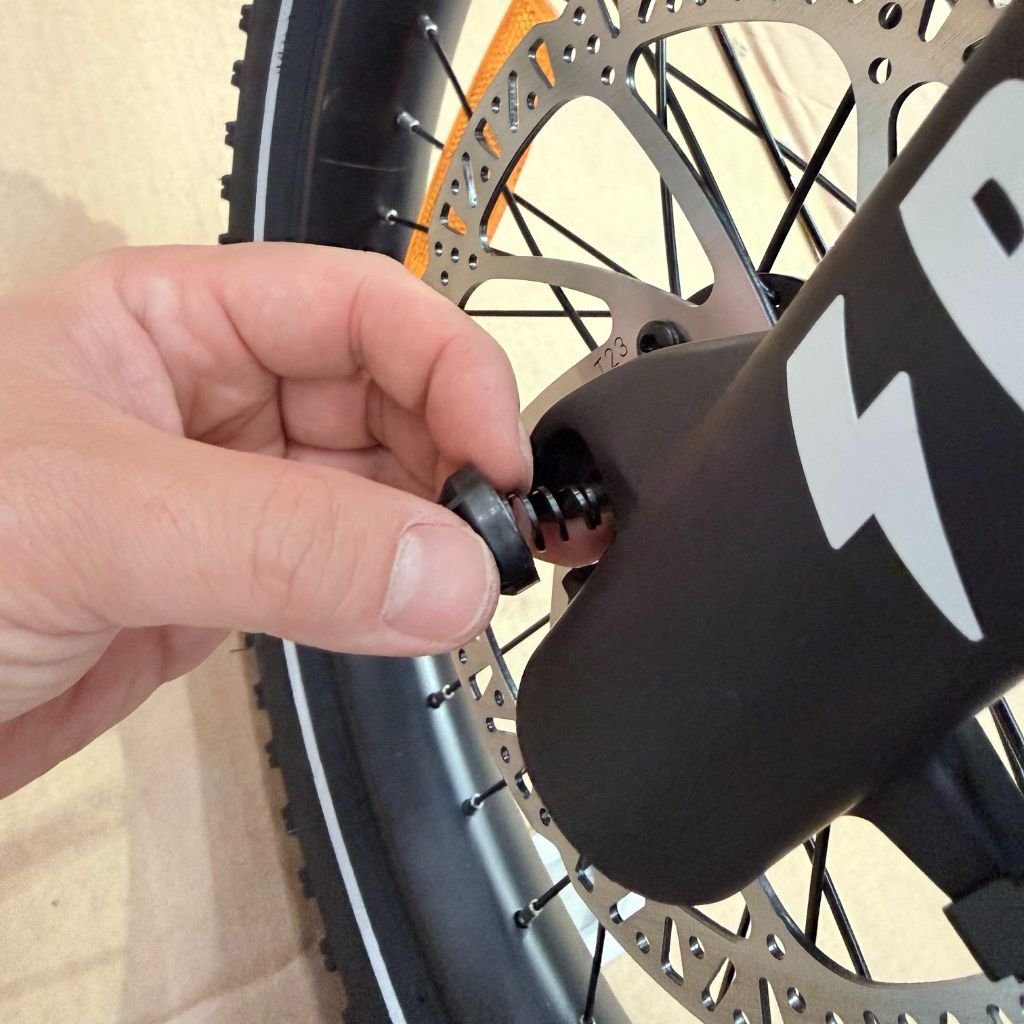
On the front wheel, hold the lever side of the quick-release axle and unscrew the cap and spring from the opposite side to remove the axle.
Lift the front forks with one hand and roll the wheel into place between them, making sure the brake rotor sits correctly between the pads.
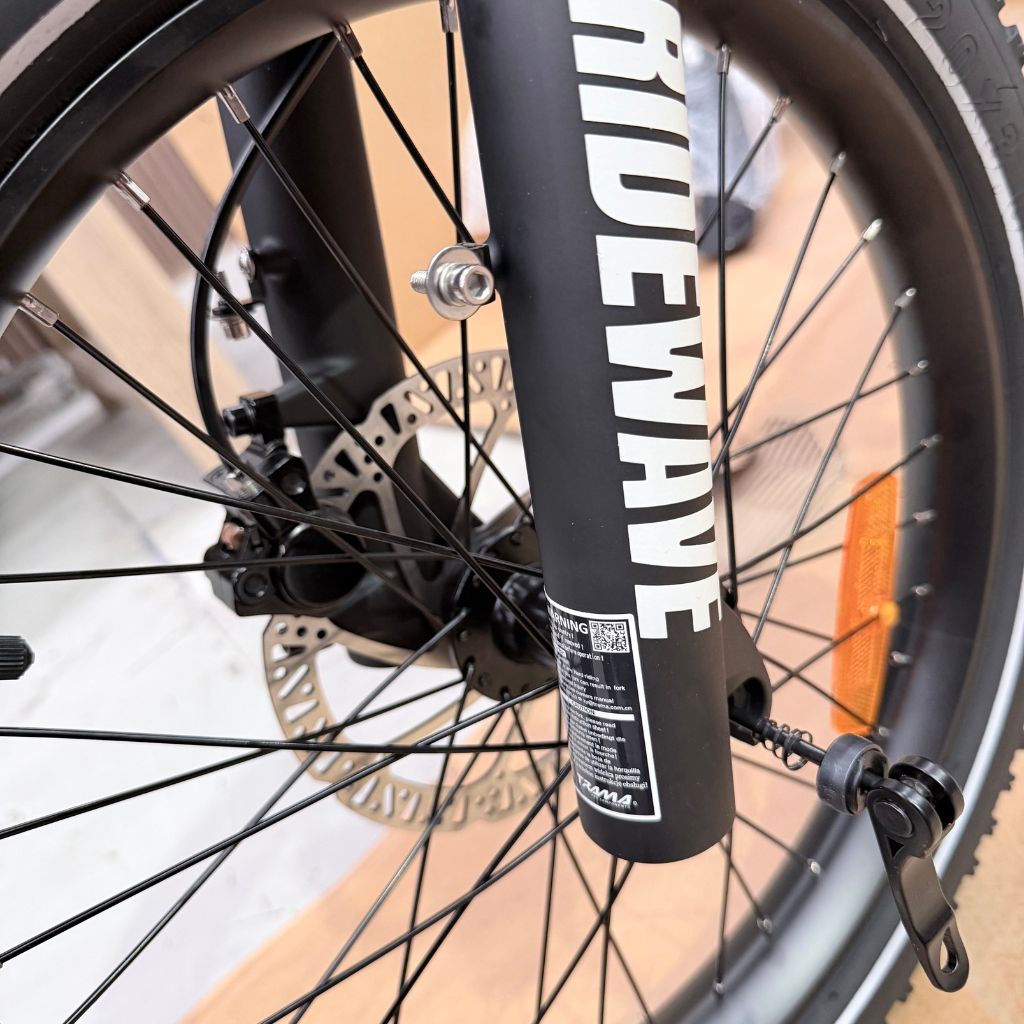
With the forks resting on the hub, insert the quick-release thru-axle from the rotor side. Reinstall the spring and cap on the opposite side, ensuring the springs face outward (the narrow end of each spring faces toward the centre of the axle, and the wider end faces outward).
 Spring direction above.
Tighten the cap and close the lever using the palm of your hand. The lever should require firm pressure to close and securely clamp the wheel in place.
Step 4: Attach Front Mudguard
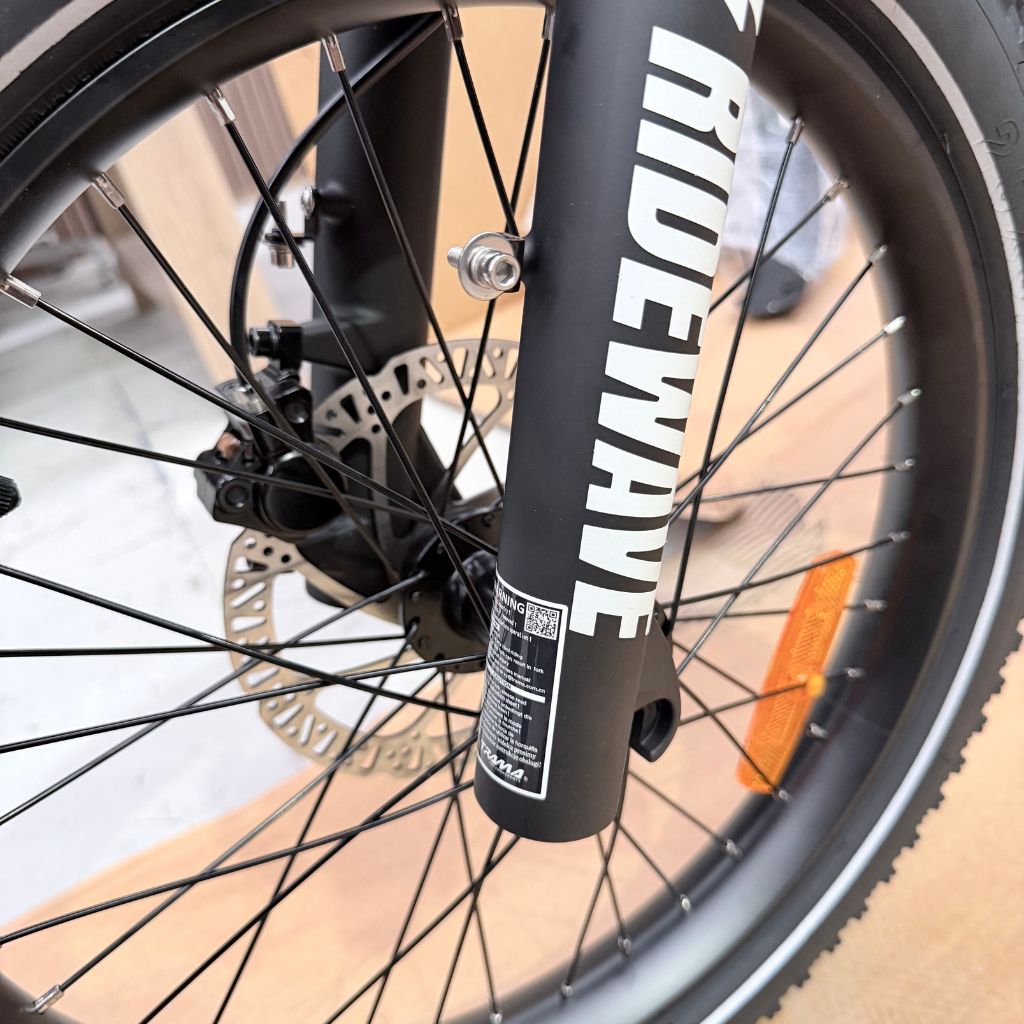
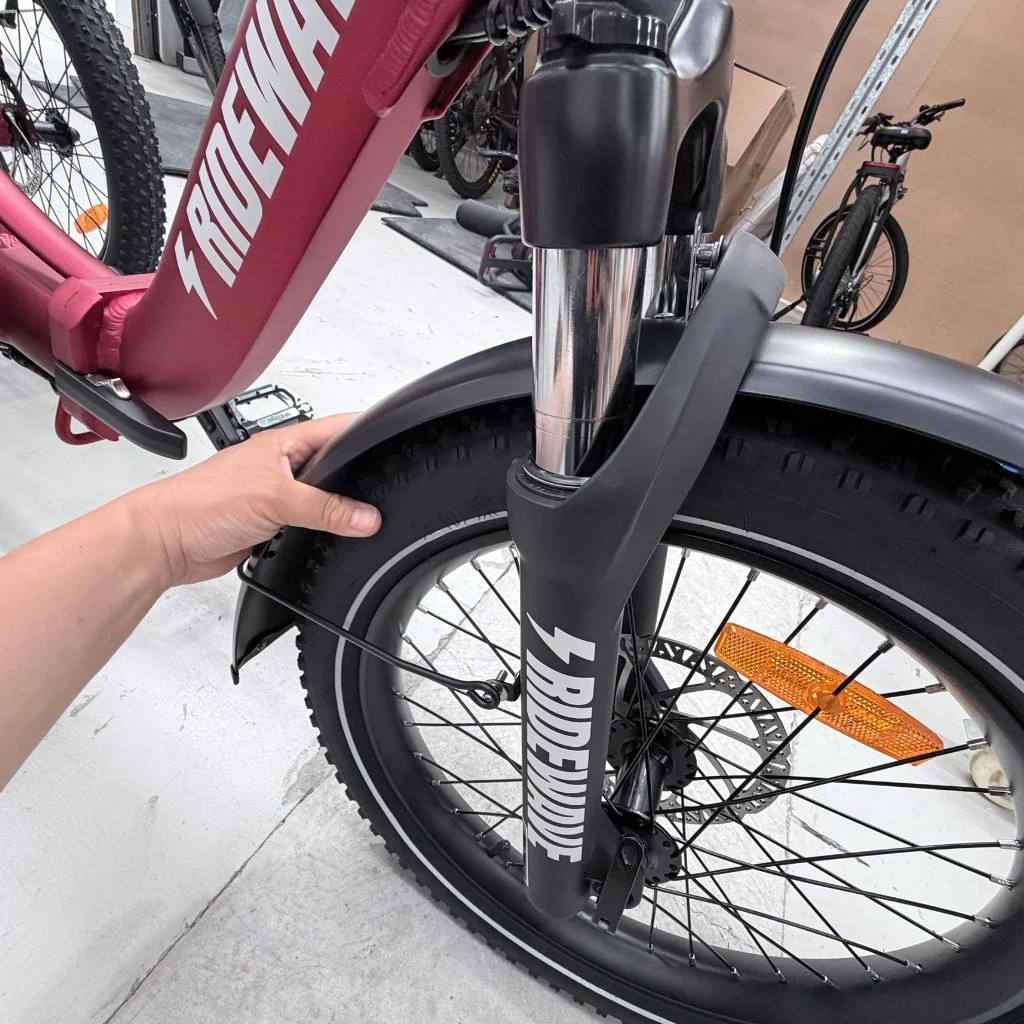
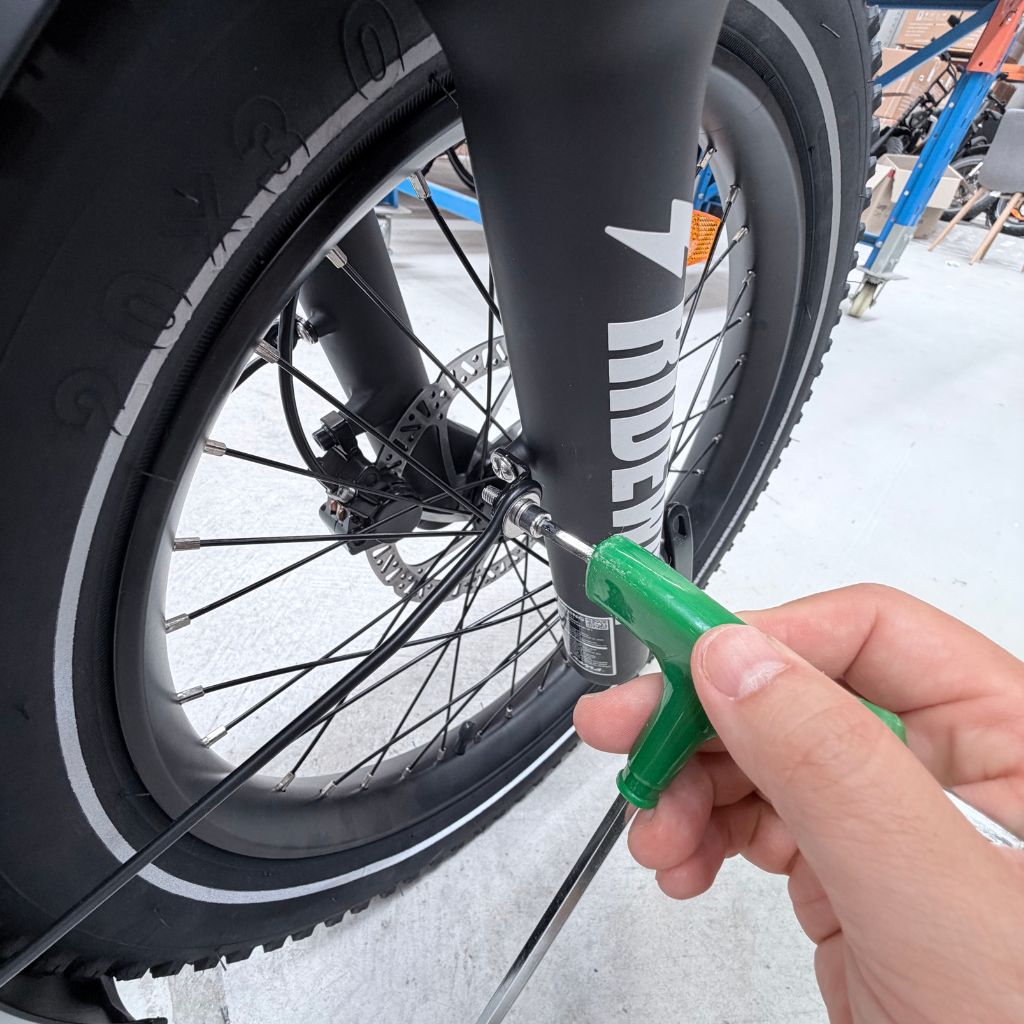
- Remove mudguard screw: Use a 5 mm Allen key and 10 mm wrench (20x3" Wallaby doesn't have a nut, no need for wrench) to remove the existing front mudguard screw from the fork. Slide the mudguard in from behind the fork with the short end facing forward, then reinstall the screw through the fork and guard and thread the 10 mm nut on by hand.
- Before fully tightening this main screw, use a 4 mm Allen key to loosen the mudguard strut bolts on both sides of the wheel. Adjust and fully tighten the struts using the 4mm allen key so the guard sits centred and doesn’t rub, then go back and fully tighten the main screw above the front wheel.

Step 5: Installing Front Basket + Light
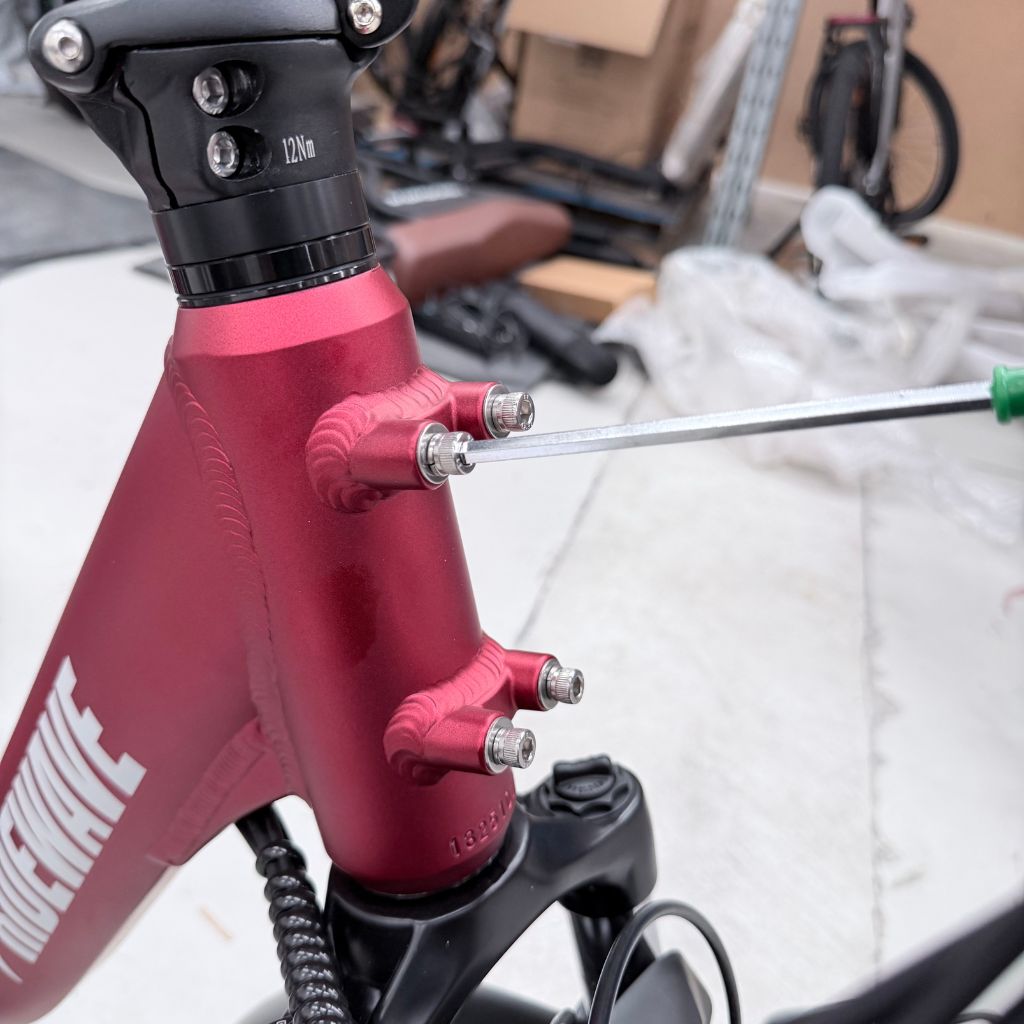
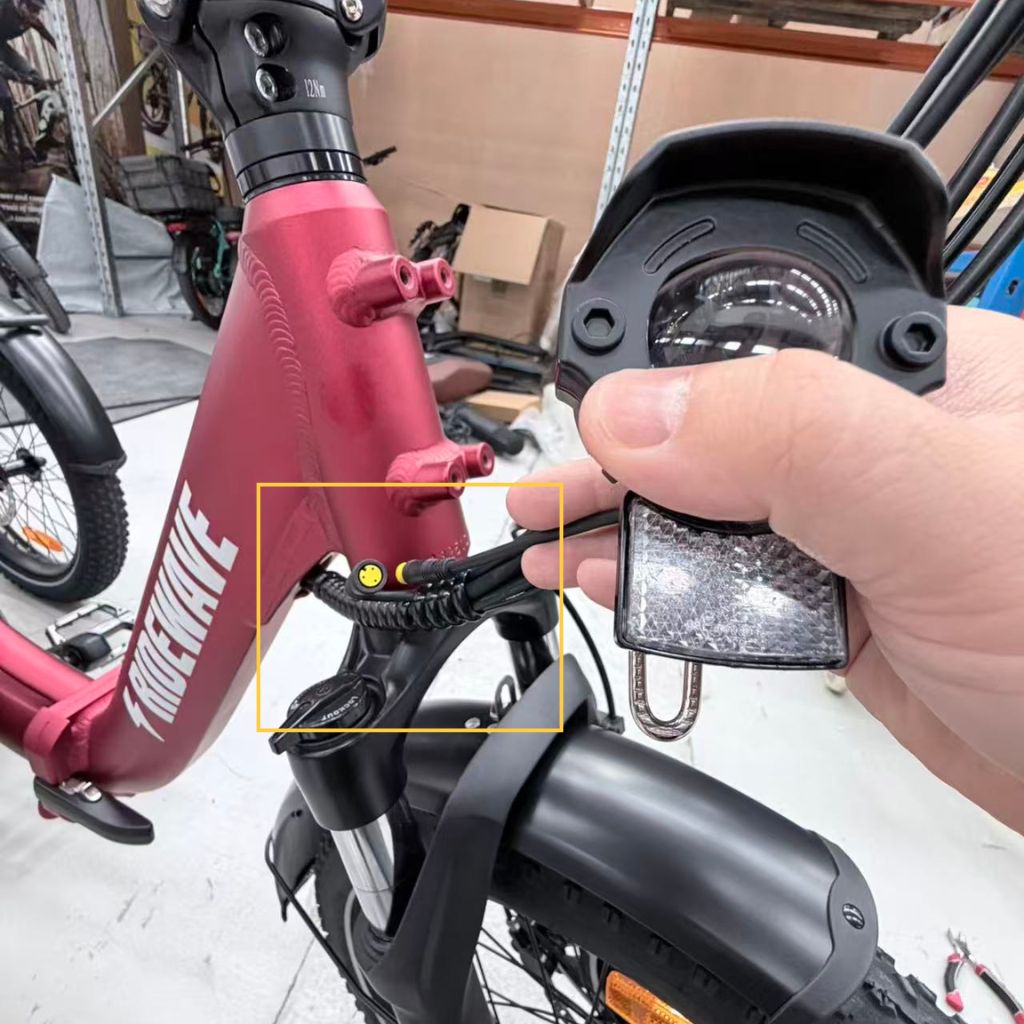
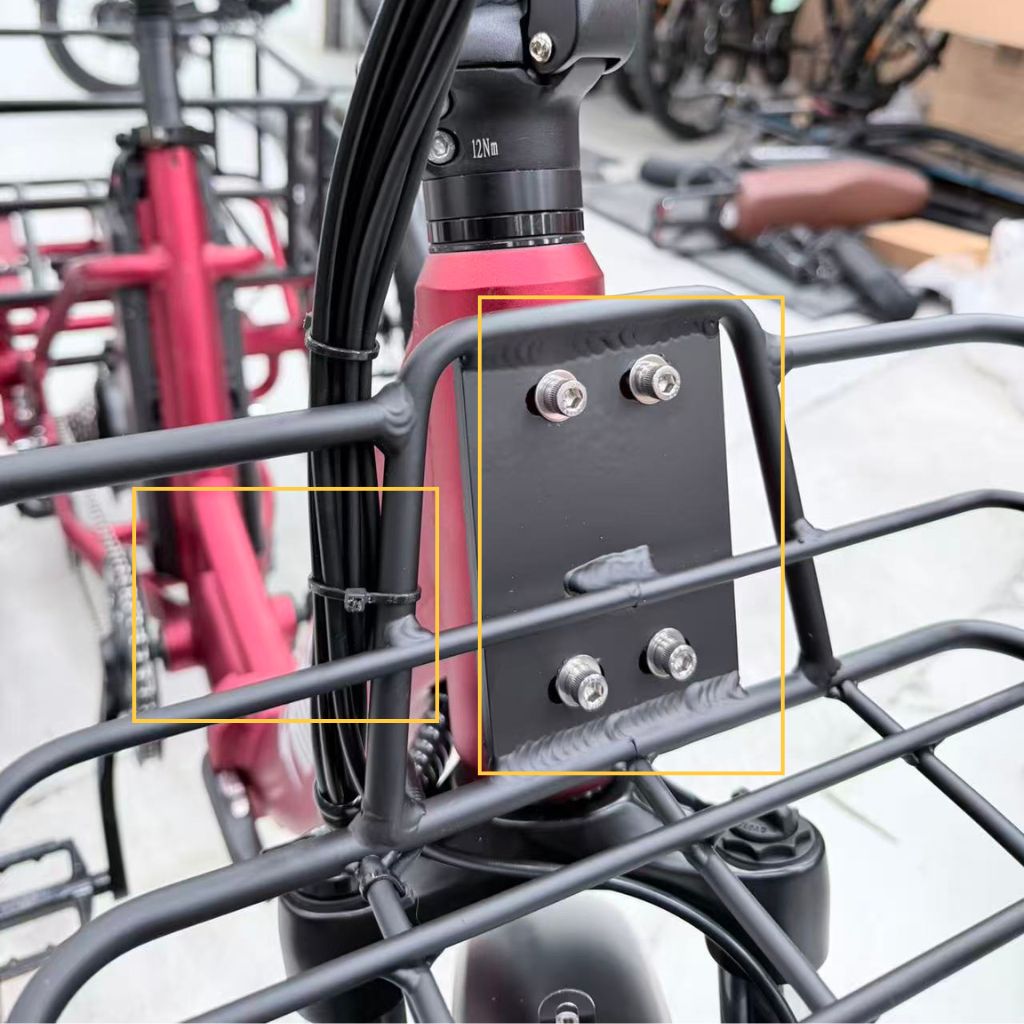
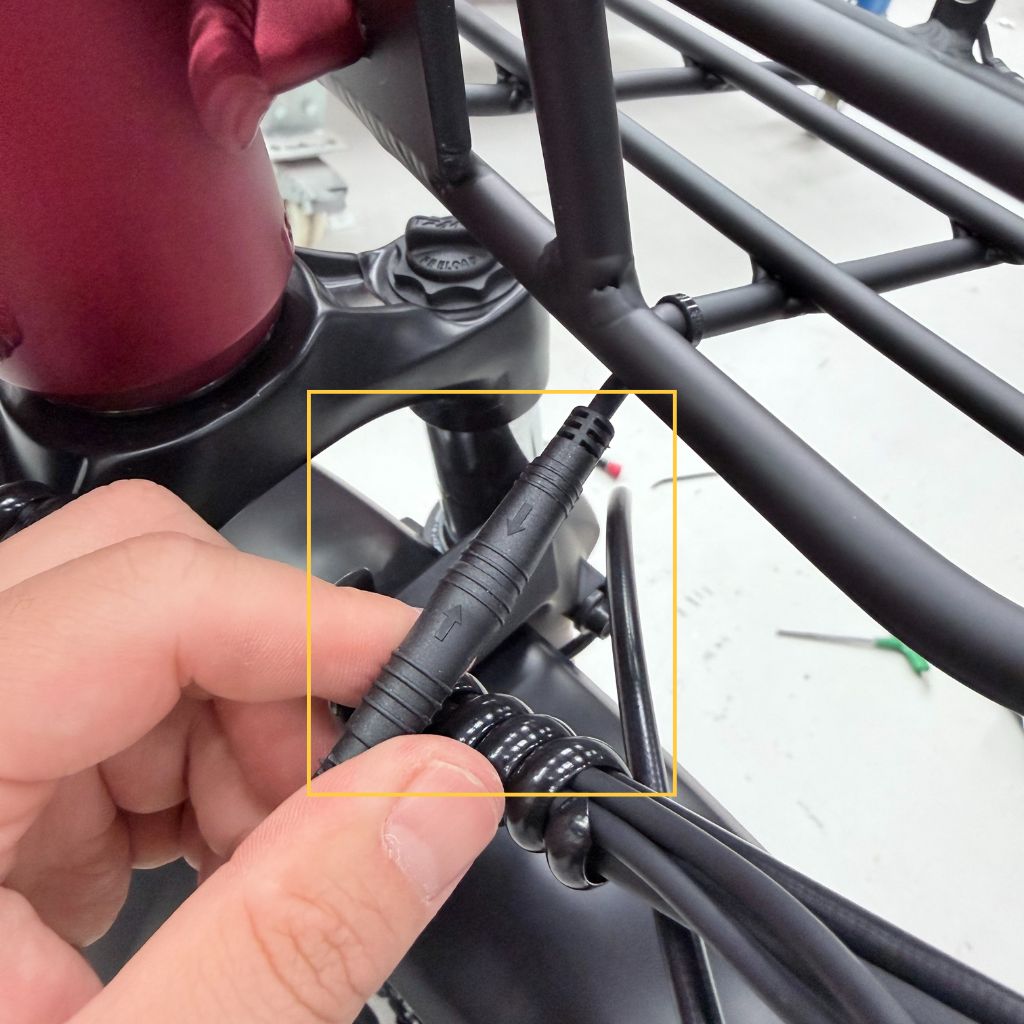
- Mounting the basket: Disconnect the front light at the cable cluster in front of the headstem, and put it aside. Use a 5 mm Allen key to remove the four screws from the front mounting plate on the handlebar. Hold the front basket in position against this plate, guiding the cables to either side (generally left of the basket when standing in front of the bike is easier) so none are pinched or stretched when the handlebars turn. Reinstall and tighten the four screws through the basket bracket into the plate.
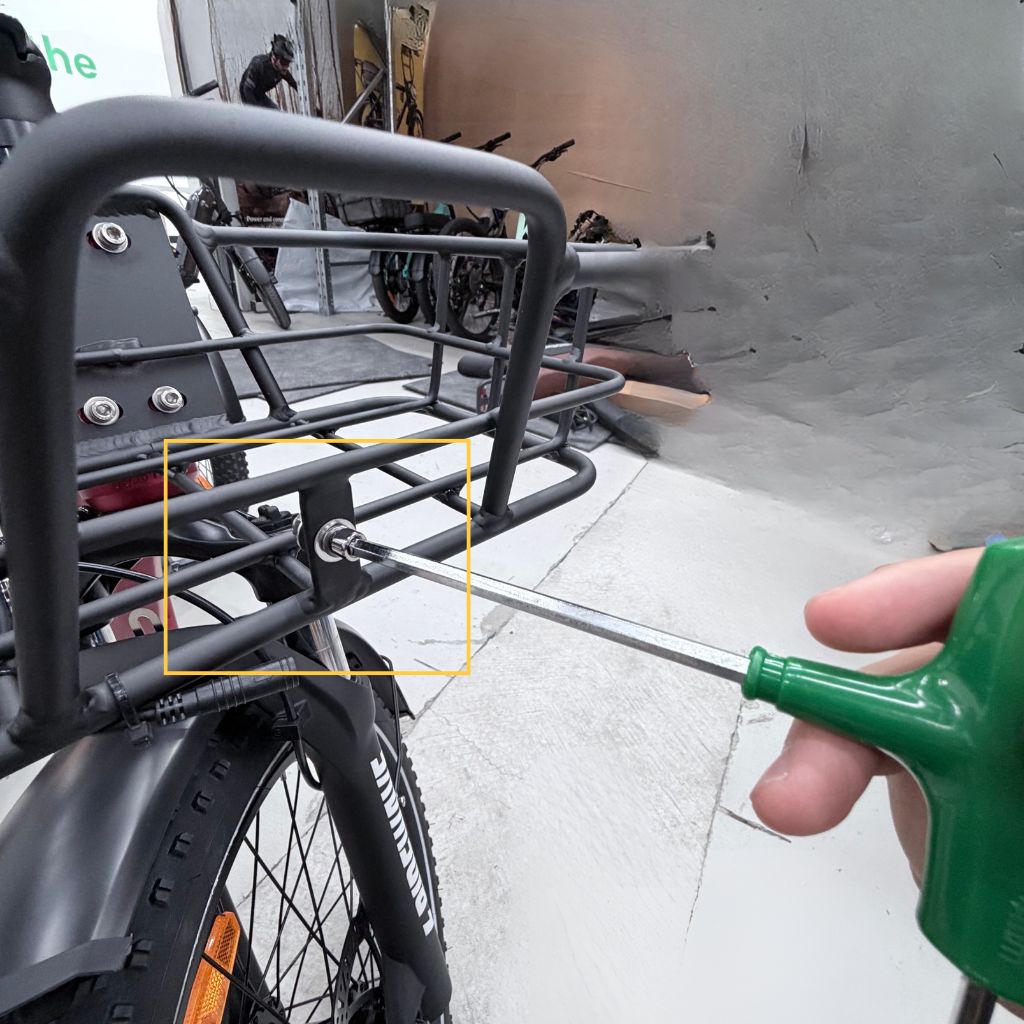
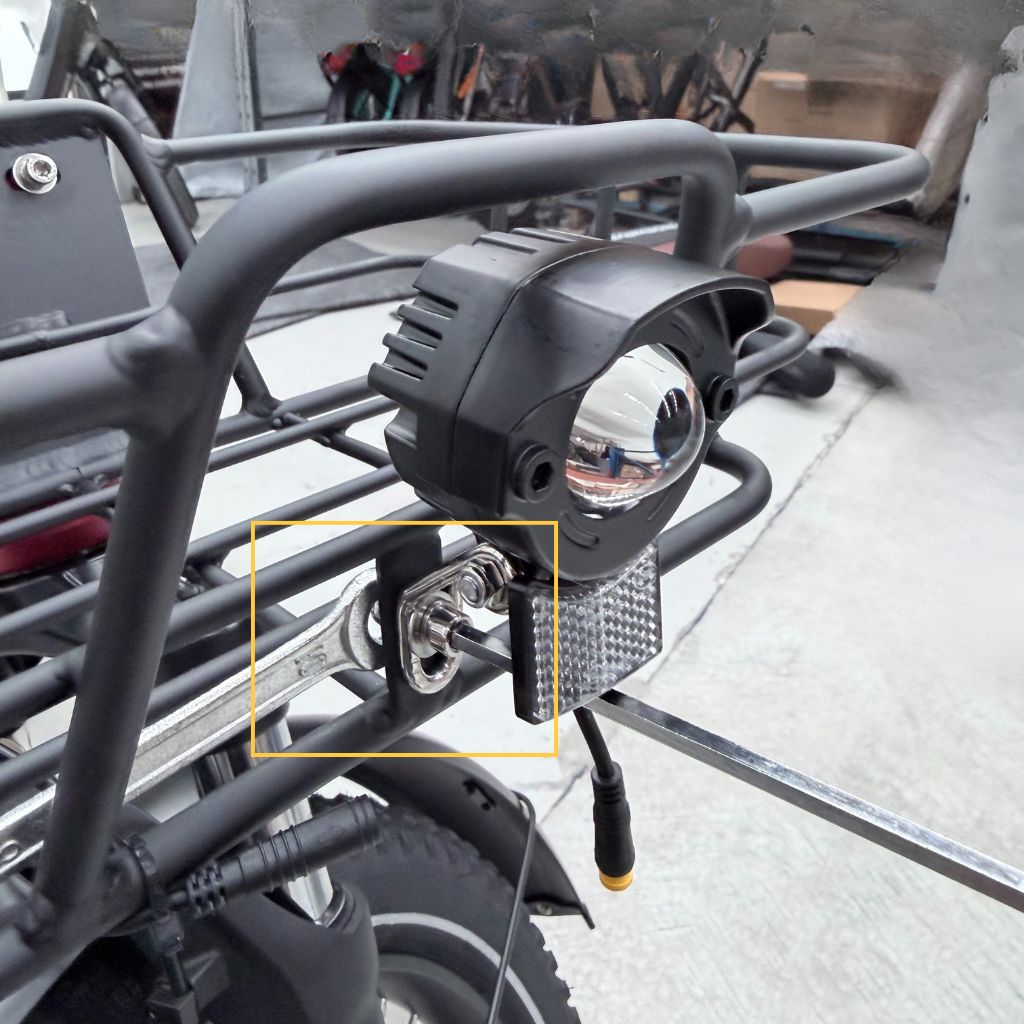
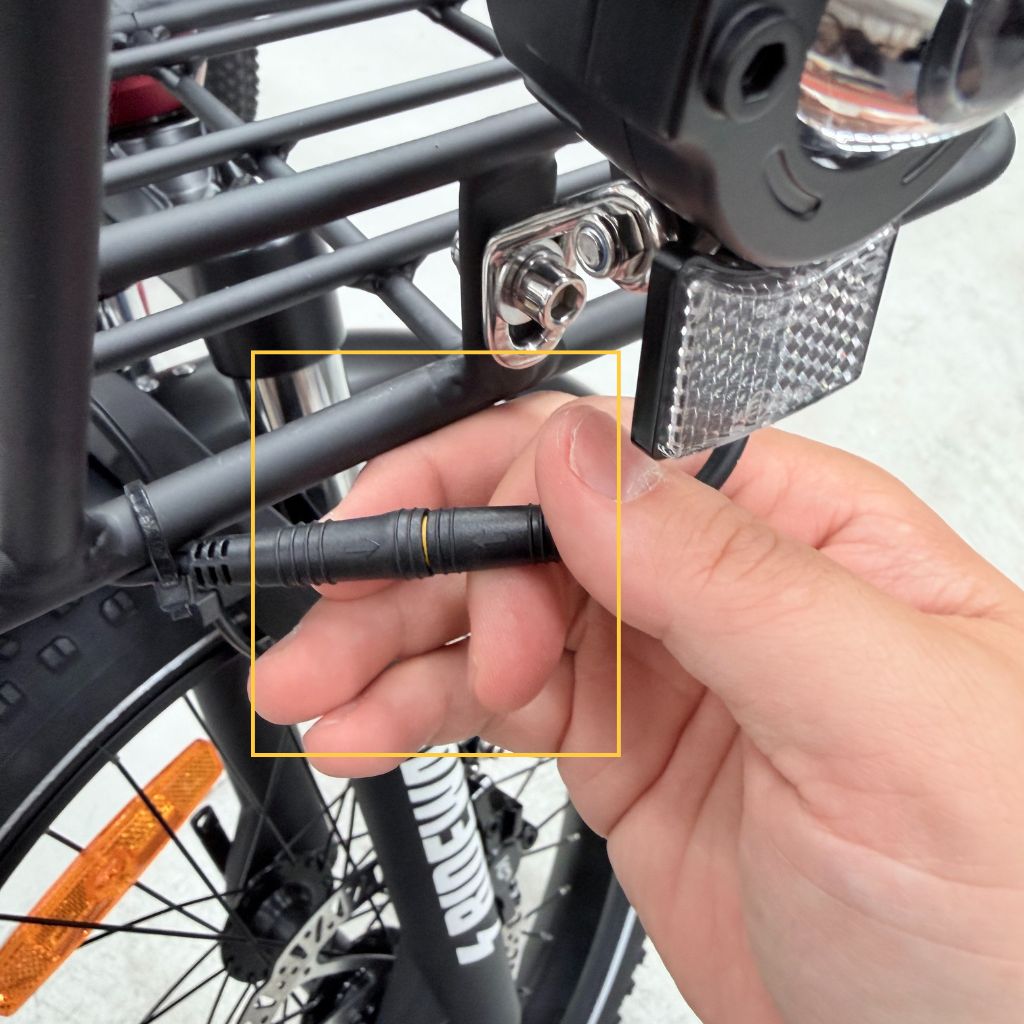
Fitting the front light: Use a 4 mm Allen key and a 10 mm wrench to loosen the screw on the front of the basket. Fasten the front light to the front mounting point of the basket. Rotate the light so it faces slightly upwards and forward. The front basket has an extension cable already zip-tied at the bottom. Finally, plug the light cable into the extension connector located underneath the front basket, and plug the other end into the front light cable just above the forks (where the front light was originally connected).
Step 6: Installing Rear Mudguards
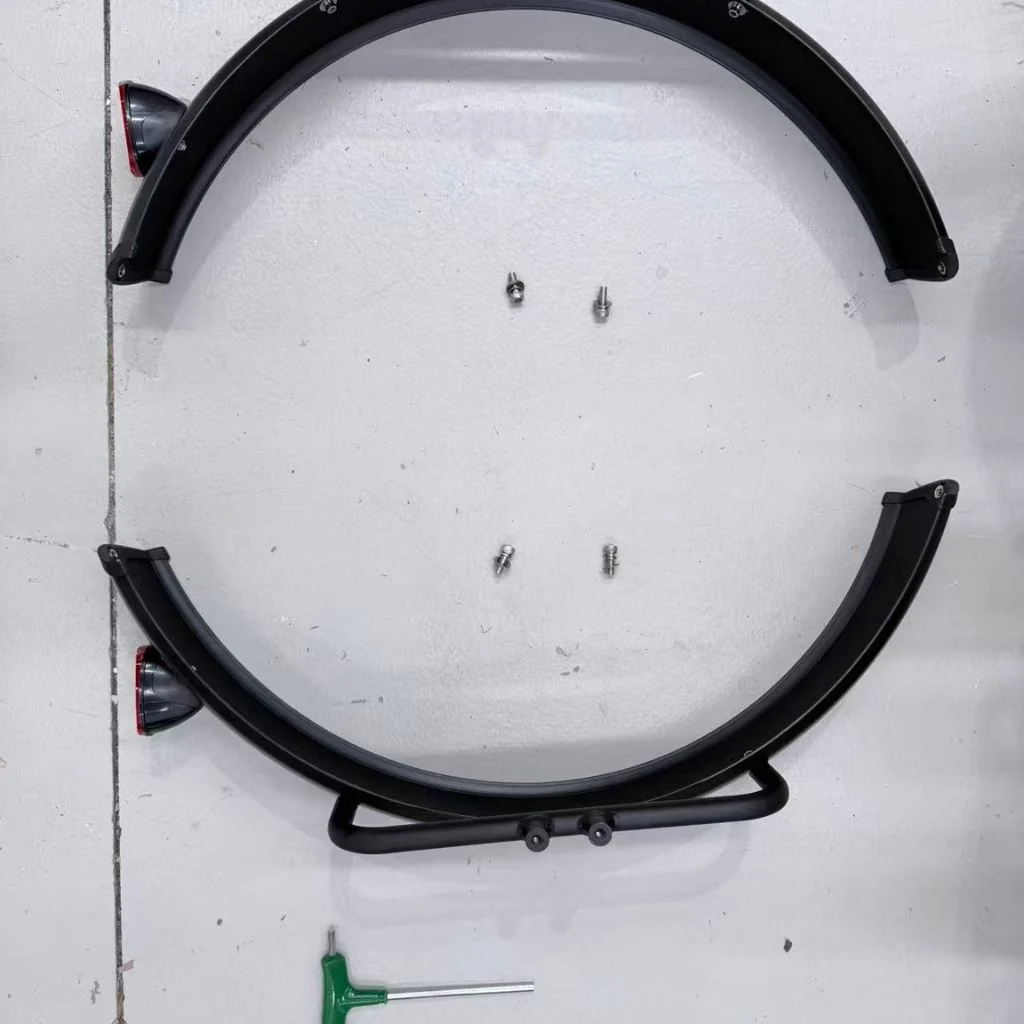
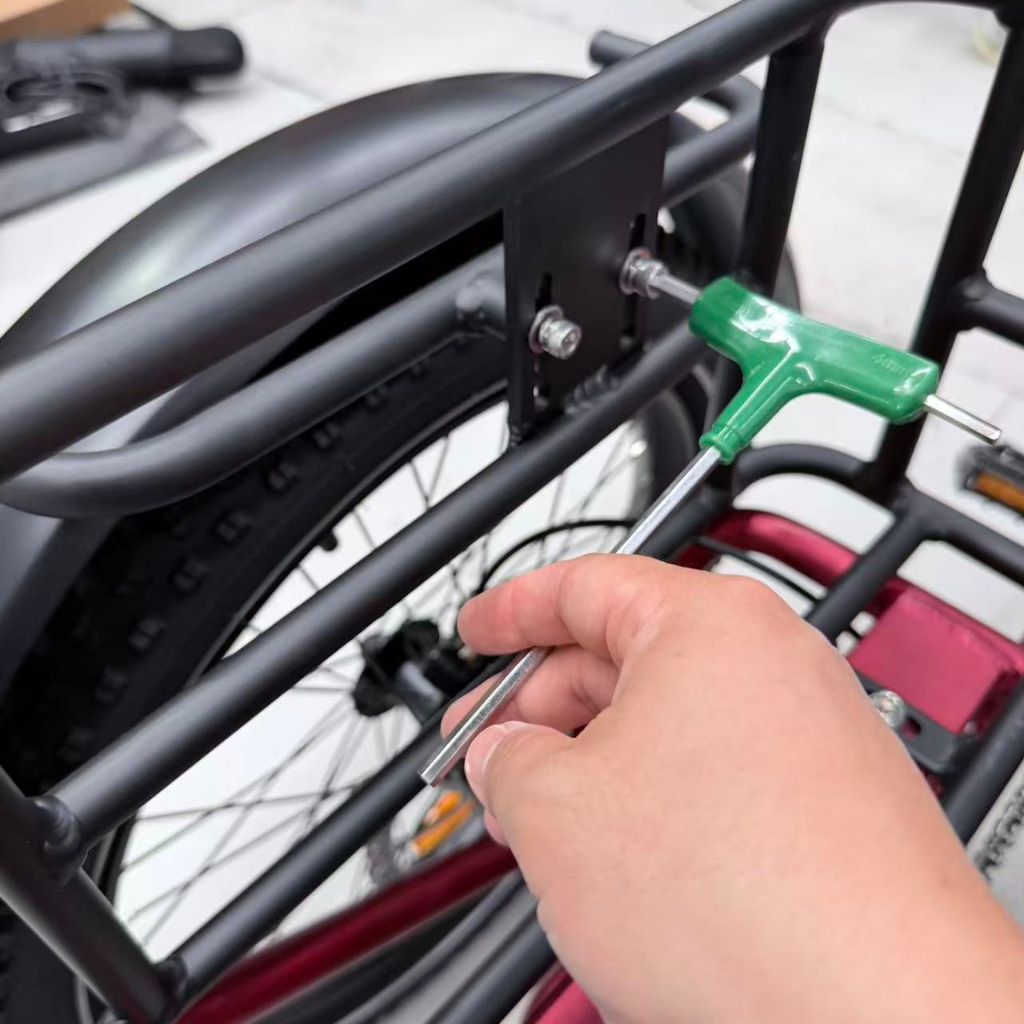
- Removing screws: Use a 5 mm Allen key to remove the mounting screws on the inside edge of each rear mudguard position. Place each mudguard over its corresponding rear wheel and line it up with the mounting points on the rear basket frame. Ensure the red rear reflectors are positioned at the rear of the trike. Reinstall and tighten the screws so the mudguards are centred over the tyres and do not rub when the wheels rotate. Adjust the mudguards to minimise the gap between the guard and the tyre without restricting rotation; as a general guide, positioning the mounting screws approximately one-third down from the top of the mounting points provides the correct clearance.
Step 7: Assembling pedals
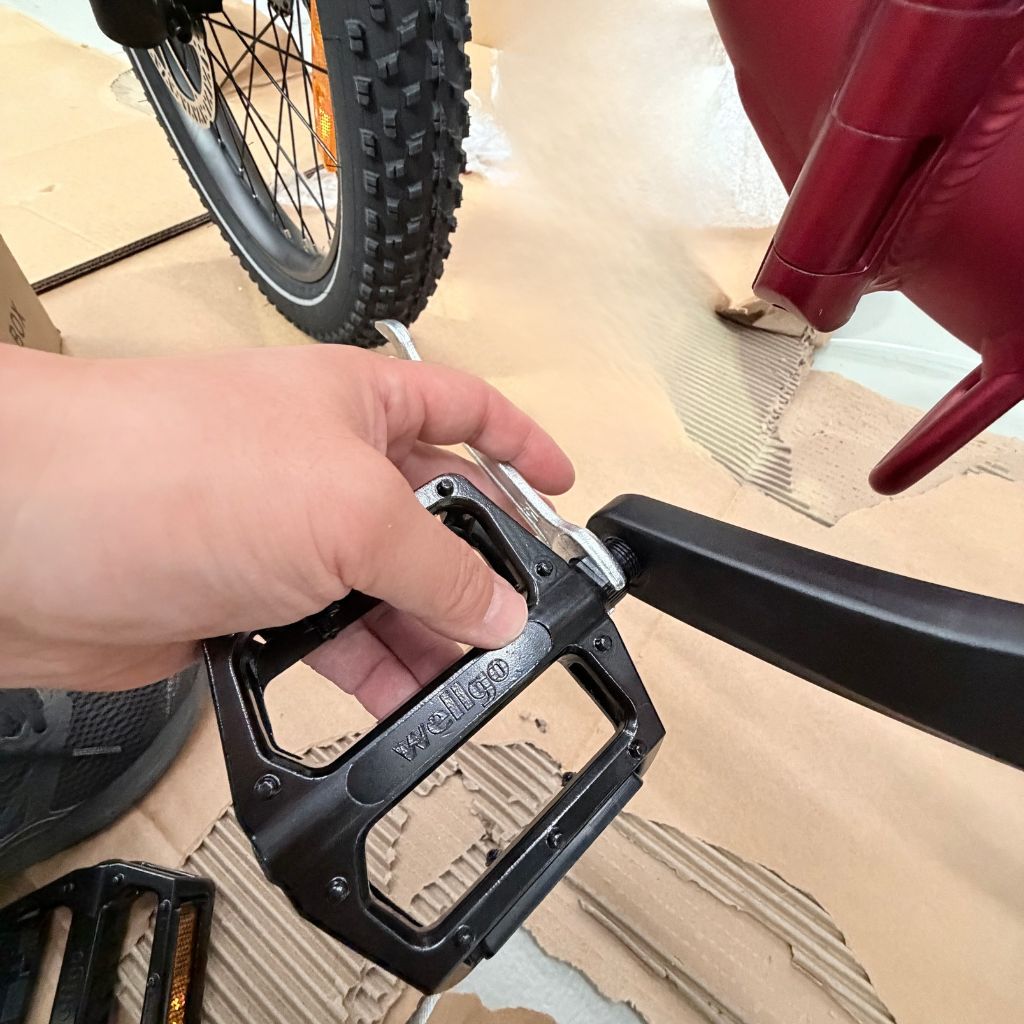
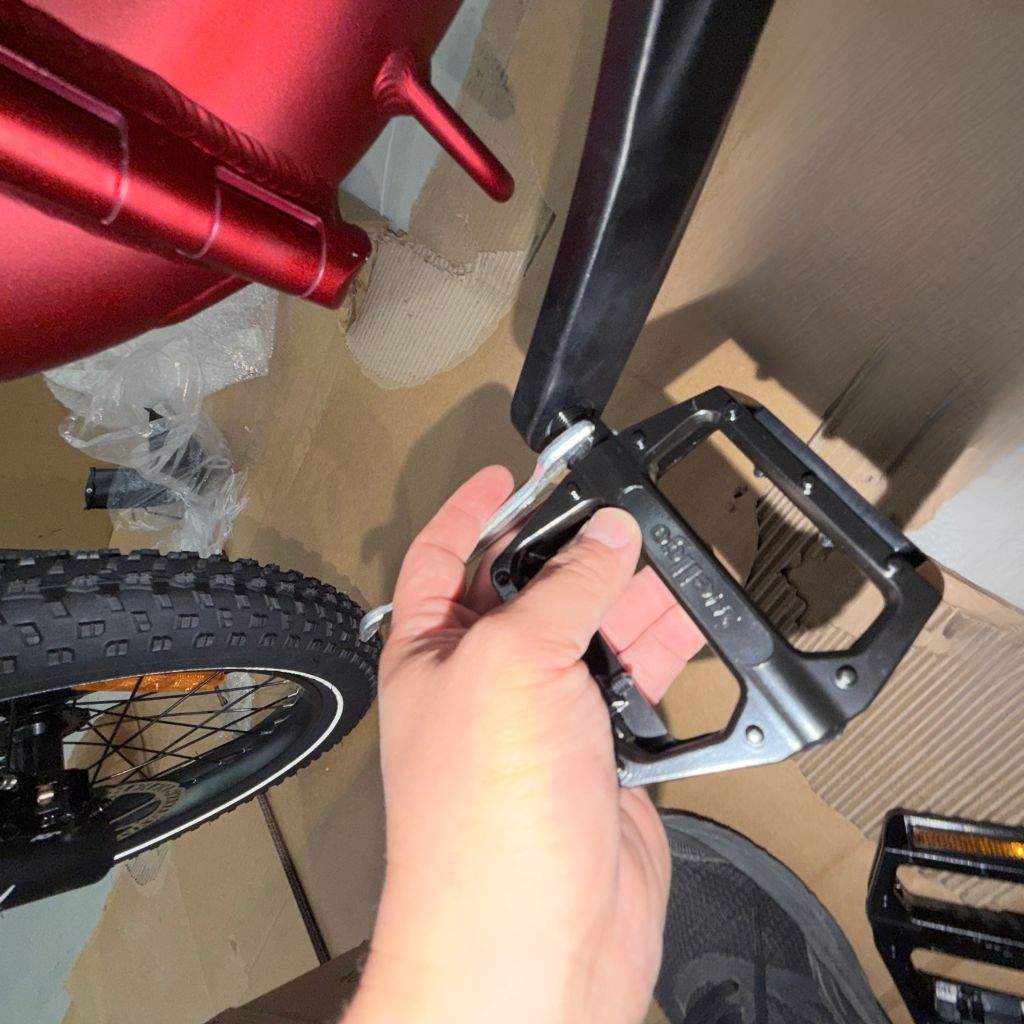
Note: Pedals are side-specific. Before installation, ensure you have the correct pedal by checking the “L” (left) or “R” (right) marking on the sticker or the engraved marking on the pedal itself.
- Greasing pedals: Apply grease to the pedal threads - Begin by applying a small amount of grease to the threads of the pedal. This helps prevent the pedals from seizing in the crank and makes future removals easier.
- Attach and tighten the pedals - Insert the pedal into the crank arm and hand-tighten it to ensure it's threaded correctly. Then, use an open-ended 15mm wrench to securely tighten the pedal. Be sure to tighten each pedal in the correct direction: the right (R) pedal tightens clockwise, and the left (L) pedal tightens anticlockwise. This means the direction of tightening should be towards the front of the trike for both pedals.
Step 8: Attaching Seat
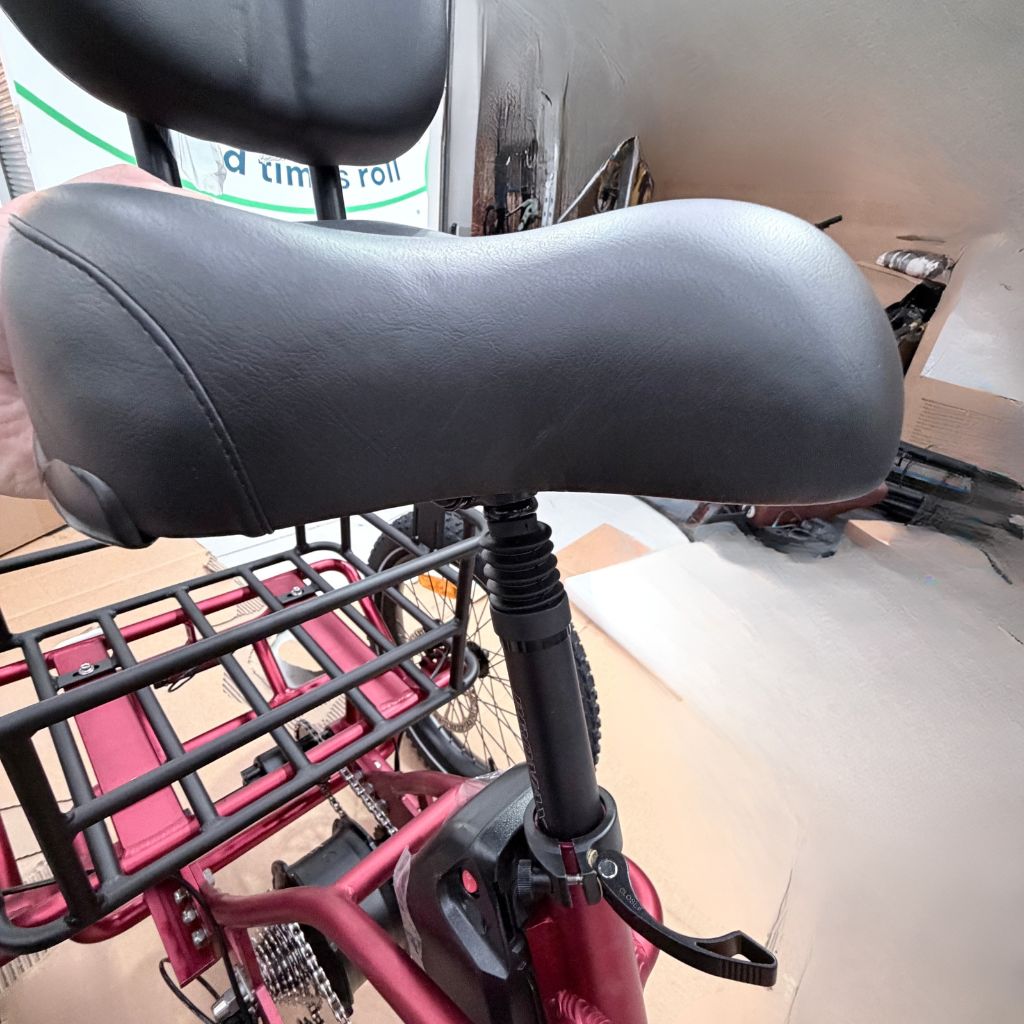
- Loosening Seat Clamp: Hand-loosen the seat clamp lever into the open position. Insert the seat post into the frame to a suitable height (at least past the minimum insertion mark), then close the clamp lever to lock the post in place. Check that the saddle is straight and does not twist when you apply pressure.
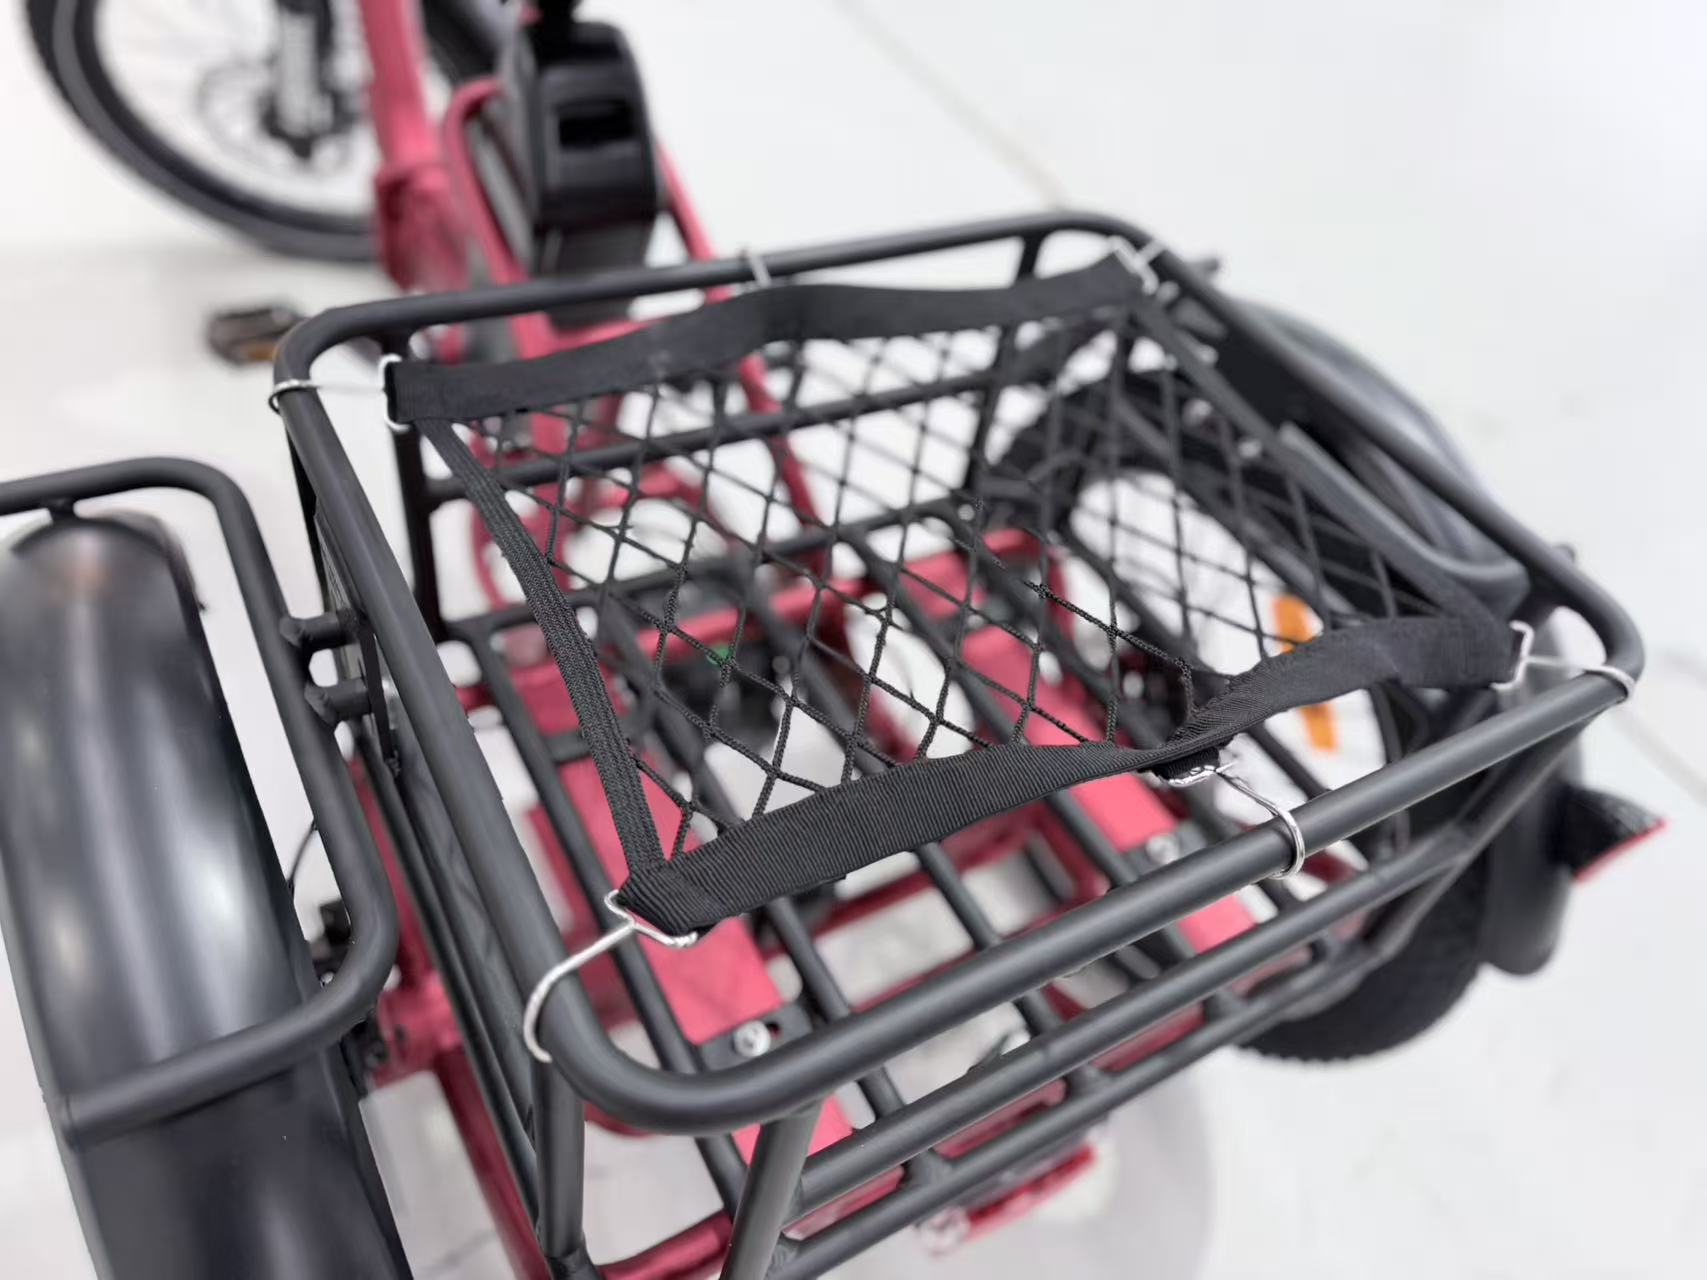
Step 9: Attaching the Rear Cargo Crate Mesh Net
- Position the mesh net over the top of the rear cargo crate. Using the silver hooks attached to the elastic straps, secure each hook onto the outer edges of the cargo crate frame. Ensure the net is evenly tensioned on all sides so it sits flat and securely holds items in place without sagging.
Step 10: Pumping the tyres
Note: When preparing to inflate the tyres, always refer to the recommended PSI printed on the tyre sidewall before pumping. Do not exceed the maximum pressure stated on the tyre. Do not exceed the maximum pressure stated on the tyre.
- When preparing to pump the tyres:
- For the Ridewave Wallaby, the maximum inflation pressure is 30 or 35 PSI, depending on the tyre width. Both the front and rear tyres should be inflated to the pressure specified on the tyre sidewall. As a general guide, the usable pressure range is 5–35 PSI, depending on rider preference and terrain.
For a Softer Ride: We recommend a PSI range of 5–20 for a smoother, more comfortable ride. This lower pressure is ideal for uneven surfaces or light off-road use and improves comfort by allowing the tyres to absorb more vibration.
For a Firmer Ride: If you prefer a more stable and responsive feel, inflate the tyres to 20–30 PSI. Higher pressure is better suited for flat, sealed surfaces such as urban roads and reduces rolling resistance.
Finding Your Ideal PSI: Experiment with different pressure levels in the front and rear tires until you discover what feels best for your riding style and terrain. Adjust as needed to achieve your desired balance of comfort and performance.
- For the Ridewave Wallaby, the maximum inflation pressure is 30 or 35 PSI, depending on the tyre width. Both the front and rear tyres should be inflated to the pressure specified on the tyre sidewall. As a general guide, the usable pressure range is 5–35 PSI, depending on rider preference and terrain.
Seasonal Tyre Pressure Adjustment
Tyre pressure can be affected by temperature changes. During warmer summer months, air inside the tyre expands, which can increase pressure. For this reason, slightly lower tyre pressures may be more appropriate in hot conditions to prevent over-inflation.
In cooler winter months, air contracts, which can cause tyre pressure to drop. You may need to inflate the tyres slightly more frequently to maintain your preferred PSI. Always recheck tyre pressure before riding, especially when there are significant temperature changes.
Important:
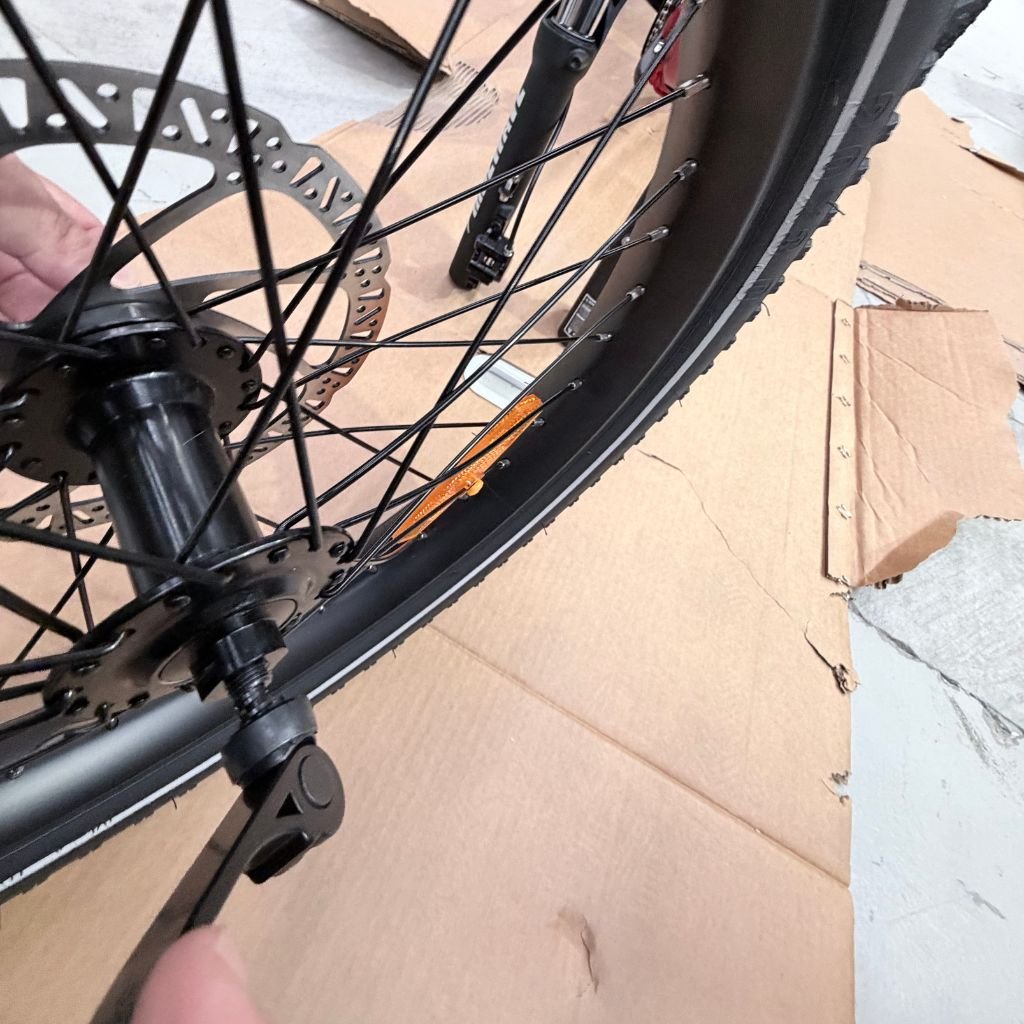
While inflating, pause occasionally to check that the tyre bead (indicated with arrows) is properly seated around the rim.
Ensure that the pumping nozzle is correctly attached to the inner tube valve, air should escape before the lever is adjusted. (Proper attachment circled in red)
If the bead starts to rise unevenly, deflate the tyre slightly and press the bead back into place before continuing.
Ensure the tyre bead line (a thin moulded line near the sidewall) is evenly positioned just above the rim on both sides.
If any part of the inner tube becomes exposed during inflation, stop immediately as this can cause the tube to burst.
Properly seating the bead ensures safe and consistent tyre inflation.

Final Checks
Before riding your Ridewave Wallaby Folding eTrike, perform the following checks:
- Ensure all bolts are tightly fastened.
- Test the folding mechanisms to ensure they are secure.
- Check the tire pressure and inflate as needed.
Congratulations — your Ridewave Wallaby Folding e-trike is now fully assembled and ready to ride. Enjoy your e-trike, and don’t hesitate to contact our support team if you need any further assistance.