Wallaby User GuideUpdated 5 months ago
This guide outlines the basic operation and core functions of the Ridewave Wallaby Folding eTrike. Detailed explanations of individual riding features and advanced settings are covered in later sections of this manual.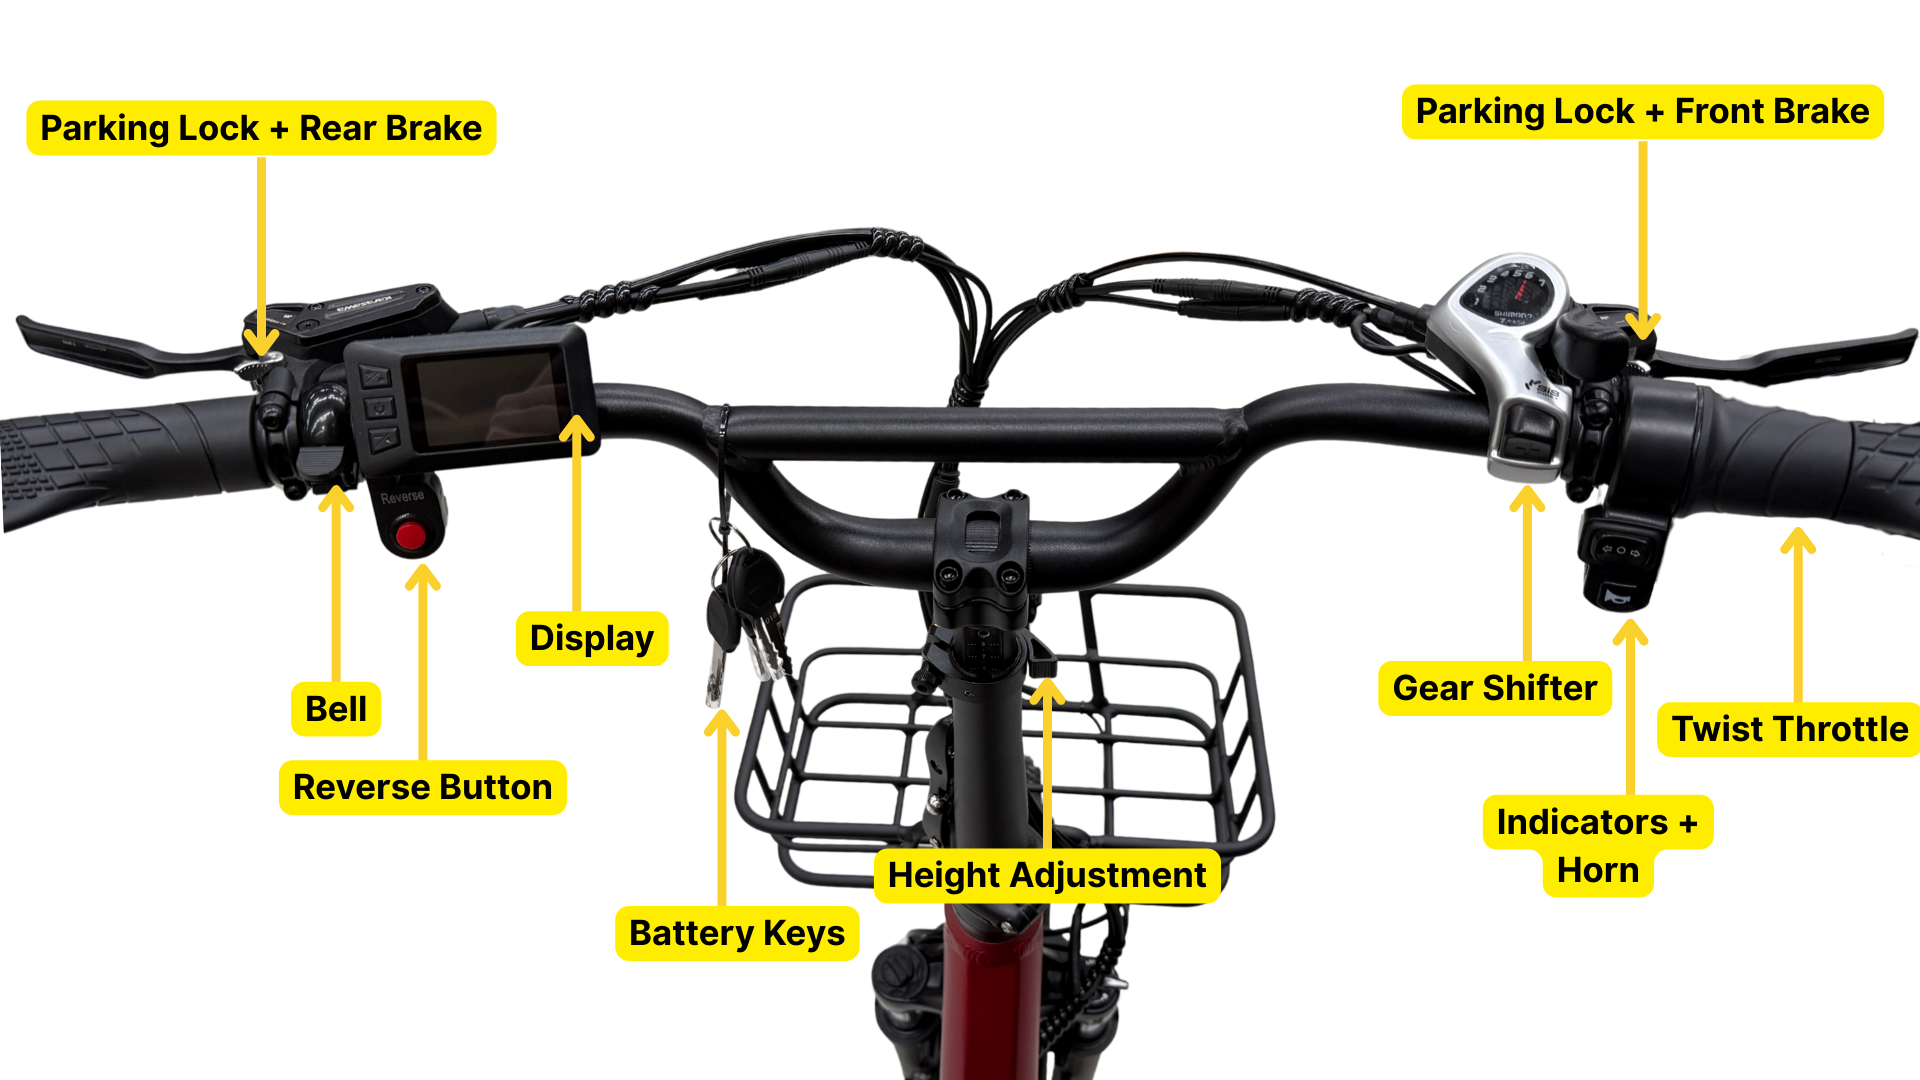
Using the e-Trike:
1. Powering the Battery
Before use, ensure the battery has sufficient charge.
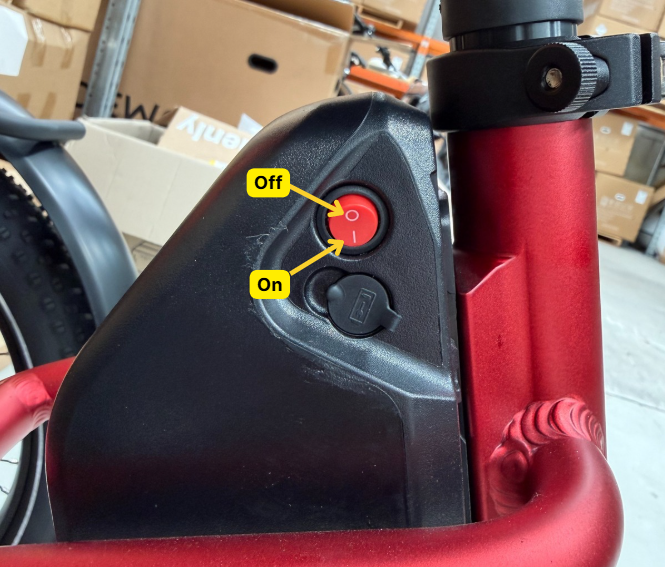
Confirm the red power switch on the top of the battery is switched ON.
Make sure the battery is fully seated in the battery base. When locking the battery, the key should turn smoothly with little to no resistance—this indicates correct installation.
2. Turning the System On
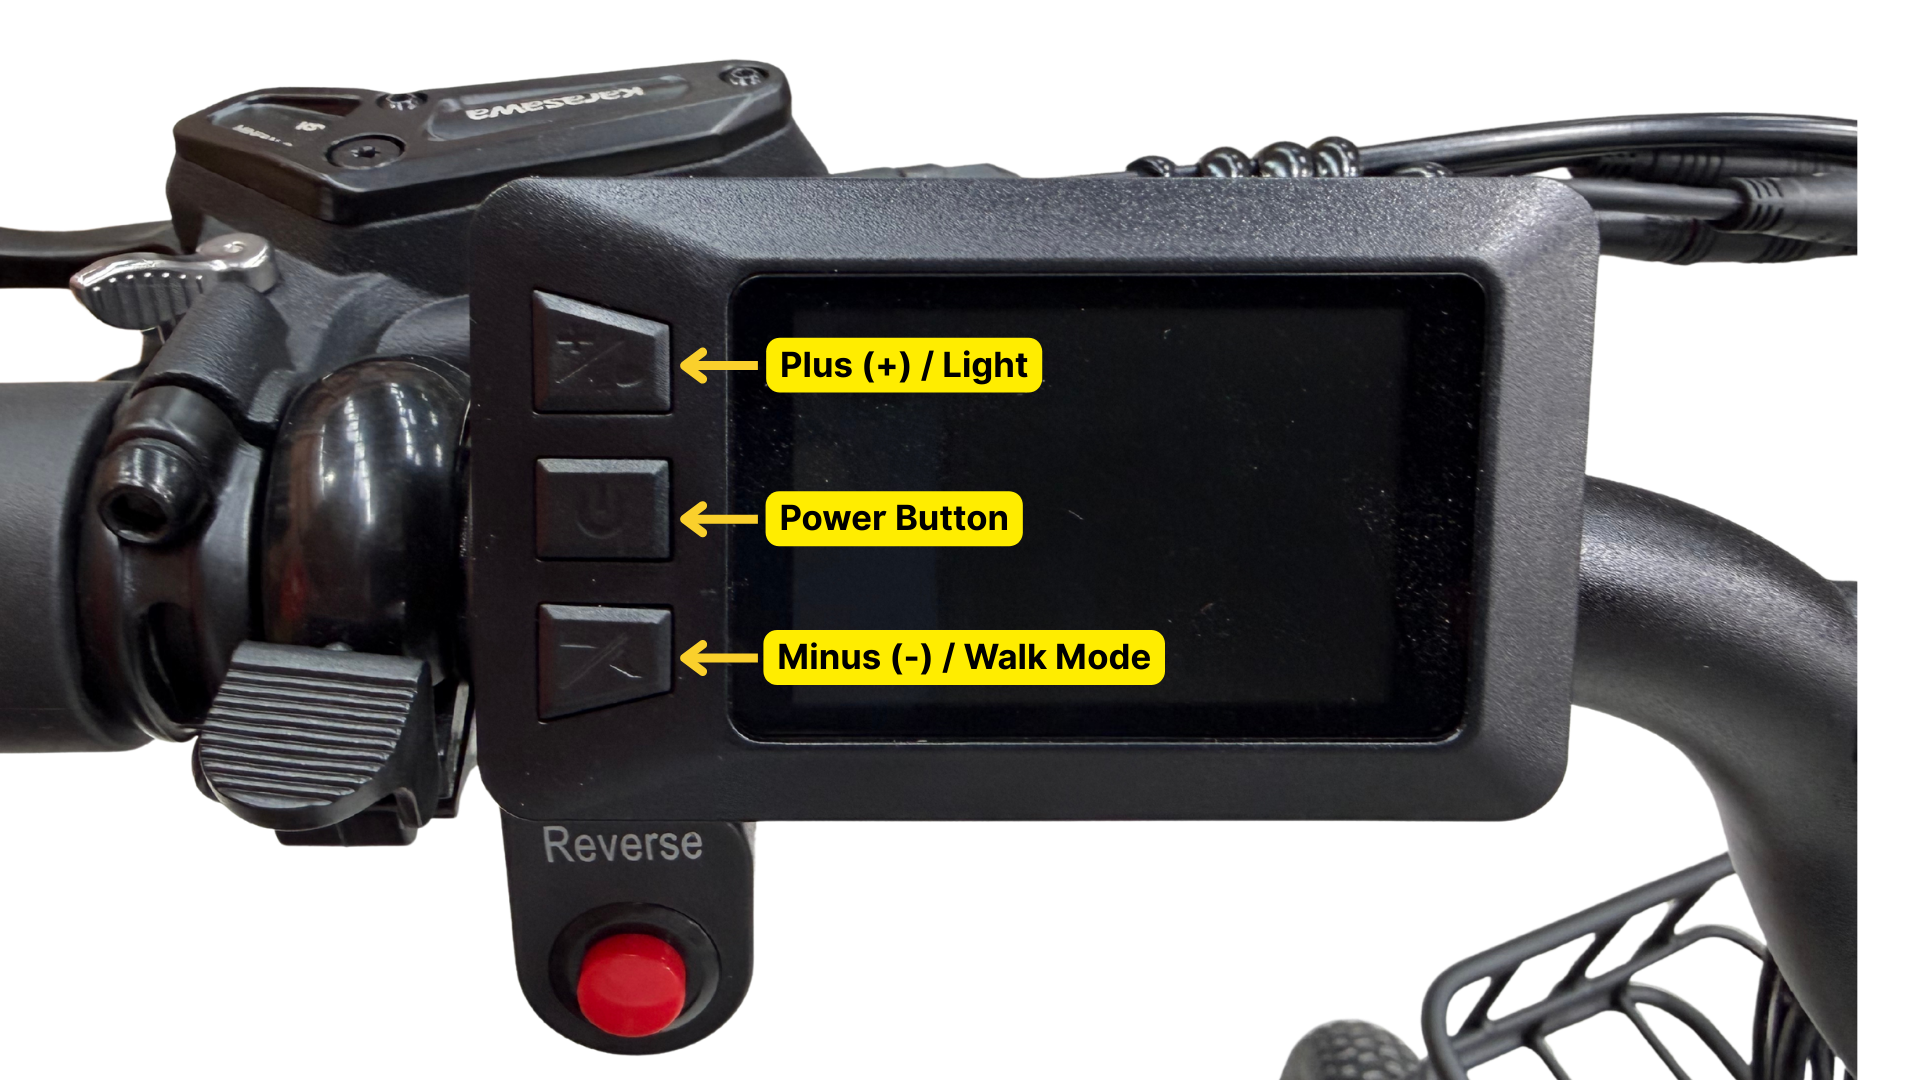
Press and hold the Power (middle) button on the display for approximately 2 seconds.
Release the button once the Ridewave logo appears.
Allow the display to complete its boot-up sequence before riding.
Note: If the trike is left unused for approximately 10 minutes, the system will automatically power off to conserve battery.
3. Pedal Assist System (PAS)
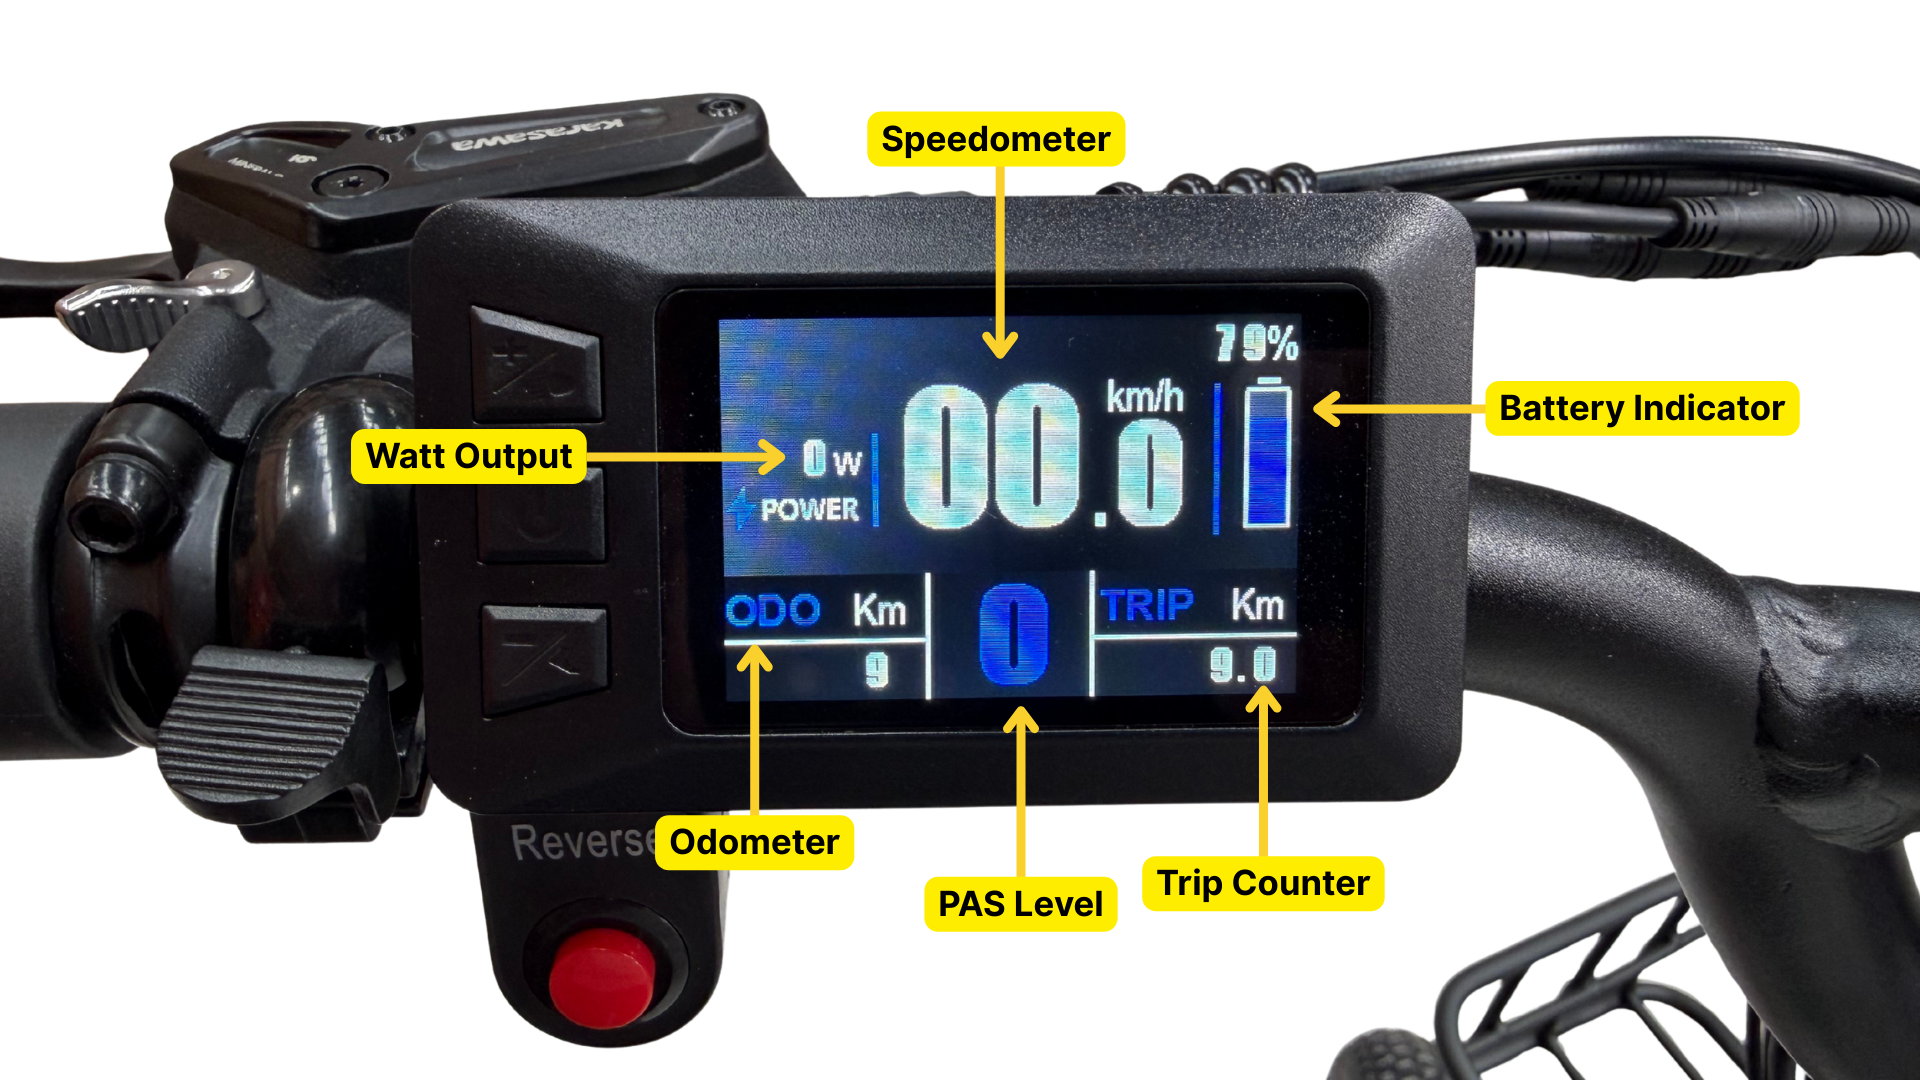
Once the display is on, the main screen will show your speed, battery level, and PAS level.
Use the “+” button to increase the Pedal Assist (PAS) level and the “–” button to decrease it.
PAS levels range from 0 to 5:
Level 0: No motor assistance
Levels 1–5: Increasing levels of motor support
When PAS is set to Level 1 or higher, begin pedalling forward and the motor will engage automatically.
You can adjust the PAS level at any time while riding to suit your terrain and comfort.
4. Riding Notes
Motor assistance is activated when pedalling with PAS set to Level 1 or higher, or when using the twist throttle. The twist throttle is designed as a start-up assist feature and provides assistance up to 6 km/h only. It is recommended to use the throttle to initiate movement, then begin pedalling once the throttle assistance has neared/reached its maximum.
Always start with a low assist level until you are familiar with the trike’s response.
Display Functions
Switching the Lights On / Off
With the display powered on, press and hold the “+” (Plus / Light) button for approximately 2 seconds to turn the lights on.
When activated, both the front and rear lights will illuminate.
The headlight icon will appear on the display, and the display backlight will automatically dim for night riding.
Press and hold the “+” button again to change the lighting mode to flashing / intermittent.
In this mode, the lights will blink to increase visibility.
Press and hold the “+” button once more to turn the lights off.
The headlight icon will disappear and the display backlight will return to normal brightness.
Note: The lighting function controls the trike’s integrated front and rear lighting system where fitted.
Walk Mode (Push-Assist Function)
The walk mode is designed to assist when walking alongside the eTrike, such as when pushing it uphill or manoeuvring at low speed.
Ensure the display is switched on.
Press and hold the “–” (Minus / Walk Mode) button.
After approximately 2 seconds, the motor will engage and provide gentle assistance at a constant speed of less than 6 km/h.
The walk mode immediately disengages once the “–” button is released.
⚠️ Important Safety Notes
Walk mode should only be used while walking beside the eTrike.
Do not use walk mode while riding.
Ensure the wheels are in contact with the ground before activating walk mode to avoid injury.
Display Screens & Menu Button Functions
Once the display is powered on, it will default to showing:
Current speed
Battery level
PAS level
Trip distance
By short-pressing the Power / Menu (middle) button, you can cycle through additional ride information screens in the following order:
ODO (Odometer) – Total distance travelled by the eTrike
Max Speed – Highest speed reached during the current ride
Average Speed – Average speed for the current trip
Trip Time – Total riding time for the current trip (in minutes)
Each press of the Power / Menu button advances to the next screen.
Additional Trike Functions
Reverse Function
The reverse function assists with manoeuvring the eTrike at low speed.
Press the red Reverse button until it clicks into position.
With the button engaged, gently twist the throttle to begin reversing. The trike may take slightly longer to start moving compared to normal forward throttle operation.
Continue holding the throttle to maintain reverse movement.
Press the button again when you are finished reversing, and the trike will drive forwards as usual.
⚠️ Important: When reversing, the pedals will rotate backwards due to the chain drive. Keep your feet on the pedals and allow them to move naturally to avoid foot or ankle injury.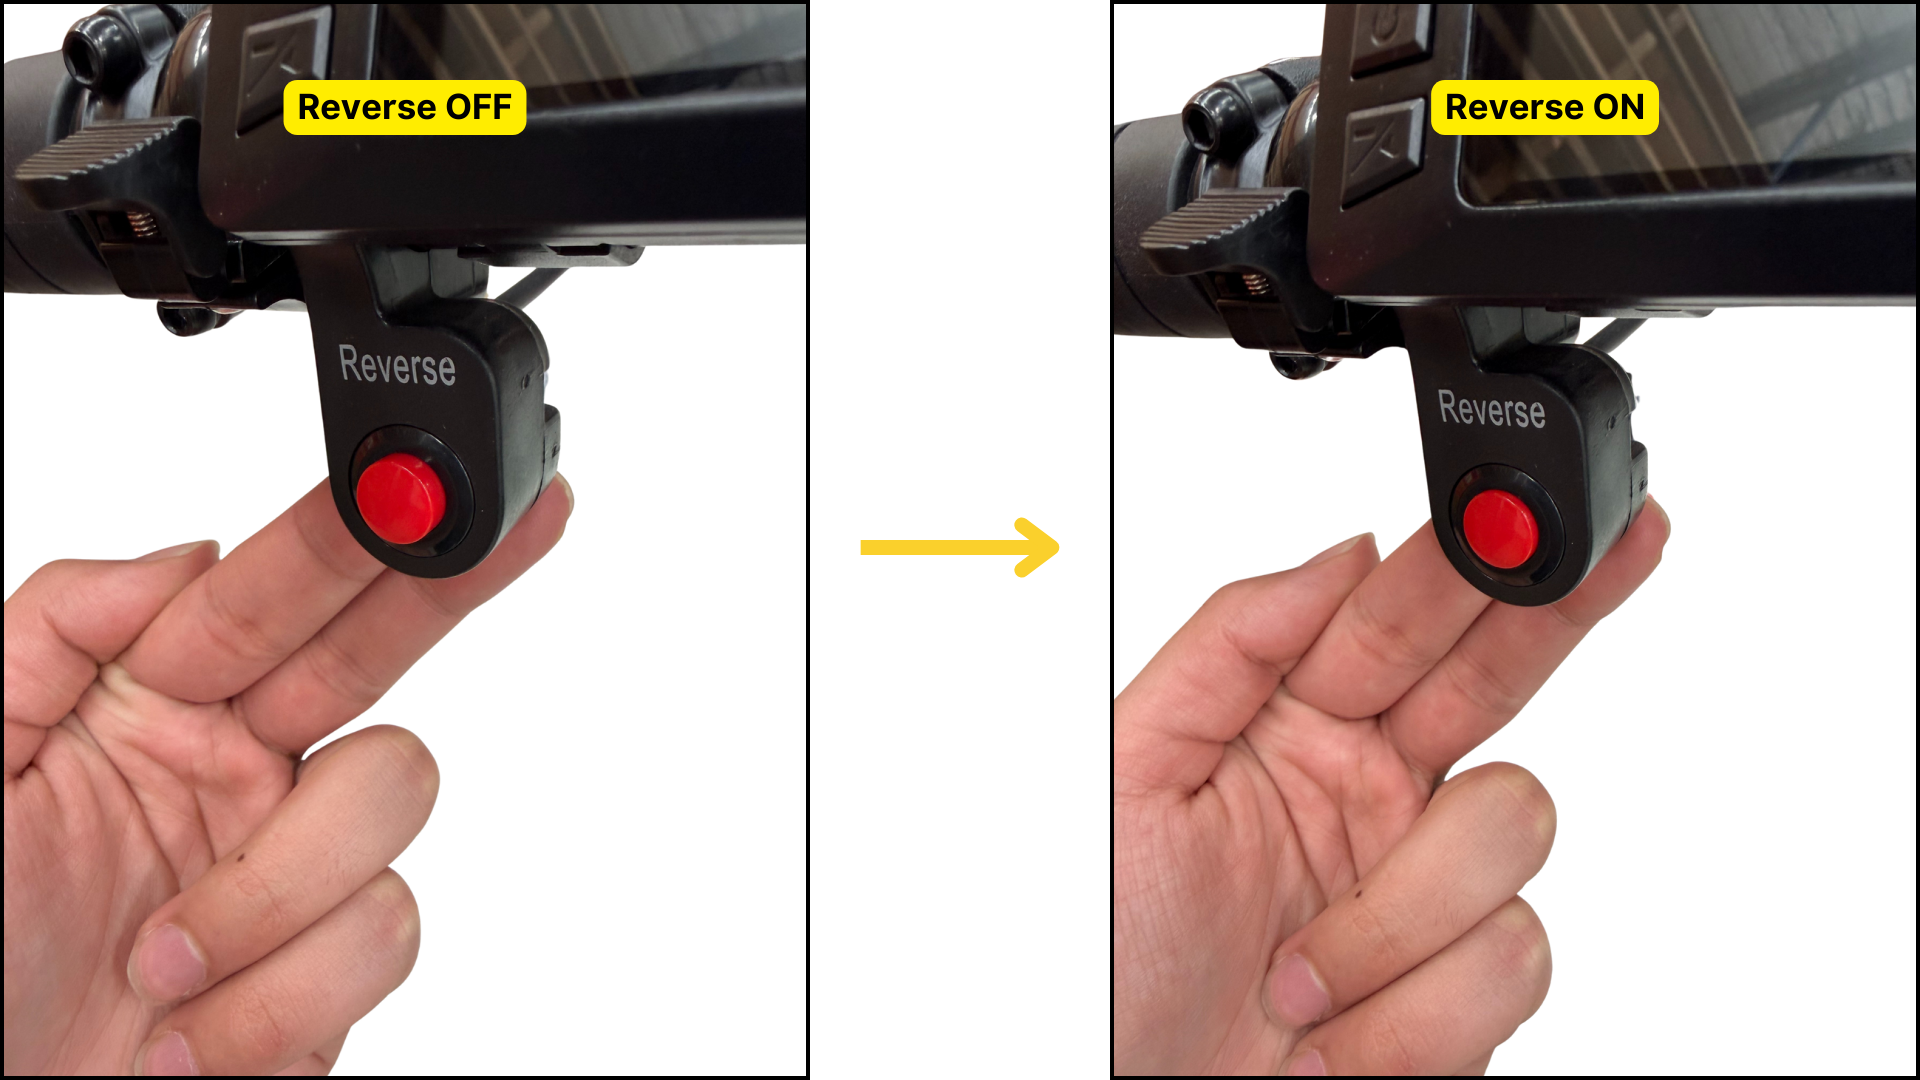
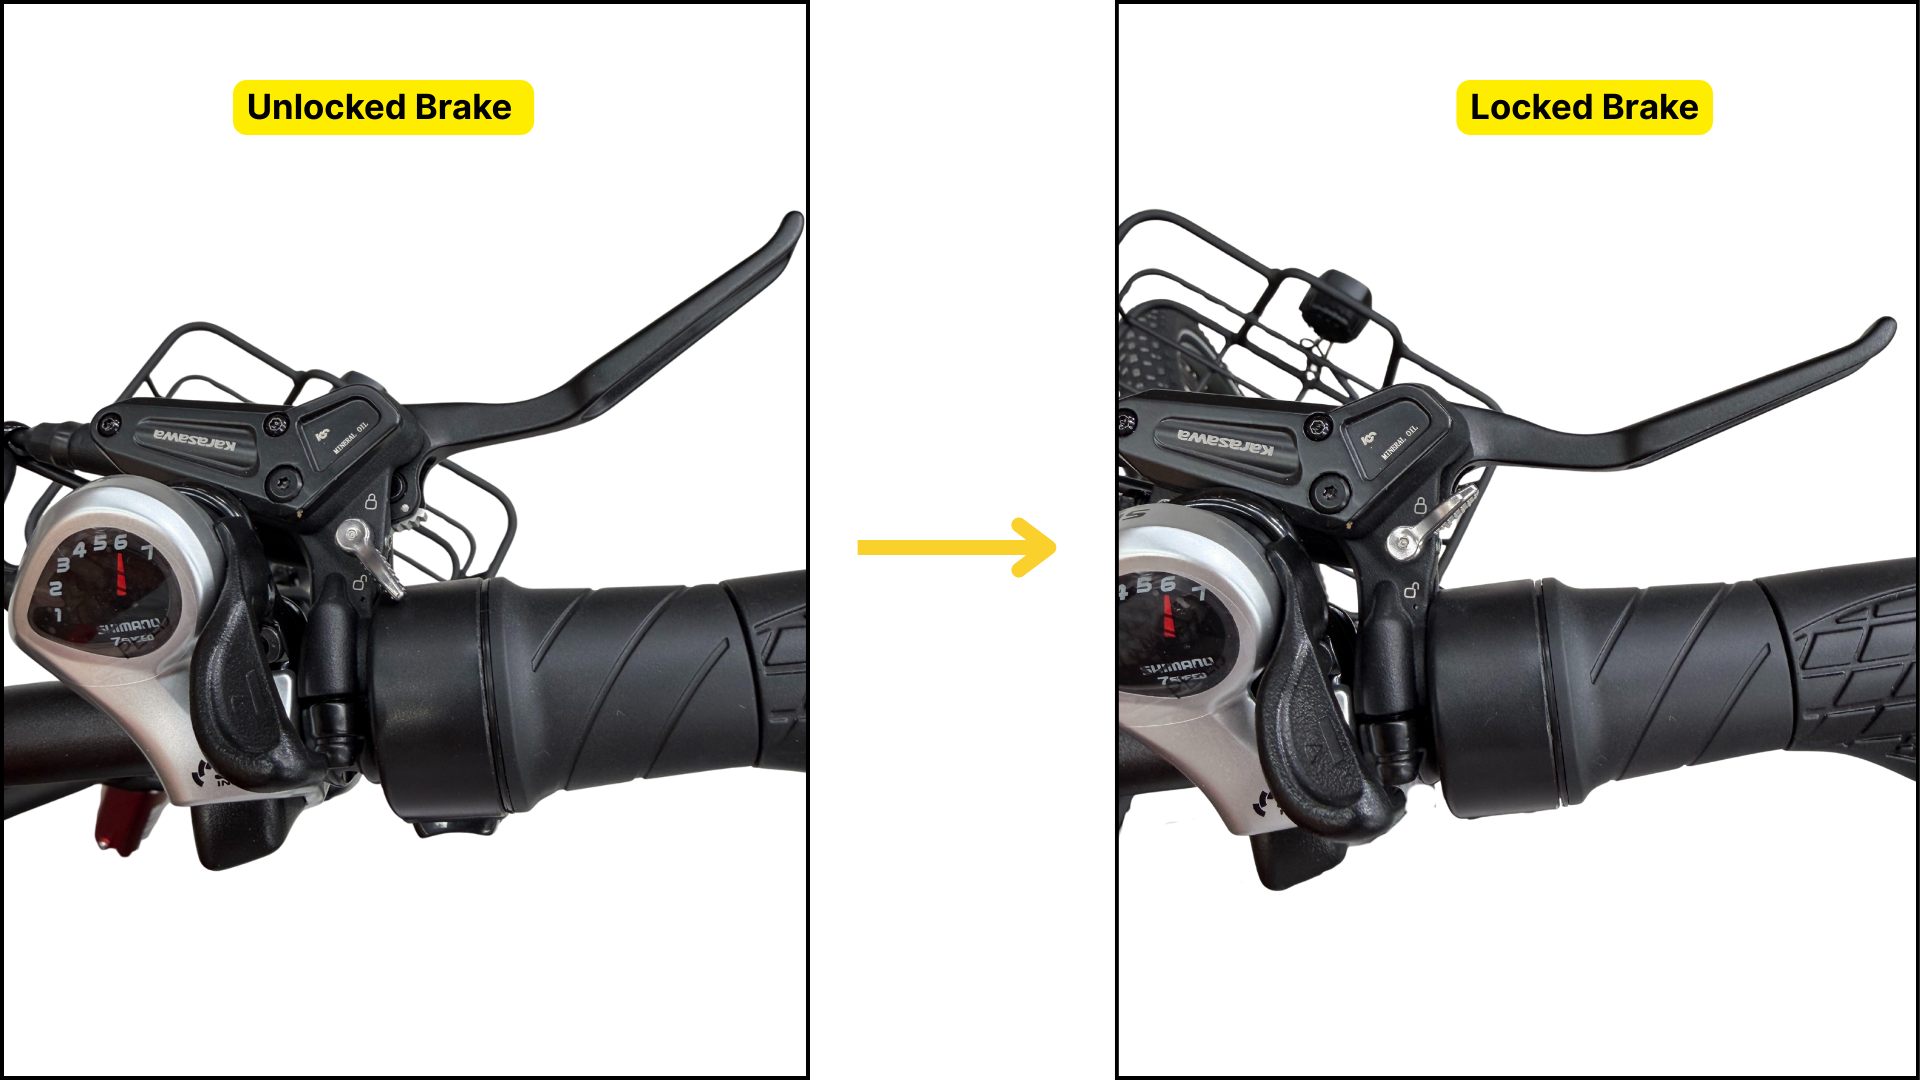
Parking Lock (Brake Lock)
The parking lock allows the eTrike to remain stationary when parked, particularly on slopes.
Firmly squeeze the brake levers. It is generally easier to do one at a time.
While holding the lever(s), flick the silver parking-lock lever upward to the locked position.
This locks the brake levers in place and keeps the brakes engaged.
To release the parking lock:
Squeeze the brake levers again.
Flick the silver lever back downwards.
Gently squeeze and release the brake lever to fully disengage the lock.
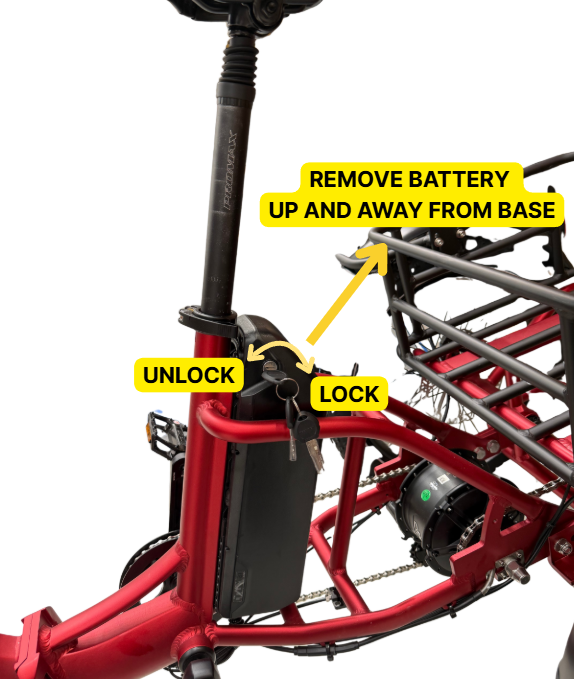
Removing the Battery
Insert the battery key and turn it anti-clockwise to the unlocked position on the right-hand side of the battery.
Once unlocked, lift the battery upward and away from the battery base.
If clearance is limited, raising the seat height or temporarily removing the seat can help provide enough space to safely remove the battery.
Always switch the battery off before removing it from the trike.