Xplorer Front Rack + Basket Assembly TutorialUpdated 5 months ago
Tools Required:
- Stanley Knife/Scissors
- 10mm Wrench
- 5mm Allen Key
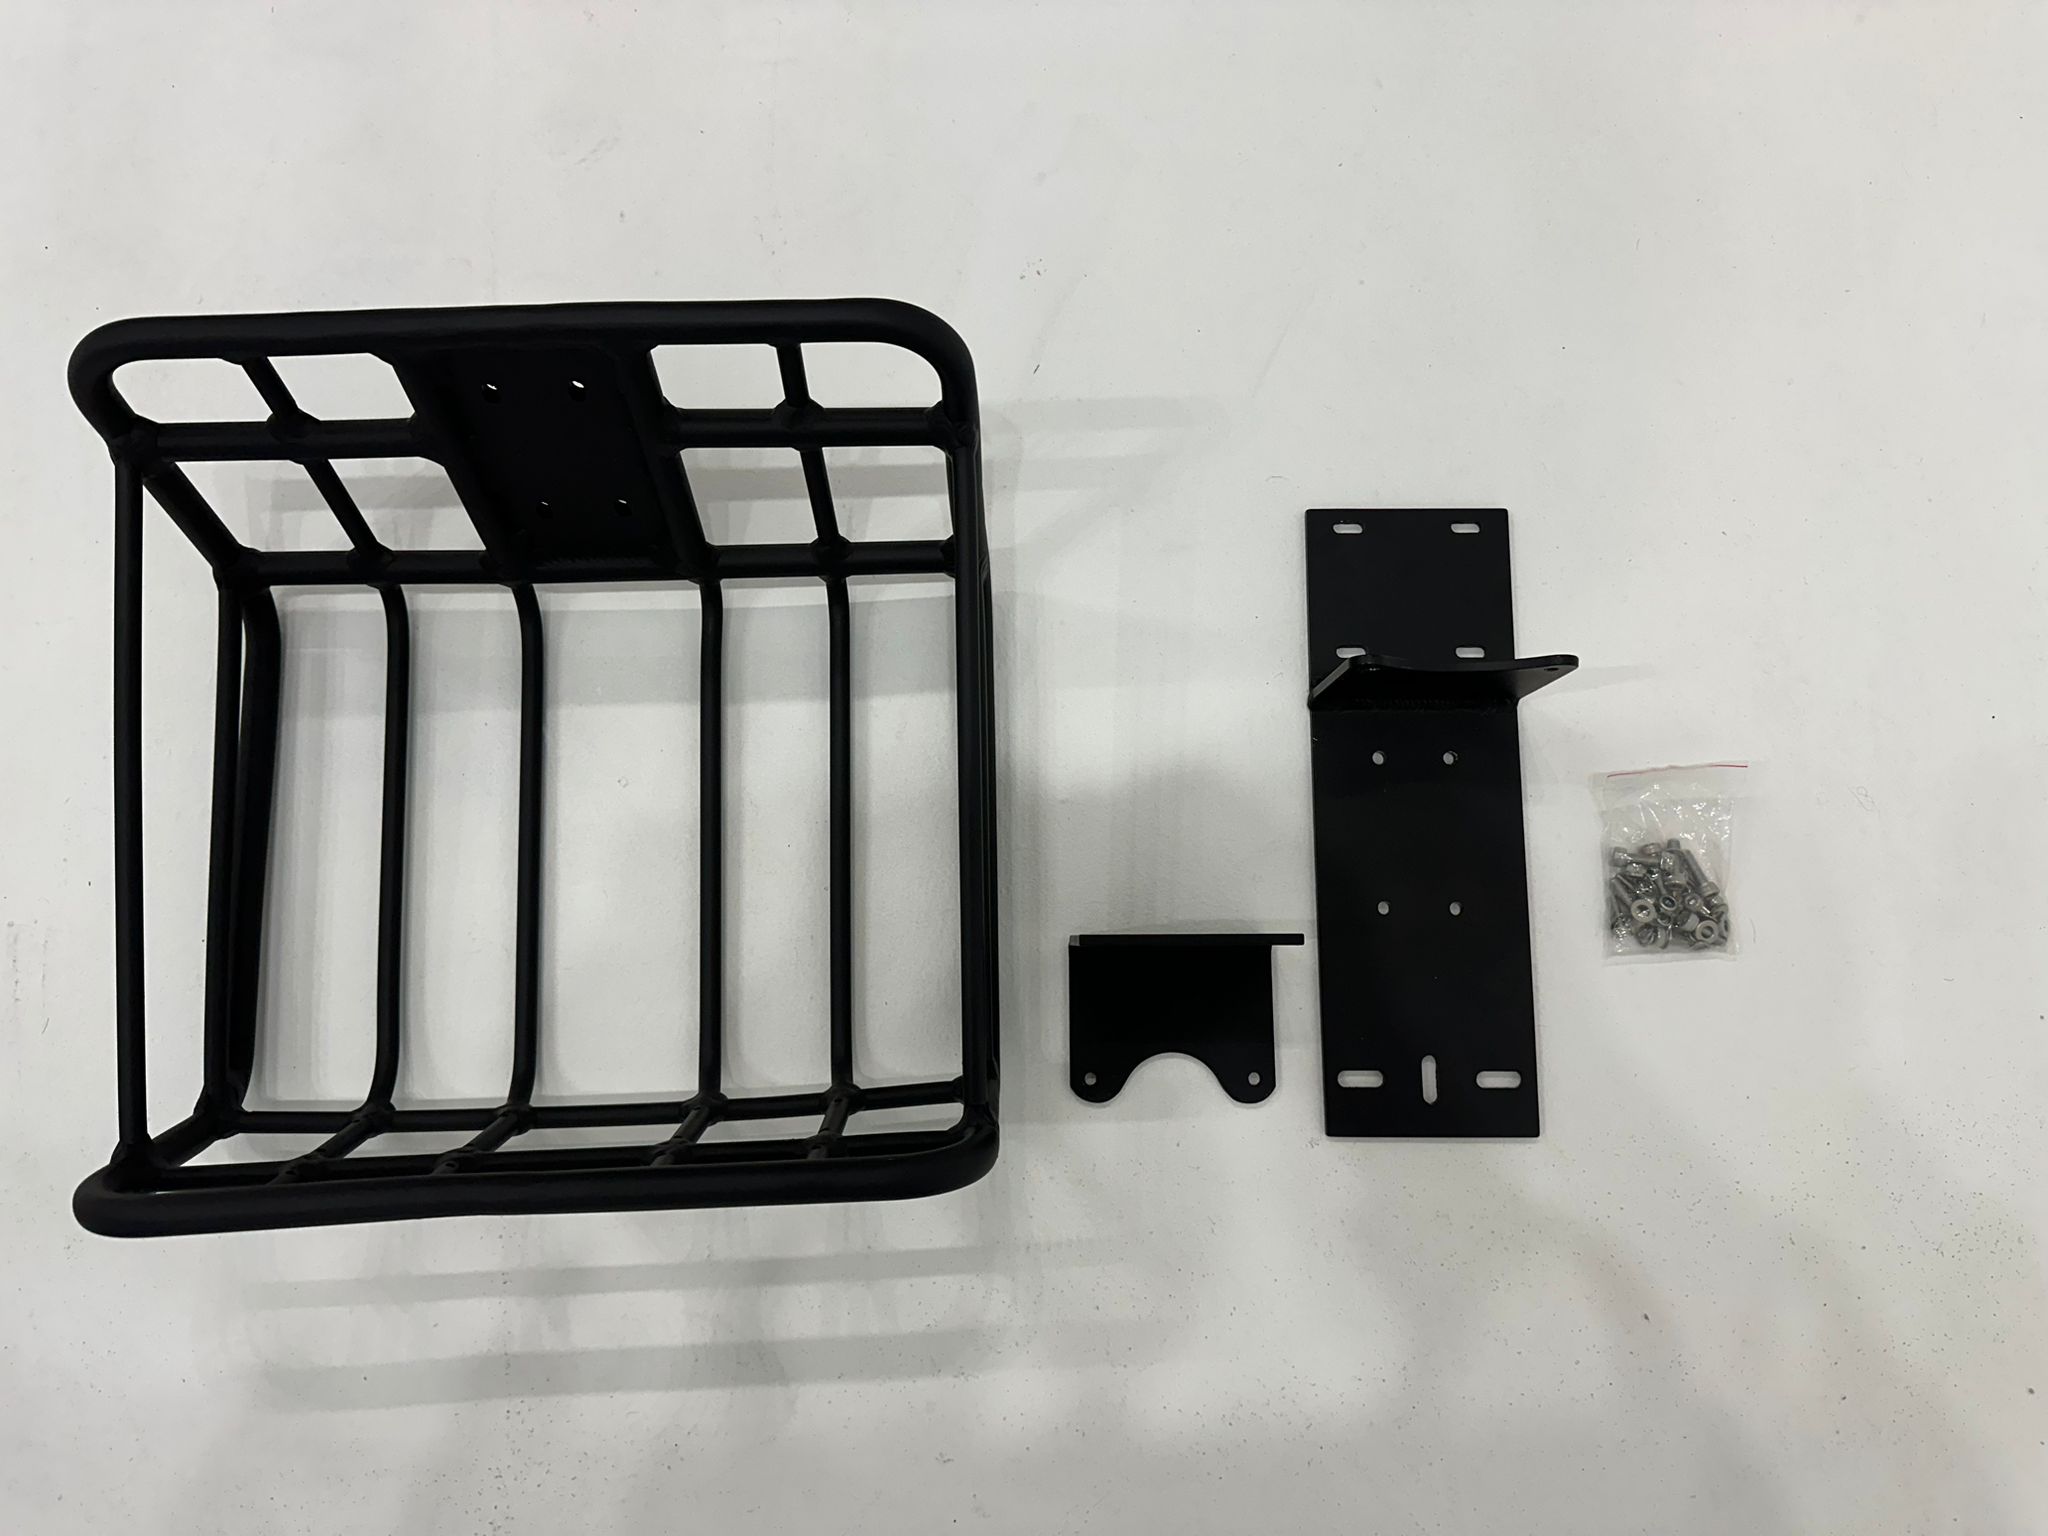
- Carefully open the package using scissors or a utility knife. Lay out all components on a clean, flat surface and ensure all parts are present before starting assembly.
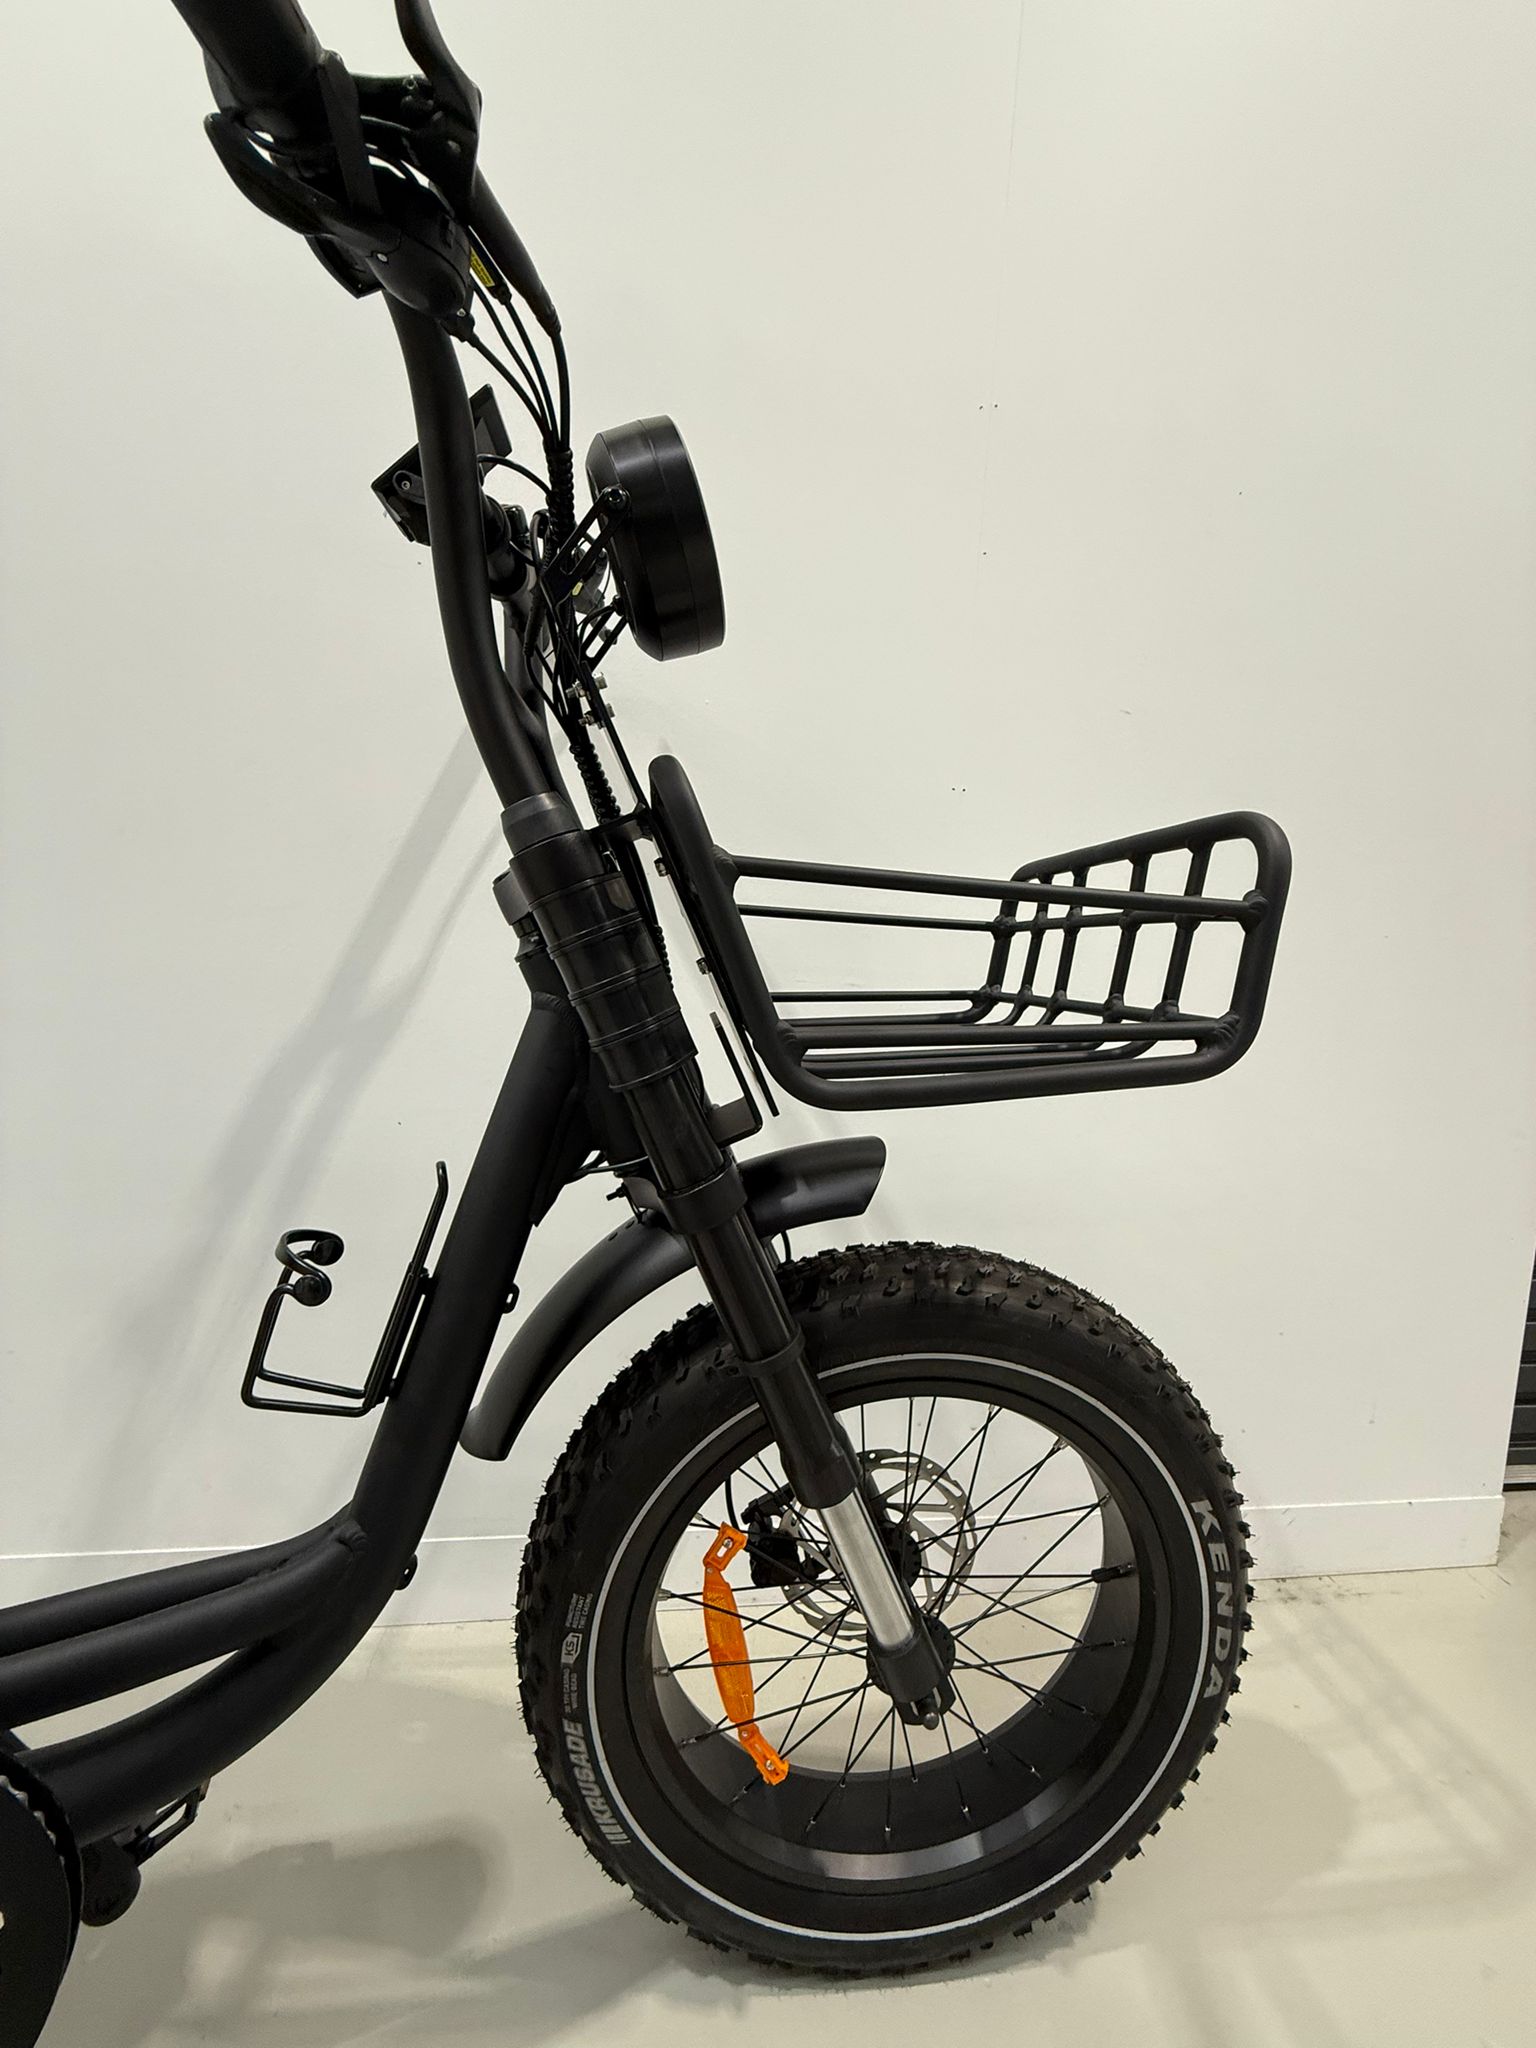
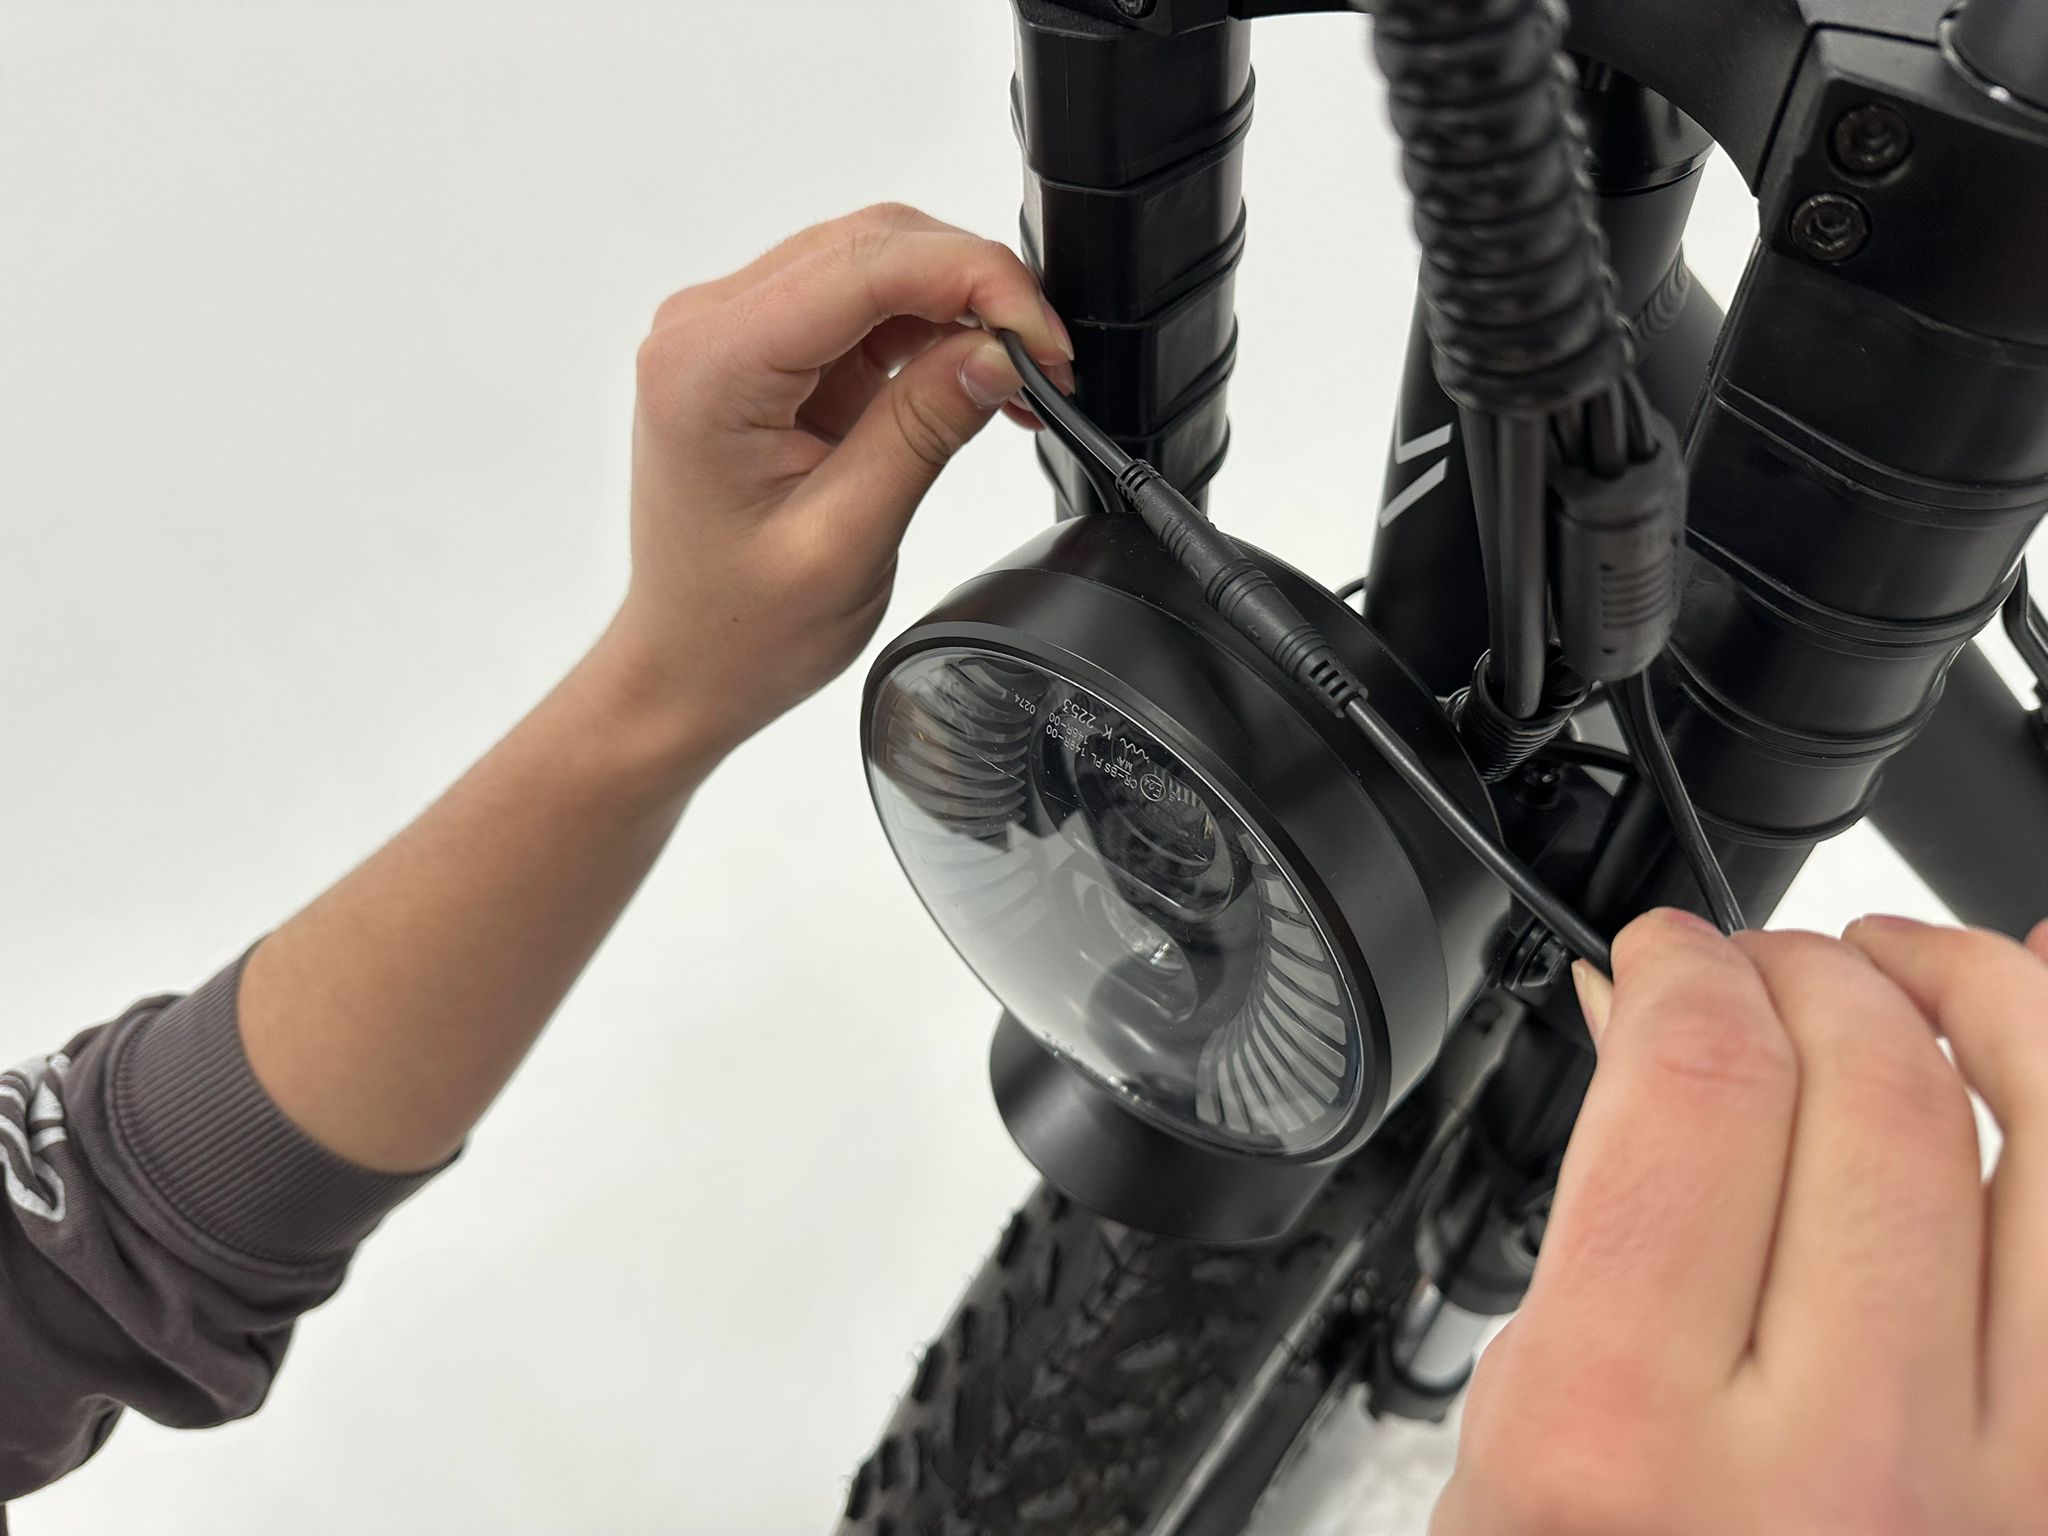
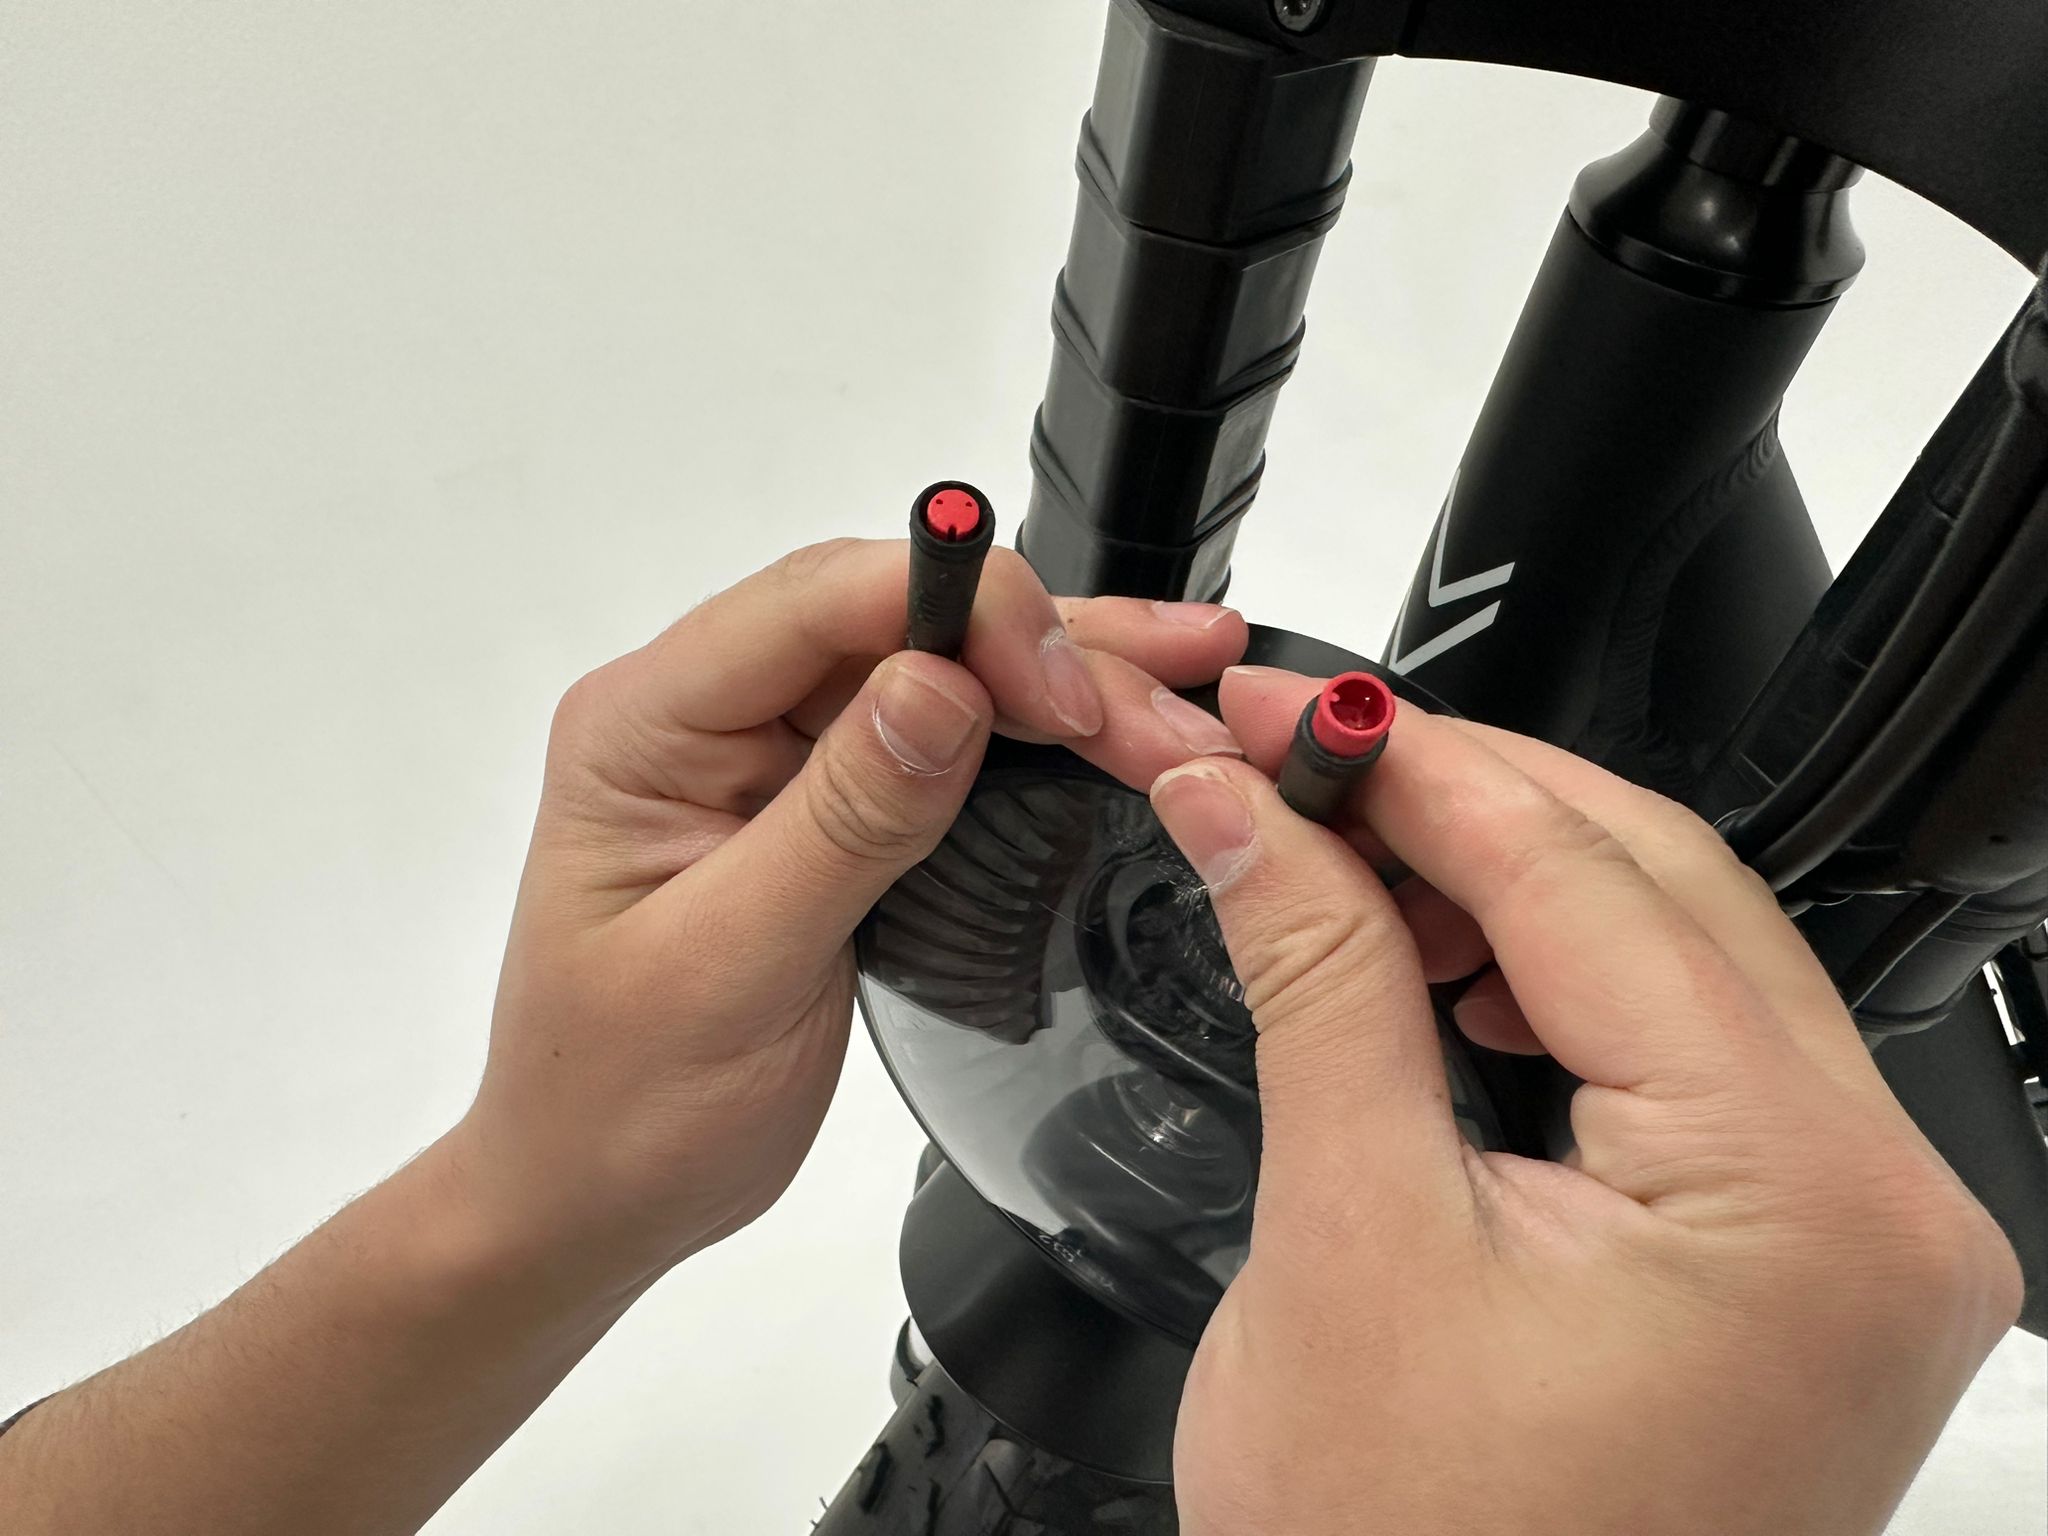
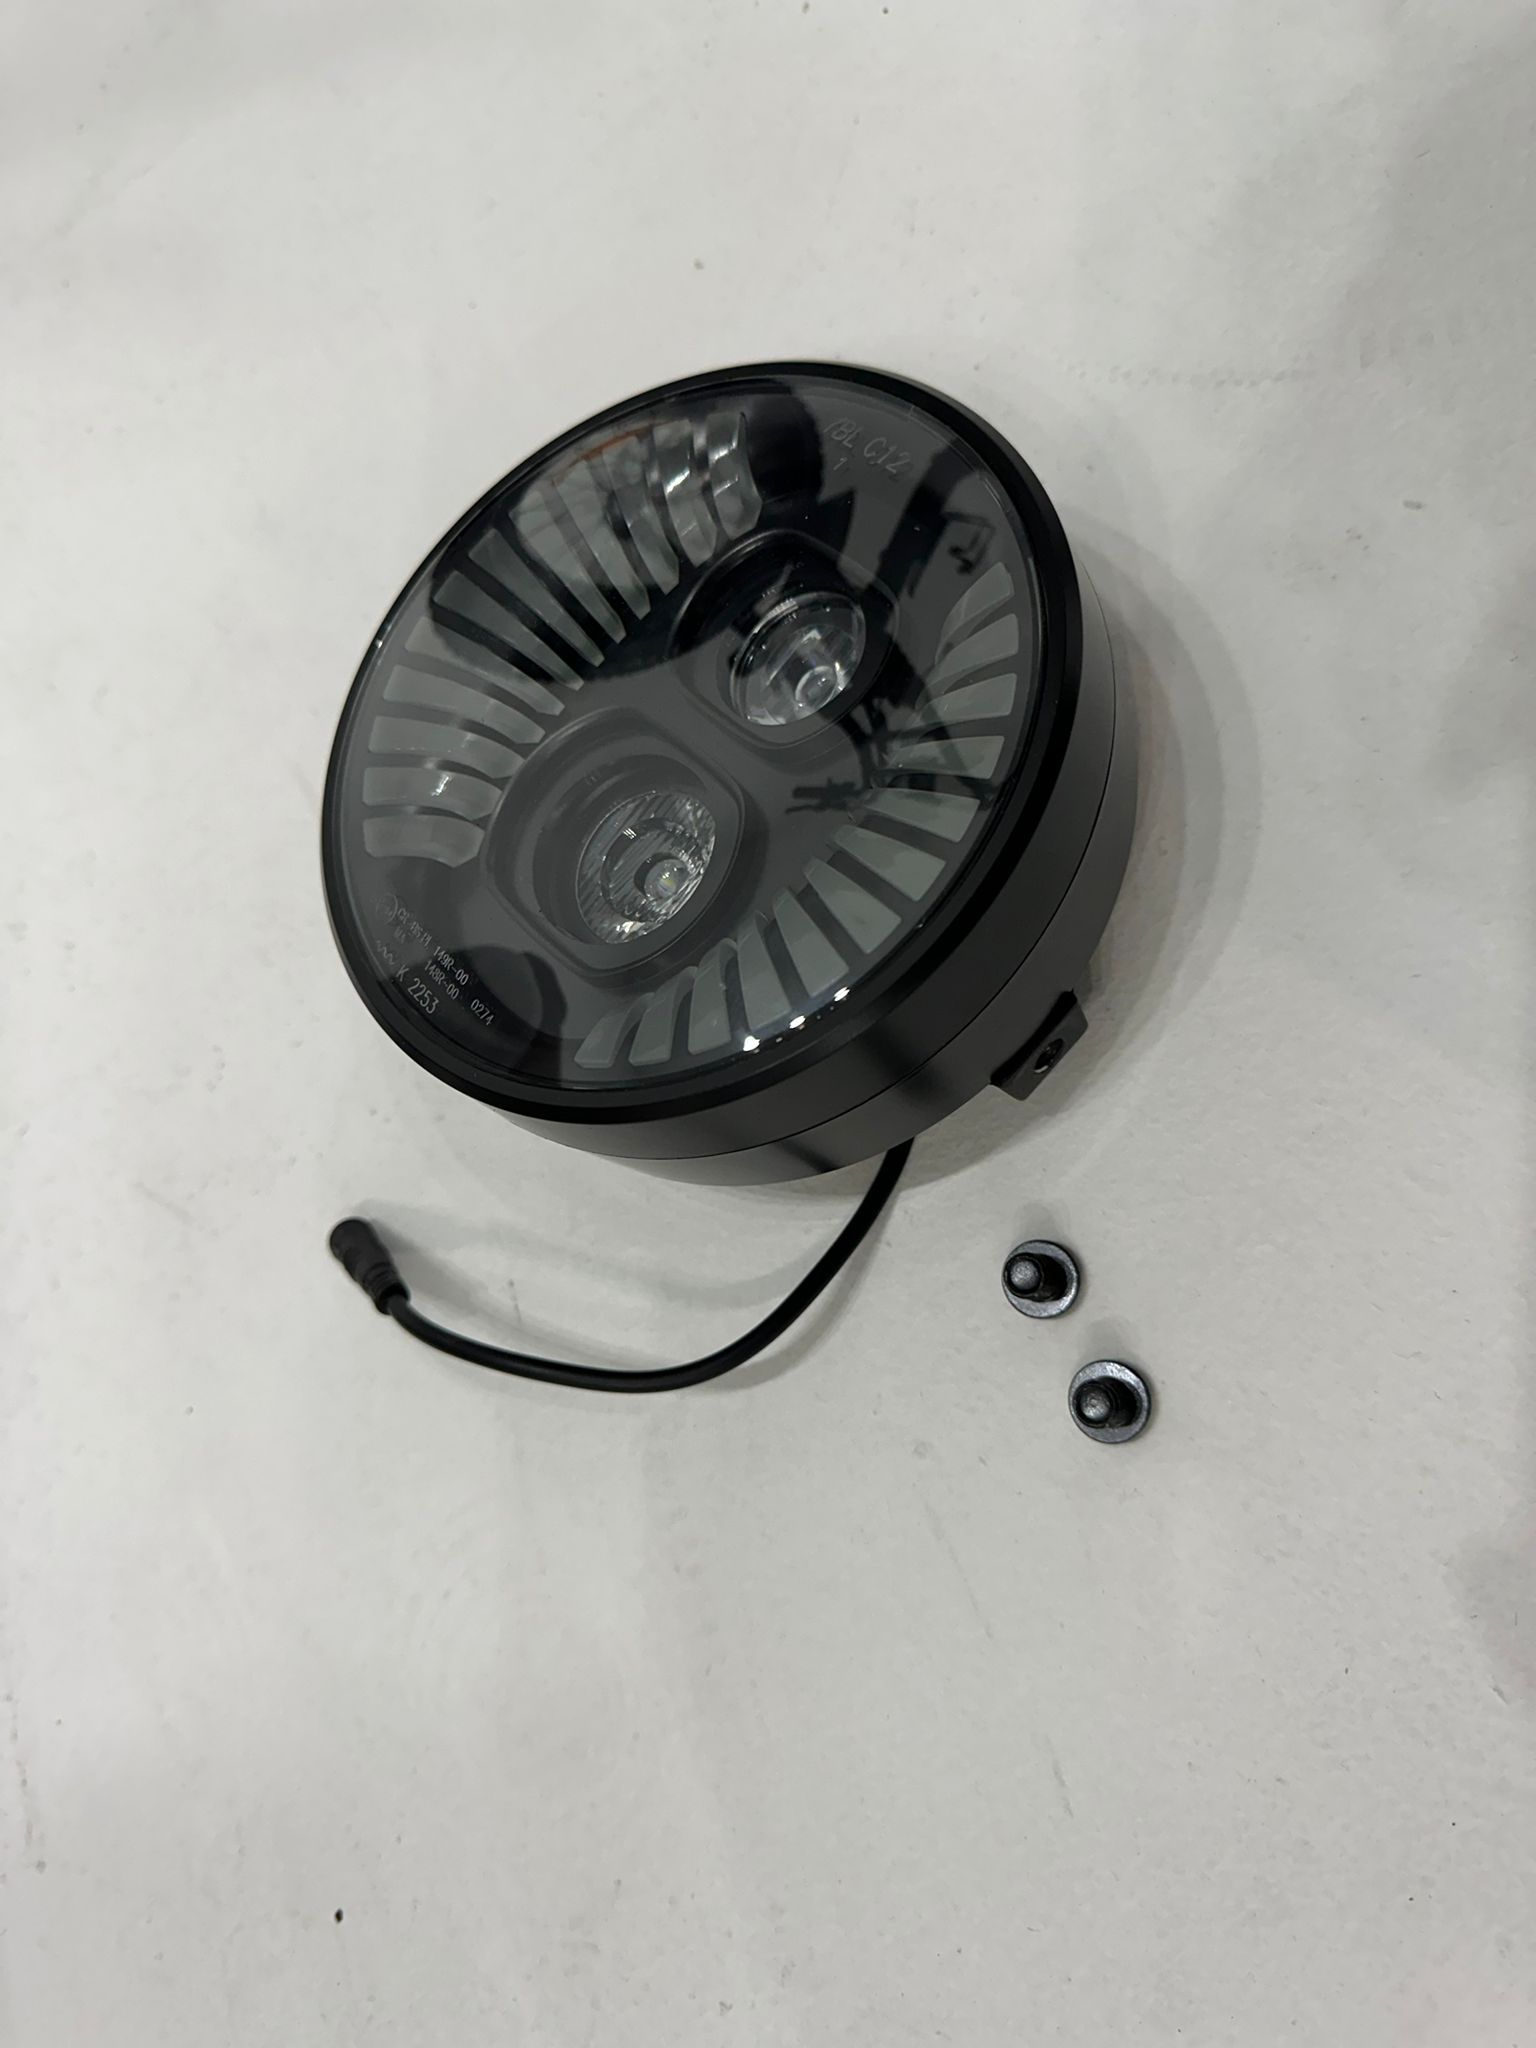
- Gently pull apart the two red ends of the headlight cable to disconnect it.
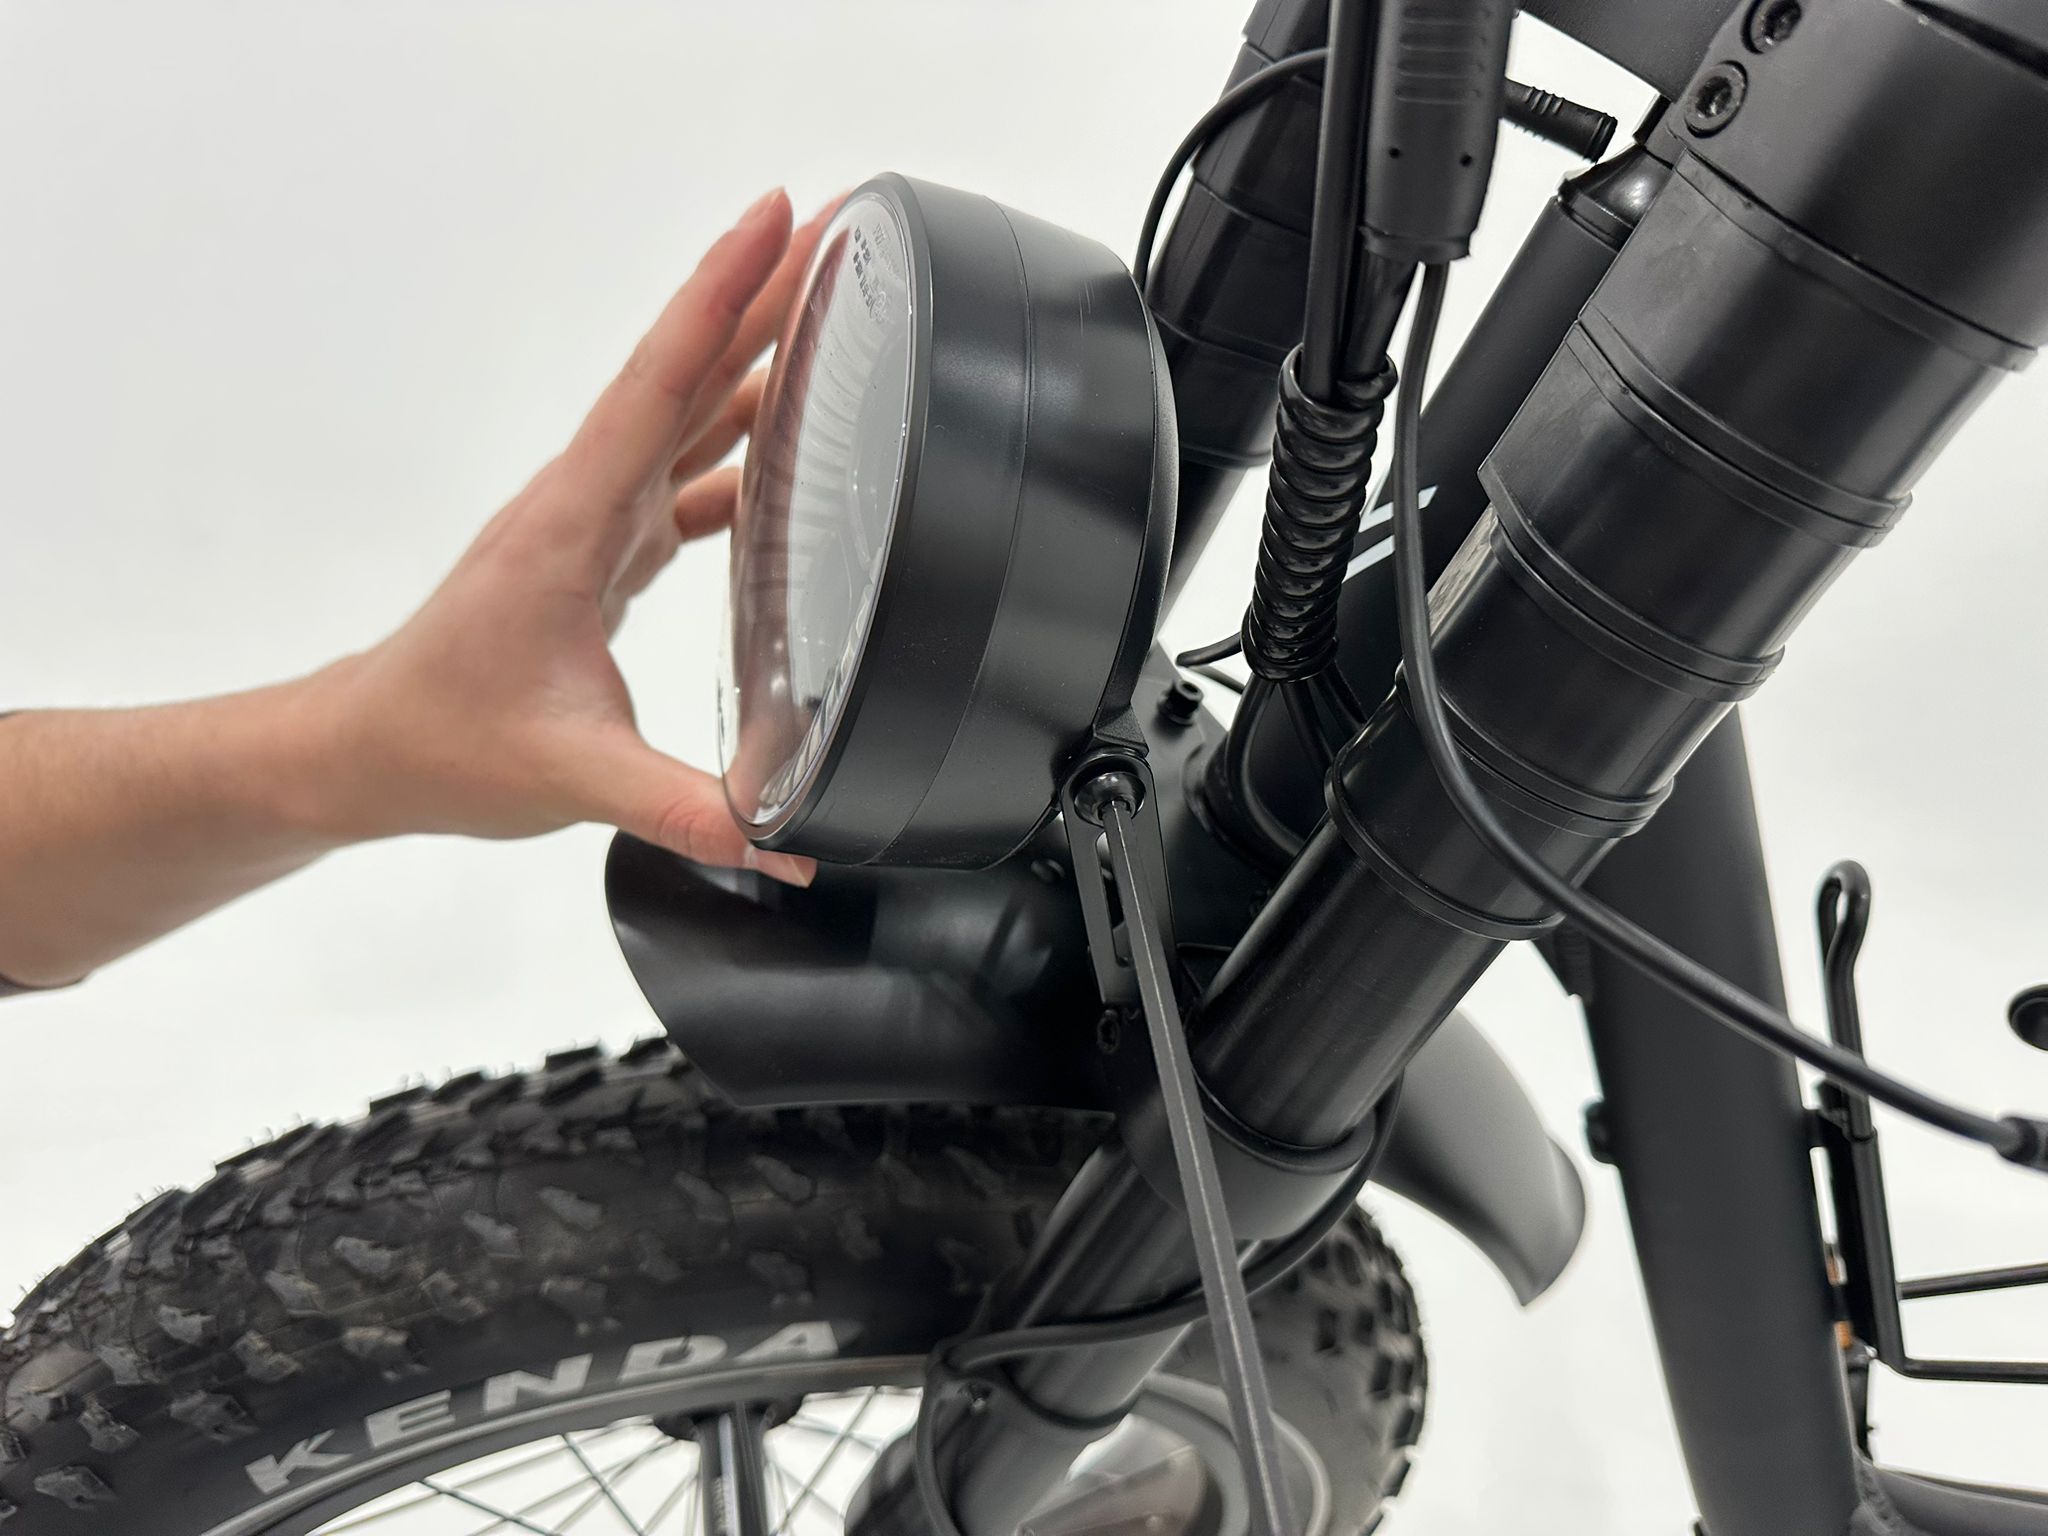
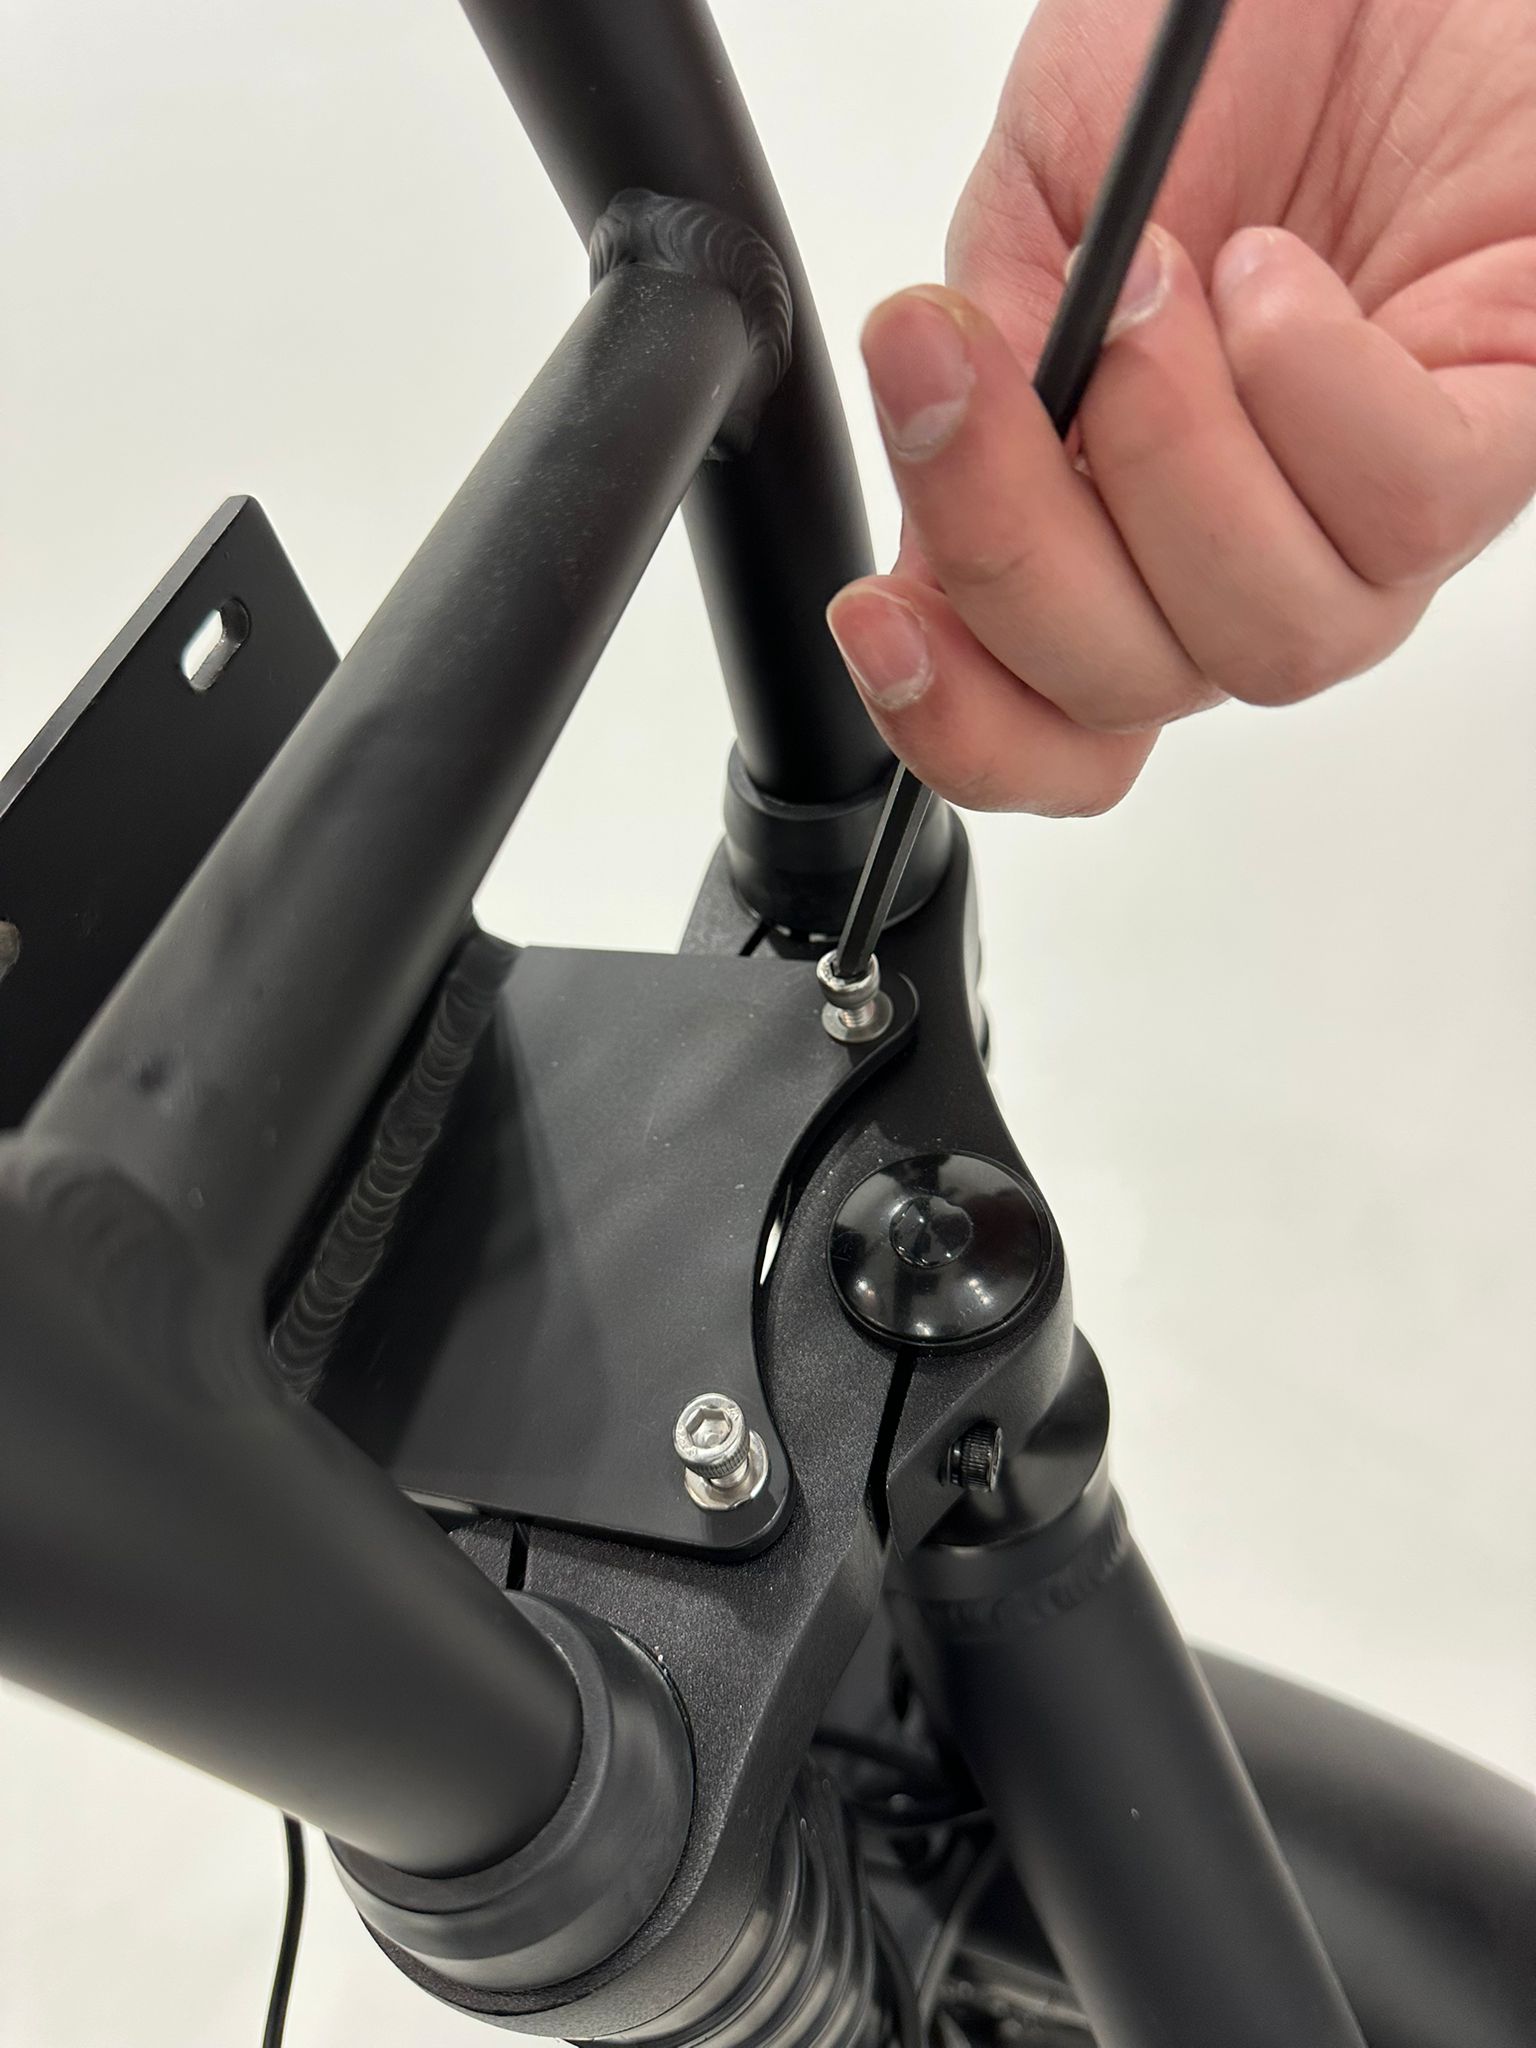
- Using a 5mm Allen key, unscrew the headlight from its mounting bracket. Retain these screws as they will be used for remounting the light later.
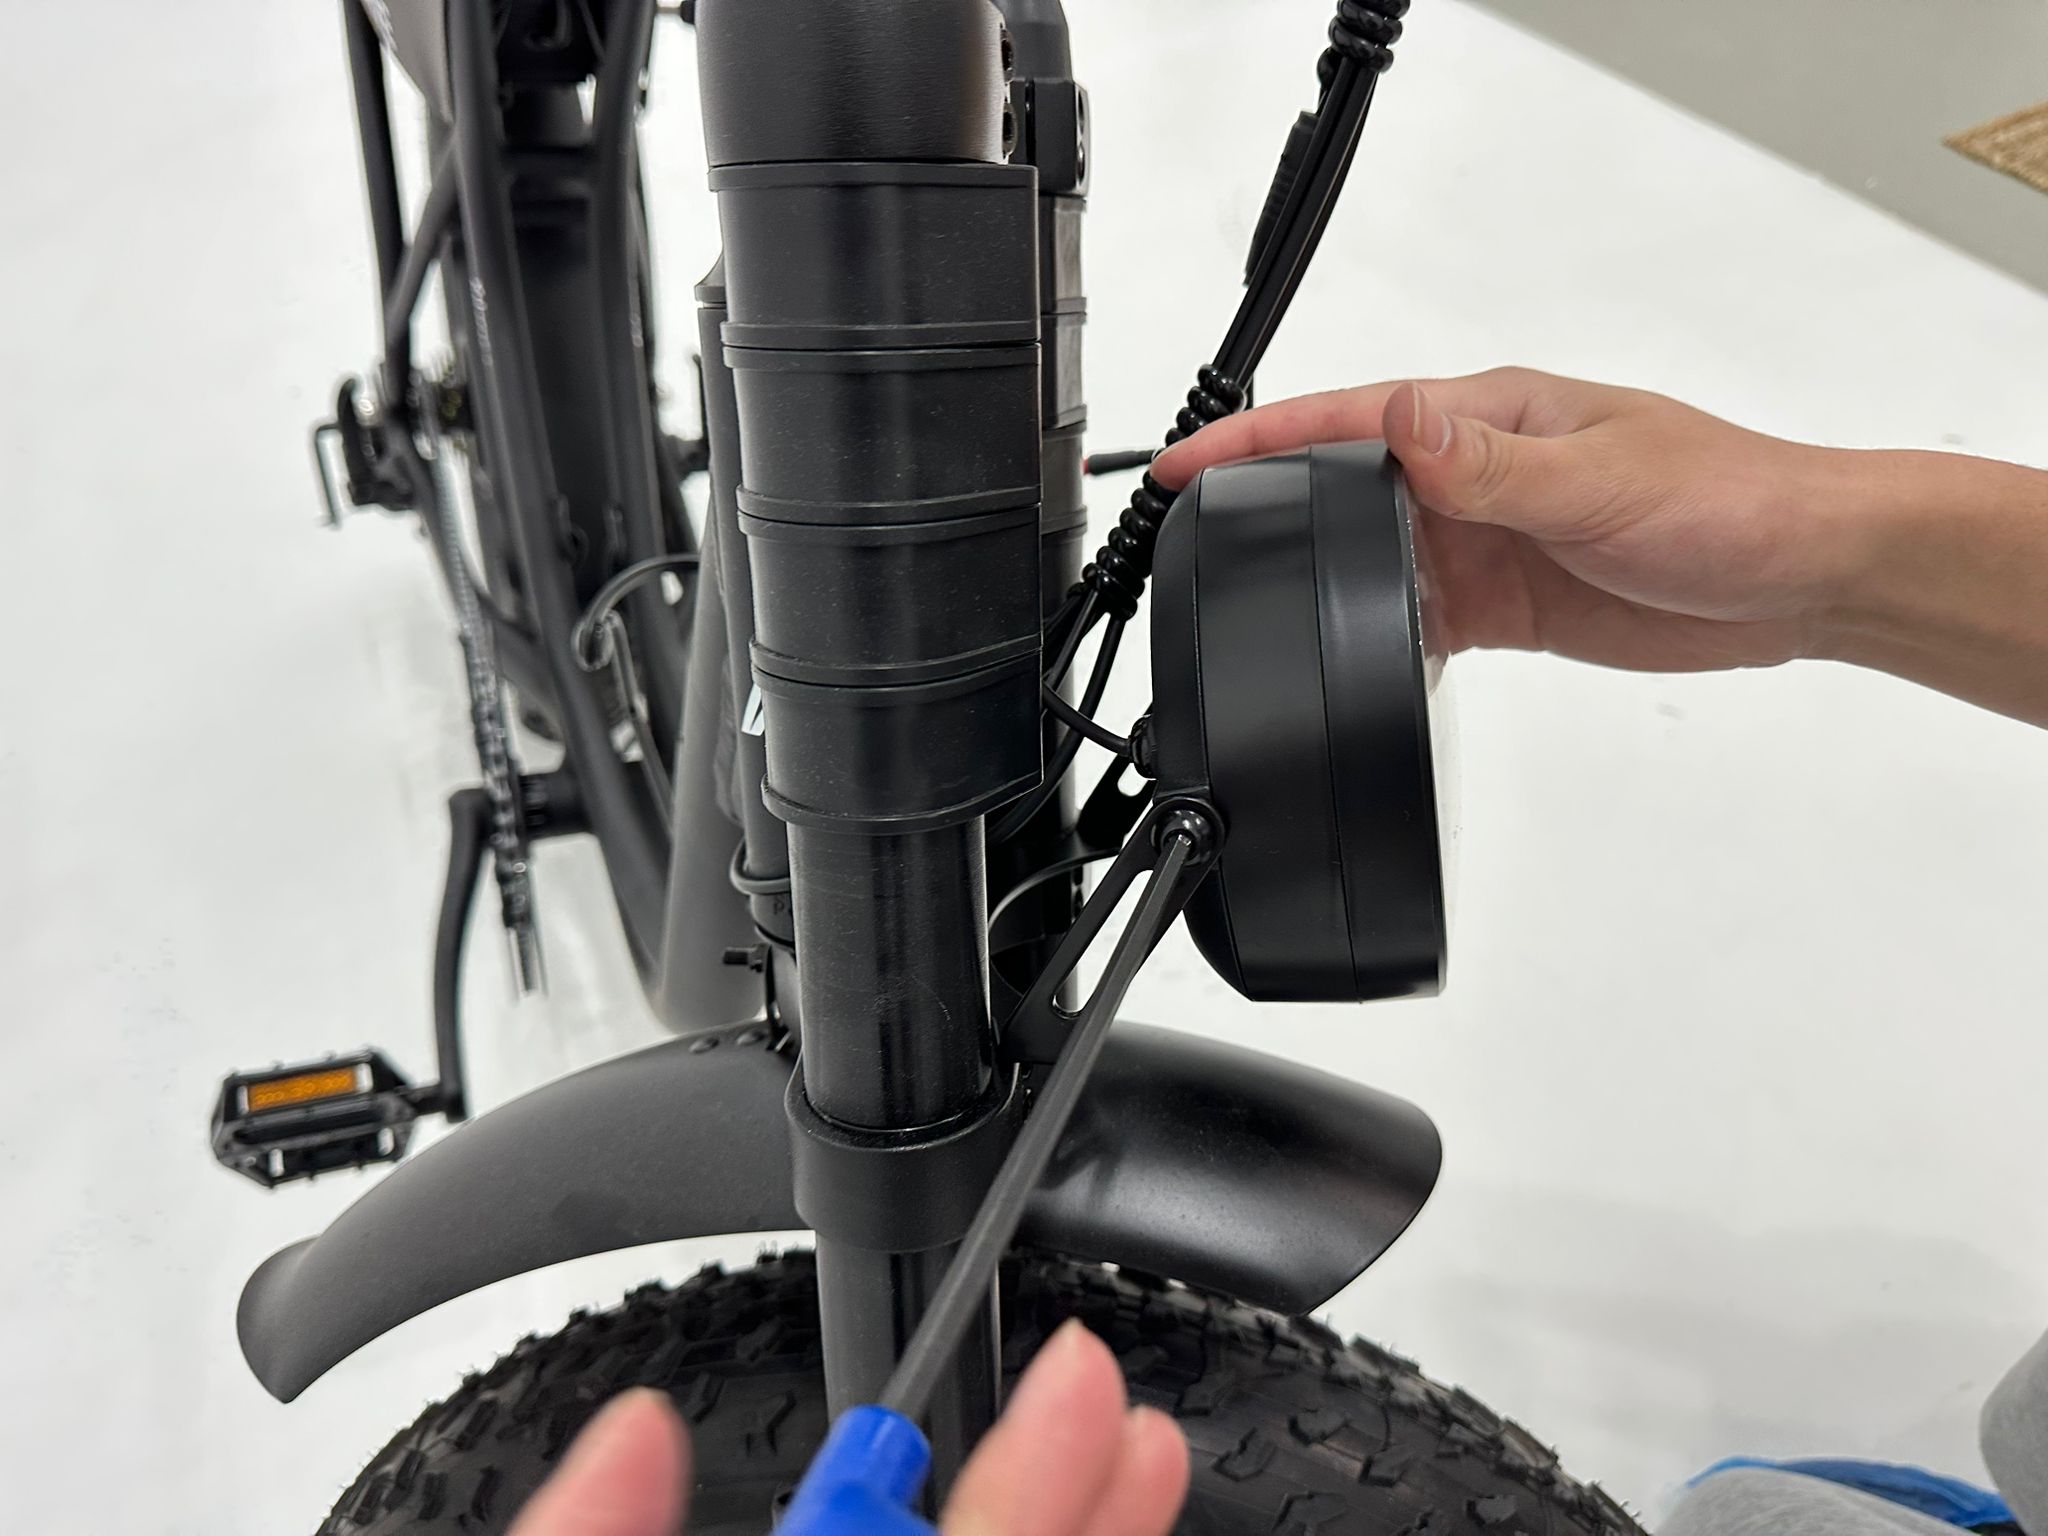
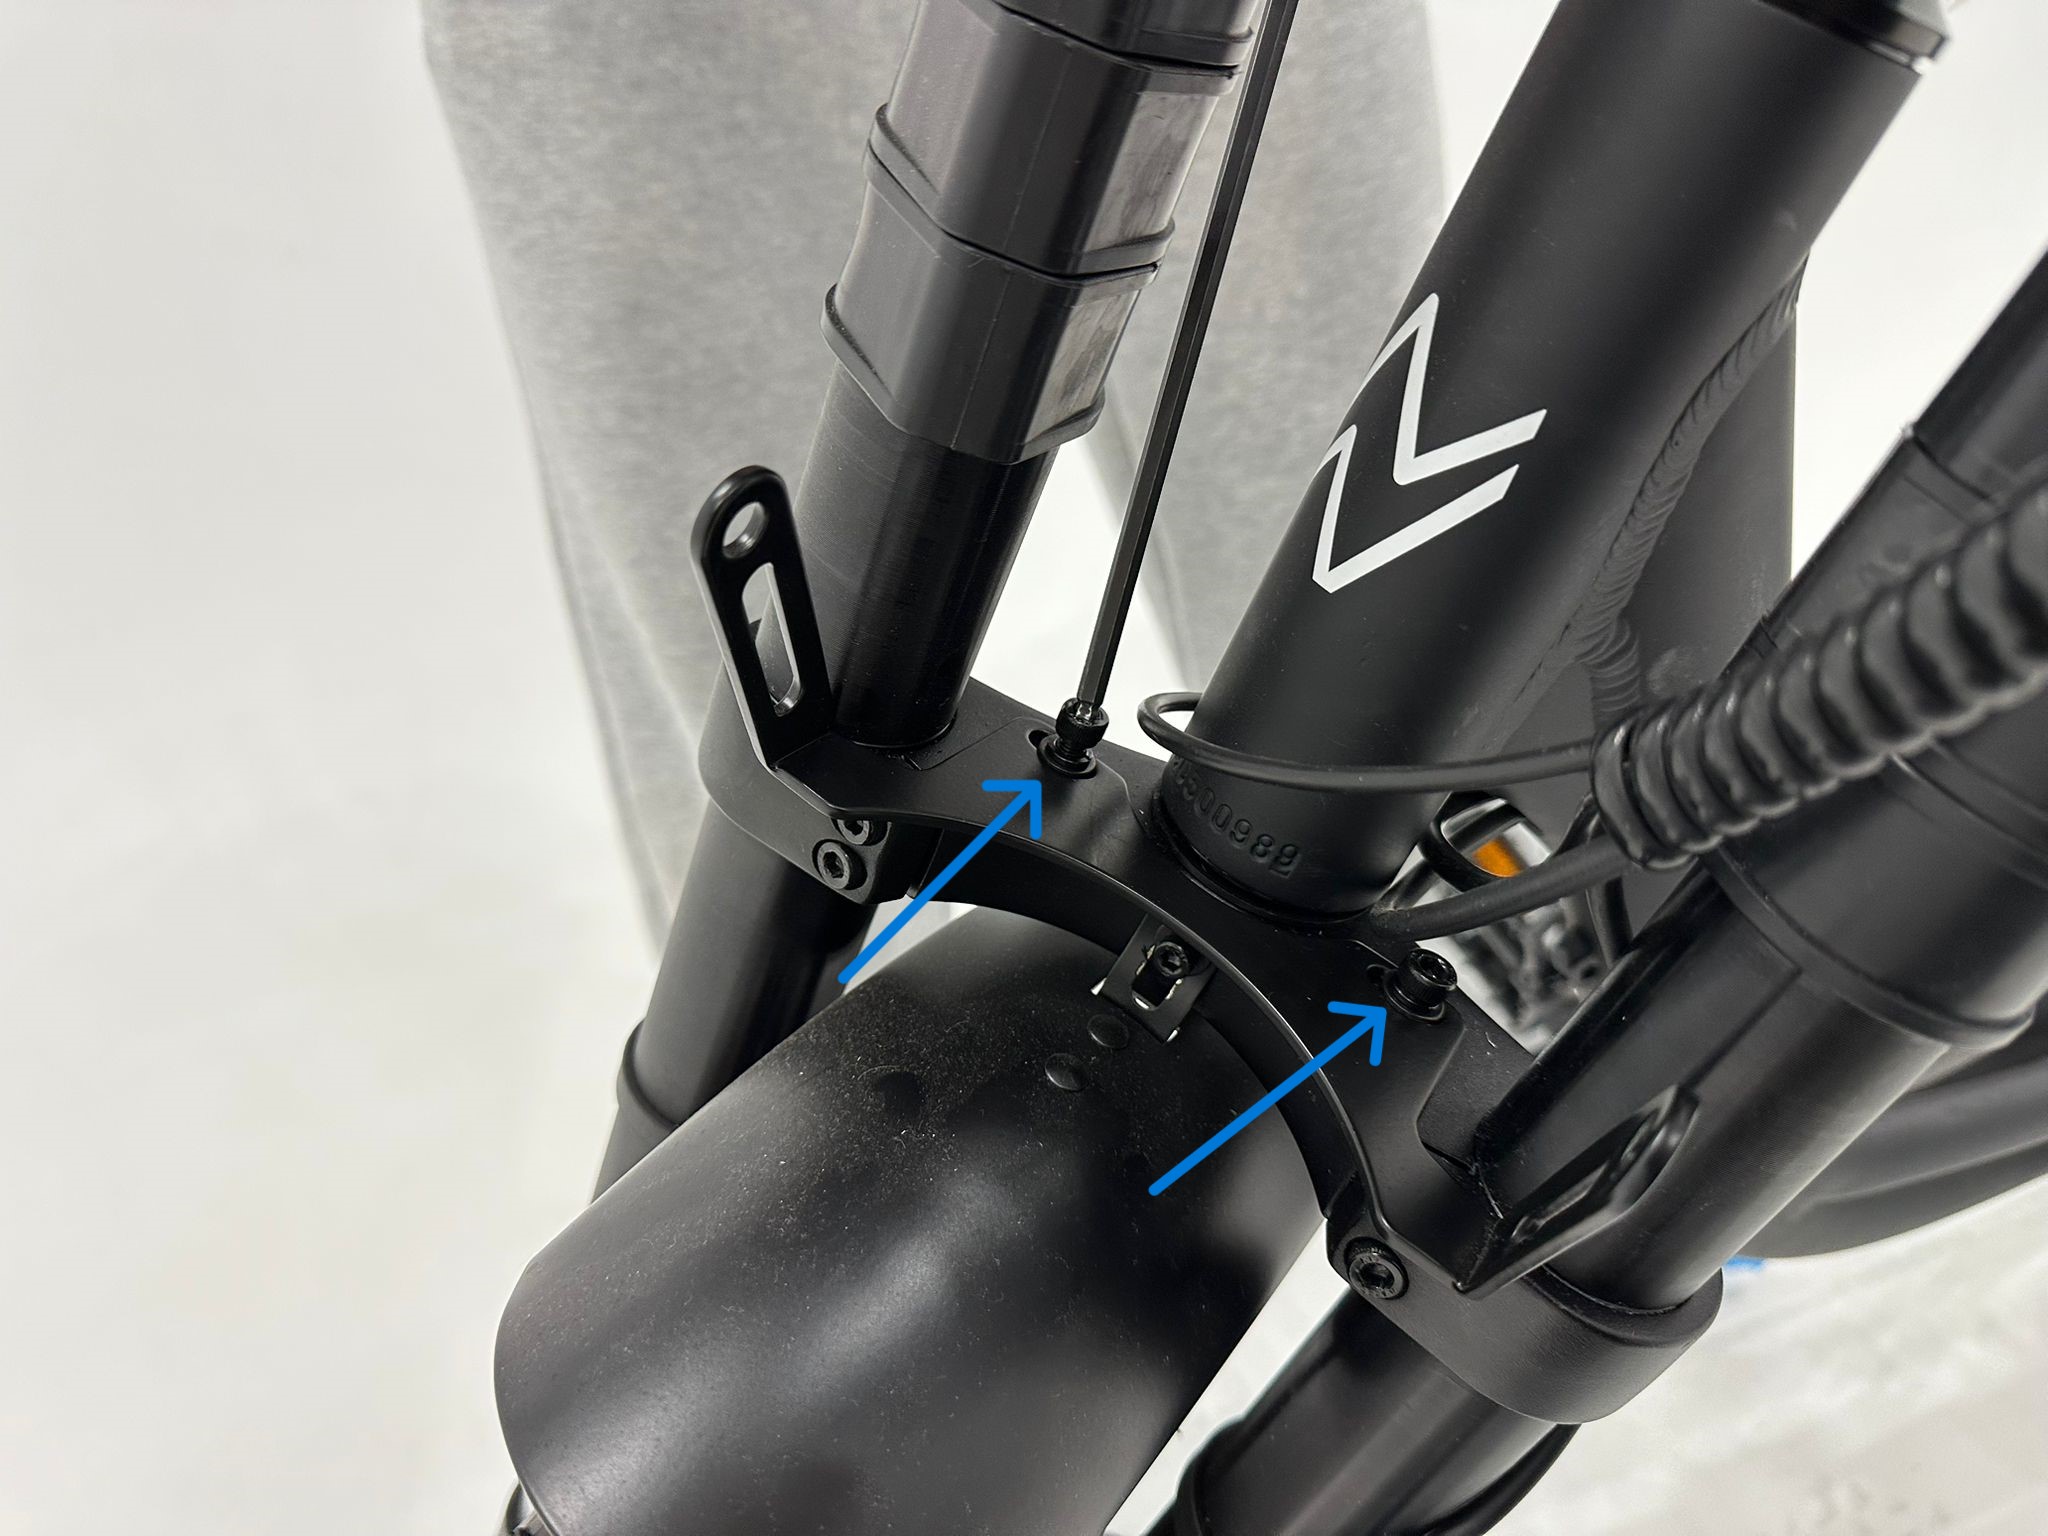
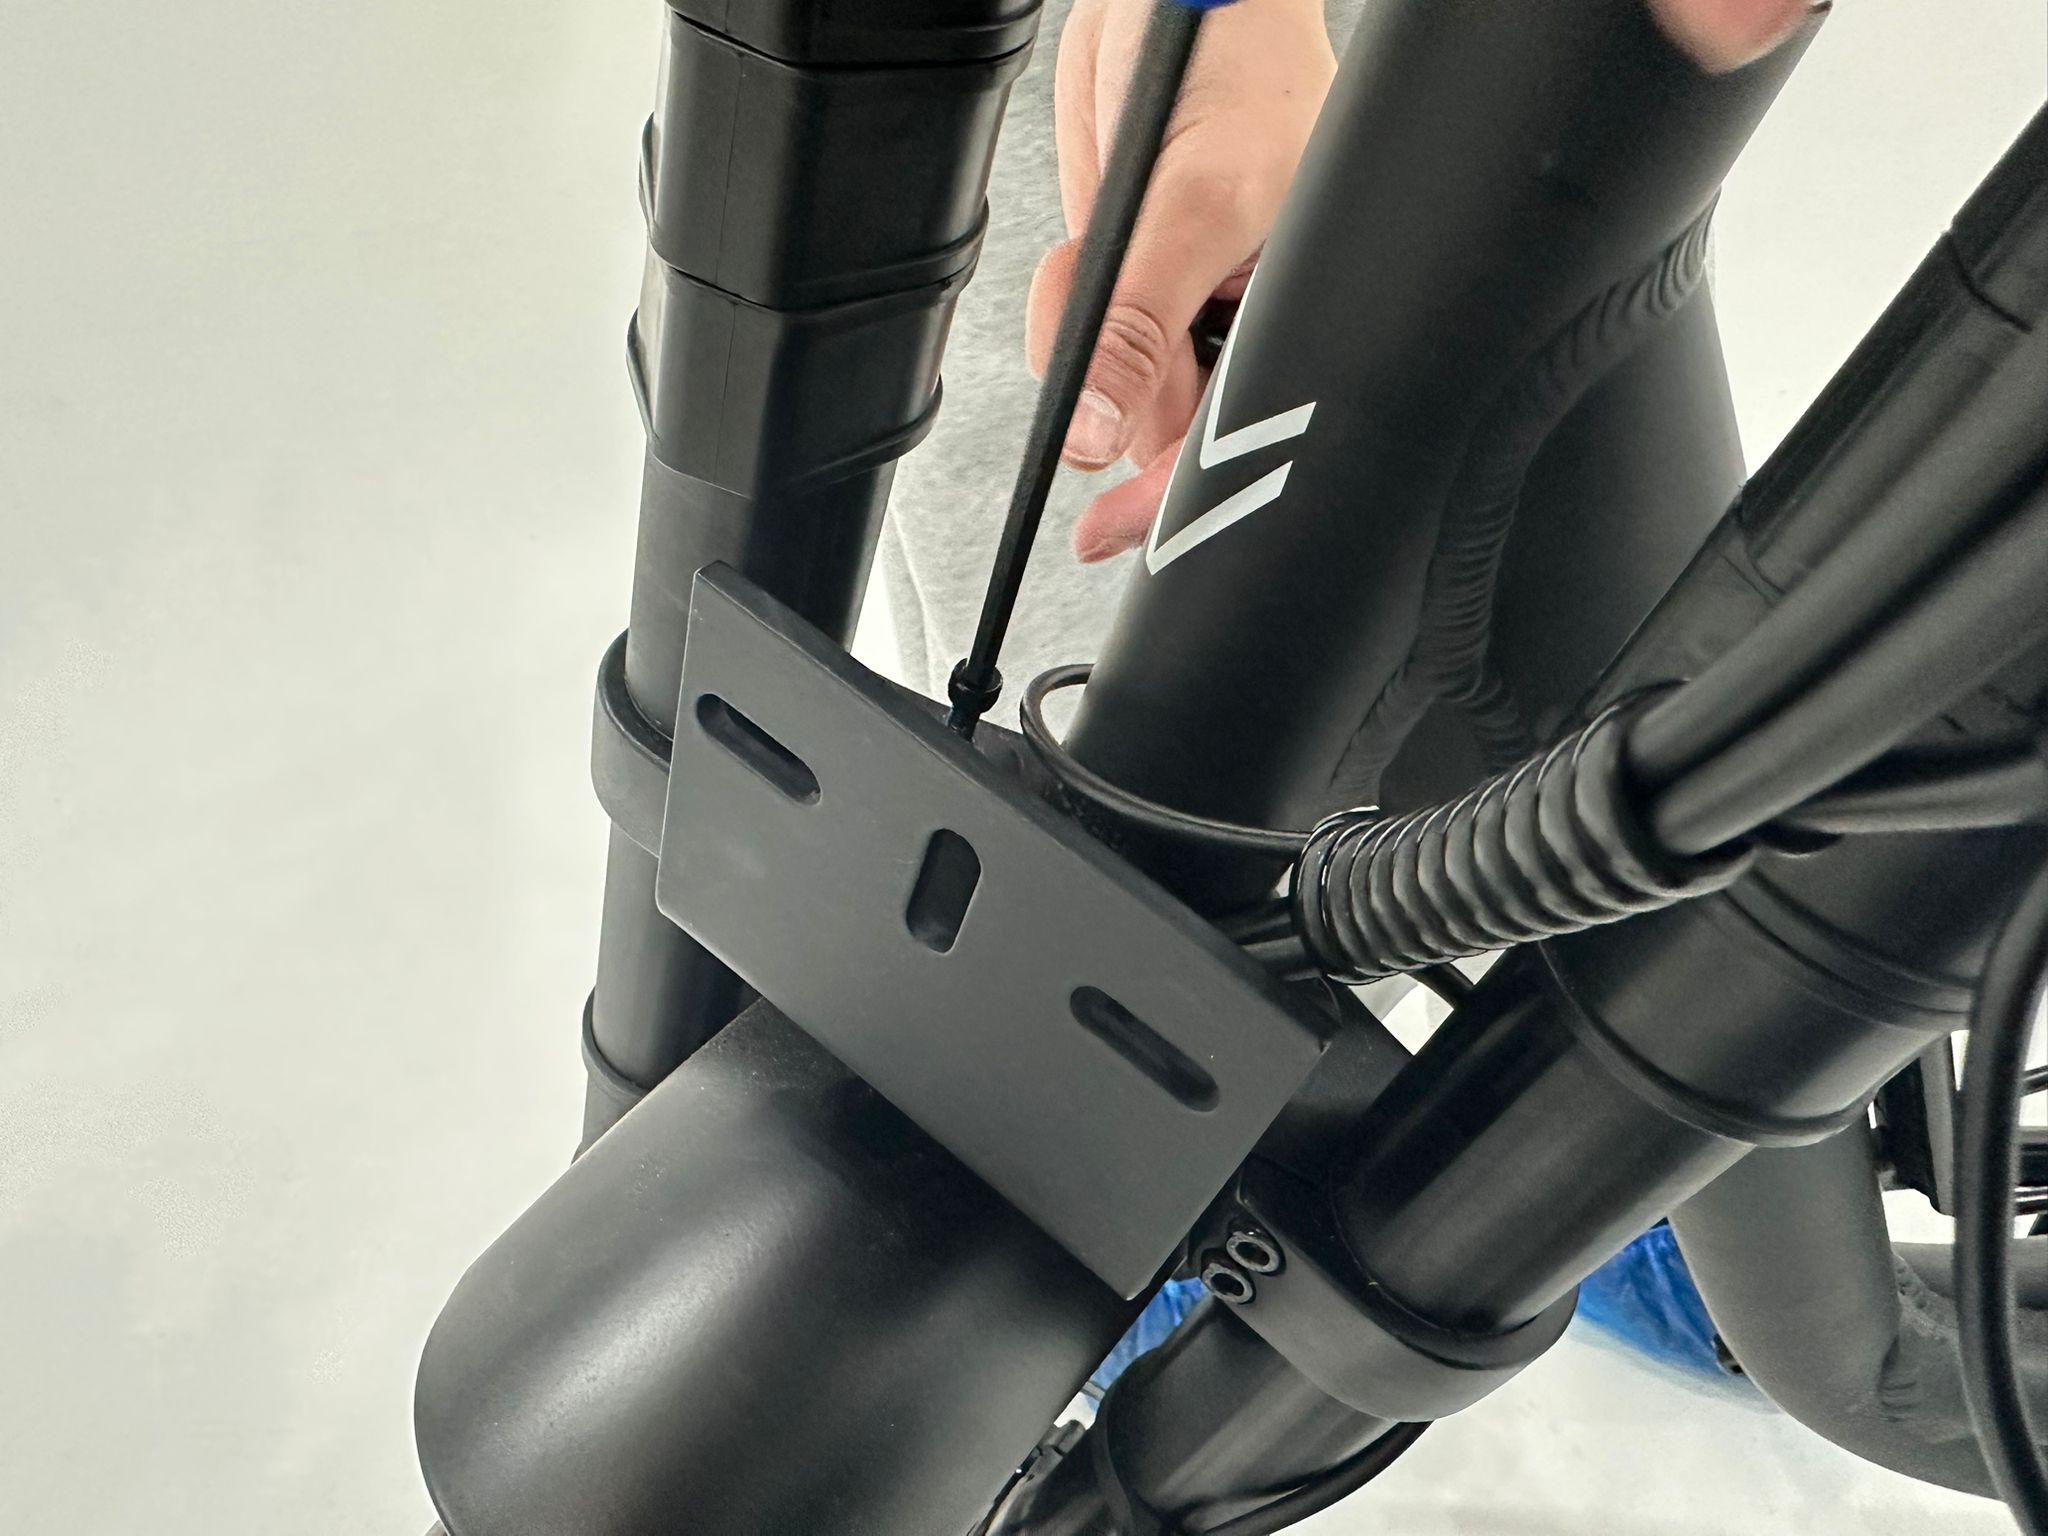
- With the headlight removed, use the 5mm Allen key to remove the two screws securing the light mounting bracket (refer to your images for highlighted screws).
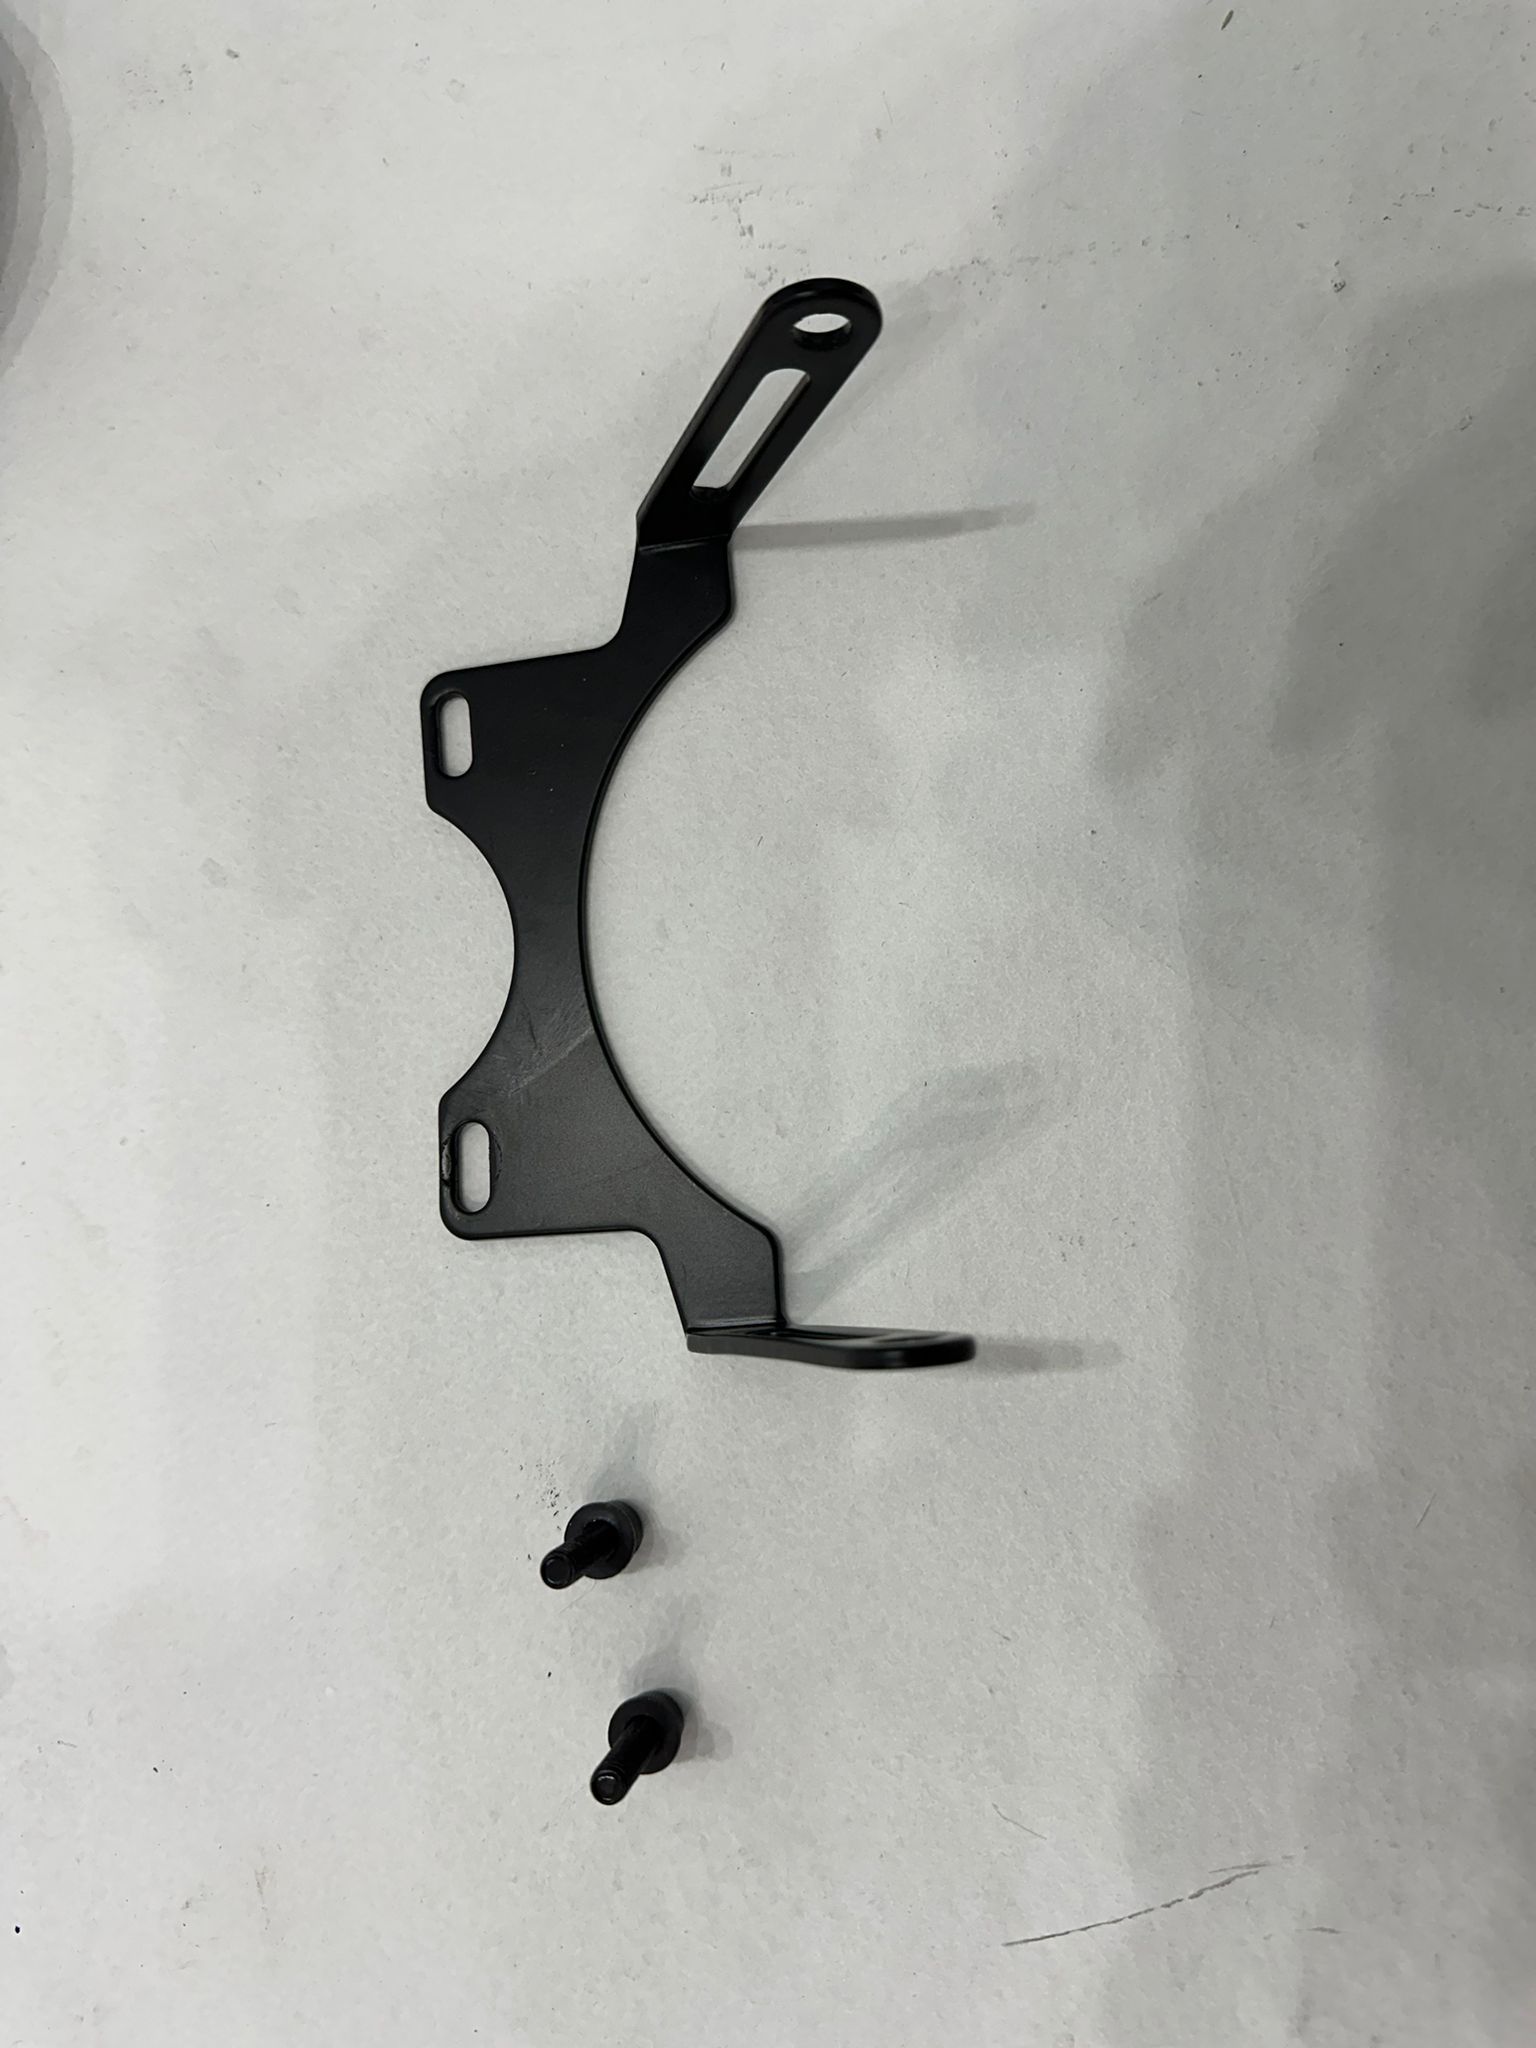
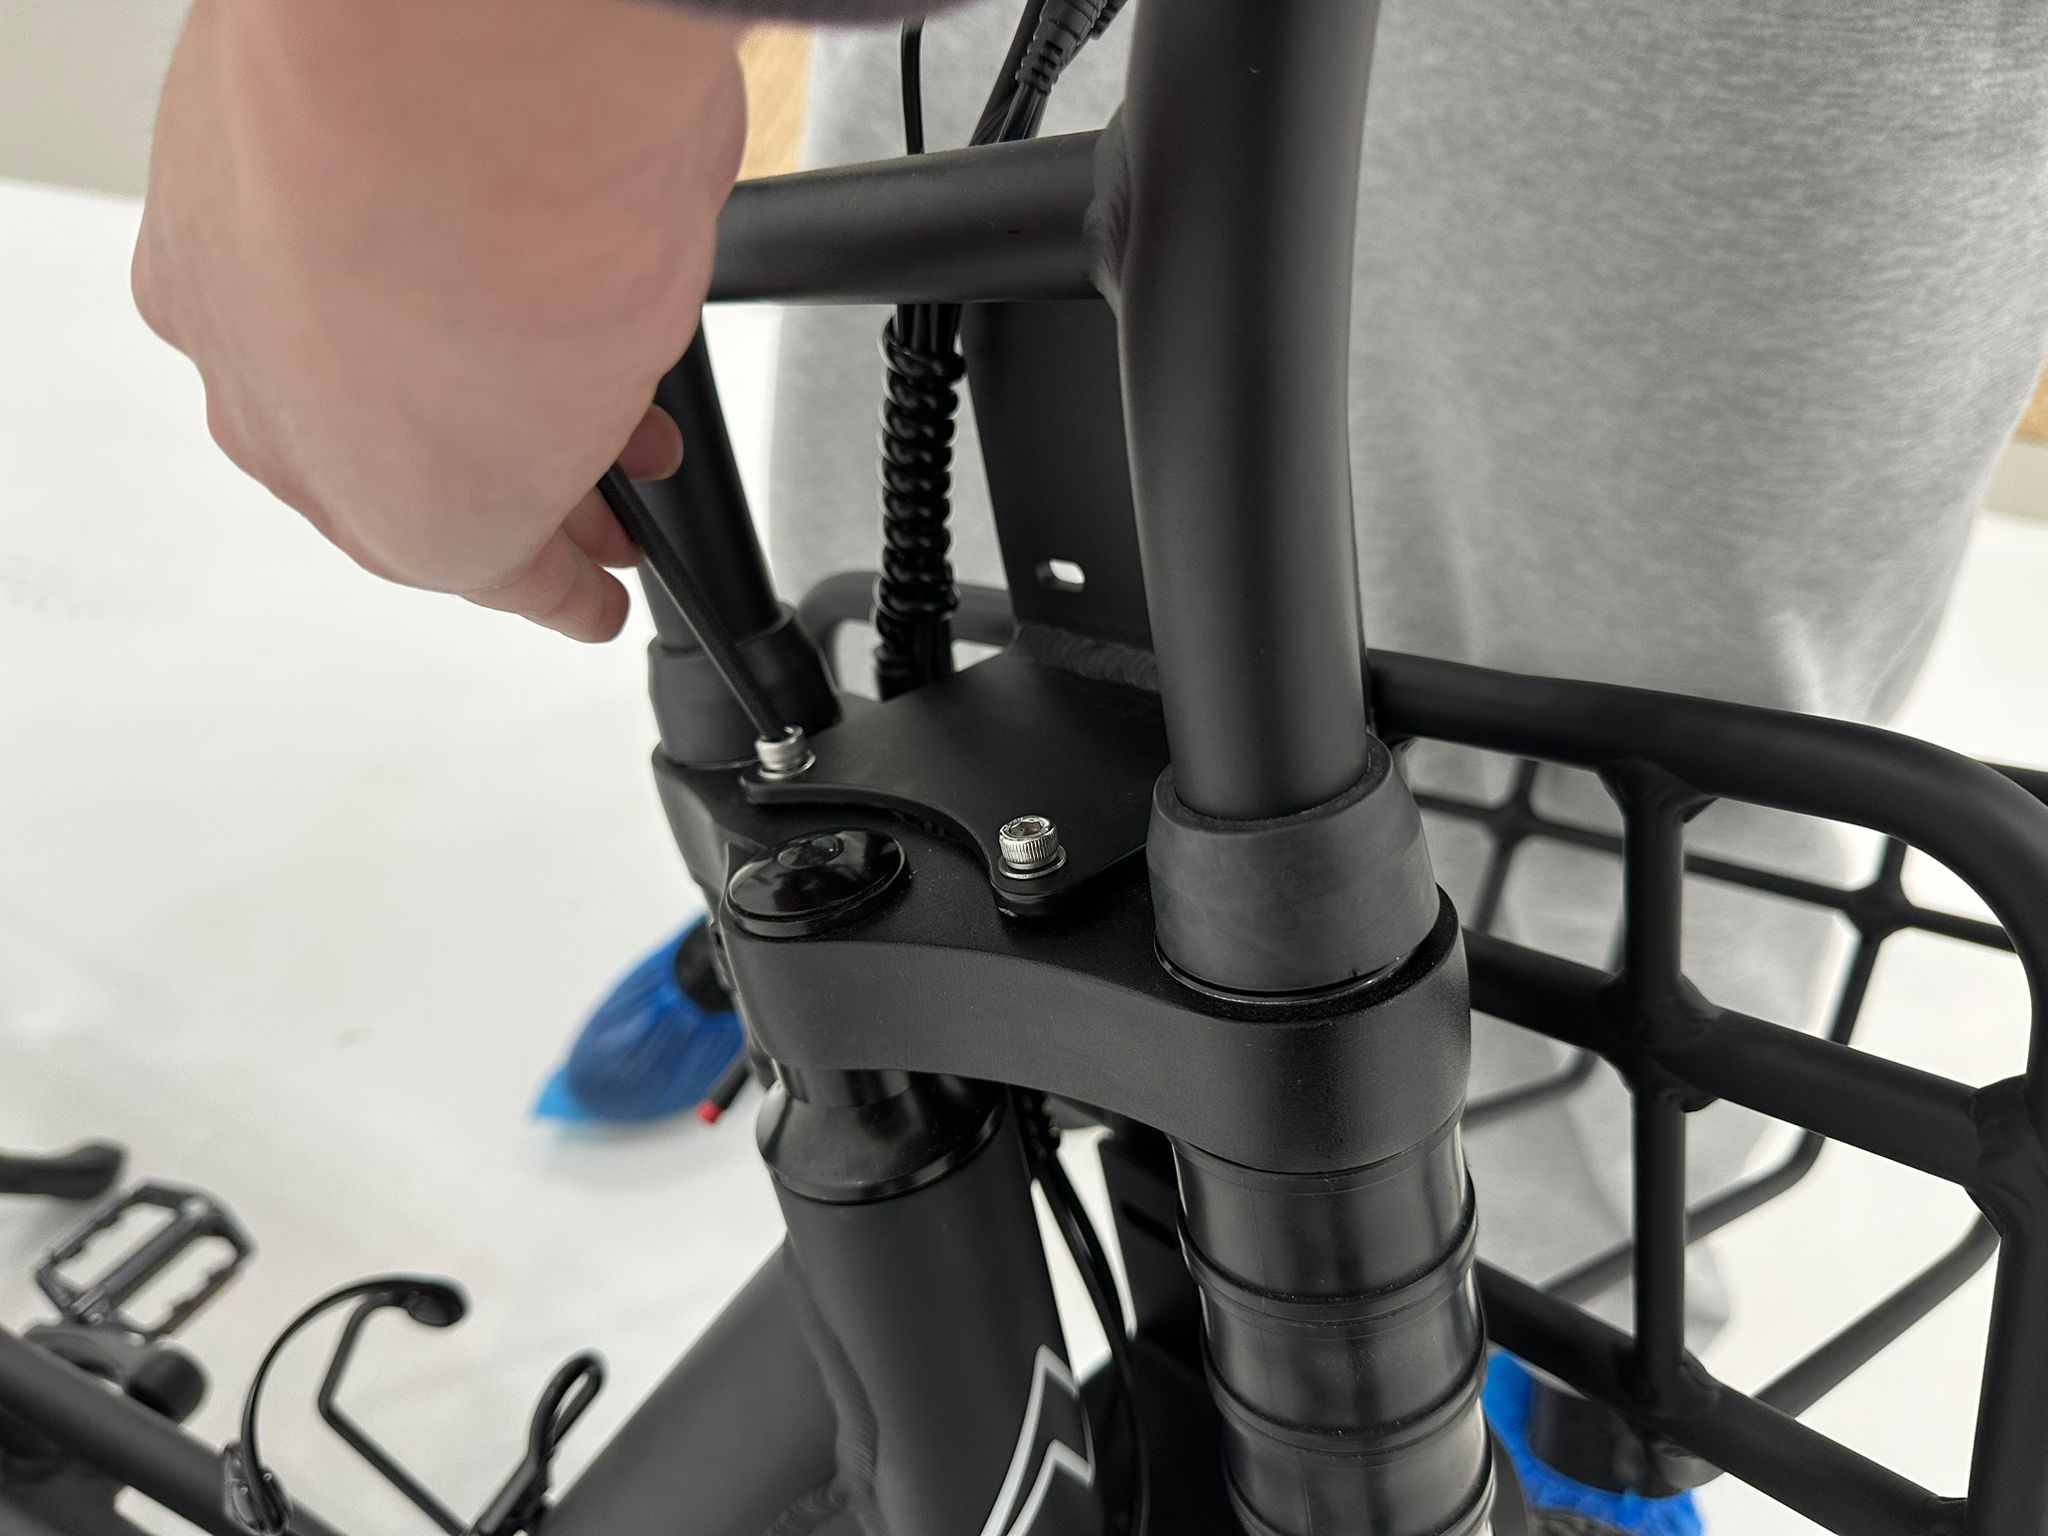
- Locate the smaller plate from the package. Use the two screws that previously secured the light mounting bracket to fasten this smaller plate to the bike frame. Ensure the plate is oriented correctly (refer to images for proper orientation). This plate replaces the original position of the light mounting bracket.

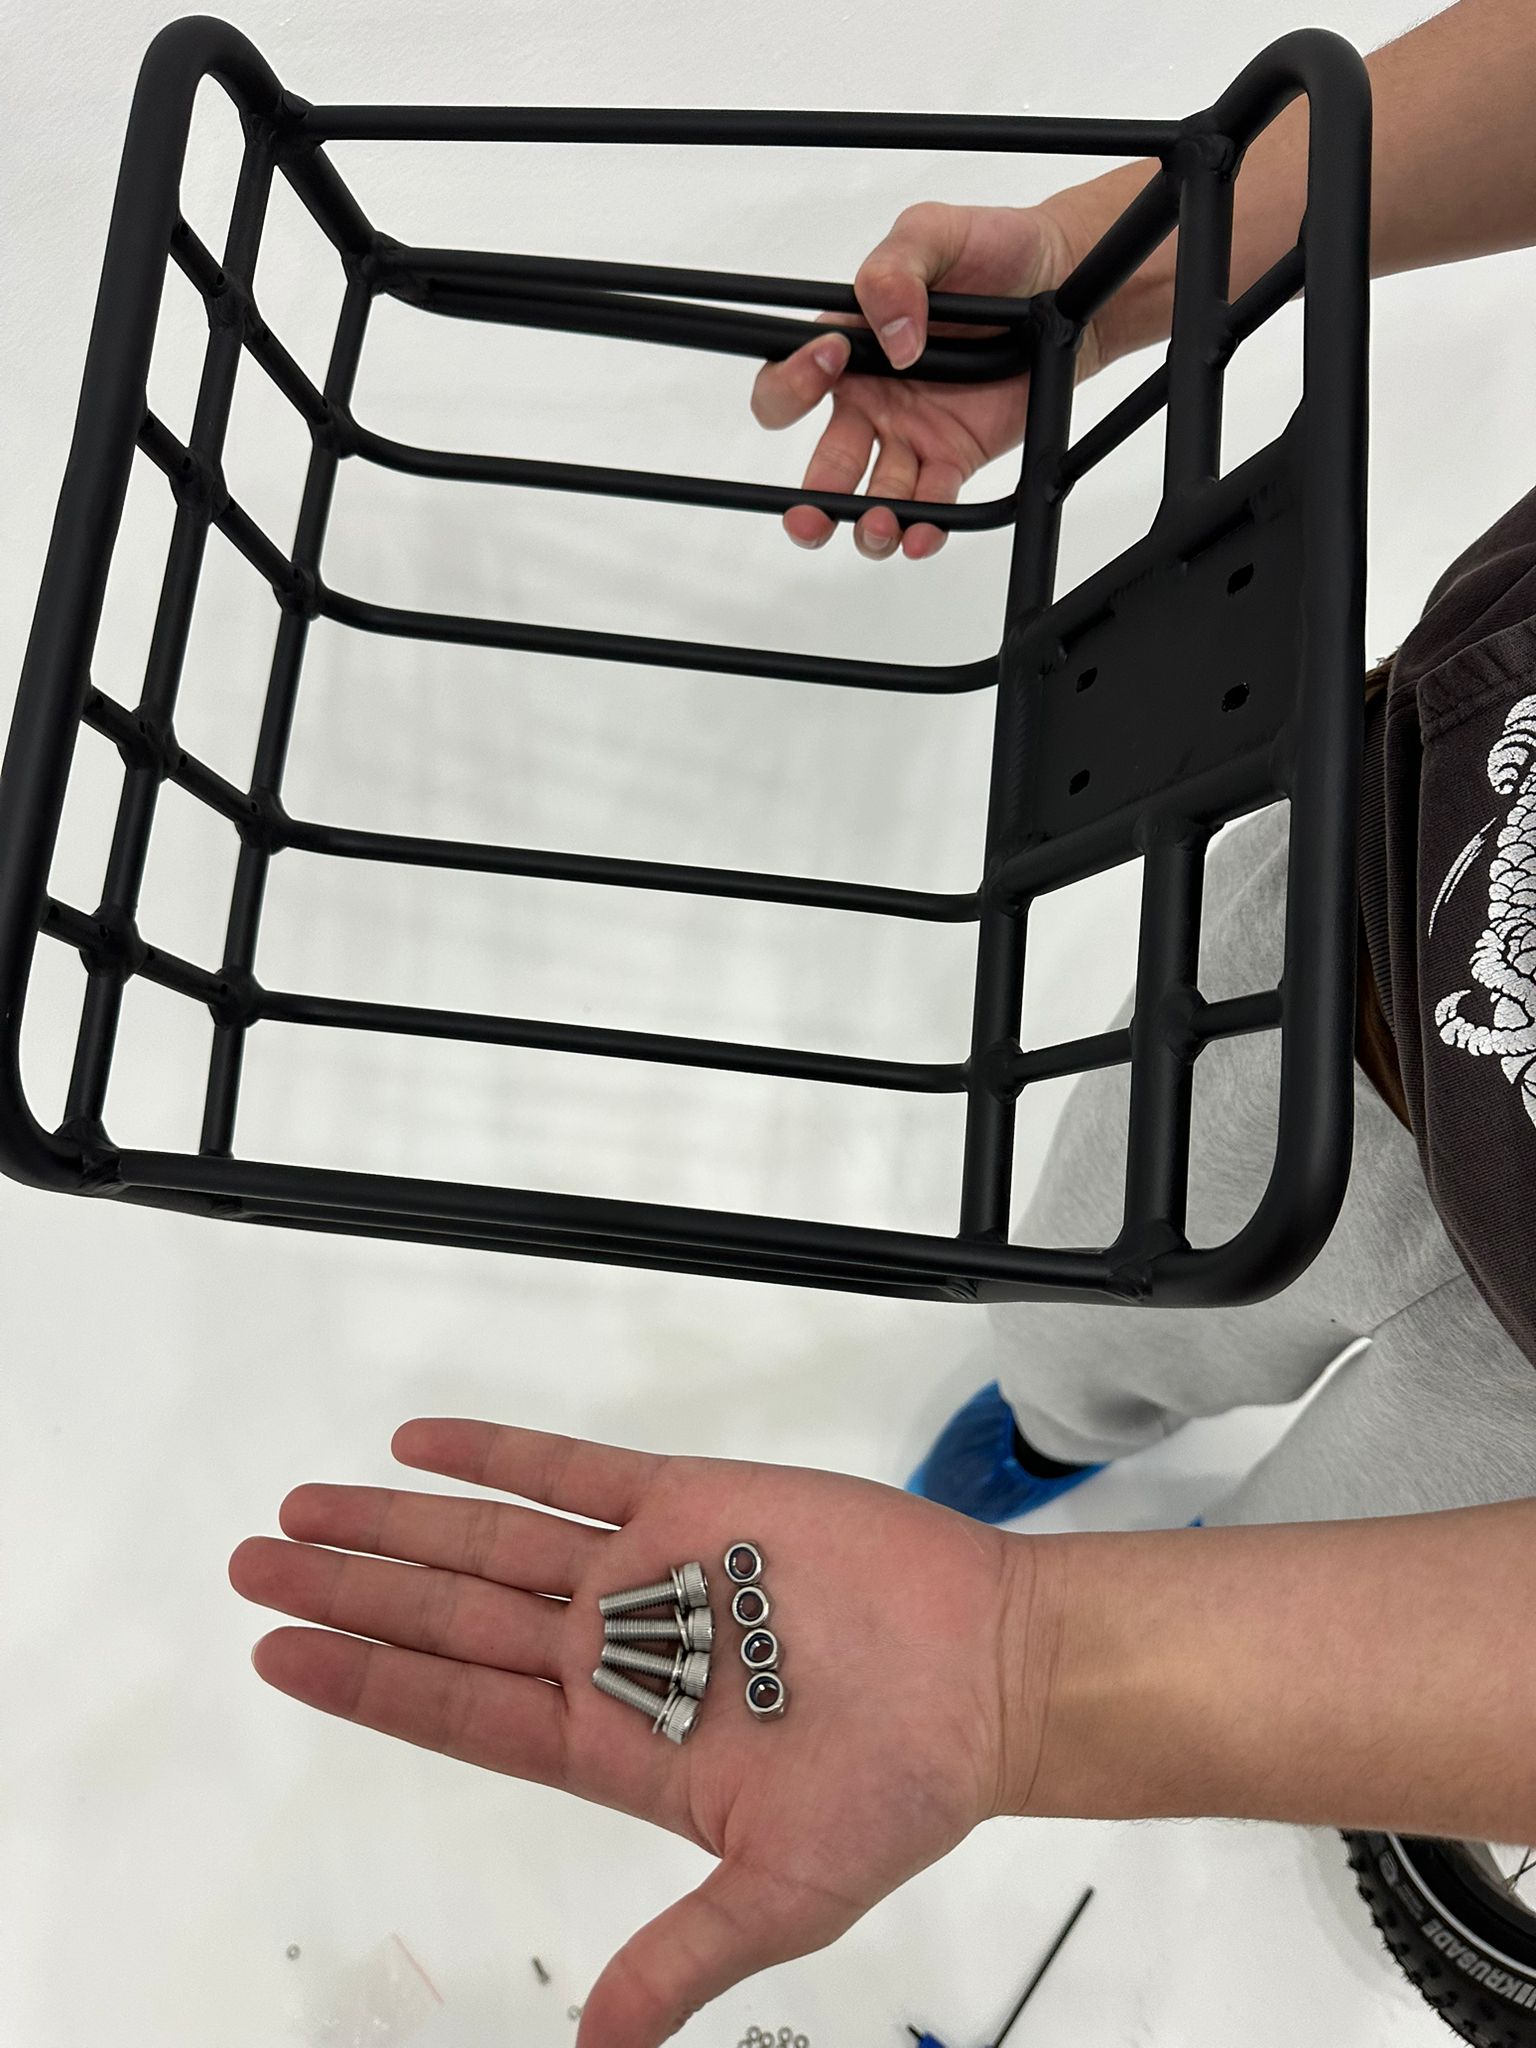
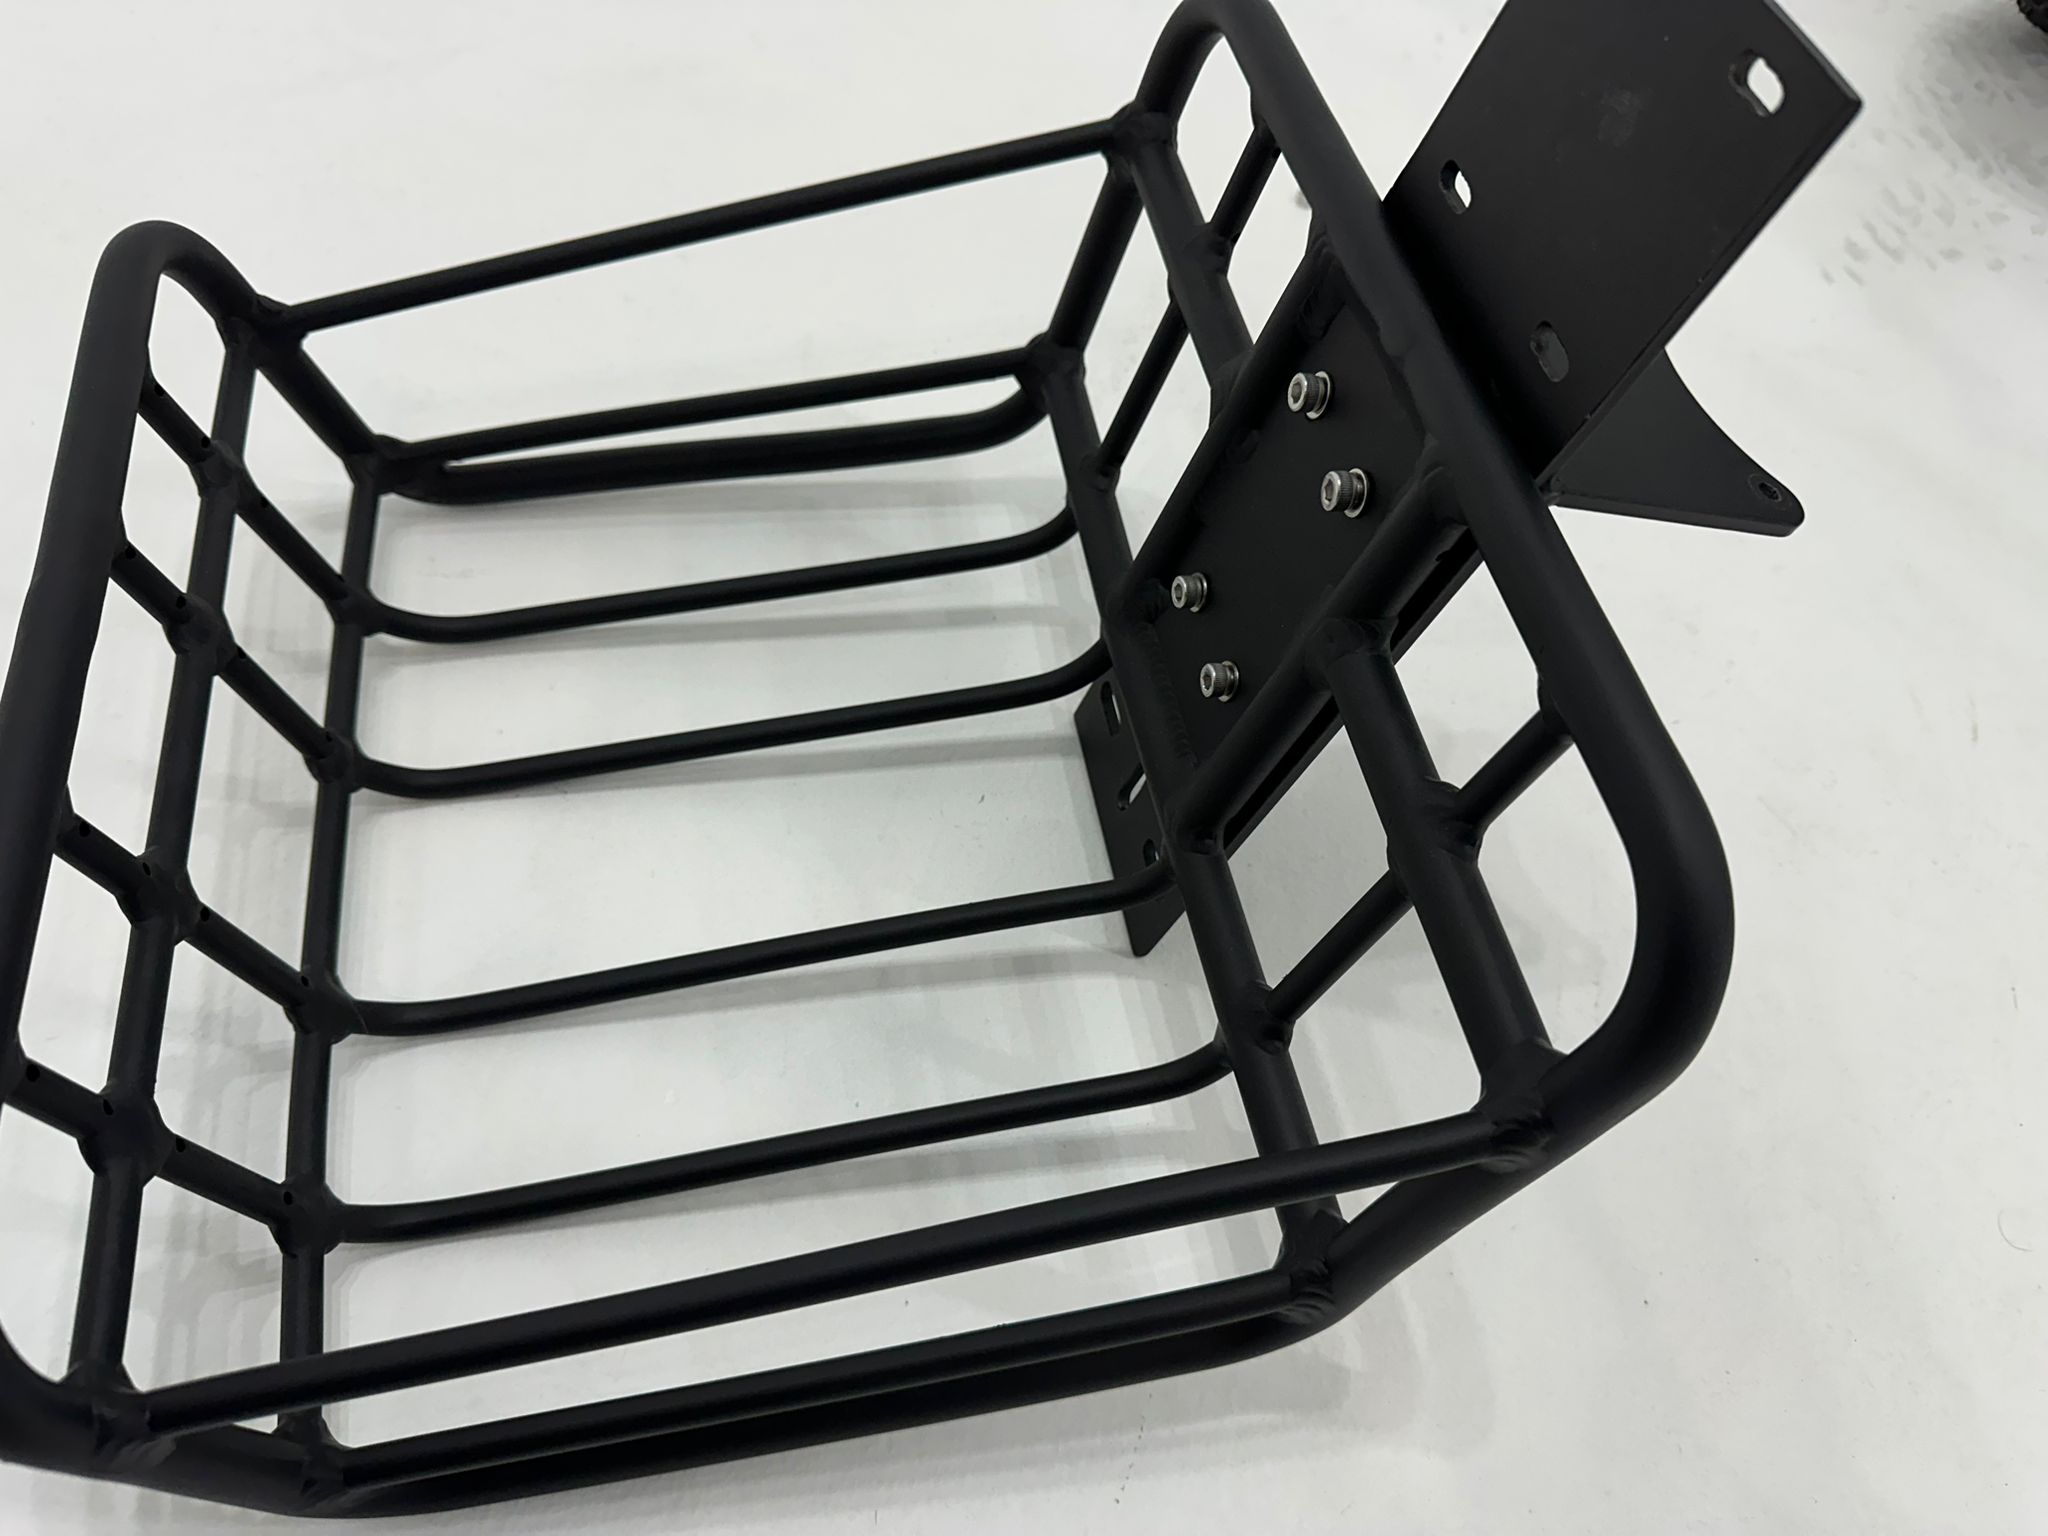
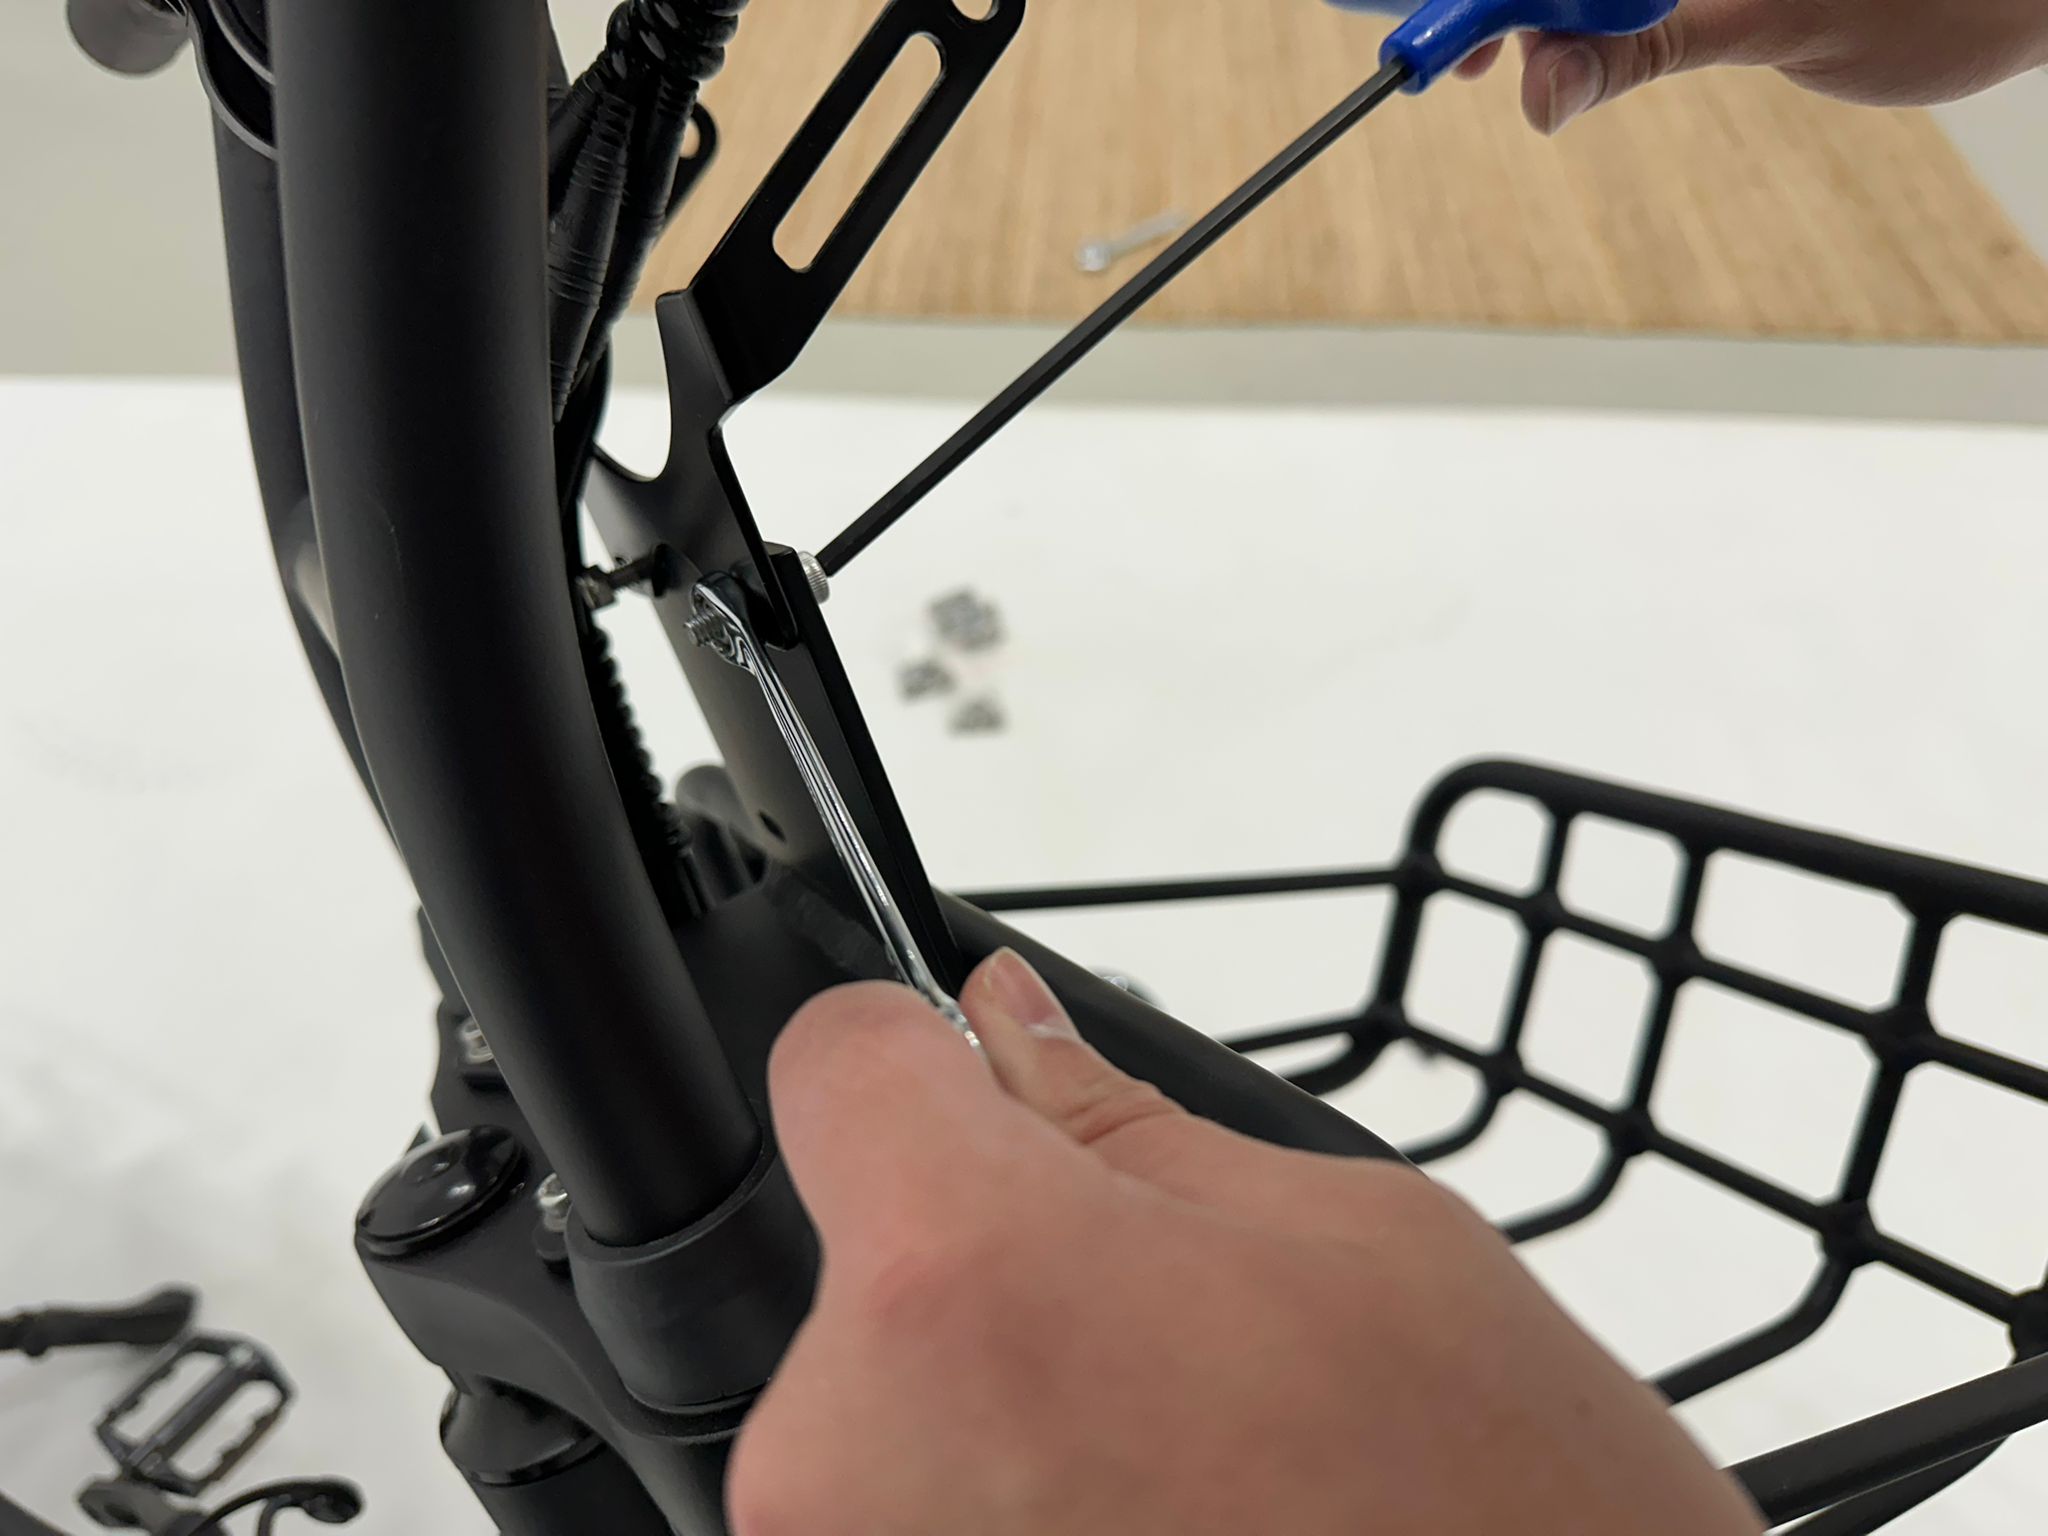
- Connect the front basket to the large mounting plate using four of the provided nuts and bolts. Position the mounting flap above the basket and facing away from it, as this flap will be used to secure the basket to the bike. Tighten these bolts by holding the nut in place with the 10mm wrench and turning the bolt with the 5mm Allen key.
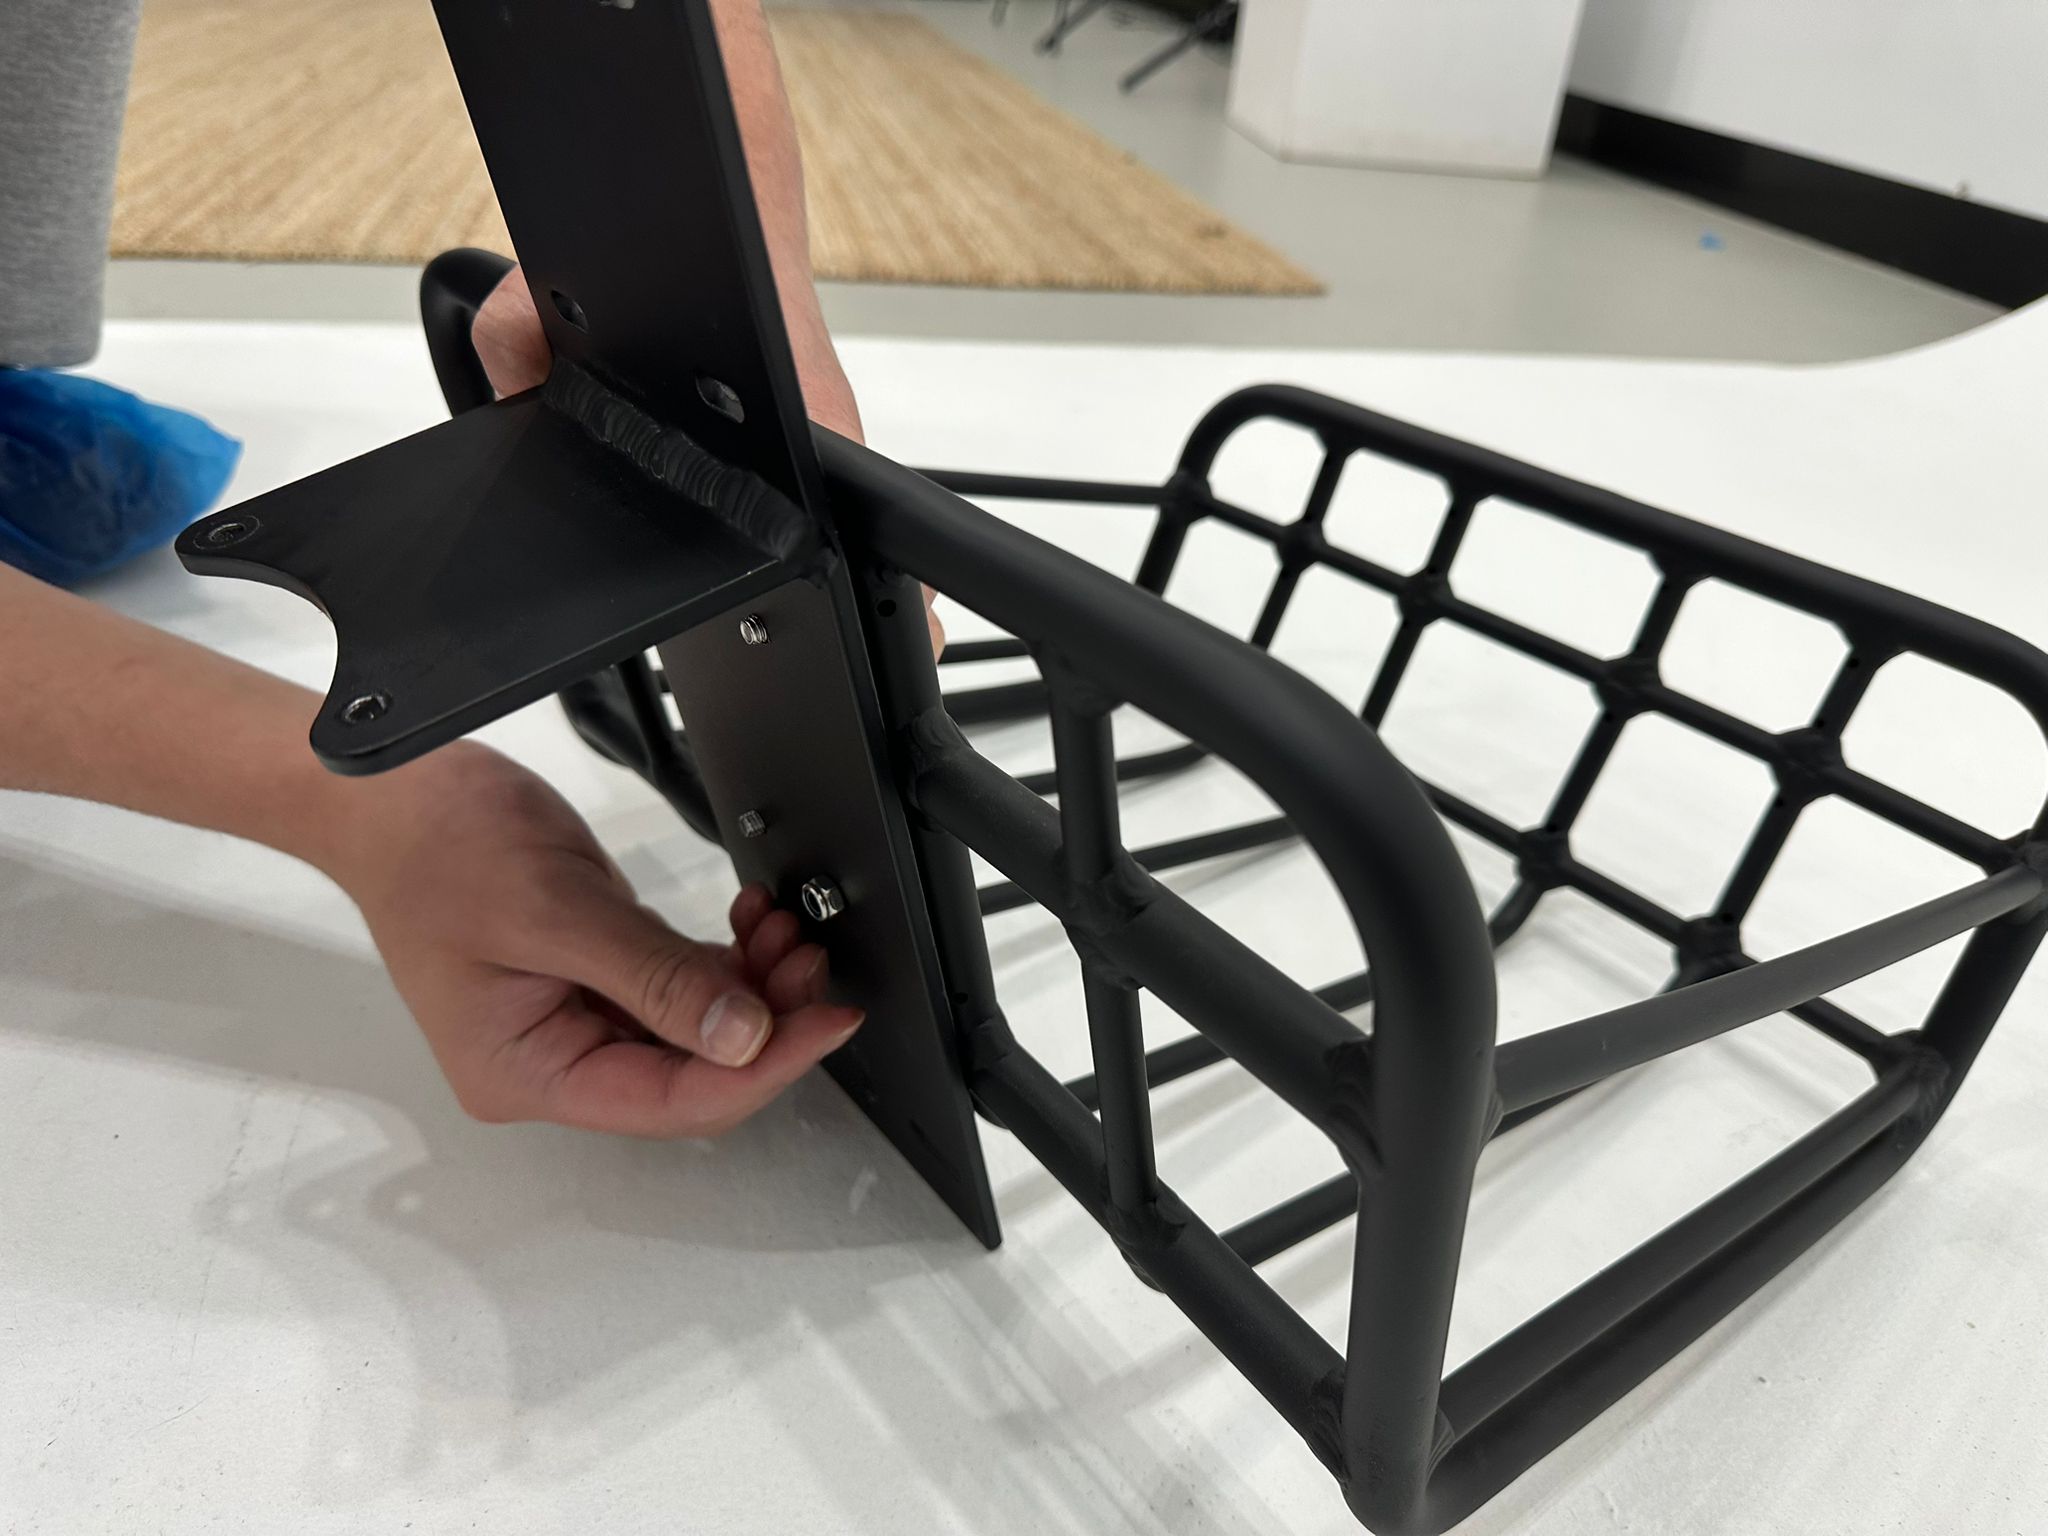
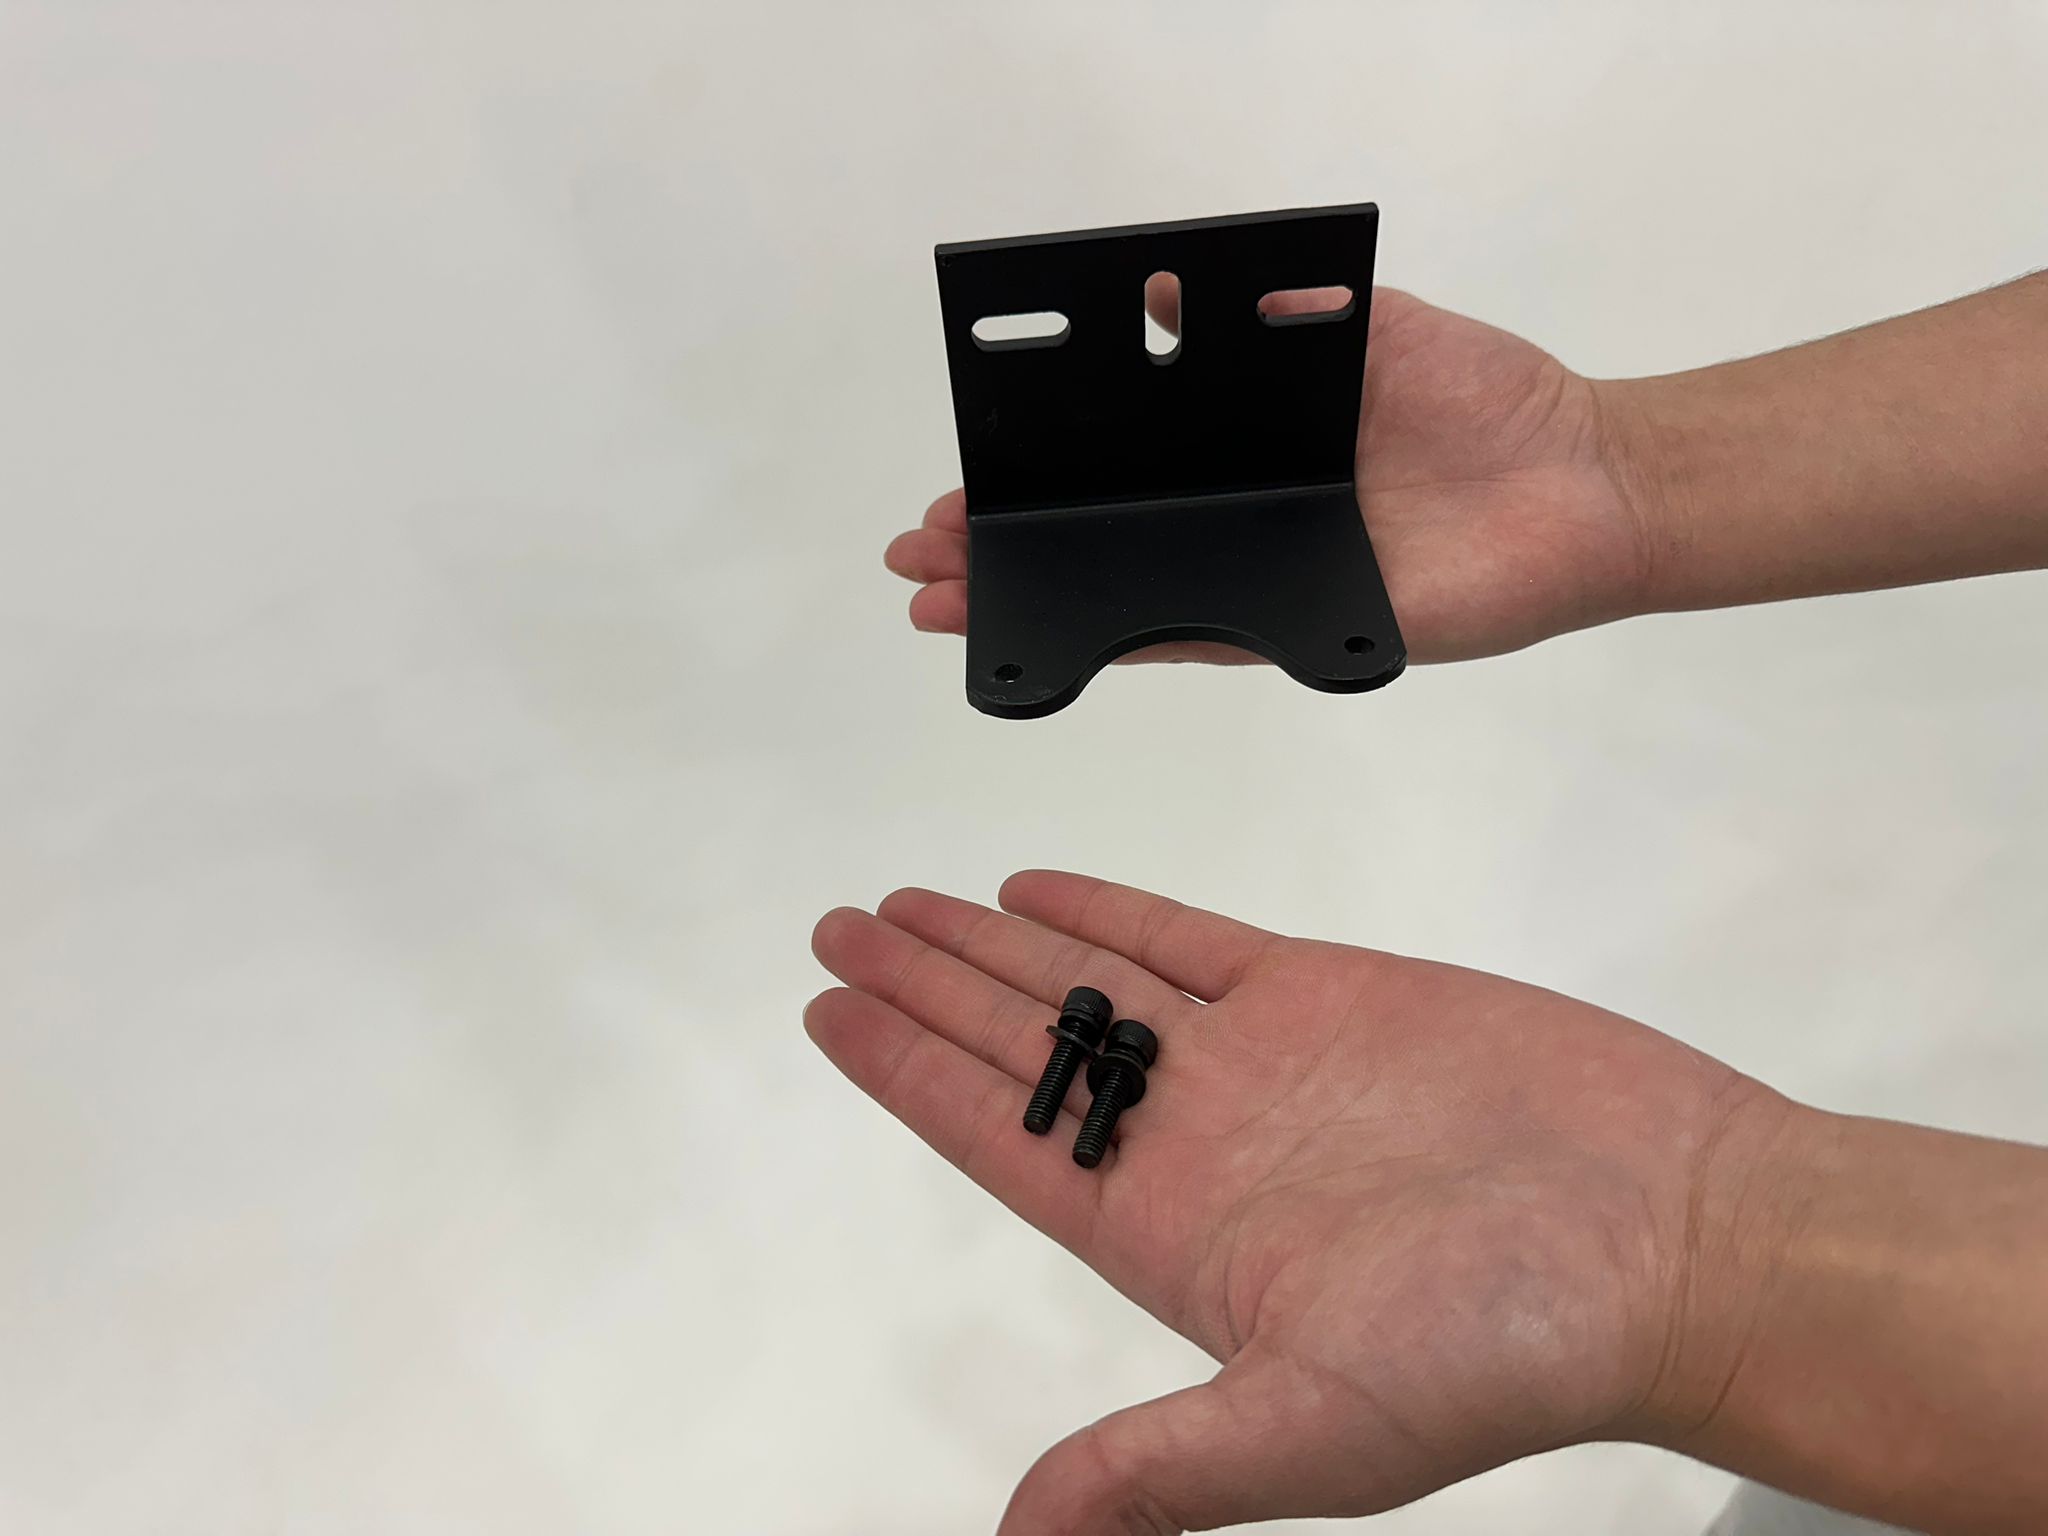
- Once the basket is securely fastened to the large mounting plate, position the plate in front of the handlebars. Use two additional screws from the package to fasten the plate above the head stem. Tighten these screws with the 5mm Allen key.

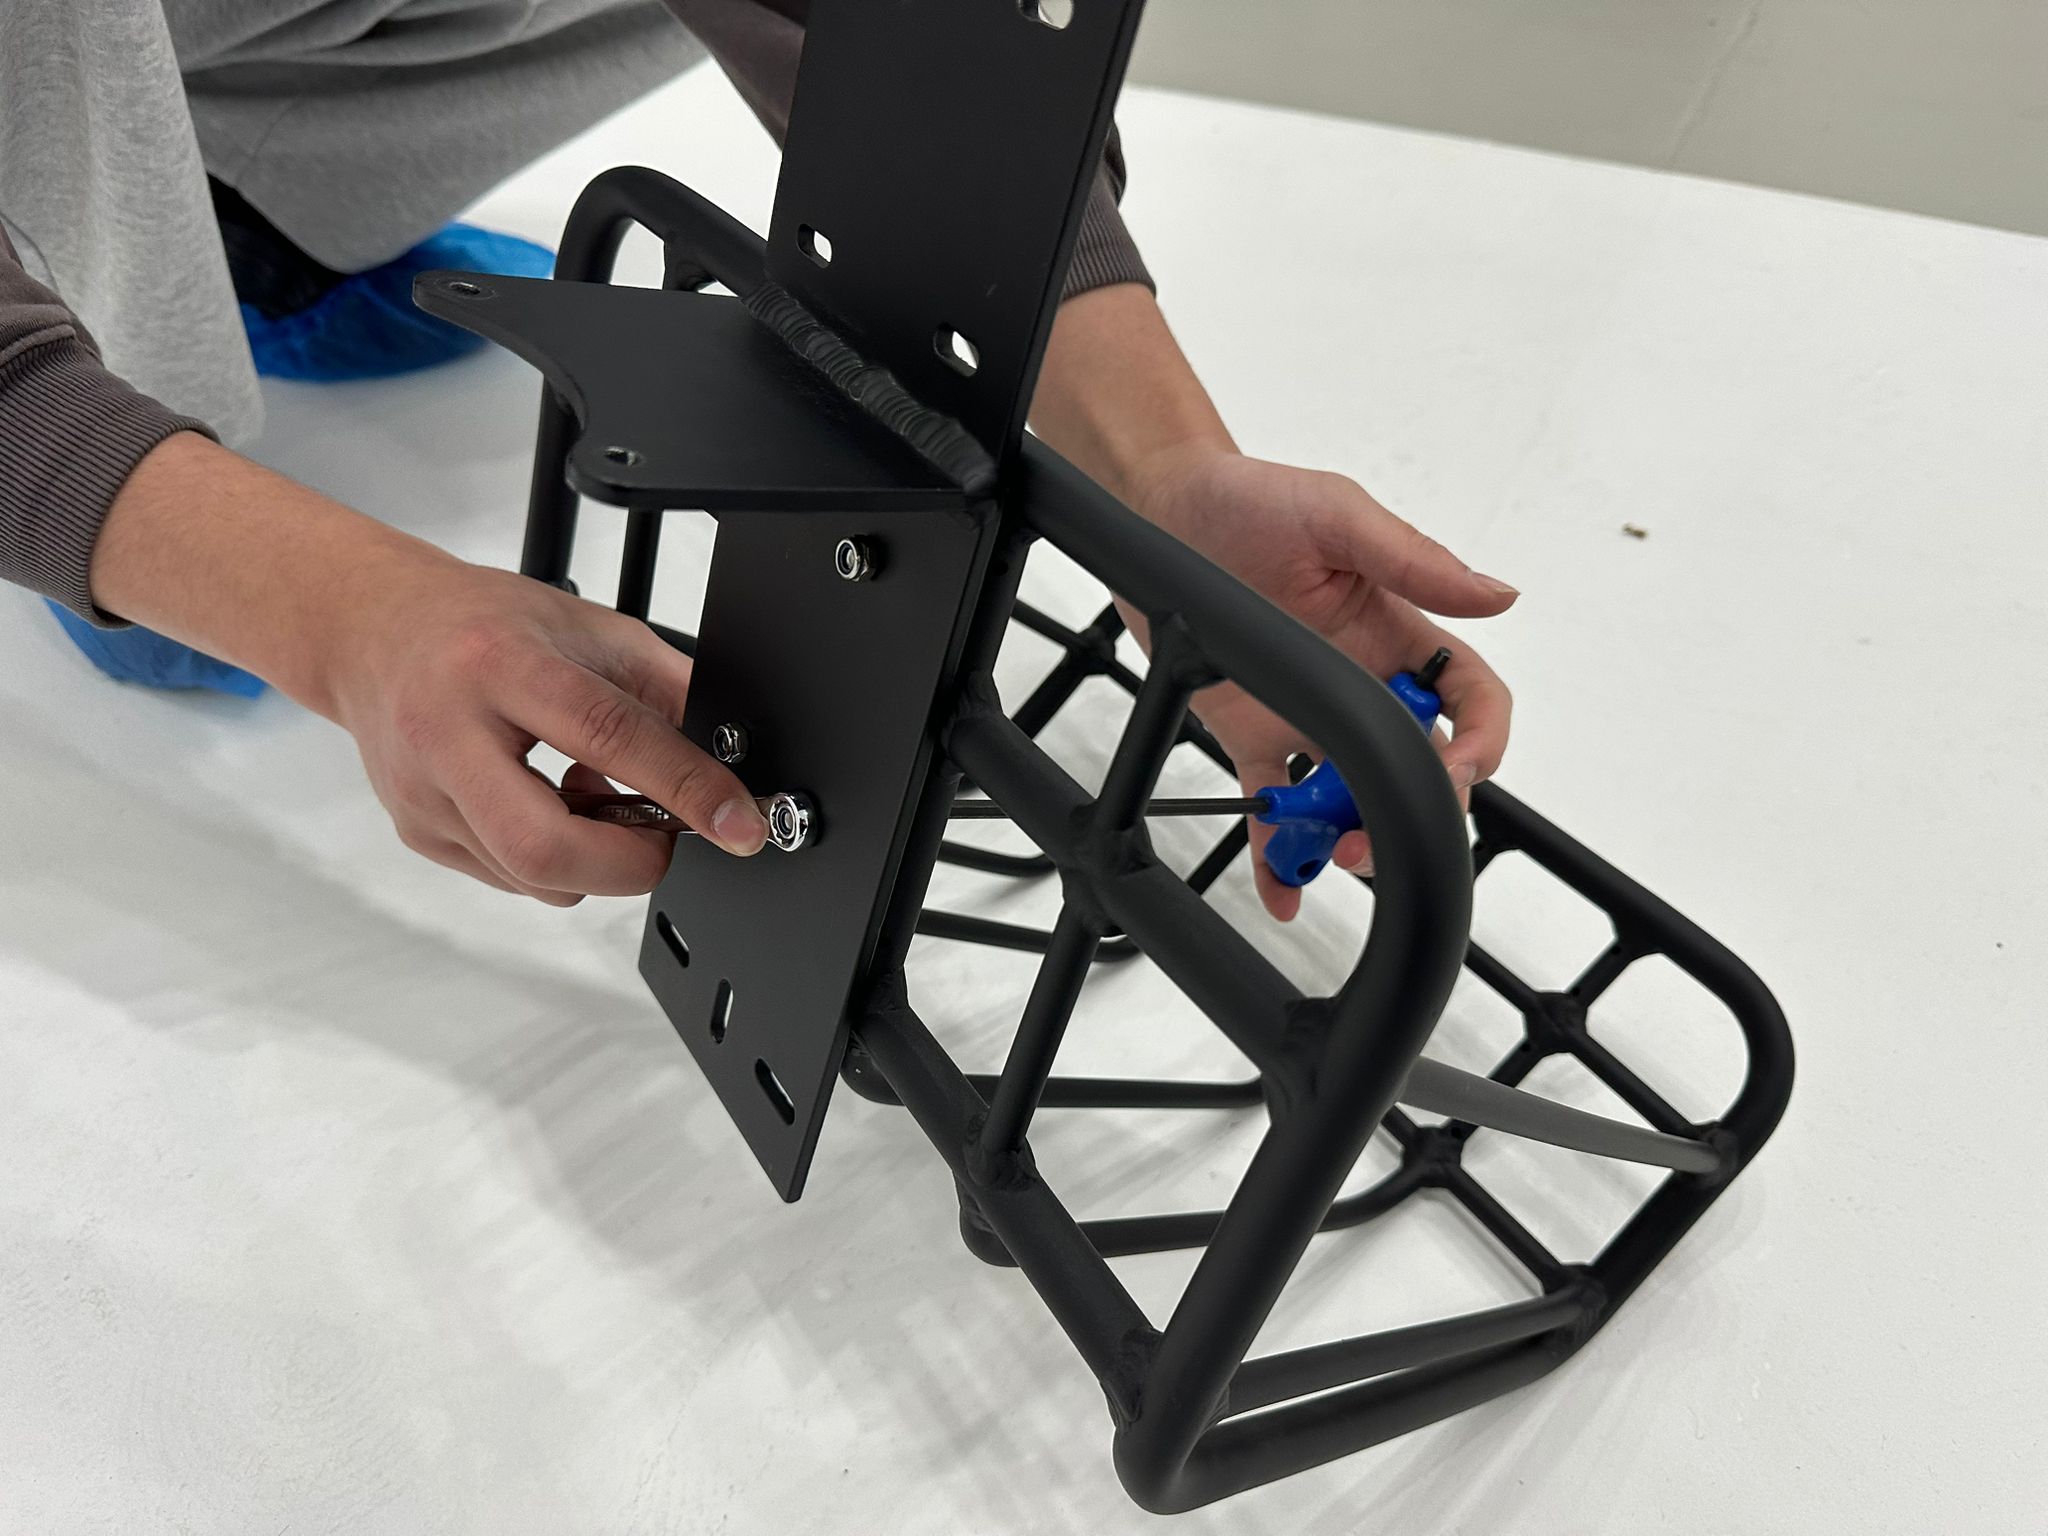
- Use the remaining two nuts and bolts from the package to secure the headlight's mounting bracket above the front basket. Fasten these with the 5mm Allen key and 10mm wrench. Retrieve the two original screws used to mount the headlight to its bracket. Use the 5mm Allen key to fasten the headlight to the bracket in a suitable position.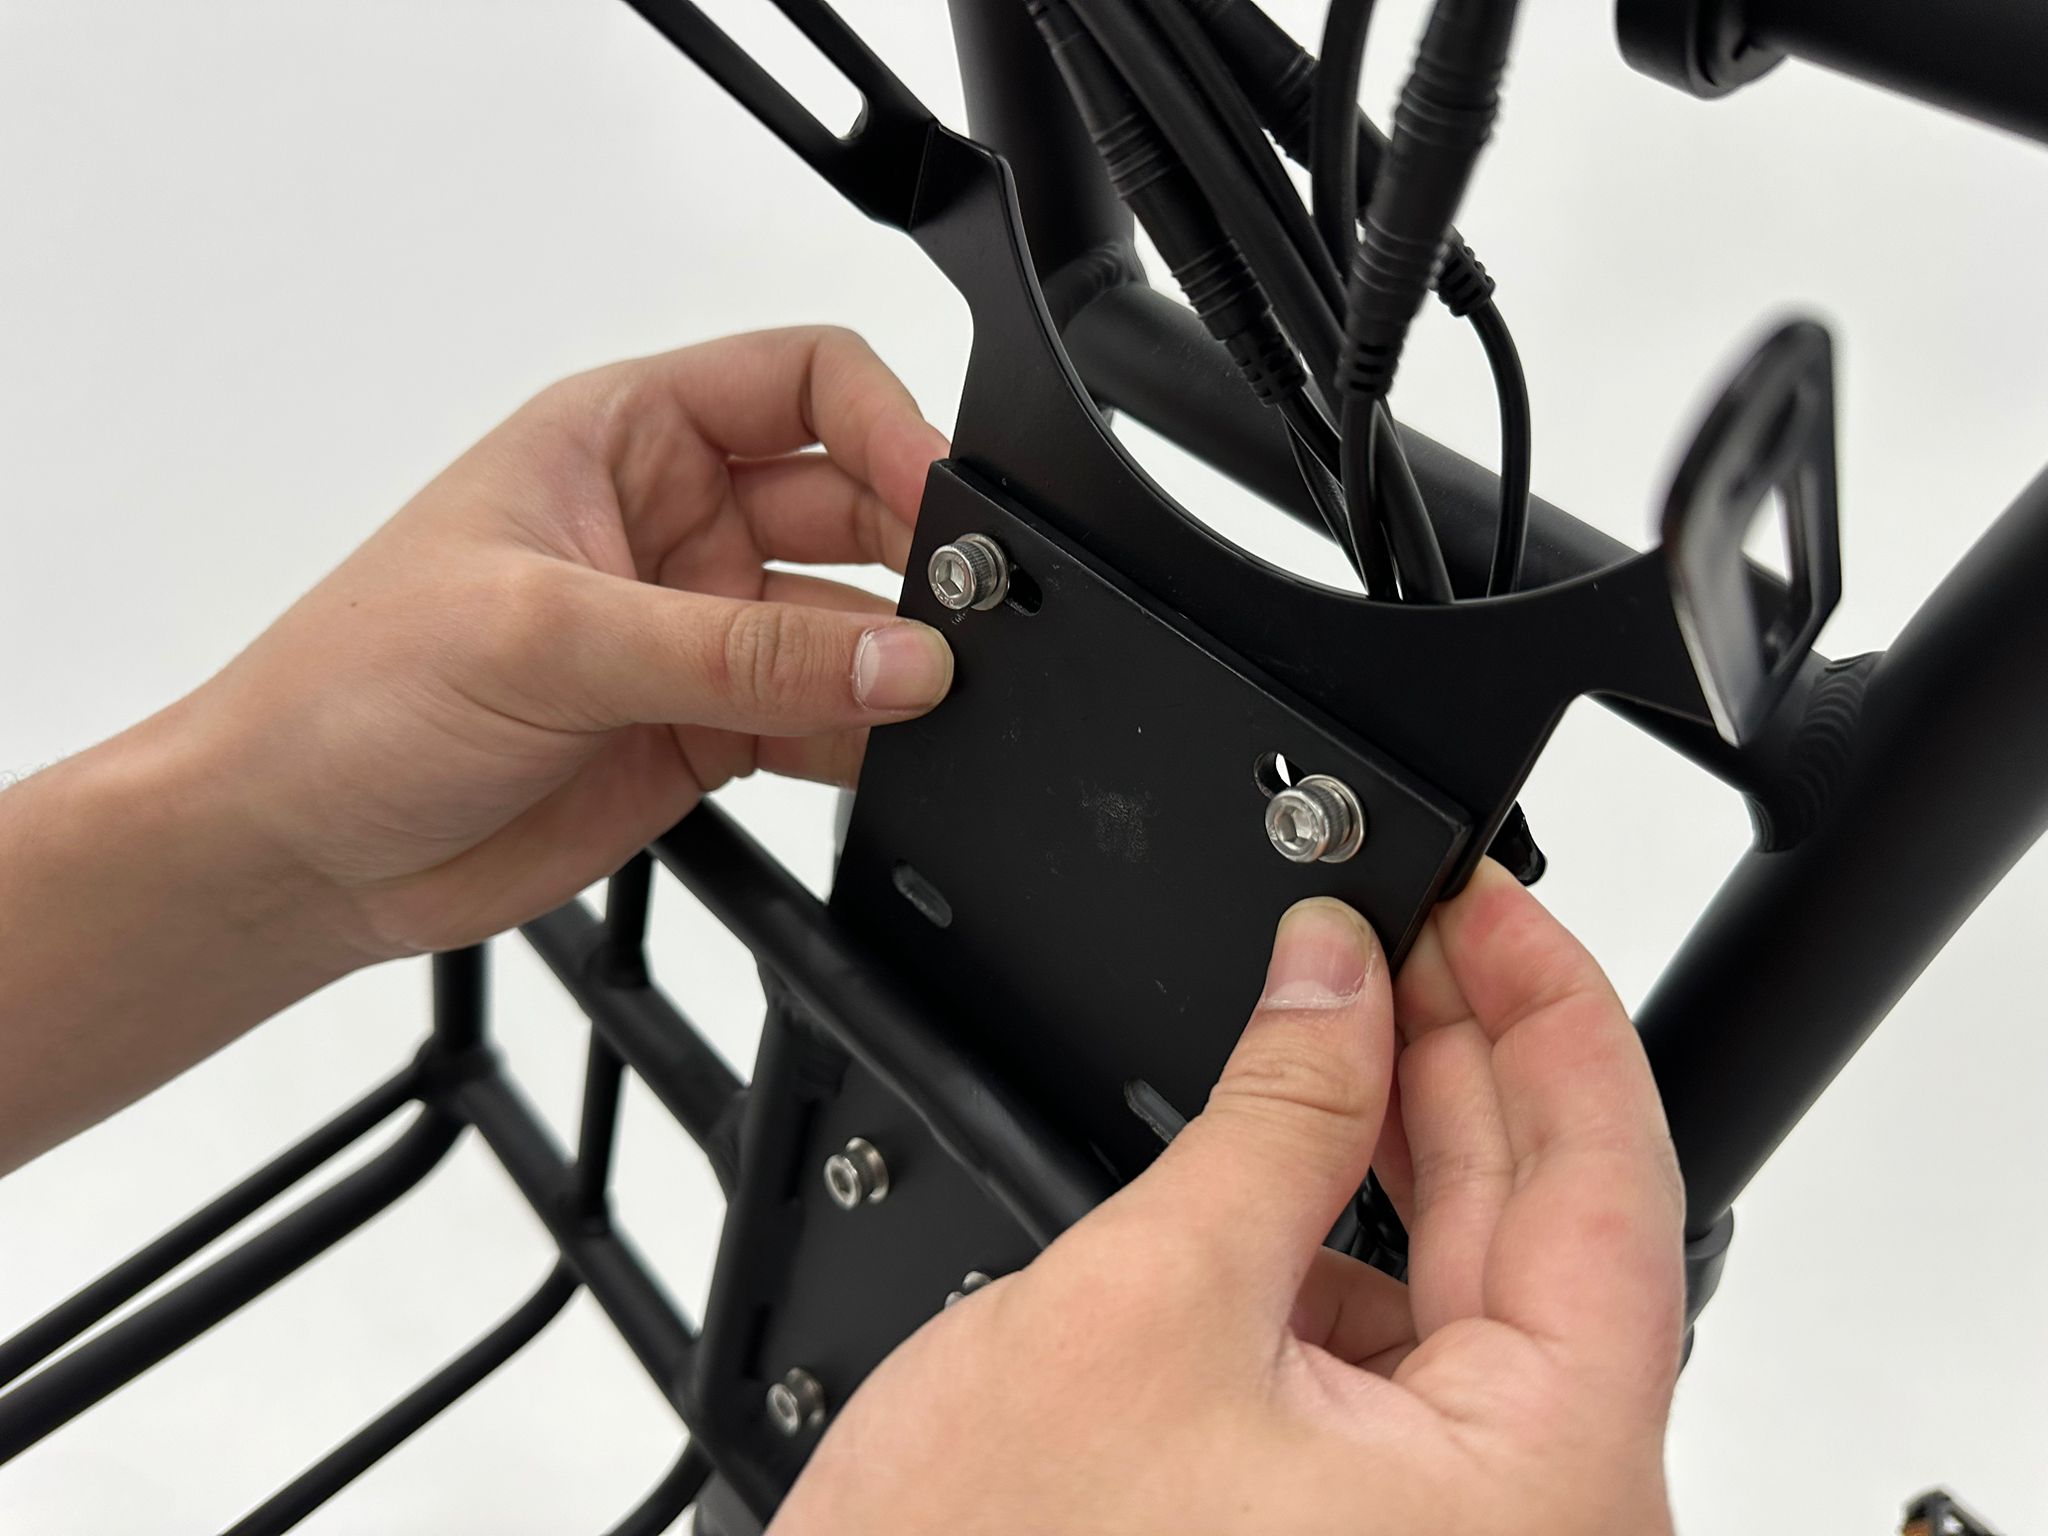
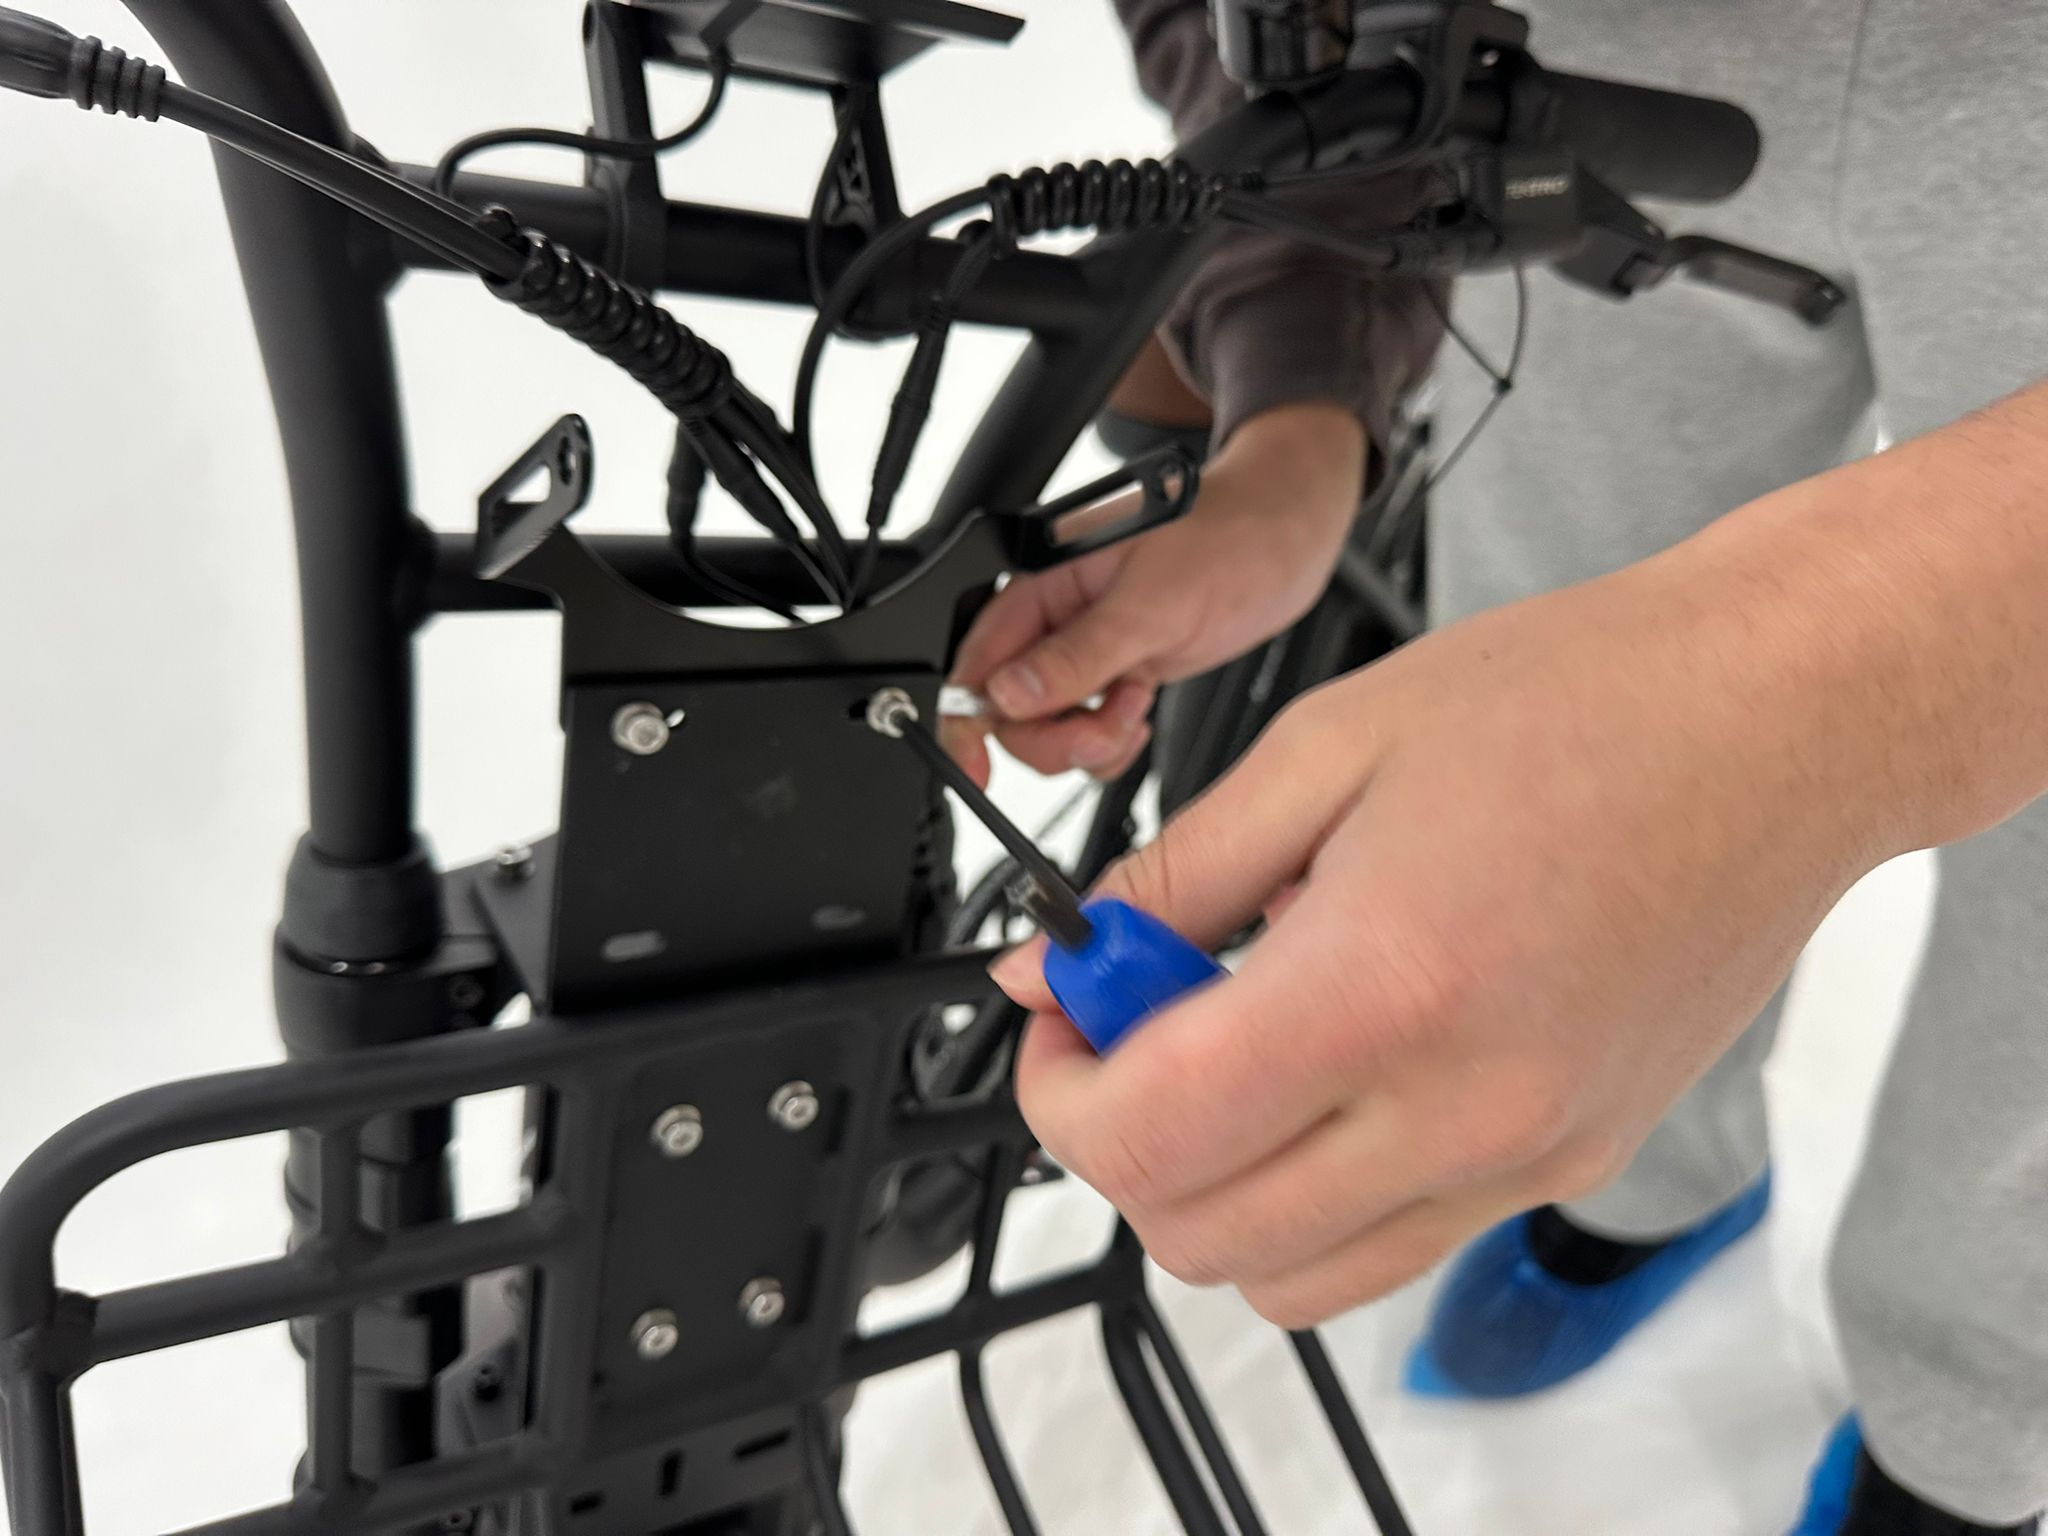
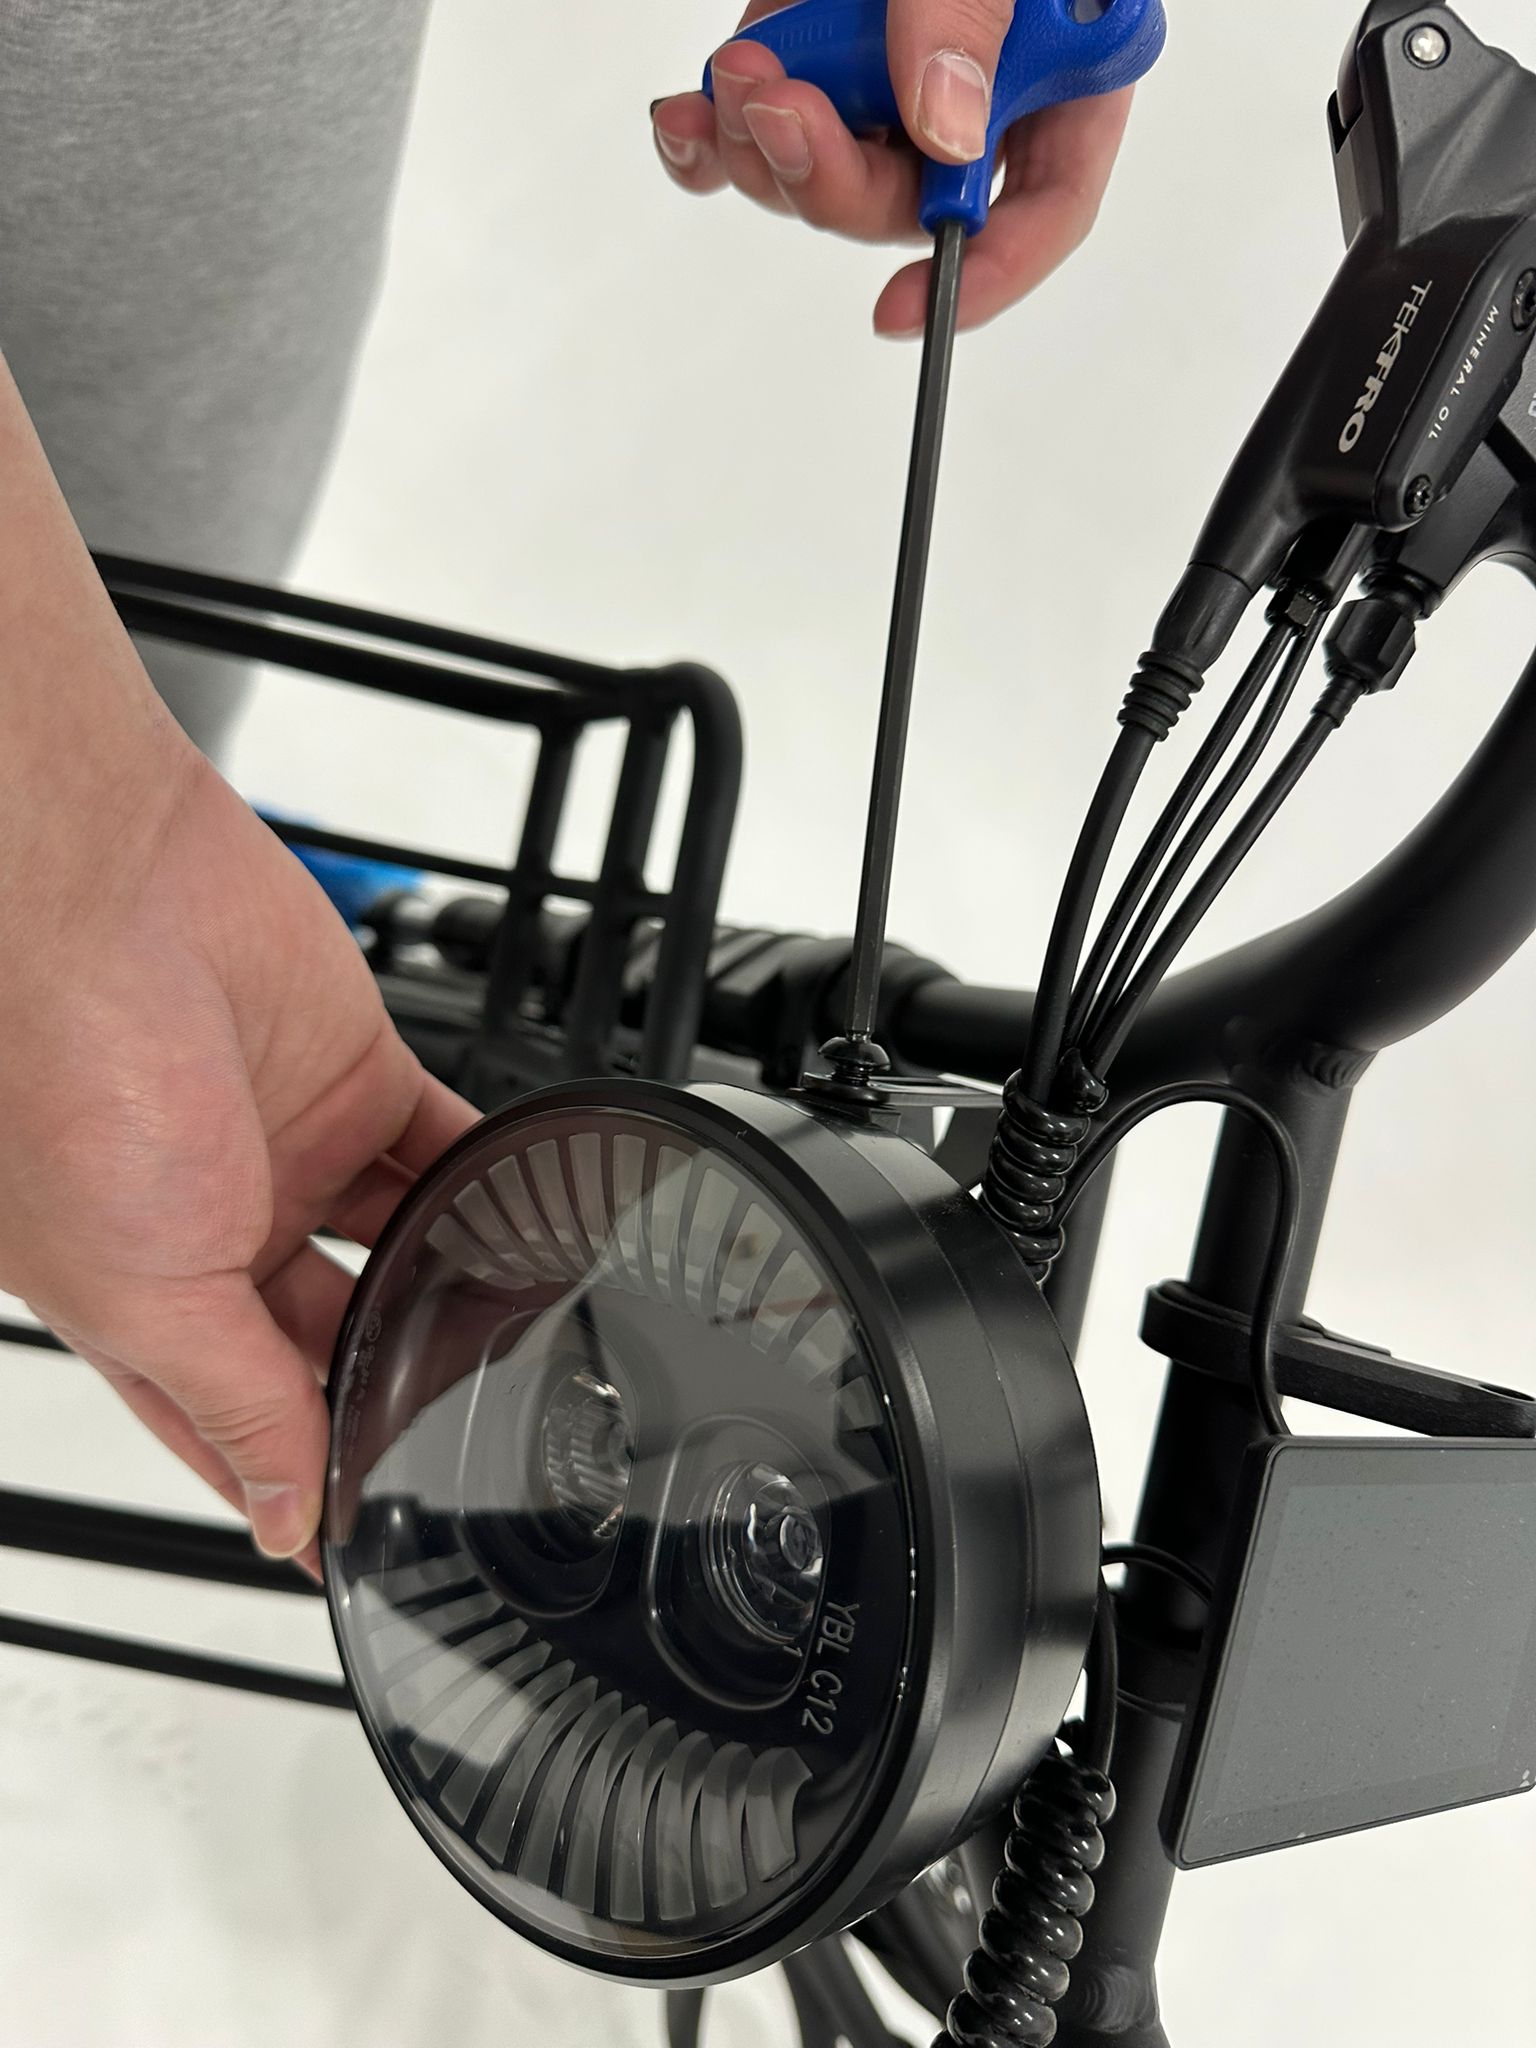
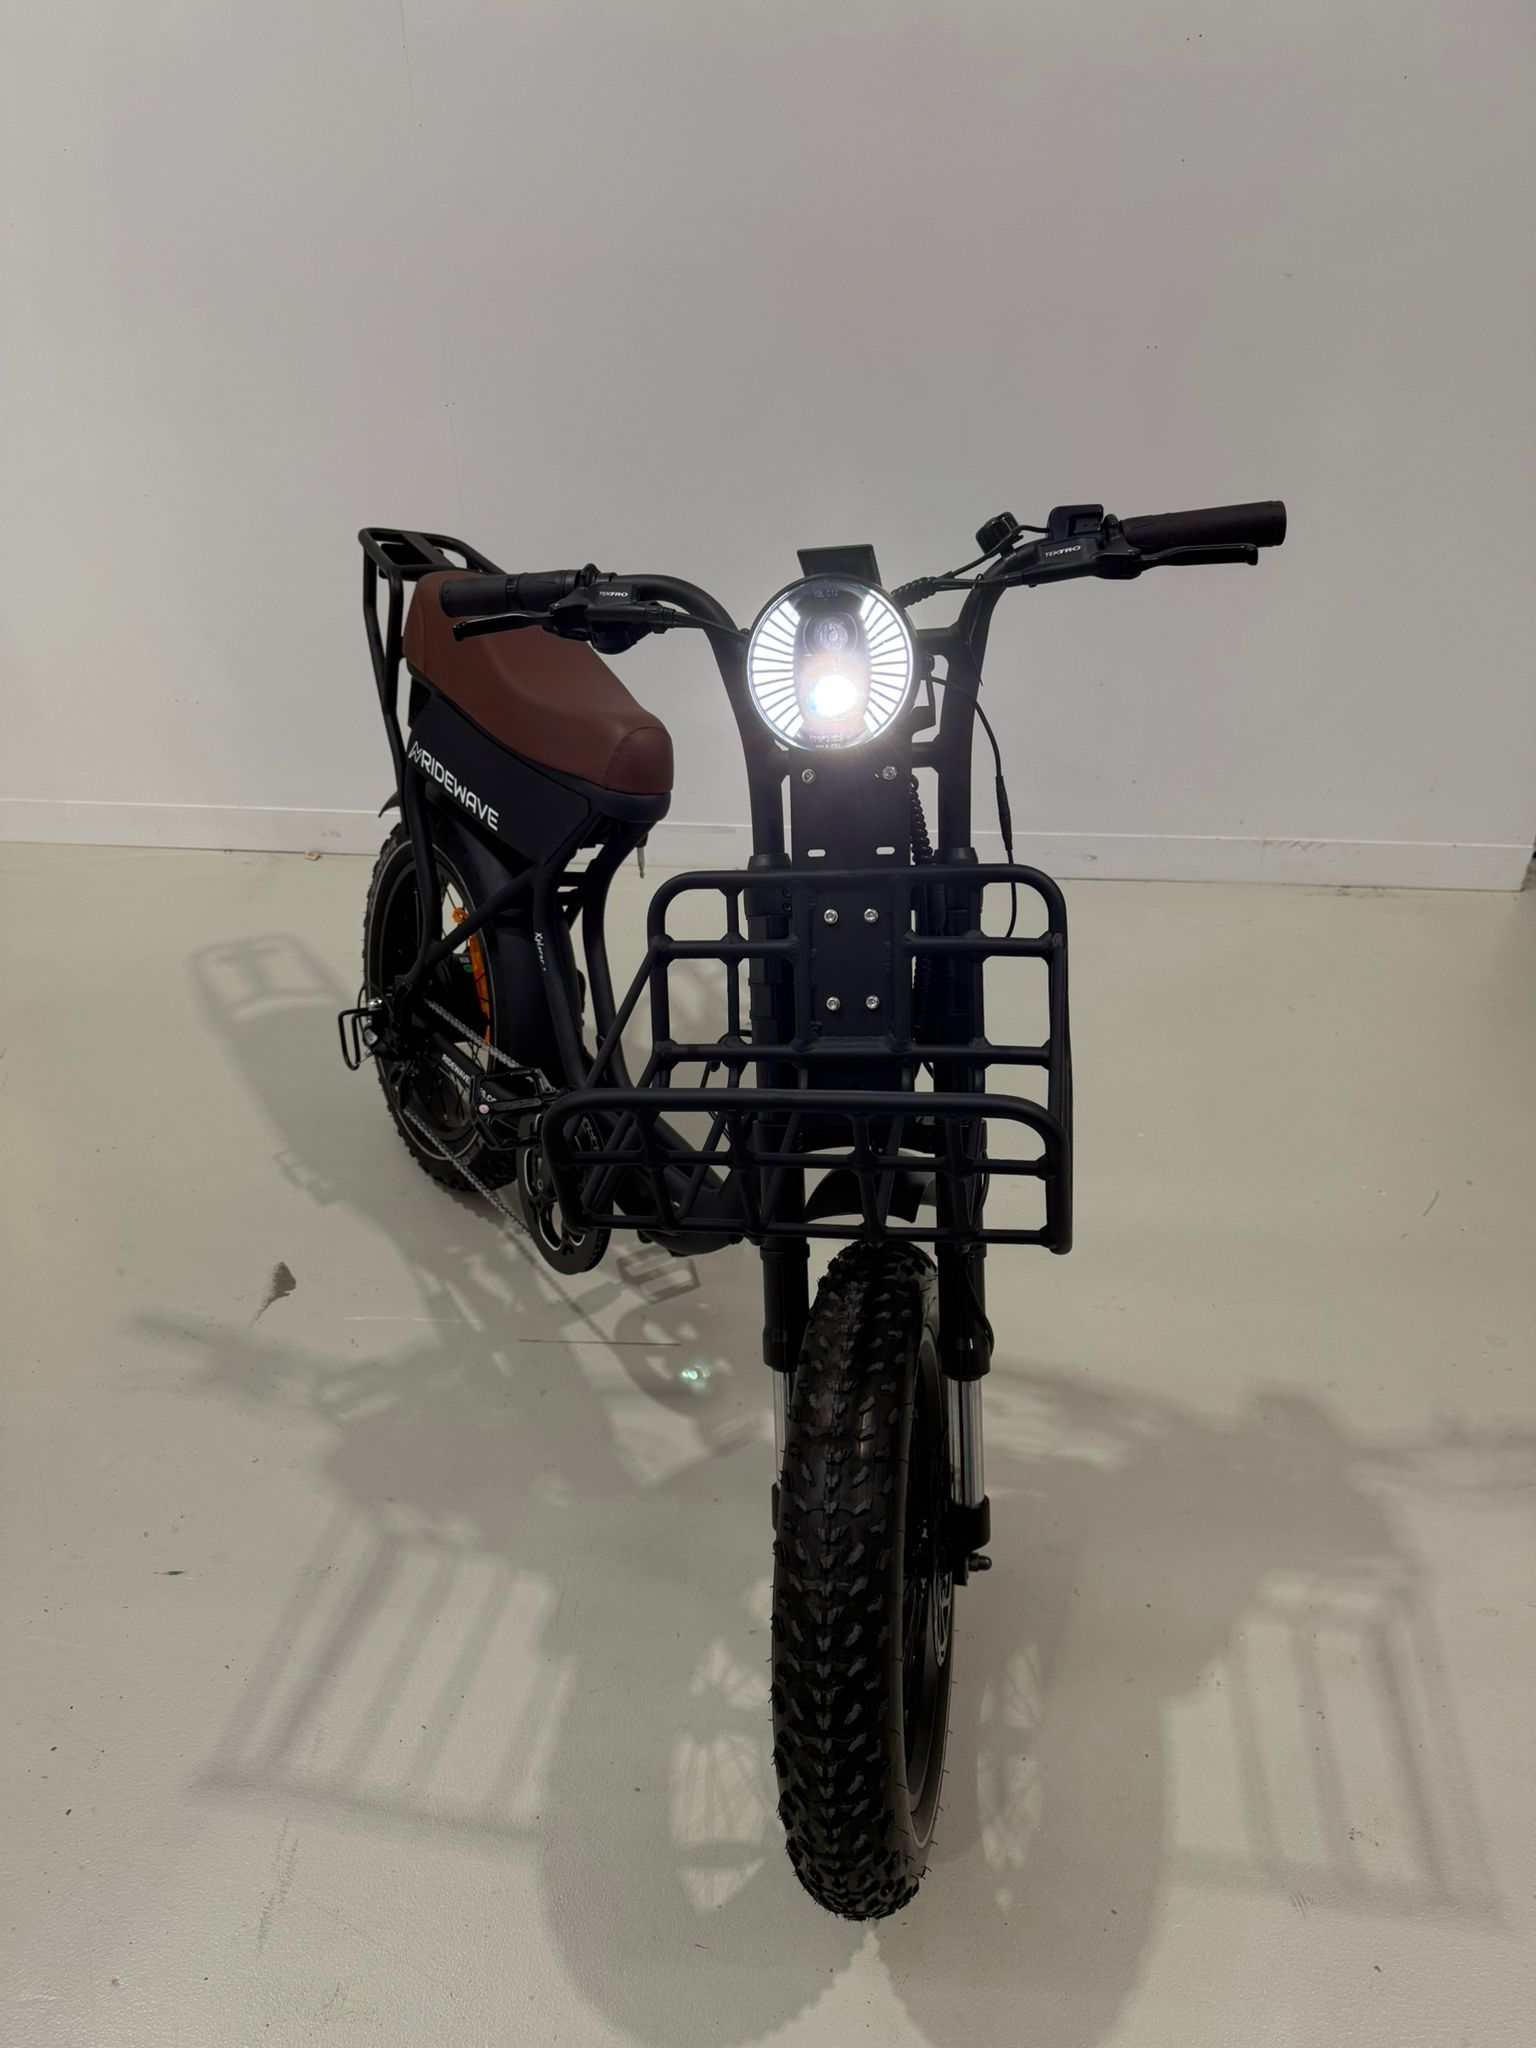
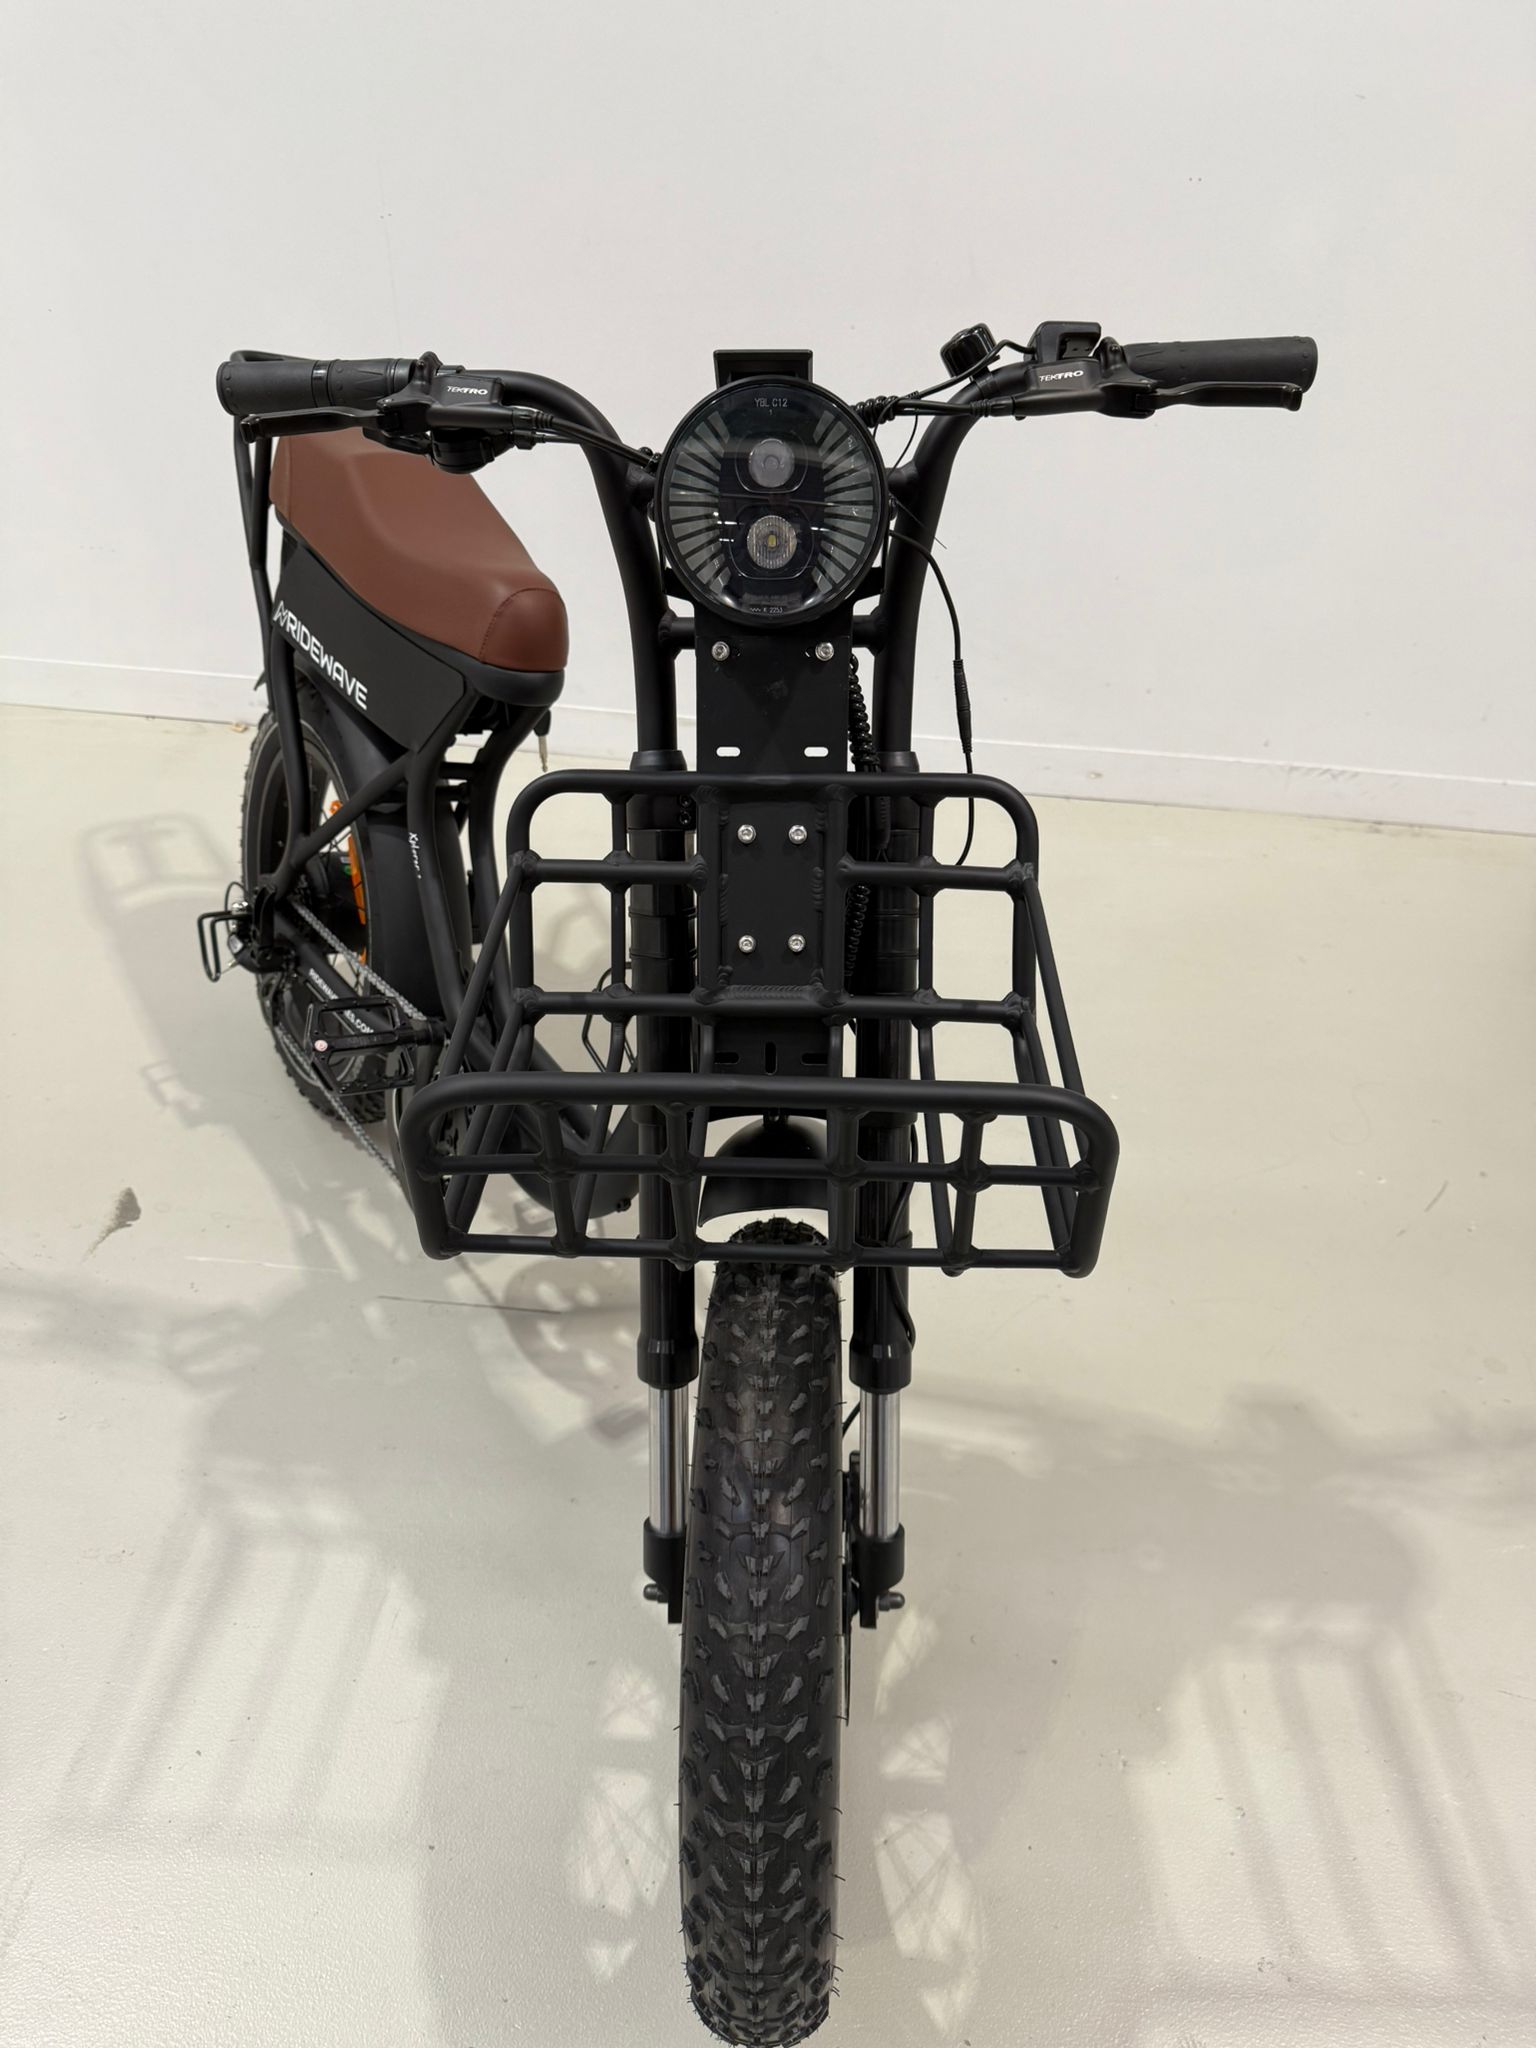
- Reconnect the headlight cable, ensuring the arrow indicators on both ends of the cable are aligned. Turn on your e-bike and test the headlight's function. Assess the sturdiness of the entire rack setup. If there is any movement, tighten all connections further as needed.
- The plates are designed not to touch. Refer to the images of the completed setup for visual confirmation.