Glide — Motor Controller RemovalUpdated 5 months ago
Over time, your Glide eBike’s motor controller may need inspection, servicing, or replacement. This guide explains how to safely remove the controller from the frame to access wiring connections or install a new unit.
Tools Required
- Cable Cutters
- 2 mm hex key
- T20 Torx wrench
Before You Start
- Turn off the bike and remove the battery (if applicable).
- Work on a stable stand or flat surface with good lighting.
- Keep small bolts and covers in a tray to avoid losing them.
- Take photos of cable routing before unplugging anything — this makes reassembly easier.
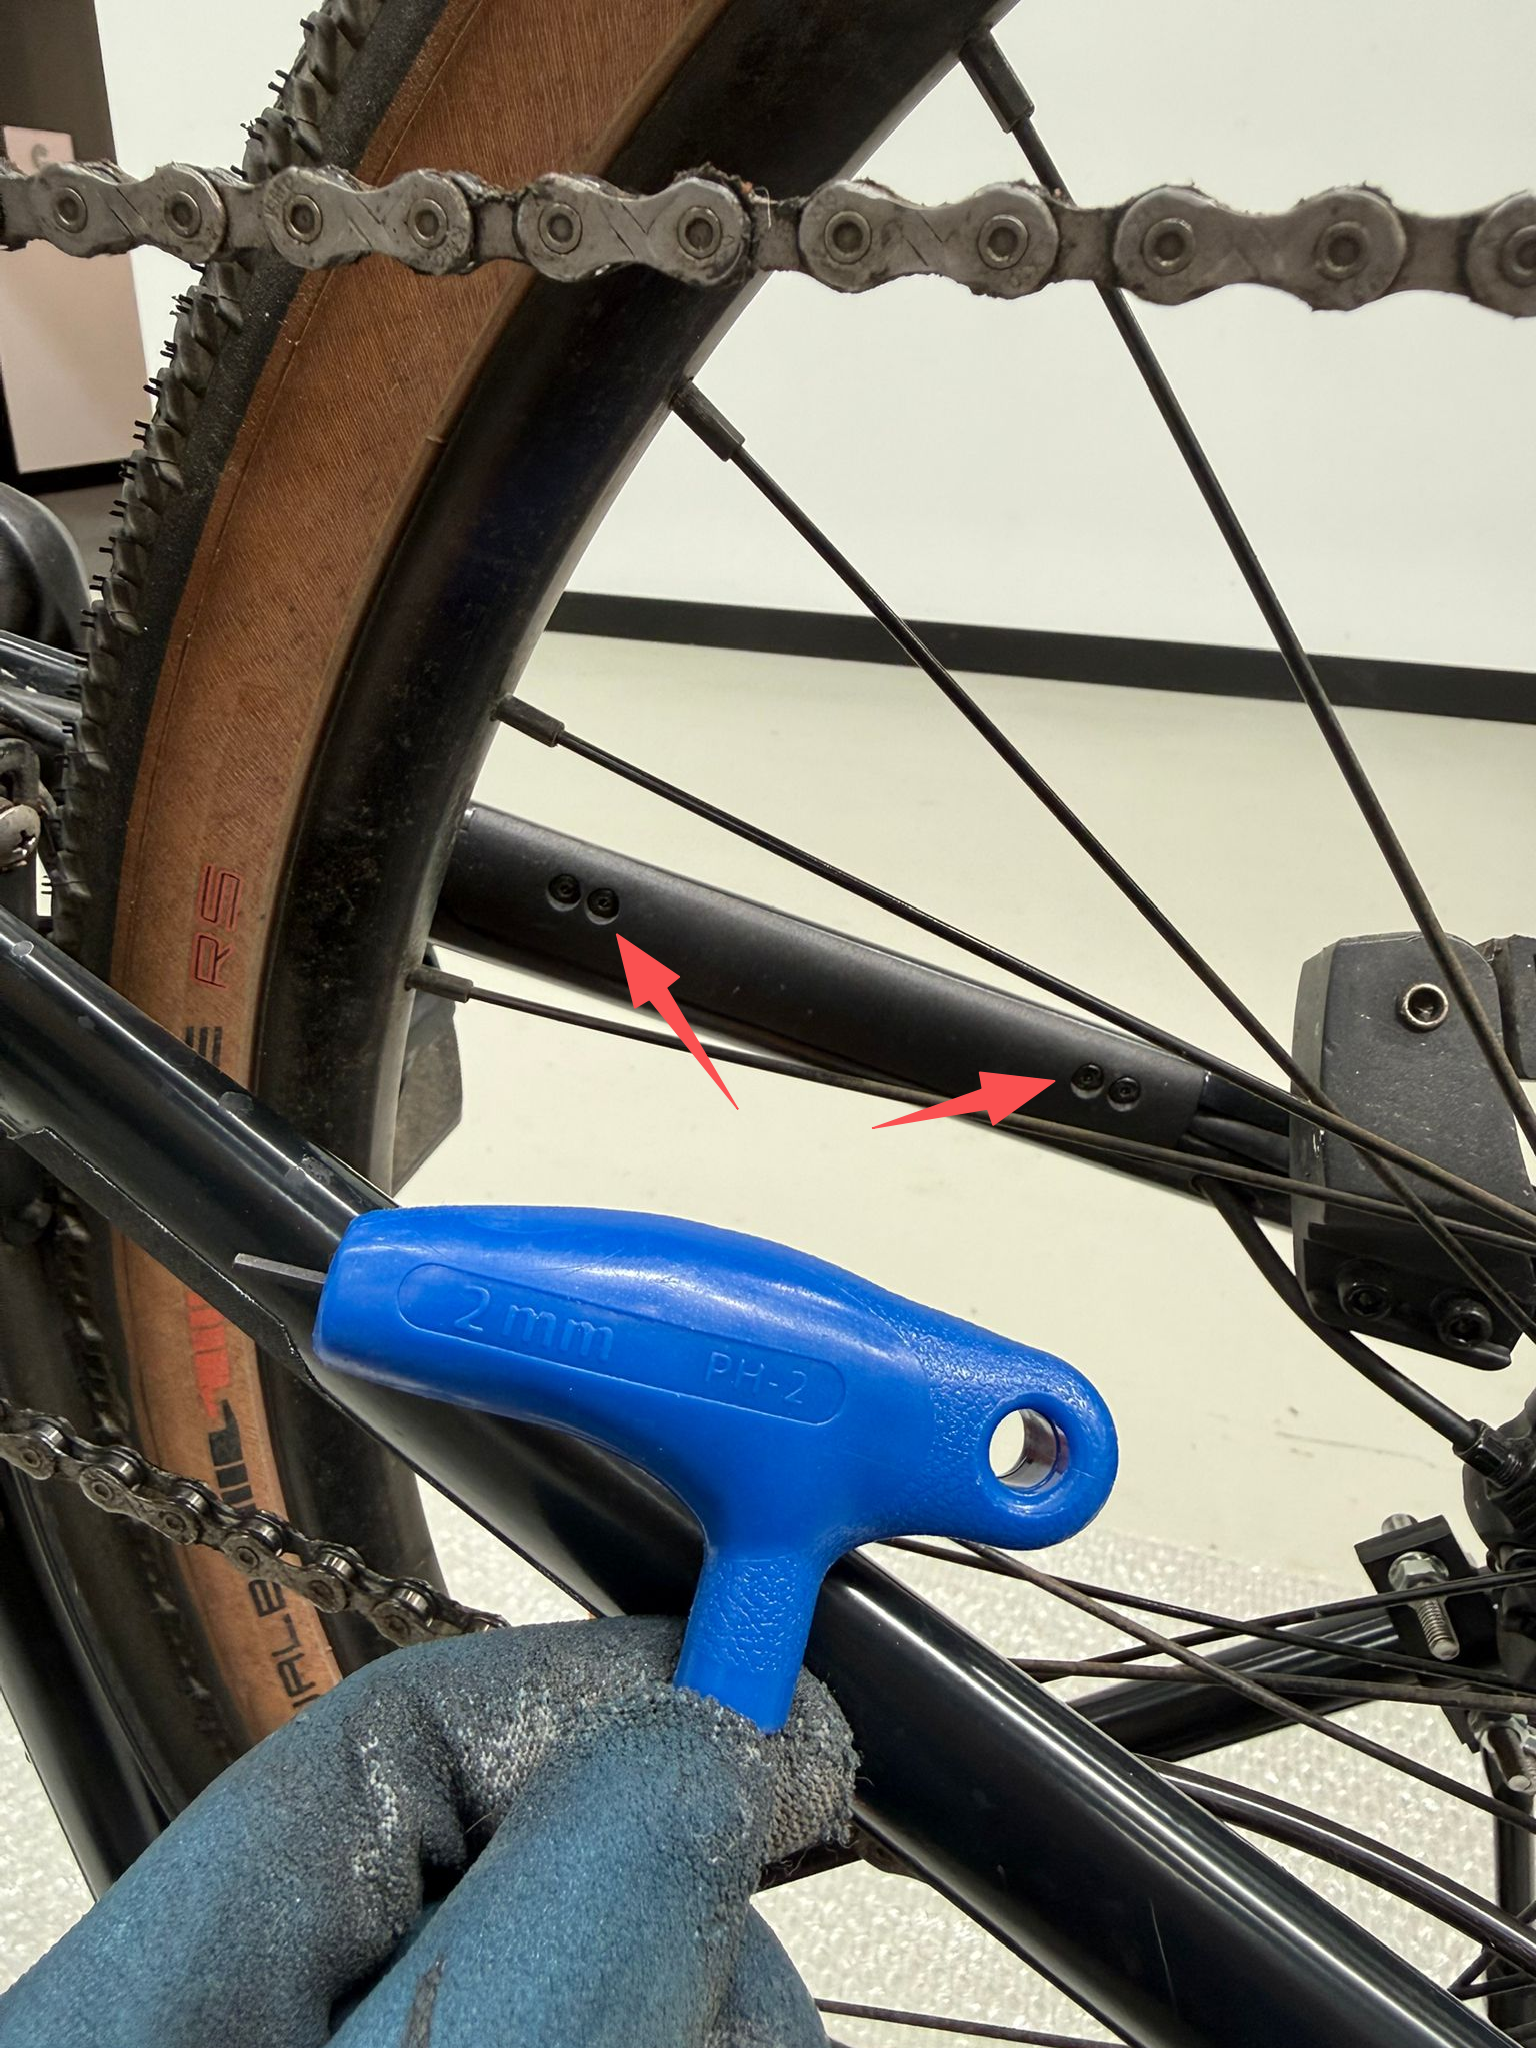
Step 1 — Loosen the Motor Cable
To remove the controller, you first need to unplug the motor cable to create enough slack in the wiring. This connection is located near the rear wheel.
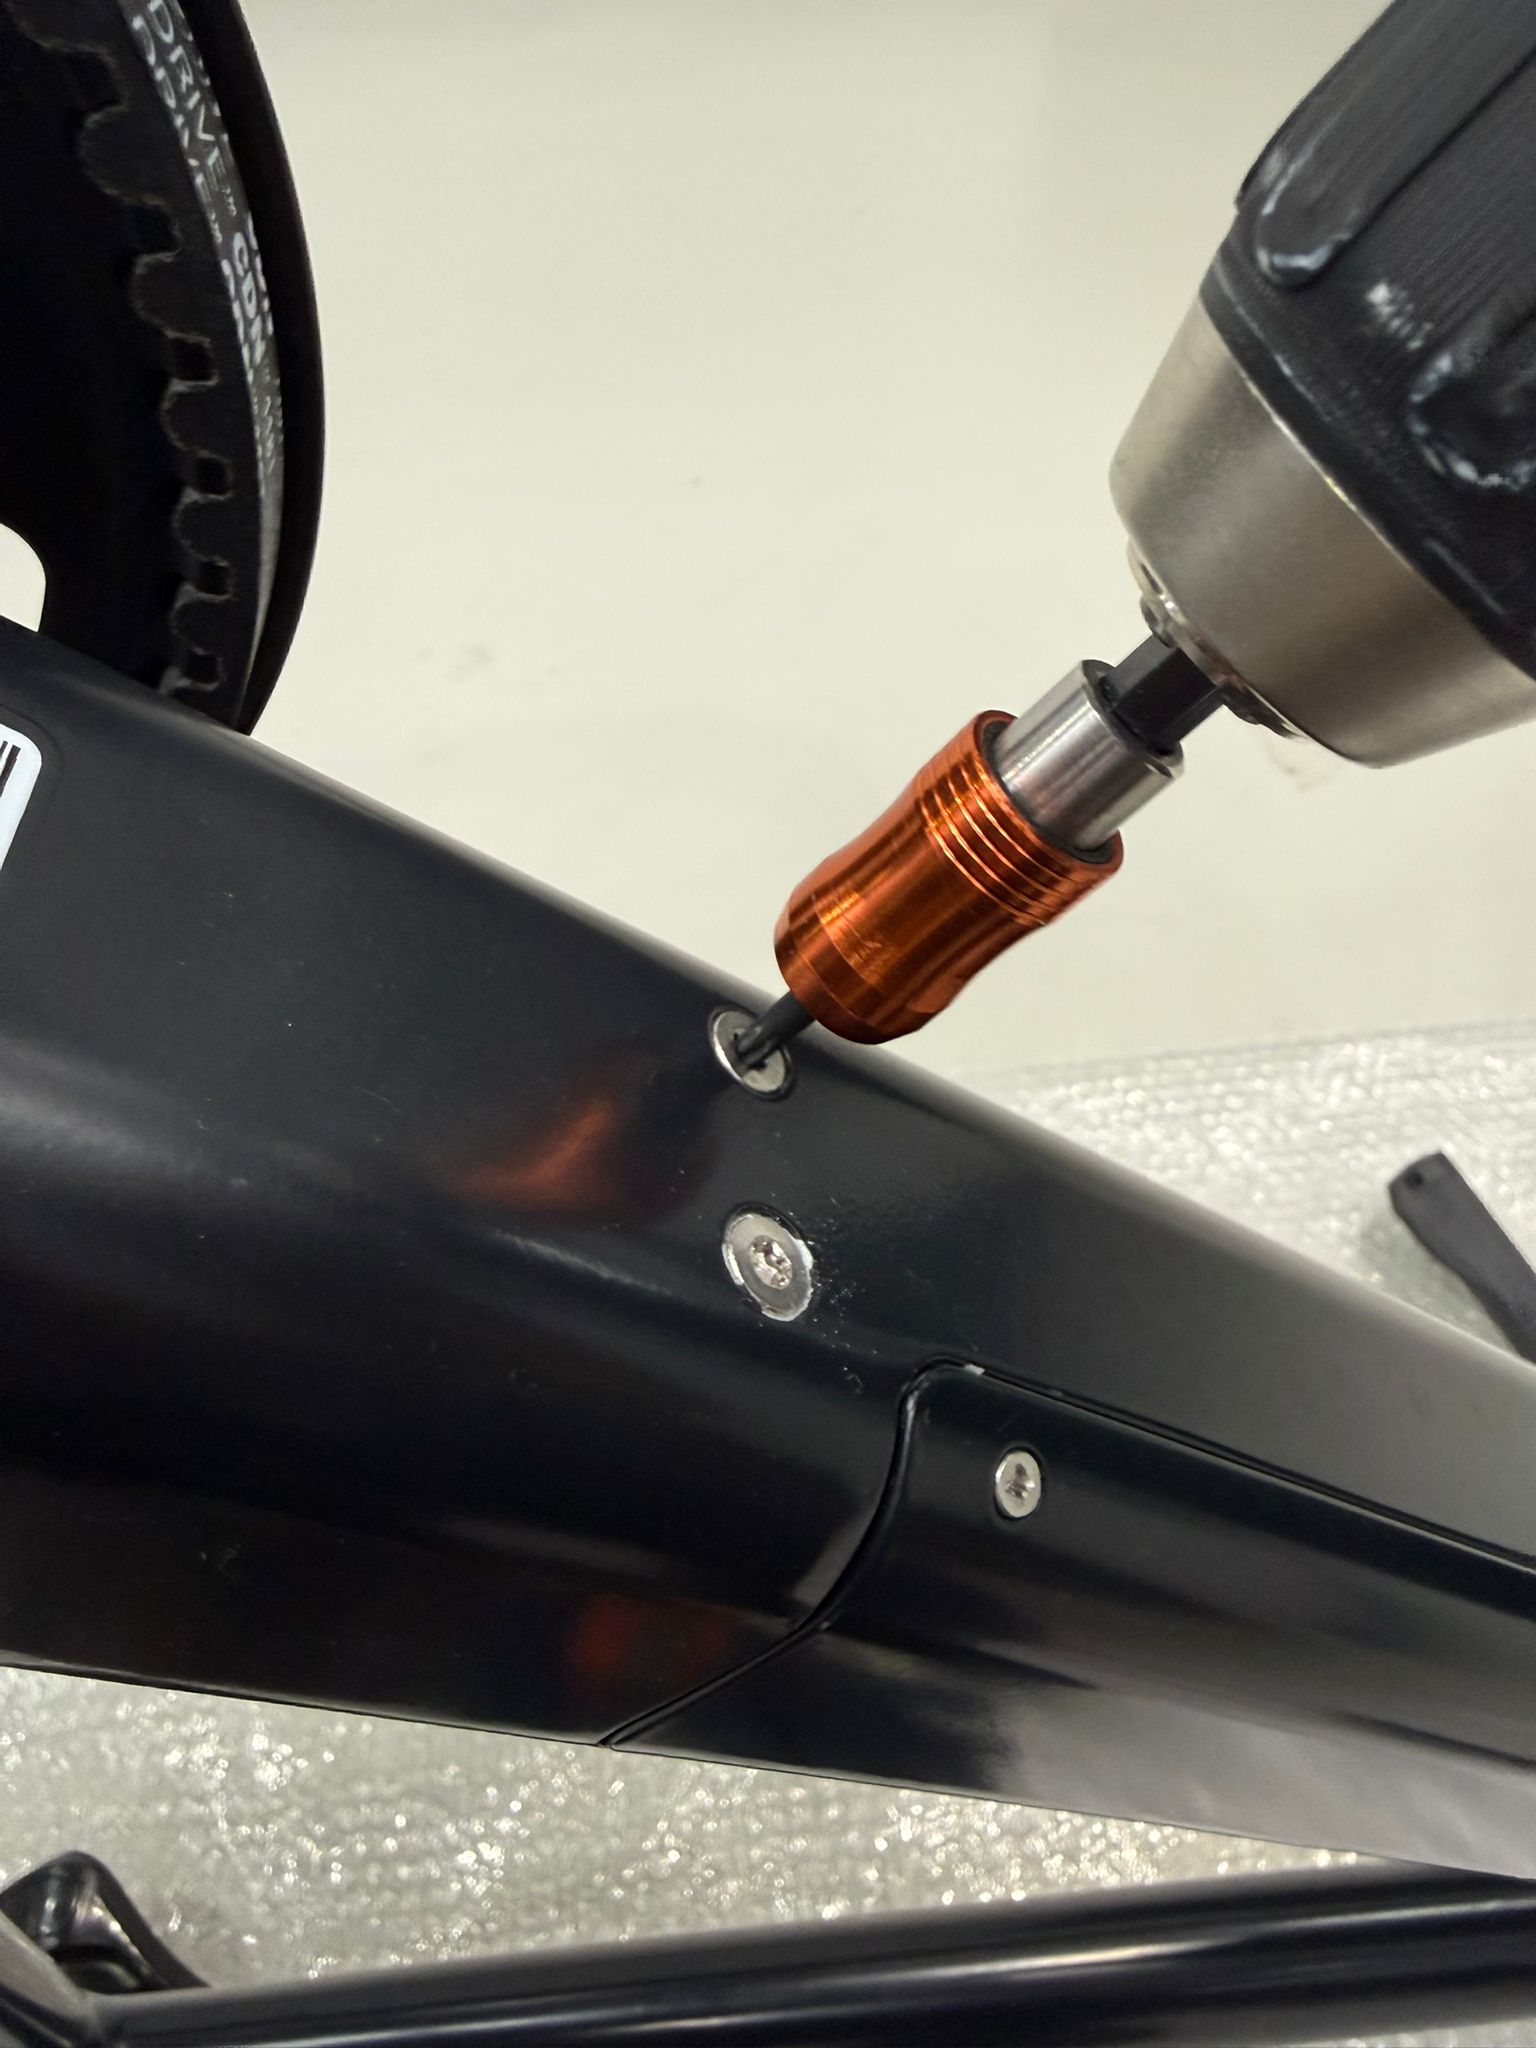
- Locate the motor cable cover by the rear wheel.
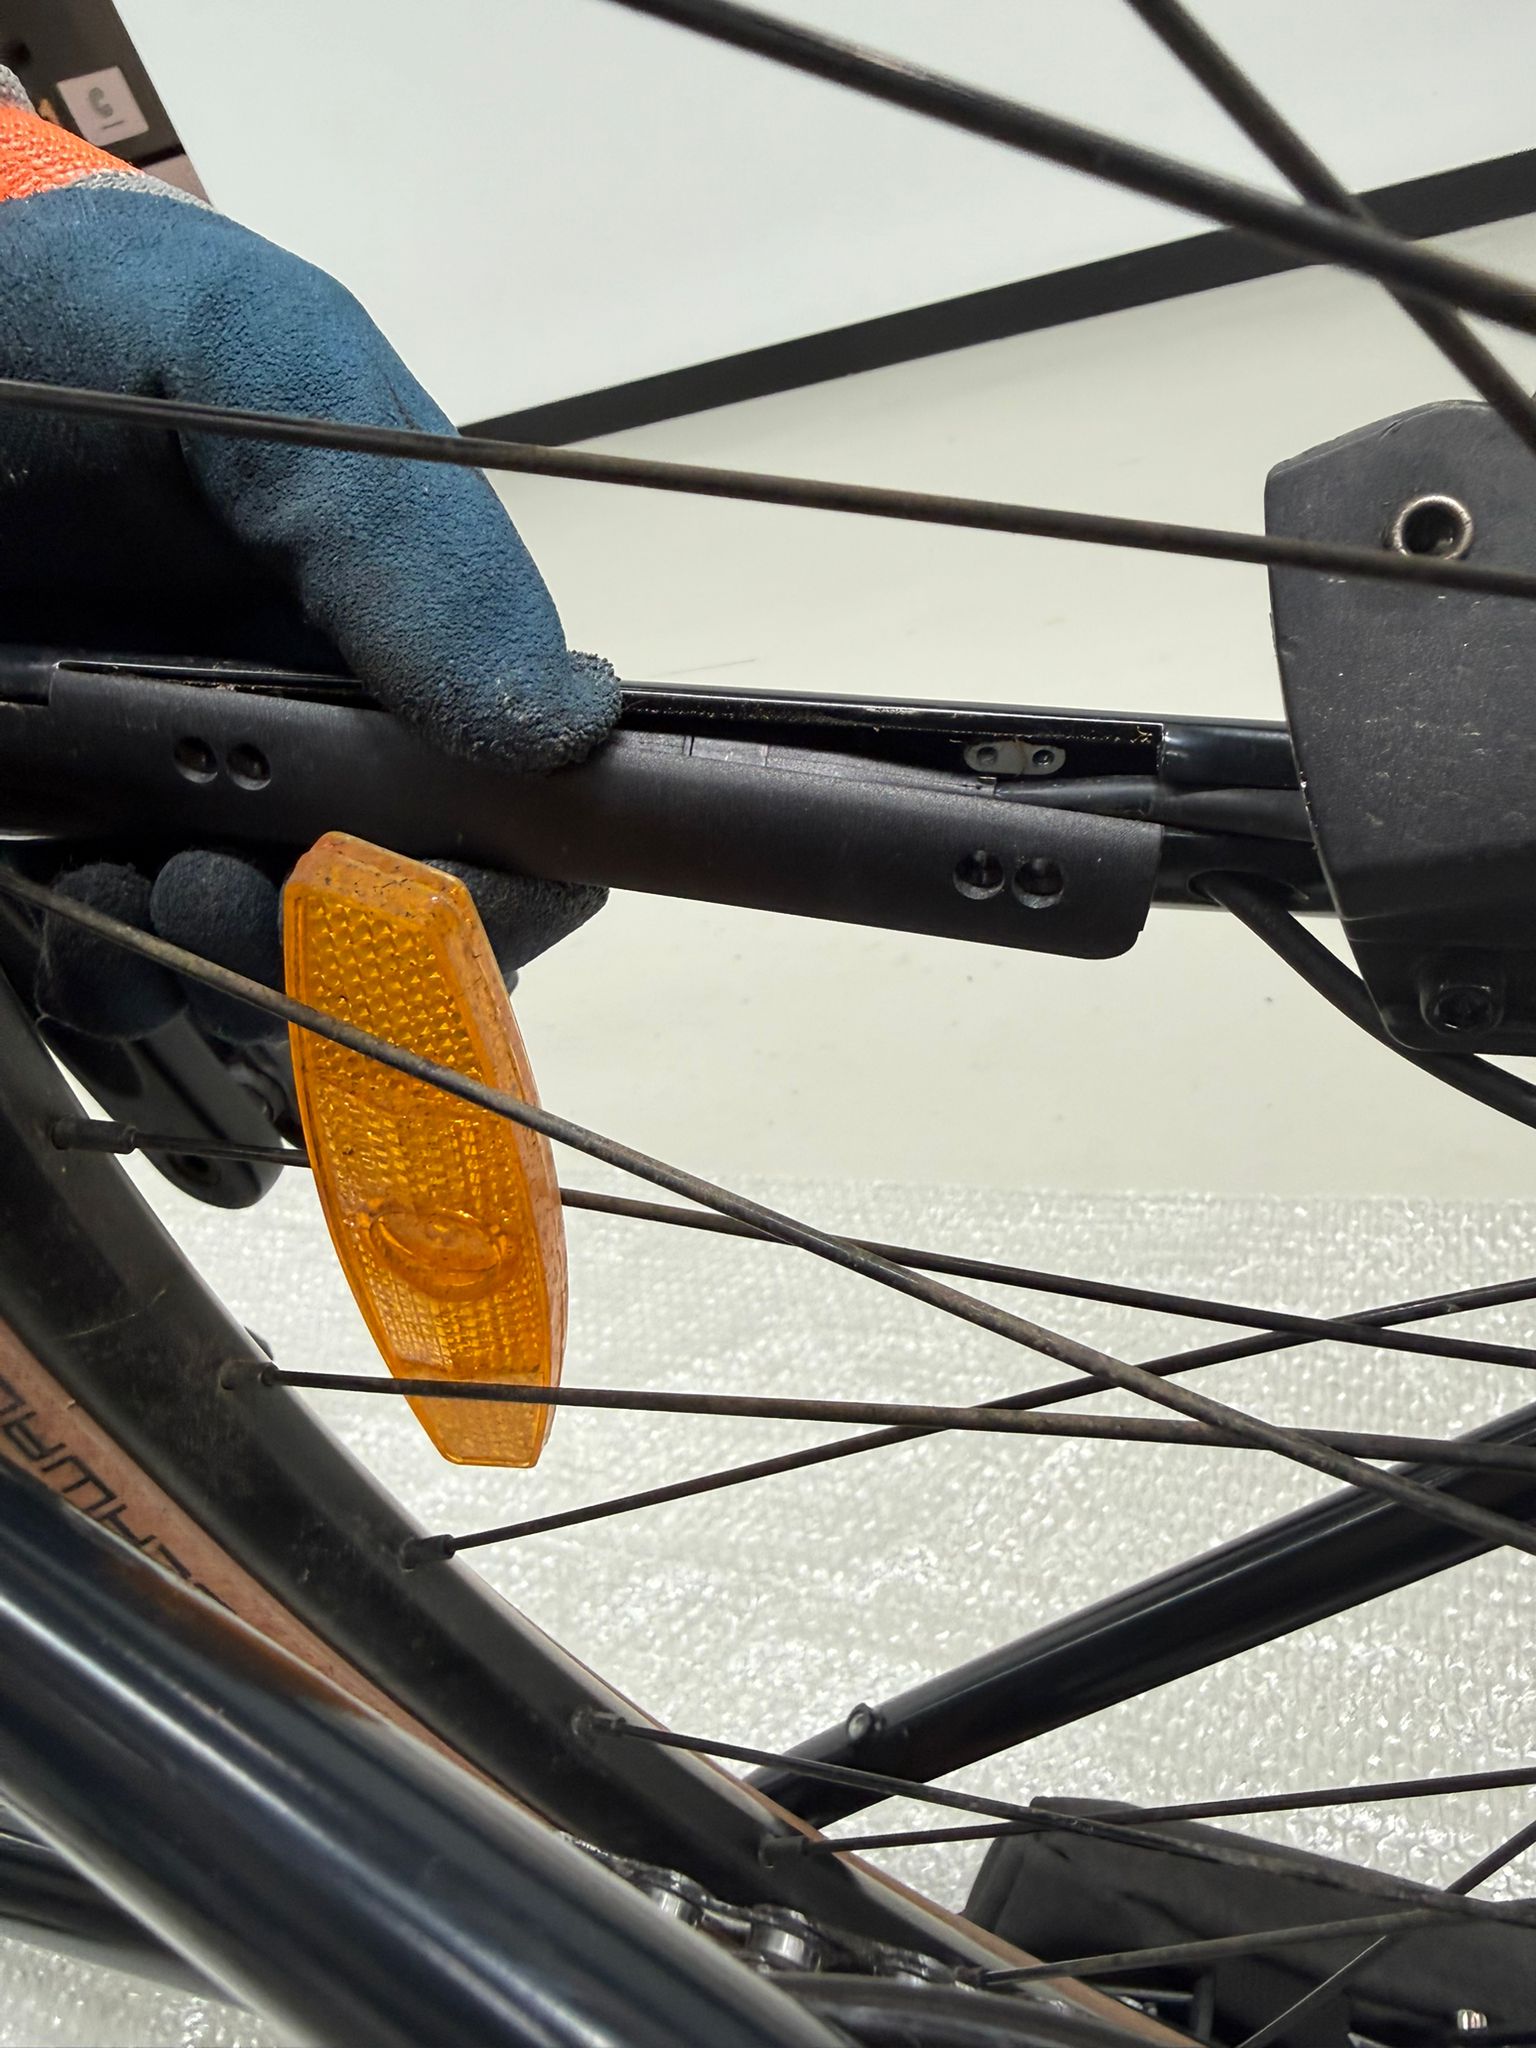
- Loosen and remove the four small hex bolts using a 2 mm hex key.
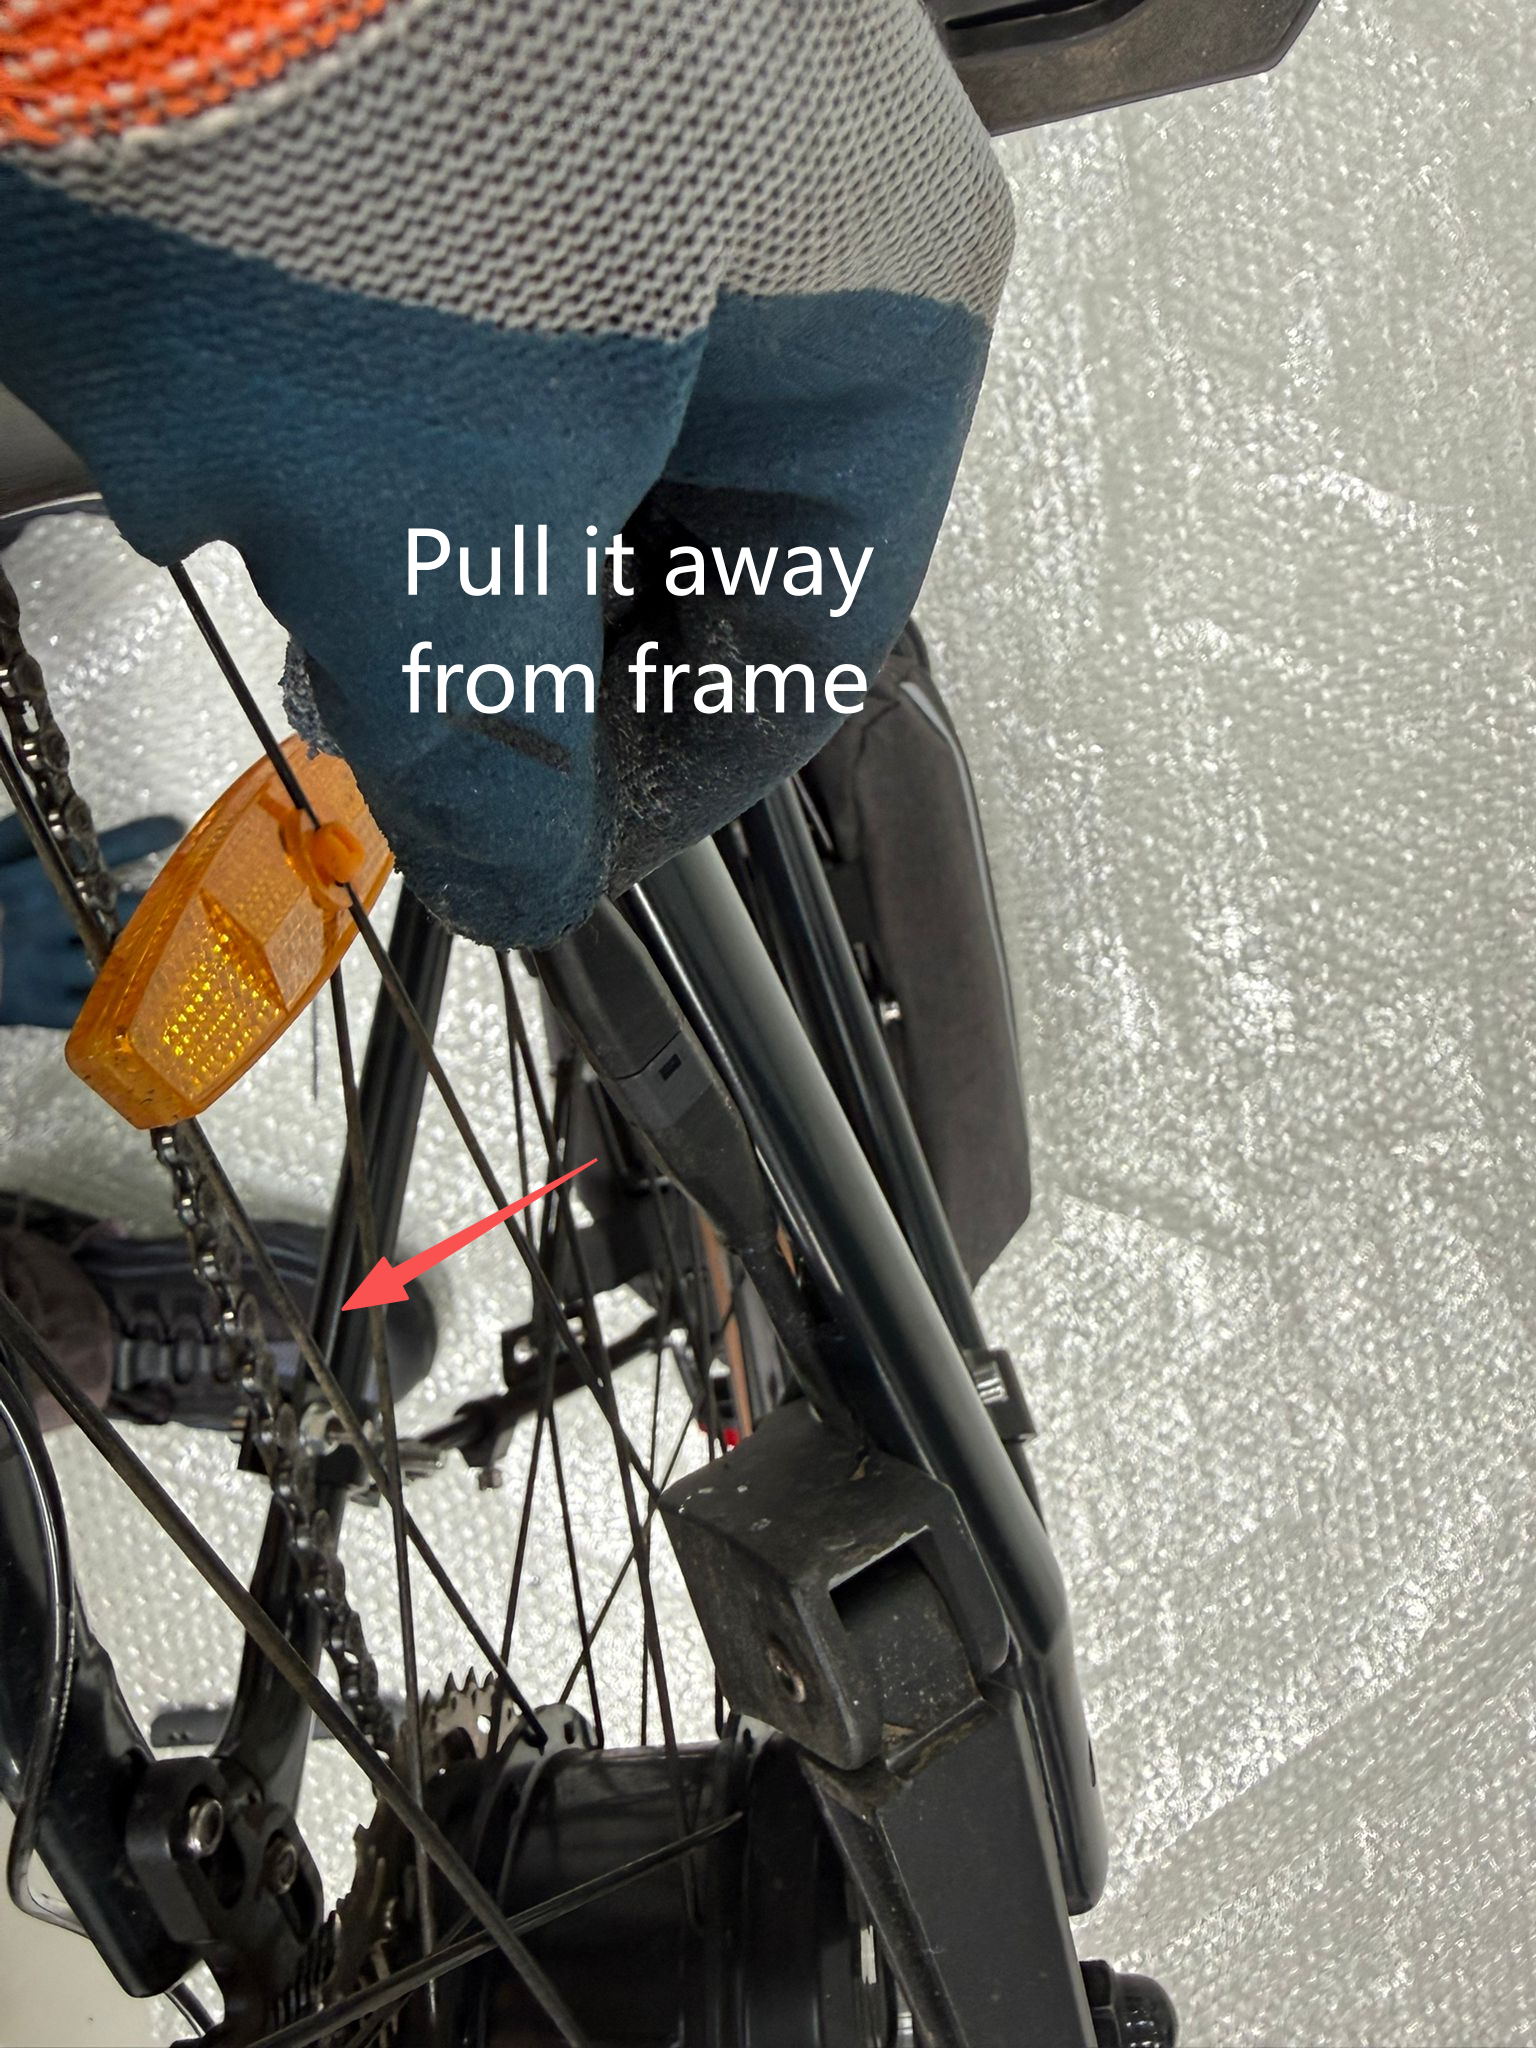
- Carefully remove the cover.
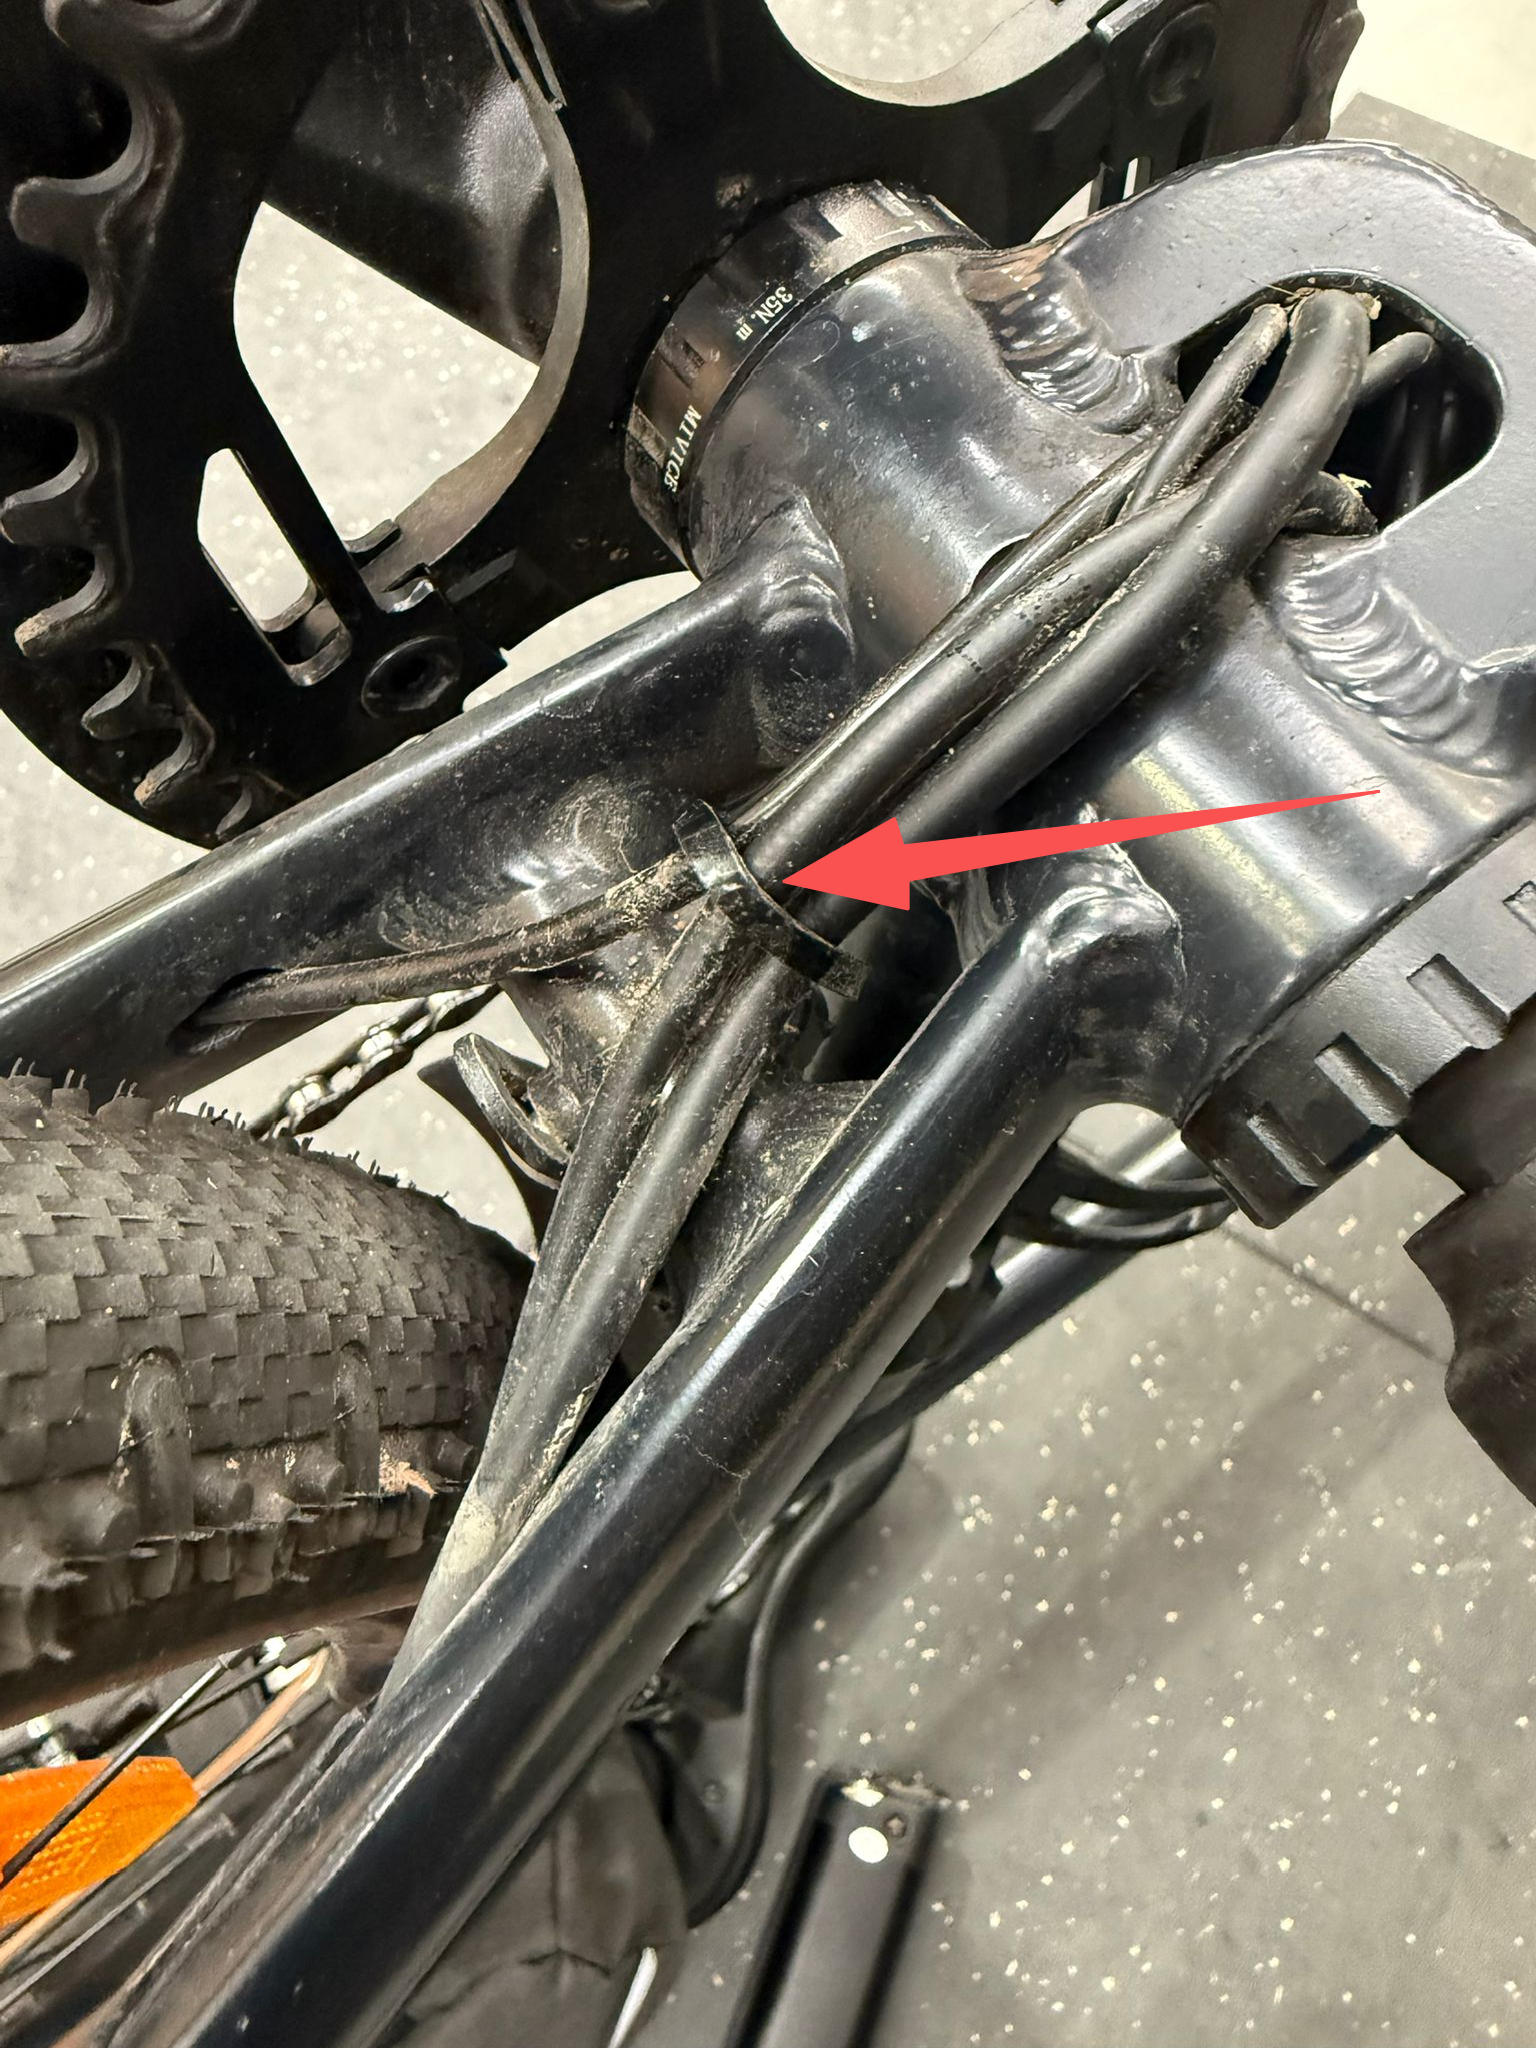
- Cut the zip tie holding the cable bundle in place to give the wiring more movement.
- Disconnect the motor cable to gain access to remove the controller

Step 2 — Access the Motor Controller
Once the motor cable is loose and disconnected, you can access the controller inside the frame by removing the lower battery panel.
- Locate the lower battery panel underneath the frame.
- Remove the two T20 Torx bolts securing the panel.
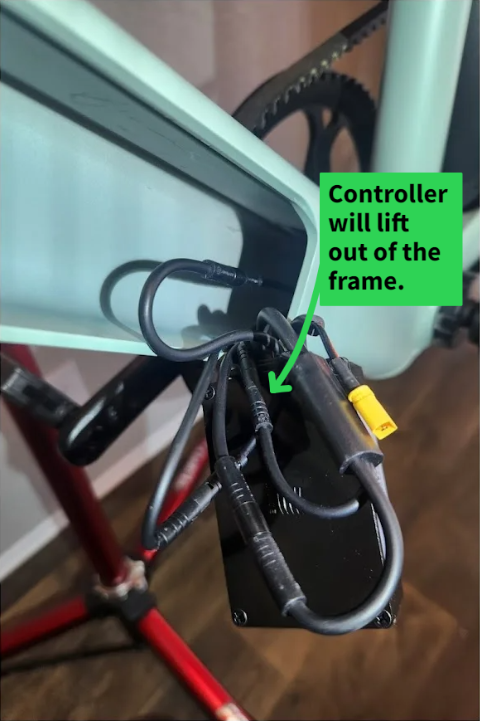
- Slide the panel out of the frame. The yellow battery connector may unplug during this step — this is normal.
- Lift the motor controller out carefully, taking note of how the wires are arranged.
Tip: Take a photo of the cable layout before disconnecting anything. This will help you during reinstallation. It can also help to flip the bike over to gain access to the T20 Torx bolts.

Step 3 — Disconnect and Inspect
With the controller removed, you’ll have access to all wiring connections. Before unplugging connectors, note the colour coding and orientation — most plugs only connect one way.
- Gently disconnect each plug by pulling straight apart — do not twist.
- Check for bent pins, corrosion, or loose connectors.
- If replacing the controller, connect the new one following your reference photo.
Step 4 - Reassembly
- Reconnect all plugs firmly.
- Slide the controller back into the frame and ensure no cables are pinched.
- Reinstall the lower battery panel and torque the two T20 bolts snugly.
- Replace the motor cable cover and secure it with the four small hex bolts.
- Power on the eBike to confirm that the display, assist levels, and motor all function correctly.
Need Help?
If you’re unsure about any step or don’t have the required tools, we recommend visiting a qualified eBike technician or contacting Ridewave Support for assistance.